This Wednesday The Pole Barn Guru answers reader questions about extending an existing 60′ long pole building by twelve feet, the best way to insulate outside walls to prevent sweating, and the reasoning behind setting purlins flush with the top of the truss top chords.
 DEAR POLE BARN GURU: I have an existing 40 x 60 pole building, built in the late 80’s. It has double trusses spaced 12 ft apart. I would like to extend it from 60 to 72 ft. We originally were thinking we would extend using stick frame construction but now I am wondering if this will affect the integrity of the existing building. I would like to leave the end of the pole building in place and add a door into the new space at each end. Your advice on the best way to go about this? The extension is planned for a bathroom and laundry space and would have a concrete floor. Thanks for your help. WENDY in VANCOUVER
DEAR WENDY: Adding as a post frame (pole) building will be your most economical and easiest route to go, especially as your Building Department will require engineer sealed drawings and verifying calculations. In order to determine how best to achieve your end goals, we would need detailed photos of inside and outside of your existing building, measurements at eave sides and dead center from bottom of pressure preservative treated splash plank to underside of roof steel, spacing of existing endwall columns, etc. We make deliveries into Western Washington and Northwest Oregon frequently, so freight costs will be quite reasonable. Please forward your information to Caleb@HansenPoleBuildings.com along with site address and best contact phone number.
DEAR POLE BARN GURU: I built a pole barn last year and am having the floor poured this week. Once completed, I will begin building an apartment inside the barn area. What is the best way to insulate the outside walls for great R value and prevent sweating? DAVID in PORTSMOUTH

DEAR DAVID: If you placed a Weather Resistant Barrier (think Tyvek or similar) between your framing and siding, then fill your insulation cavity with Rockwool and have a well sealed vapor barrier before interior finish. If no WRB, then have two or more inches of closed cell spray foam applied to inside face of your siding, then fill balance of cavity with rockwool and no interior vapor barrier. Depending upon what you do with your under slab and roof for vapor barriers and insulation, you may need to mechanically dehumidify in order to prevent condensation (sweating), as your walls alone are merely a small piece of a big puzzle.
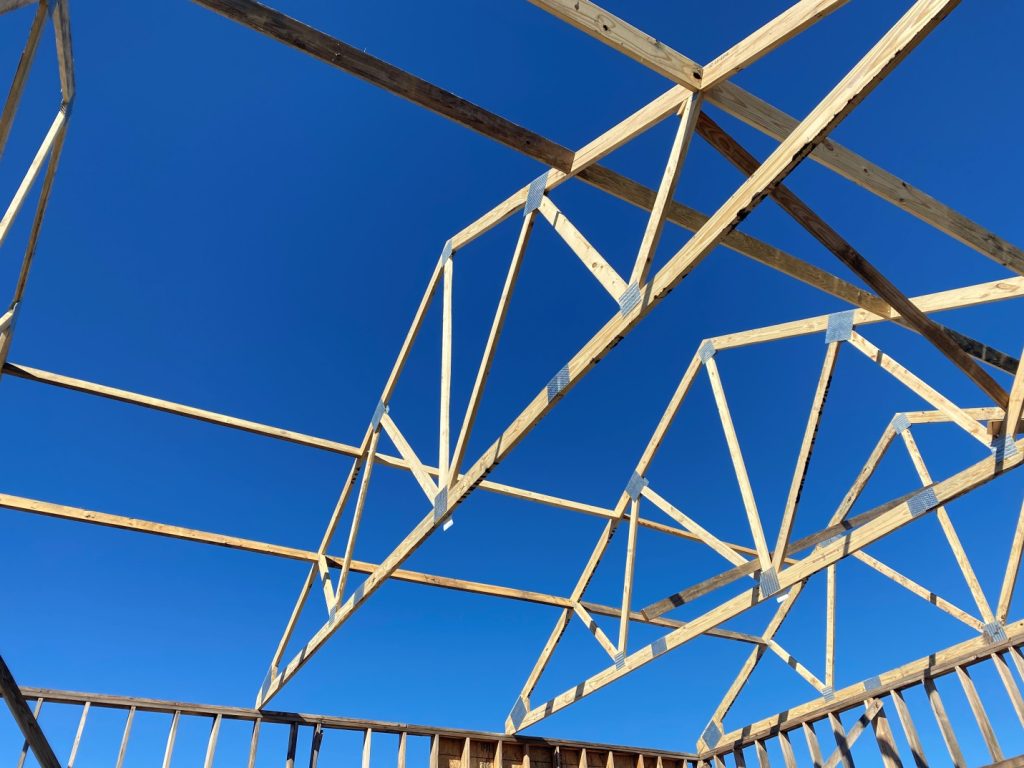
DEAR POLE BARN GURU: I understand your roof design is with purlins flush with the top of the truss. Why do you use this design? Sorry if this info is on your website, I didn’t see it. Regards, STANLEY in DOSWELL
DEAR STANLEY: Here is an article on this subject: https://www.hansenpolebuildings.com/2019/02/where-oh-where-should-my-purlins-go/
Having roof purlins flush with top of trusses has many advantages:
It does not take up extra height (purlins over top of trusses either reduces interior clear height or increases eave height).
 Purlins are then in perfectly straight lines, allowing for pre-drilling of roof panels (this eliminates misses). Others may try to align purlins over top of trusses using butt end splices. This makes for a very poor connection attempting to get adequate fasteners into 3/4″ (1/2 width) of truss top chords. When purlin joints are lapped, it causes a stagger of the purlins, resulting in inability to pre-drill and a significant chances of screw misses.
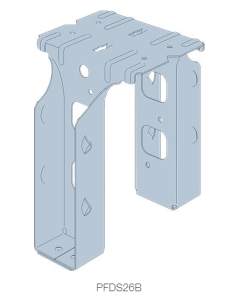
Purlins can be connected to trusses using engineered and Code conforming parts (in our case, quick to install Simpson Strongtie PFDB26B). Codes (as well as sound engineering practice) require purlins on edge to be solid blocked or otherwise prevented from rotation at ends. A nailed only connection would not meet this requirement).