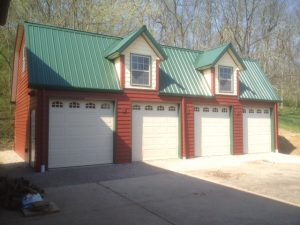
Installing Cement Panel Siding on Post Frame Buildings
Step 1
Install vertical cement siding over horizontal and vertical braced wood girts spaced a maximum of 24 inches on center. Alternatively, the panels can be installed over wood sheathing.
Step 2
Begin first panel with edge even with outside of corner column. If panel has overlap/underlap. begin with an overlapping edge. Fasten the panels to the sub-structure with a pneumatic nailer and corrosion-resistant nails. Drive the nails to be just flush with the surface of the panel, but not so deep the nails dimple the cement panel surface. Place all nails 3/8 inch from the panel edge and at least 2 inches from any corner.
Step 3
Ensure a bare minimum of six inches clearance up from grade to the panel bottom edge. Measure up from the six inch point on the splash plank the height of the cement panel siding at either end of the wall and snap a straight, level chalk line between the marks as a reference line. This line is for guidance in positioning the top edge of the panels. Check the reference line with a four foot level. Allow at least two inches of clearance between the material and any walkway paths, sidewalks, decking, stairs or driveways which can wick or leach water and chemicals into or out of the product.
 Step 4
Starting on one end and working across the wall, measure and trim the first cement panel siding making sure the edge falls in the middle of a blocking member for support. Using the chalk line as a guide along the panel’s top edge, carefully position the panel and secure it with suitable fasteners and fastener spacing for the particular application. As installation continues, check the vertical edge of each cement panel siding with a four foot level. Leave an appropriate gap between panels (1/8 in is the most common) and do not jam panels up against one another, as this can cause warping over time.
Step 5
Caulk all cement panel siding joints with an elastomeric joint sealant which complies with ASTM C920 Grade NS, Class 25 or higher or a latex joint sealant complying with ASTM C834. Panels may be installed first with caulk applied in the joints after installation; or as an option, after the first panel is installed, apply a bead of caulk along the panel edge. When the next panel is installed against the first, the edge embeds in the applied caulk creating a thorough seal between the edges of the panels.
In some applications such as multi-story structures or at gable ends, it may be necessary to stack siding. The horizontal joints created between cement panels must be flashed properly to minimize water penetration. After installing the lower course of panel siding, install vinyl or coated aluminum “Z” flashing at the top edge of the panel. Make sure the flashing is sloped away from the wall and does not rest flat on the top edge of the panel. Install the second level or gable panels leaving a ¼ inch minimum gap between the bottom of the panel and the Z flashing. This gap should never be caulked.


Could you please elaborate on step one. How can you attach vertical panels to horizontal girts when there is nothing to nail to on the vertical edge of the panel. Can you sheath over the girts and nail the vertical panel to tje sheathing?
We place vertical blocking between horizontal girts every four feet so panel edges are backed.