Tag Archives: ceiling load trusses

Ceiling Loaded Trusses

Part of the mission of any good post frame (pole) building kit package supplier or contractor should be to save the client from making crucial design errors which they will later regret.

Among the most often questions I answer in my “Ask the Pole Barn Guru” weekly column is in regards to the ability of an existing building’s roof trusses to carry a ceiling load. I’ve expounded in this area in the past:

https://www.hansenpolebuildings.com/2013/03/ceiling-loads/

With a client who possibly did not communicate their needs well: https://www.hansenpolebuildings.com/2015/04/ceiling-load-2/

Existing buildings: https://www.hansenpolebuildings.com/2013/10/ceiling-load/

Ceiling Loaded TrussesThis morning Hansen Pole Buildings’ Designer Dennis asked a question of me which I had failed to address in the past 1000 plus blog posts, “I was looking on blogs couldn’t find difference between roof trusses designed for ceiling load and not designed”.
Like most anything here at Hansen Pole Buildings, ask the question and ye shall receive an answer.

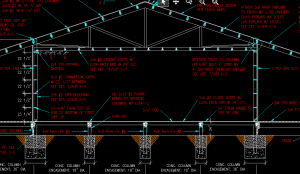
Increasing the ceiling load carrying capacity of a roof truss can result in one or more of many changes. Generally there will be more changes to the physical nature of the trusses as the span of the truss, or roof snow loads increase.

Here are some of the things which might change:

Grade of lumber. The #2 grade lumber which one might acquire at the local big box store or lumberyard is rarely strong enough to be used in most truss chord applications. Most generally one finds the use of #1 or Select Structural visually graded material, or what is known as machine graded lumber (https://www.hansenpolebuildings.com/2012/12/machine-graded-lumber/). Often the need for increased load carrying capacity can be accommodated by a step or two up the ladder in the strength of the lumber.

Sometimes, stronger lumber alone, will not be the cure and larger dimensions of lumber may need to be utilized. 2×8 instead of 2×6 as an example.

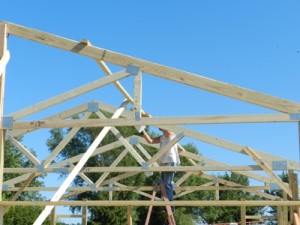
Truss webs – those internal pieces of the truss, the ones running at angles between the top and bottom chords are known as “webs”. Sometimes the extra load capacity can be gained by adding more webs to the truss.

And let us not forget the lowly steel connector plates, which hold prefabricated metal connector plated trusses together. All of those joint connections now have to take an increased load, so there is going to be more square inches of steel utilized to do the trick.

The important part is less about HOW the load is going to be carried, and all about the ABILITY to carry it. Considering a new post frame building? If you think either you or the next owner or owners of the building might ever consider adding a flat level ceiling in the building, then it would be prudent to (at the least) order trusses designed to support the load now.

This is not the place to scrimp out trying to pinch a few pennies!

Clip-Lock Standing Seam, Adding a Ceiling, and Knee Brace Issues

This week Mike the Pole Barn Guru answers reader questions about replacing roofing with clip-lock standing seam and what the PBG recommends in the scenario, creating a wood shop in an existing structure and wondering if ceiling weight can be held, the possibility of removing knee braces in order to install a ceiling.

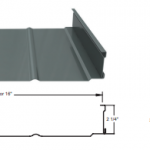
DEAR POLE BARN GURU: I am leaning toward replacing with clip lock standing seam on 2×4 purlins every foot on center. My installer wants to do away with the vapor barrier and stretch synthetic underlayment over the purlins. What do you recommend in this scenario? JAVO in PRINCE FREDERICK

DEAR JAVO: Clip lock standing seam panels have no ability to transfer wind shear loads and should only be installed over 5/8″ CDX plywood sheathing. If not, your building is likely to rack (or even fail) due to wind loads. There are other reasons to use sheathing: https://www.hansenpolebuildings.com/2015/08/standing-seam-steel/ In summary remove vapor barrier, install plywood with synthetic underlayment between plywood and standing seam steel.
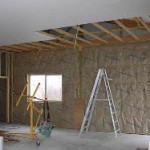
 

DEAR POLE BARN GURU: Hello, I have an existing pole barn/garage but I have very little information about it. I would like to create an interior room for a woodshop but I don’t know if my trusses would support a ceiling and the necessary insulation. Is this something you can help with? CHAD in GRASS LAKE

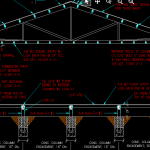
Installing a ceilingDEAR CHAD: Unlike all Hansen Pole Buildings with spans of 40 foot or less (where we have our interior double trusses always designed to be able to support at least a minimal ceiling load of five pounds per square foot), most pole barn trusses are not ordered or designed to support any sort of a ceiling. Many times trusses will have a stamp on them stating truss spacing and loads, if so, you want a Bottom Chord Dead Load of 5 psf or greater. If nothing else, truss manufacturer’s stamp will tell you who fabricated those trusses and you can reach out to them to verify adequacy. If they do not have records available, or are no longer in business, you should engage a Registered Professional Engineer to perform a field inspection to verify adequacy, or to provide an engineered repair.
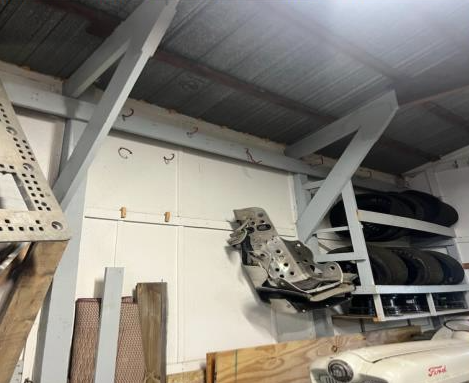
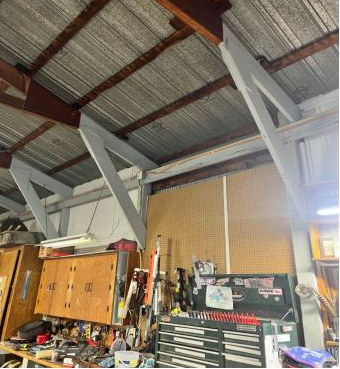
 

DEAR POLE BARN GURU: I have a 30′ x 48′ x12′ pole barn that has Knee braces. I am wondering if I am able to remove the knee braces on this type of rafter to eliminate having to cut around each one as I am installing interior liner steel. The rafter top chord is 2×10, the bottom chord and webs are 2×6 and the rafters are adjoined to the poles appx 30′ below the bottom chord. The rafters have fink style webs. JOSH in CANBY

DEAR JOSH: In fairly recently built pole barns, I would have encouraged you to reach out to whomever originally engineered your building. Your building obviously has been around (somehow) for more than a few years. I say this “somehow” in all seriousness as your roof system does look questionable. It very well could be compromised by any changes – even weight of steel liner panels. Best bet is this – hire an engineer to do an actual physical examination of your building to determine if knee braces can be removed, any structural changes needed if they are to be removed, as well as adequacy to support any sort of ceiling. Think of this as an investment, rather than an expense, especially if it prevents a failure.

Ceiling Addition, Drywall Orientation, Ridge Vent Replacement

This week the Pole Barn Guru addresses reader questions regarding the ability to hang a ceiling addition in a Hansen Building, if it is better to hang drywall parallel or perpendicular to framing, and if Hansen can replace a ridge vent in Buffalo, NY

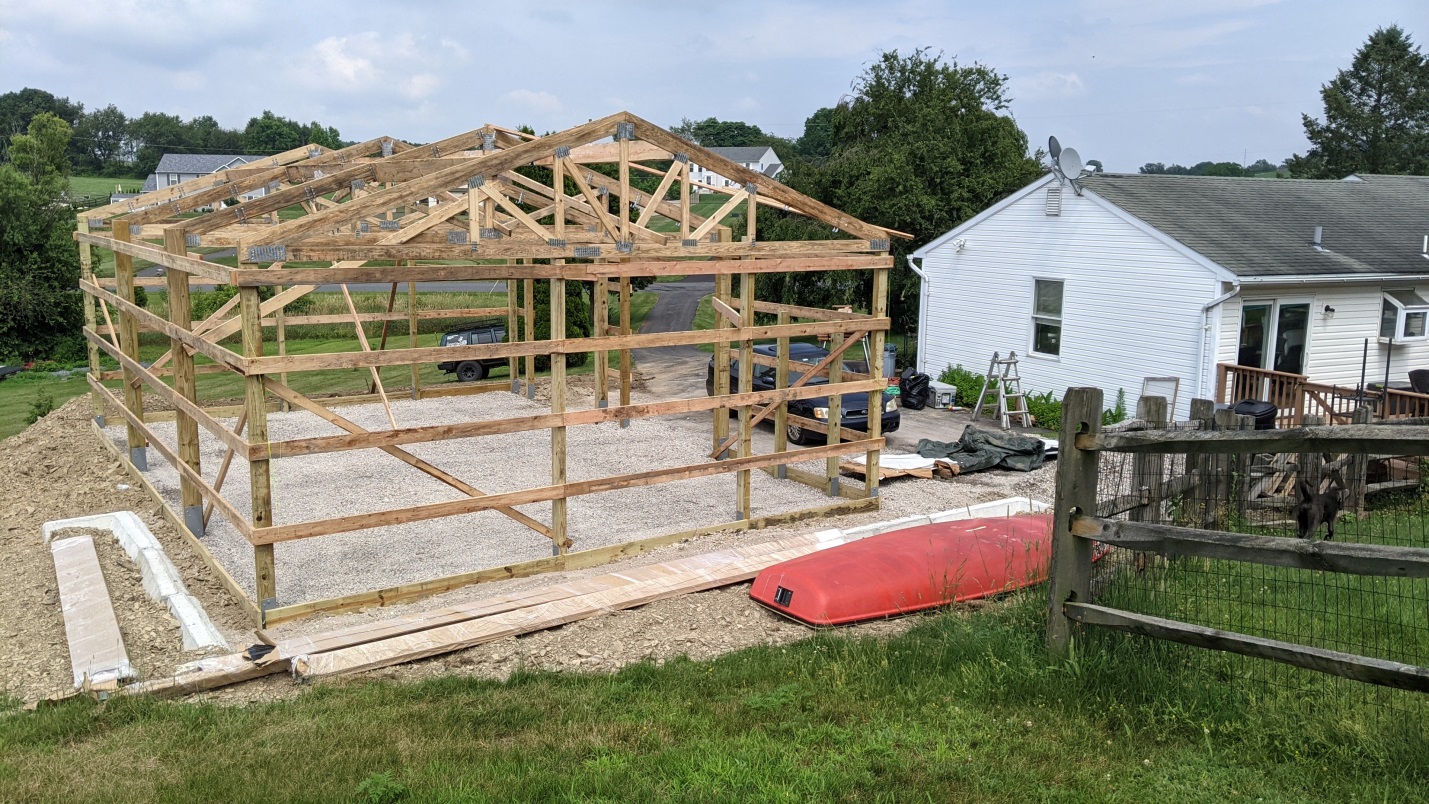
DEAR POLE BARN GURU: I purchased a 25′ x 35′ kit from you and was wondering if I can hang a ceiling in my pole barn? I have 11′ or 12′ trusses on center and was worried about the strength of the trusses to hold more weight. THOMAS in NEW TRIPOLI

DEAR THOMAS: Your building’s roof trusses are designed to support a five (5) psf (pounds per square foot) dead load from the bottom chords. This would be sufficient to carry 2×6 ceiling joists 24 inches on center on hangers between bottom chords, as well as 5/8″ gypsum wallboard (drywall) and blown in or batt fiberglass insulation.

Please note – in your provided photo wall girts have been externally mounted, they have been engineered to be placed bookshelf style, as externally mounted girts on 11′ and greater spans will fail due to bending and will excessively deflect. They should be removed, trimmed and placed to match engineered plans. Also – end trusses are to be notched into columns 1-1/2” to provide proper and adequate bearing. They should be carefully removed, notches cut, then properly placed.


DEAR POLE BARN GURU: I got my final inspection last week, so I have finished the workshop according to the county. Now I am working on the insulation and interior wall and ceiling finishing. For insulation, I am using R-19 craft faced batting for both walls and ceiling and might later add blown in above the ceiling to further increase the R value.

I have a question on the best orientation for the drywall for ceiling and walls. It seems that running the sheets perpendicular to the ceiling purlins and commercial girts would provide greater strength than parallel. What is your experience? I am planning on using 5/8 inch board.
Thanks, LEE in HUNTSVILLE

DEAR LEE: For best installation you will want to run drywall perpendicular to framing (e.g. vertically on walls) https://www.hansenpolebuildings.com/2019/09/11-reasons-post-frame-commercial-girted-walls-are-best-for-drywall/
Ideally, you should use unfaced insulation in your ceiling, this allows any warm moist air within your building to escape into attic space and be properly exhausted through ridge vent.


DEAR POLE BARN GURU: You’re listed as building pole barns in Buffalo, NY. I want to find someone that can replace my ridge vent that goes the full length of the building. Who do you recommend in the area and what choices do you have for a new vent for me? GARY in BUFFALO

vented-closure-stripDEAR GARY: If your steel panels are 3′ wide, with 5/8″-3/4″ high ribs every 9″ we can provide form fitted ridge closures, if so, please reach out to Materials@HansenPoleBuildings.com with your zip code and length of ridge line for pricing and availability.
Most of our clients are DIYers, should you need an installer, we would suggest your try posting in your nearest Craigslist under “GIGS”.

LP Siding, Ceilings, and an Inspector’s questions!

This Monday, the Pole Barn Guru discussed attaching LP siding on a post frame home, installing ceiling panels, and an Inspector’s questions.

DEAR POLE BARN GURU: I am looking at the possibly of installing standard LP lap siding on a post frame home, in that case it would seem like I would need to go with vertical studs. As a look at cost and installation time, metal siding is starting to look a little better. TRENT in WALLA WALLA

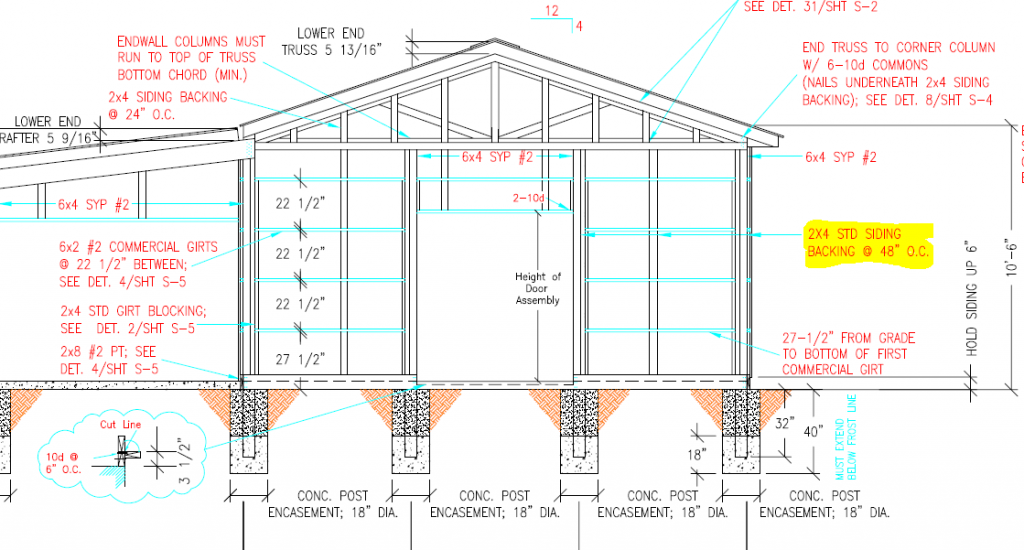
DEAR TRENT: My own home features steel siding and wouldn’t consider doing it any other way. Besides being less expensive to install (both material and labor), steel siding will prove to be extremely durable and requires no maintenance. For sidings such as LP lap, you can still use bookshelf girts, reducing girt dimensions from 2×8 to 2×6 and placing vertical 2×4 nailers every two feet upon girt exterior face running from pressure preservative treated splash plank up to soffit supports. This results in a savings of around 20% in assembly framing lumber.


DEAR POLE BARN GURU: How far apart should the strapping be for installing metal on a ceiling. Trusses are 4ft apart metal is Tuff Rib 3/4 inch I think. BERNIE in ARMSTRONG

DEAR BERNIE: By “strapping” I will guess you are meaning supports for the steel ceiling liner panels. If you install panels perpendicular to trusses you can screw directly to bottom chords without any additional framing.


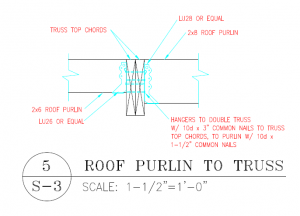
DEAR POLE BARN GURU: My building inspector is requesting information on the direct to ground treated aspect of the glulaminated timbers in my building.  The wording on the posts for the direct to ground side are covered with concrete.  The color alone isn’t enough.  Where can I get this info?  Also the LU28 hangars call out 3 1.5 inch nails per side to truss, and 2 1.5 per side to Purlin. Which is 10 mails per Purlin bracket. He is requesting all holes being filled.  Do I argue or do I fill the holes? RICK in PARMA

DEAR RICK: Justine forwarded to you manufacturer’s warranty information in regards to your building’s glulaminated columns, specifying level of treatment as adequate for structural in ground use.
Your inspector will be merely enforcing information denoted upon your engineered building plans. Unless called out for otherwise, all holes in hangers having wood to nail into must be filled. If nailing into a two ply member (e.g. double truss) 10d common x 3″ nails should be used. I also just happened to have a Simpson LU28 sitting next to me atop my desk – I count three holes per side to nail into purlin and four holes per side to nail into truss, total of 14 holes per bracket.


Hipped Roof, Adding a Ceiling, and a Leak

Questions about a Hipped Roof, Adding a Ceiling, and a Leak for the Pole Barn Guru

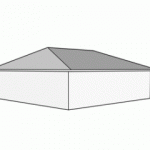
DEAR POLE BARN GURU: My home has a hip roof and I would like for my garage to have a hip roof as well. Would that be possible? Thank you. SCOTT in BILLINGS

DEAR SCOTT: It is very possible to have a full hipped roof on a post frame building. To the best of my knowledge, Hansen Pole Buildings is one of the few post frame building kit providers who engineers them regularly.
For more reading on full hip roofs: https://www.hansenpolebuildings.com/2015/01/full-hip-roof/


DEAR POLE BARN GURU: I want to use 1/2 drywall for my 32 x 18 pole barn. Rafters are 4′ on center. Can I run 2 x 4 flat against rafters on 16″ centers and attach my drywall to 2 x 4’s without adding any additional support between the rafters? STEVE in FORT WAYNE

DEAR STEVE: I will interpret your “rafters” as being prefabricated roof trusses. If they were not designed to support a ceiling (as is typical of most trusses designed for four foot on center spacing) then it is the end of the road for this project unless an engineered truss repair is done to upgrade the load carrying capacity of the truss bottom chords.

If your intent is to attach the 2x4s flat wise to the underside of the trusses, you may have some deflection challenges, depending upon the grade and species of the lumber.  You’ll want to use an engineered screw (not drywall screws) to attach the 2x4s, rather than screws – which may withdraw.

How I would do it…..

Provided the trusses are adequately designed, I would use 2×4 ceiling joists on edge between the truss bottom chords with joist hangers every 24 inches. I’d use 5/8″ Type X gypsum wallboard as it far less prone to wave and affords some fire protection.


DEAR POLE BARN GURU: Advisement of how to prevent insulation from becoming wet due as
there is no house wrap on his pole barn. JOHN in WISCONSIN

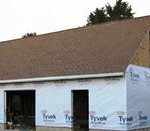
DEAR JOHN: If you have wall insulation getting damp, it is due to water getting inside of the siding – most generally this is seen where there are openings in the walls (e.g. doors and windows) or there is a roof leak above the eave girt. First step is to identify the source of the moisture – to eliminate a roof leak as the source, you can run water from a hose onto the roof and look for infiltration. If it is coming from the roof, fix the leaks.

Having eliminated the roof as the source, the best fix is to remove the steel siding a wall at a time and install a high quality house wrap, then screw the siding back in place. Make sure to seal all joints in the housewrap. Ensure all window and door openings are well sealed – use lots of high quality caulking at corners (especially above windows and doors).