Variances in Surface of Pole Building Concrete Slabs
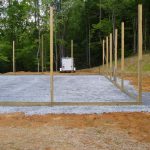
Reader RON in MARYSVILLE writes: “What is an acceptable variance in the finished level of the concrete floor in a new 24×36 pole building? It is 1/4 inch out of level, 1 1/8 inch slope, 3/4 inch hump all acceptable numbers? My floor has all of these and more.”
Like fences make good neighbors, contracts make happy clients.
 You will need to go back to the contract you signed with the concrete finishing company to see what allowable tolerances you agreed to.
According to ACI (American Concrete Institute) 117-10 Section 4.8 your finisher could probably argue the point from the Commentary found in R4.8.4:
“The purpose of establishing floor surface tolerances is to define surface characteristics that are of importance to those who will be using the surface. The two surface characteristics thought to be of greatest importance for concrete floors are flatness and levelness. Flatness can be described as bumpiness of the floor, and is the degree to which a floor surface is smooth or plane. Levelness is the degree to which a floor surface parallels the slope established on the project drawings. Two methods are identified for use in the evaluation of floor surface finish tolerances. The F-Number System uses data taken at regular intervals along lines located in random locations on the test surface. The described methods use different criteria to evaluate the as constructed data. Therefore, it is important that the Specifier select the method most applicable to the end user of the floor. “
Here is a simple ACI check for flatness:
“4.8.6.1 The gap under the straightedge and between the support points shall not exceed either of the values as listed for the specified Floor Surface Classification in Table 4.8.6.1.”
In the Table, for a conventional floor, the maximum gap for 90% compliance samples should not exceed ½ inch, for 100% ¾”.
“ 4.8.6.2 The following minimum sampling requirements shall apply for test surfaces evaluated using this tolerance method:
4.8.6.2.1 A test surface is deemed to meet specified tolerances if it complies with the maximum-gap-underthe-straightedge limitations given in Section 4.8.6.1 above. The maximum disparity between a taut string stretched between the bottom corners at the ends of the straightedge and the underside of the straightedge shall not exceed 1/32 in. at any point.
4.8.6.2.2 The minimum number of samples = (0.01) area for floor areas measured in ft2. A sample is a single placement of the straightedge.
4.8.6.2.3 Orientation of the straightedge shall be parallel, perpendicular, or at a 45-degree angle to longest construction joint bounding the test surface.
4.8.6.2.4 An equal number of samples shall be taken in perpendicular directions.
4.8.6.2.5 Samples shall be evenly distributed over the test surface.
4.8.6.2.6 Straightedge centerpoint locations for samples shall not be closer than 5 ft.
4.8.6.2.7 Test results shall be reported in a manner that will allow the data to be verified or the test to be replicated, such as a key plan showing straightedge centerpoint location and straightedge orientation.
R4.8.6 The manual straightedge approach evaluates the flatness of a floor surface by placing a 10 ft long straightedge on the floor surface and measuring the maximum gap that occurs under the straightedge and between the support points.
R4.8.6.1 Measurements should be taken between straightedge support points and perpendicular to its base. Smaller gaps between the straightedge and supporting surface are indicative of higher flatness quality. The use of this approach requires that 90% of the data samples should comply with values in the second column, and 100% of the data samples should comply with values in the third column.”
Apply the above to your floor, in lieu of specifics spelled out in your contract, if these tolerances are not met, you may yet have a cause of action.


