Tag Archives: housewrap

Wall Insulation for a Hybrid Building

Wall Insulation for a Hybrid Building

Reader MASON in HILLSBOROUGH writes:

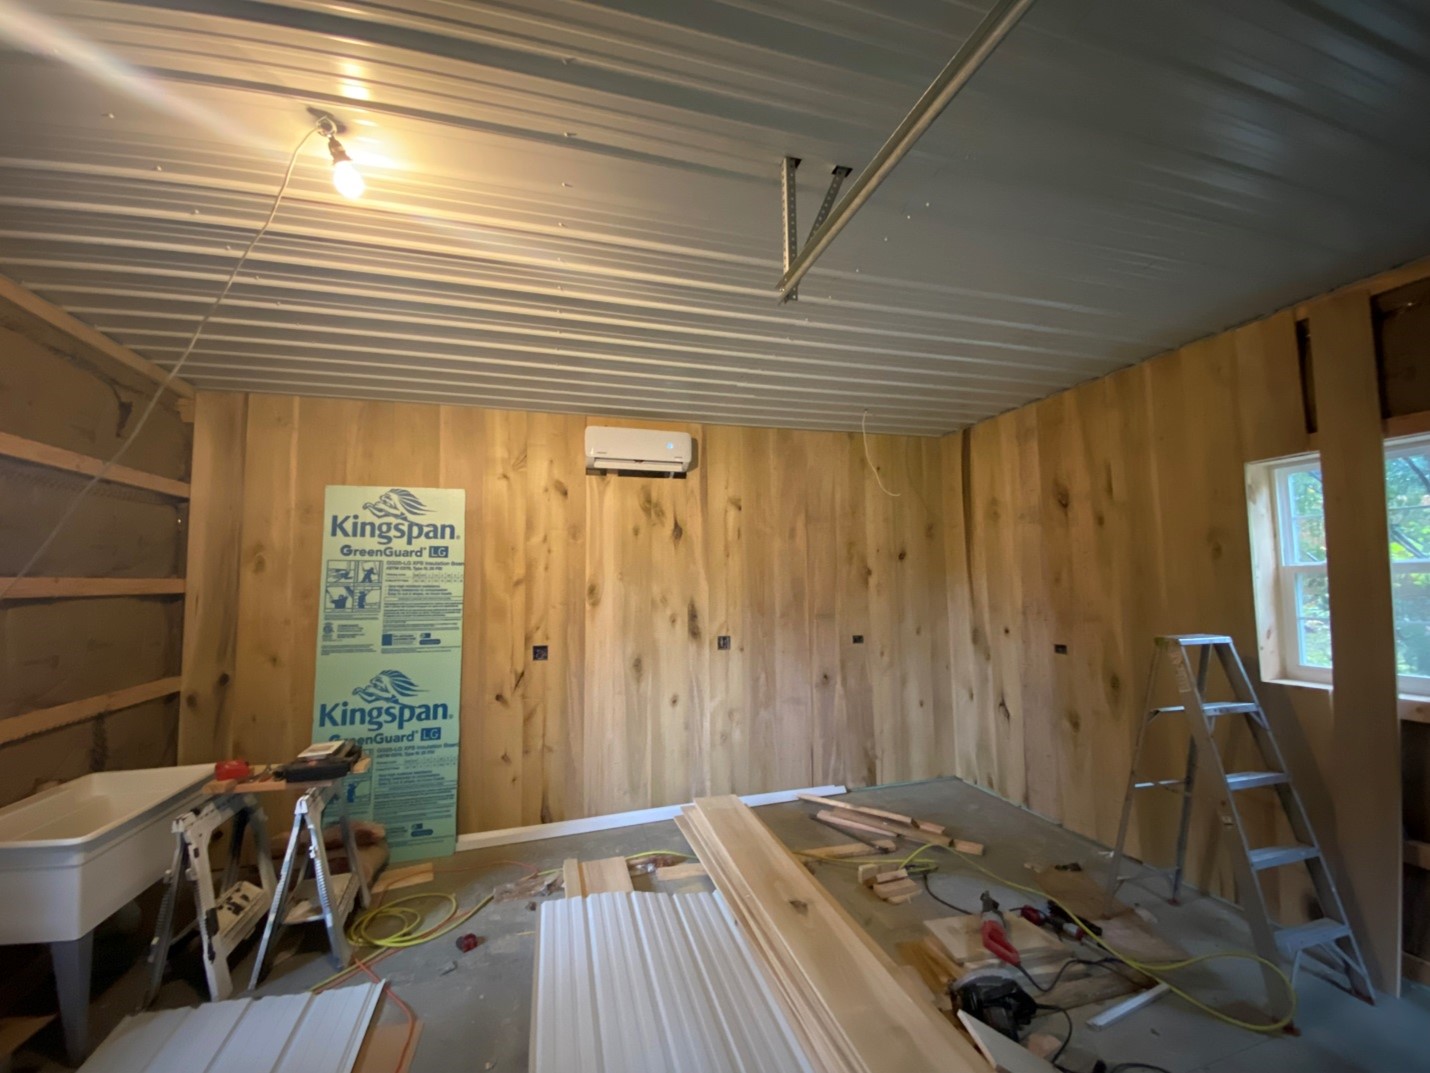
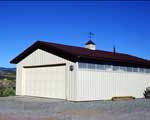
“I read your blog often and I truly appreciate the wealth of knowledge you openly share. I am in the process of starting construction on a hybrid steel shop that will house a small apartment that the wife and I will move into once its finished. We will sell our current home and then build a smaller house adjacent to the shop. 50 X 80 with 24′ wide mezzanine on one end. My questions are centered around wall/roof construction as well as proper insulation. Roof: I plan to install a standing seam roof with ice/water shield over 5/8 plywood. As you are aware, with hybrid steel it is hard to ventilate the roof with this type of construction. This downfall didn’t outweigh some of the benefits so this is what I am stuck with. Would like to understand some insulation options. Note: I do have the building designed to handle the loading of a couple of cupula’s and have considered making these passive and active ventilation points. (Exhaust fans with some louvers that I have yet to get the details figured out on)Walls (2 options): (Note: I prefer not to plan or have to always be fully conditioning the shop to 72 degrees…..I plan to have that ability by mechanical means but I don’t want to consistently have to be conditioning that much space, therefore I think i prefer the building to be able to breath out to the perimeter. I realize this may be tricky between the roof type and wall type)Option 1: metal siding – would like some input on wall and insulation construction based on the above notes of conditioning. Option 2: Hardie board vertical board and batten walls. Same as above, would like your input. There will be components on the first floor and second floor that make up the apartment space. Our approach on insulation and wall construction may change within those enclosed spaces may vary as they will be conditioned separately from the open shop space. Hope you can help shed some light on this approach and again thank you for your time and knowledge. Thanks!”

Thank you very much for your kind words!

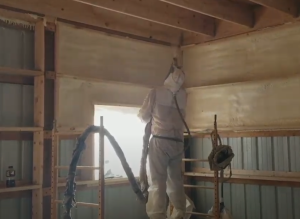
In Orange County, being Climate Zone 3A, I would most often recommend drying to inside, using closed cell spray foam to insulate underside of roof deck and applied directly to wall steel. This does entail having to mechanically dehumidify.

Given your desire to dry walls to exterior, here are my thoughts:

Have a well-sealed vapor barrier under your slab on grade – you want as little moisture as possible entering building.

Include eave overhangs of at least two feet – this is again about moisture. You want to push weather (water) away from base of building.

Install continuous gutters, draining at least 10 feet away from building foot print.

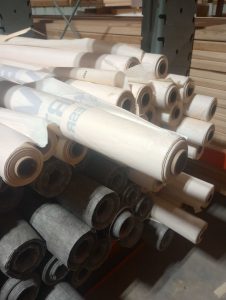
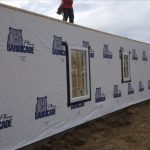
For wall construction – regardless of siding being used, place a drainable housewrap under siding (make sure it is omnidirectional, so you can install either vertically or horizontally). Use bookshelf wall girts to minimize deflection and create an insulation cavity. Unfaced Rockwool insulation to completely fill insulation cavity. Well-sealed interior vapor barrier.

Help – My Hobby Shop Has Wall Condensation

Help – My Hobby Shop Has Wall Condensation

Reader EVAN in PHILADELPHIA writes:

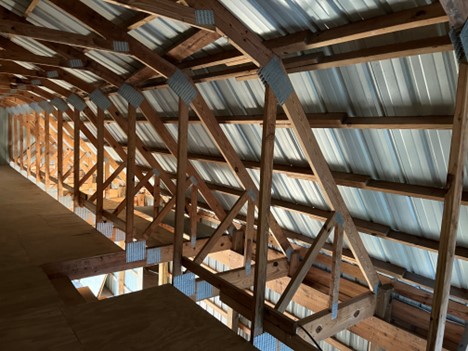
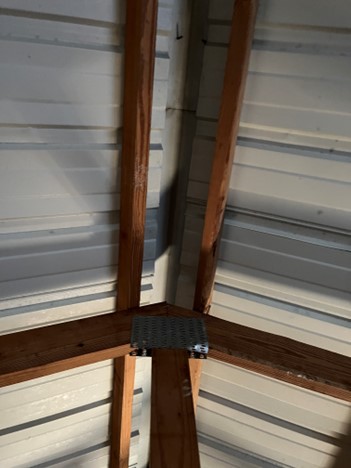
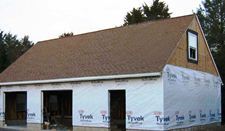
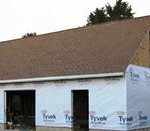
“Hi there, I recently constructed a small 20x20x10 pole barn for use as a hobby shop (woodworking, etc.). The eaves have vented soffit and the roof has a ridge vent. On the interior I did a metal ceiling with blown in R-C38 Cellulose. The attic space seems to be ventilating very well and I have no concerns. However, for the walls, I am having some moisture issues and am curious what the best plan of attack might be. The building is wrapped in Tyvek, I then constructed horizontal studs that line up with the exterior purlins and filled the gap with R19 faced Batts. I taped all the seams and tried to seal it the best I could. I then covered the walls with wood panels. However, after some activity that created some moisture in the air of the shop, I decided to check the walls and found the back of the Tyvek and fiberglass insulation soaking wet in a couple spots. Now, granted, the spots I had access to were less than ceiled (Around a pipe) that would be a likely spot for the warm moist air in the shop to get to the cold Tyvek, But I am afraid it’s likely an all-over problem. I know this is probably one of the most common questions you receive but I’m curious what you would recommend? Should I pull the wood panels off and add a vinyl vapor barrier. Would it be okay to put a vinyl vapor barrier over top of the faced fiberglass? Is there any negative to adding a vapor barrier? For example, would the reverse happen in the summertime if the shop is air conditioned? Any thoughts would be appreciated, I wish the company that sold me the barn would’ve discussed all this beforehand! But, we will move ahead. Attached are pictures showing the wall construction.”

This one really is not your provider’s fault.

Your faced insulation is already a vapor retarder. Adding another vinyl vapor barrier over interior of it is unlikely to change your outcome (although it shouldn’t negatively impact anything – other than being a lot of work).

If you do not have a vapor barrier under your slab, seal top of slab.

You have a very small area, so it takes only a very small amount of excess moisture to create challenges. Invest in a good portable dehumidifier (we bought one for our house at Walmart) and run it any time relative humidity inside your shop is over 40%.

This should take care of your challenge.

Housewrap, Roof Insulation, and Ceiling Fasteners

This Wednesday the Pole Barn Guru answers reader questions about a home owner asking builder to install housewrap on the roof, the best solution to insulate underside of roof, and what the best fastener for screwing steel to ceiling or roof trusses would be.

DEAR POLE BARN GURU: Pole Barn Guru, thank you for your knowledge. I have a customer wanting house wrap around the exterior of a 30×40 pole barn. Is house wrap to be installed in between purlins and roof steel or will I need a radiant barrier to prevent condensation? Home owner says house wrap on the roof as well but I’m not sure if that’s the route he really wants to go. House wrap on side walls in between girts and side steel is also the best route correct?

Thank you for your kind words, they are much appreciated. Provided your client will not be doing closed cell spray foam on walls, use house wrap between girts and wall steel. For his roof, housewrap is totally incorrect, as it allows moisture to pass through and become trapped between wrap and roof steel – potentially causing premature degradation. If your client is not closed cell spray foaming directly to roof steel, then order your roof metal with an Integral Condensation Control factory applied (Dripstop, Condenstop or similar) https://www.hansenpolebuildings.com/2020/09/integral-condensation-control-2/. If roof steel has already been ordered (again assuming no closed cell spray foam being applied), then you do need some sort of a thermal break – such as a well-sealed radiant barrier.


DEAR POLE BARN GURU: Hi Mike, I built a 32’X40’X12′ pole building, (Shop) I used 1 1/2″ foam board on the inside walls, (on the inside of the girts) I can’t decide how I should insulate the underside of the roof. I have had a couple Spray Foam guy’s quote it , that’s pricy. Of course, the best R Value etc. at the most reasonable price is what I am looking for. In some of your post you have mentioned Rockwool that has gotten my attention. I see they make it up to R30. One thing that sticks in my mind is, my builder suggested not to use an insulation that will give insects a place to live. What would be your suggestion for underside of Roof insulation. Thank you. JIM in SPRING HILL

DEAR JIM: If your building has no current provision for controlling condensation on underside of roof steel, then two inches of closed cell spray foam applied directly to steel is your best insulation option. If you desire a greater R value, you can go thicker, or add open cell.


DEAR POLE BARN GURU: What screw is best for installing metal panels on the ceiling to wood trusses. MICHAEL in WENTZVILLE

DEAR MICHAEL: Most people are using #9 or #10 diameter 1″ screws. If you have ceiling framing 24 inches on center and want to utilize strength of ceiling liner panels to help transfer wind shear loads, then 1-1/2″ long diaphragm screws would be a better design solution.

Insulation and Vapor Barrier, Rich-e Board Insulation, and a Tear-Off

Today’s “ask the Guru” answers reader questions about best applications of insulation and vapor barriers, the Guru’s experience with Rich-e Board insulation, and how to avoid a “tear-off” of a roof by adding layer of framing and insulation on top of old roof.

DEAR POLE BARN GURU: Hello, I am building a pole building in northern Indiana, I am looking for advice on insulation/vapor barrier locations. I have installed Tyvek on the outside before steel, will be putting wall girts and steel on interior as well. Plan is to install plastic on the inside before interior steel then blow in fiberglass insulation down in walls from top and do attic as well. I am just thinking since houses are built the same way with breathable Tyvek on the outside and the vapor barrier on the inside. Is the right way? Looking to keep the building from sweating on the inside. Thanks MICHAEL in KENDALLVILLE

DEAR MICHAEL: Internal sweating is a function of many more things than how you detail your wall insulation (you are correct in having Tyvek on exterior, vapor barrier on interior). As your building shell gets tighter, moisture is going to be trapped inside and you may need to mechanically dehumidify in order to prevent condensation. Some considerations – have a well-sealed vapor barrier under your slab, grade outside of building at no less than a 5% slope for at least 10 feet. Properly vent eaves and ridge, in correct proportions. You may want to consider your choice of blowing fiberglass into your walls, as it will settle over time, leaving a cold spot at top of wall. It is also affected by moisture. I would recommend using Rockwool batts instead.


DEAR POLE BARN GURU: What’s your experience with Rich-e board insulation? TERRY in NORTHPORT

DEAR TERRY: I wrote an article about Rich-e board not long after product was first announced  (https://www.hansenpolebuildings.com/2016/11/one-inch-insulation-r-50/). I reached out to them when I was looking at doing a tear off reroof of my then home at Newman Lake, Washington. I was unable to ever even be able to obtain a quote from them. As best I can tell, it appears this business has permanently closed.


DEAR POLE BARN GURU: I’ve got a pole building/residence I was wanting to avoid a tear off, was thinking of using roof hugger stand offs and wanted to insulate on top of old steel. Thoughts? Could go with 2” blue board I guess. Since you’re up at Newman lake, any thoughts on contractors in NE WA? Thank you. TERRY in NORTHPORT

DEAR TERRY: Hansen Pole Buildings’ warehouse had a 40 plus year old steel roof, it leaked water like a colandar. We also wanted to add overhangs to eaves and endwalls. In order to overlay our old roof (building is 96′ x 96′), we placed 2×8 rafters at each existing truss, fastening through into truss top chords. We then joist hung 2×6 purlins between each rafter. Although we did not insulate (building is cold storage), we could have placed R-30 Rockwool batts between purlins. As long as your underlying old steel roofing is able to withstand any shear loads imposed, then pretty much any well thought out design solution would work. Ideally, you should engage a Registered Professional Engineer to evaluate your current structure and design a best structural solution. Least expensive, provided you can access underside of roof, your least expensive will be a tear off. If you have an attic space, order roof steel with an Integral Condensation Control factory applied. Any contractor who you would consider hiring should be booked out for at least a year, if not longer, and will want a premium unless they just happen to live nearby.

Conditioning and Insulating a Shop/House in Spokane (Climate Zone 5B)

Conditioning and Insulating a Shop/House in Spokane (Climate Zone 5B)

My Social Media friend TYLER in SPOKANE writes:

“Hello Mr. Guru, I am planning to build a 48′ x 60′ post frame shop with a 48’x20′ finished living space inside and the remaining to be insulated and climate controlled shop space. I’m planning for 14′ floor to ceiling height in the shop area to accommodate 12′ tall overhead garage doors. I am thinking of doing an 8′ ceiling in the finished space with a framed platform ceiling so I could utilize the space above for storage. My question is how would you go about efficiently heating and cooling this building? I’ve seen that you’re familiar with Spokane Washington so I’m sure you’re aware the range of temperatures in the area. One would think it would be more efficient to climate control the interior finished space on a separate system or zone than the shop area. The shop area would be okay having more tolerance in temperatures but would still need to be controlled. What type of HVAC/insulation solution would work best in your opinion? Thank you”


Radiant floor heat – have shop and living space on their own zones. www.RadiantOutfitters.com can set you up with the right products, done the right way. If you can afford to do so, go with geothermal (https://www.hansenpolebuildings.com/2016/12/modern-post-frame-buildings-geothermal/) as you can use it for both heating and cooling.

Insulation – Spokane is in Climate Zone 5B. Under slab, you want a well-sealed vapor barrier of at least 6mil (thicker is better and less likely to puncture while placing insulation, etc.). Code requires R-5 under slab insulation, however most people use R-10 under heated slabs. Slab edge insulation is required, but need not extend below slab, if heated.

Walls – from out to in: Weather Resistant Barrier (housewrap), bookshelf wall girts, R-30 unfaced Rockwool batts (fit perfectly with 2×8 girts), well-sealed 6mil interior vapor barrier.

Ceiling – vent eaves and ridge in proper proportion, order roof steel with an Integral Condensation Control factory applied, raised heel roof trusses to allow for full depth of blow- in R-60 insulation from wall-to-wall.

Roof Truss Costs, Moisture Barriers, and Integrated Condensation Control

This Wednesday the Pole Barn Guru addresses reader questions about “the most cost effective length to procure, transport and install of a Post Frame Roof Truss 4/12 Pitch; 36′, 40′ or 50′?” a suitable moisture barrier for a shed, and Integrated condensation controls.

DEAR POLE BARN GURU: Typically, what is the most cost effective length to procure, transport and install of a Post Frame Roof Truss 4/12 Pitch; 36′, 40′ or 50′? Question is relevant to a mixed-use agriculture building. Thank you for your assistance. LYNNE in EDINBURG

DEAR LYNNE: Transportation can often be a limiting factor. In order to avoid pilot cars and over width permits, maximum truss height is limited to 102″ (8’6″). A 50′ span, 4/12 slope truss will normally be roughly 108″ tall, plus any overhang “tails”. So, this would entail an over width permit. Now most truss companies purchase year-long over width permits for their trucks, so this cost is negligible. Most states do not require pilot cars, unless loads are 12 foot or greater in width. This allows for 60 foot span trusses to be hauled without expensive pilot vehicles. As to procurement, while you will pay more per lineal foot of truss as spans increase, you will also need fewer trusses. For an agricultural building, I always encourage clients to build as large as they can economically justify and have space to build on, as it will never be too big. Keeping your building length to three times building width will also help with your budget, as these ratios are typically within shear load carrying capabilities of properly fastened steel roofing and siding.


DEAR POLE BARN GURU: I have a 12′ x18′ unheated shed framed and ready for the metal roof and siding. The roof will anchor to untreated 2″x4″ purlins. Is it ok to use Tyvek or a similar wrap to cover the seams from the top of my purlin ends and hang over the rake rafters that will be covered by the metal siding???? Is this an acceptable secondary water barrier between my roof and wall seam? My shed will most likely have a crushed limestone floor. It will be unheated and “unfinished” on the inside. No windows and 2 barn doors across from each other. Thank you so much. MACK in BATON ROUGE

DEAR MACK: Before placing your limestone floor materials, install a well-sealed vapor barrier (I recommend 15mil in order to minimize potential for punctures). This will help to minimize, or even eliminate condensation challenges. Order your roof steel with an Integral Condensation Control (Condestop, Dripstop or similar) factory applied. Cover walls with Tyvek or similar before installing wall steel.

If purlins cross rake rafters on endwalls, install 2×4 blocking between them to seal any open spaces.

Order steel Rake/Corner trims to cover last rib of roof steel and top of endwall steel (similar to below):


DEAR POLE BARN GURU: Building a 50x36x12 pole barn with 4:12 roof pitch. Attic space will be unconditioned with blown in cellulose insulation in ceiling and batten on walls. Attic will be vented with soffit and ridge vent. Walls will have exterior house wrap under metal panels. Question is, what to put under the roof panels? Just a vapor barrier or a dual purpose vapor/radiant barrier? I hear different opinions on placing radiant barrier under roof. STEVEN in SUGAR LAND

DEAR STEVEN: I would order your roof steel with an Integral Condensation Control (Dripstop, Condenstop or similar) factory applied. You can read more about these products here: https://www.hansenpolebuildings.com/2020/09/integral-condensation-control-2/


Barndo Living, Bracing a Roof Only, and Housewrap

This week the Pole Barn Guru answers reader questions about “barndo living” and the how to’s of post frame construction in Pagosa Springs, CO, bracing a roof only structure for working cattle, and if sheathing and housewrap are needed for a post frame building using wet-set brackets.

DEAR POLE BARN GURU: Have you ever constructed any barndominium‘s in Pagosa Springs Colorado area? Also, ball park figure, what is the square foot price of finished barndo living space in this area. I’m talking very, very simple nothing fancy finishes. What do you mean DIY? Is that in reference to assembling the kit? And would we need something like an extended boom forklift to assemble it, or no need for such equipment? If we’re building something with 12 foot doors, so presumably need at least 2 more feet for roll up doors then even more for trusses, how would we do that without some sort of boom fork or crane? Scaffolding maybe? SAM in PAGOSA SPRINGS

DEAR SAM: I personally have never built in Colorado. Hansen Pole Buildings has provided nearly 300 fully engineered post frame buildings to our clients in Colorado. Chances are good, several are in your area.

Fully engineered post frame, modest tastes, totally DIY, move in ready, budget roughly $70-80 per sft of floor space for living areas, $35 for all others. Does not include land, site prep, utilities, permits.
DIY – as in Do It Yourself In most instances, no heavy equipment is required. Skid steer (aka Bobcat) with an auger is handy for digging holes.
For information on lifting trusses, please see: https://www.hansenpolebuildings.com/2019/11/winch-boxes-episode-v/


DEAR POLE BARN GURU: I’m building a steel truss kit just like this one for working cattle. To me it doesn’t seem very stable with just post in the ground. How’s the best way to brace this style of building? The long sides of the building will have guardrail 3 rails high down the side so I know that will help some but unsure of how to brace the gable ends. RICKY in KINGSPORT

DEAR RICKY: Provided your columns are adequately sized for the wind load and embedded in fully concrete filled holes, it should prove to be fairly stable (follow the recommendations of the engineer who designed the plans). Ideally, you would have enclosed endwalls so shear loads can transfer from roof to ground through them.


DEAR POLE BARN GURU: Was wondering if I could ask you a question I’m getting ready to build a barndo was going to use wet set brackets do you recommend me using sheeting on it as well or just house wrap? Having problems with this issue thanks. DOUG in INDIANA

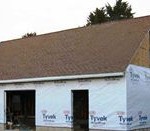
DEAR DOUG: If your steel has adequate shear strength, then there is no structural reason to sheet it. Housewrap is a must unless you are planning on closed cell spray foam for insulation.

Here is some extended reading on Weather Resistant Barriers: https://www.hansenpolebuildings.com/2016/01/determining-the-most-effective-building-weather-resistant-barrier-part-1/
https://www.hansenpolebuildings.com/2016/01/determining-the-most-effective-building-weather-resistant-barrier-part-2/
https://www.hansenpolebuildings.com/2016/01/determining-the-most-effective-building-weather-resistant-barrier-part-3/

Radiant Floor Heat, UC-4B Post Treatment, and Button Staples

This Wednesday the Pole Barn Guru answers reader questions about the use of radiant floor heat for a post frame building, post treatment that will not rot, and whether or not button staples can be used for housewrap on a post frame house.

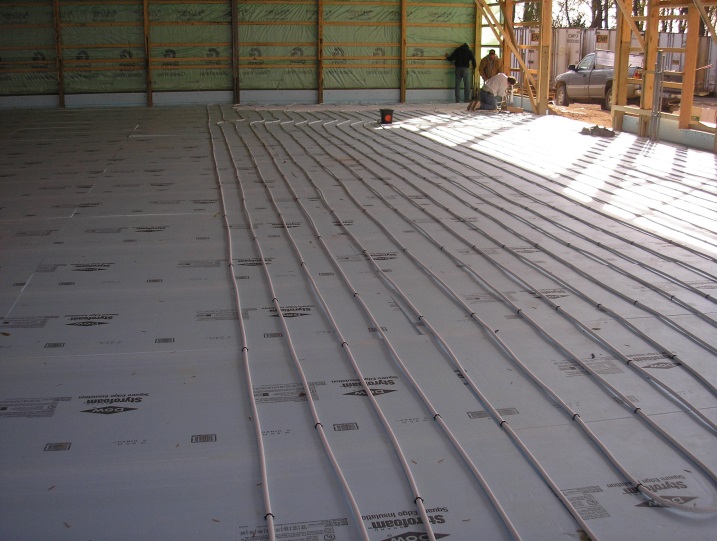
DEAR POLE BARN GURU: I am researching my build. I wanted to know since the flooring I want is concrete can heated flooring with the water system be installed in the ground for a pole barn? ERIKA in SHREVEPORT

DEAR ERIKA: Radiant in floor heat is a very popular and efficient method for heating concrete floors in post frame (pole barn) buildings. My own shouse (shop/house) has it (story here: https://www.hansenpolebuildings.com/2012/08/radiant-floor-heating/).


DEAR POLE BARN GURU: I live in a part of Texas that has clay we call blackland prairie clay, black gumbo, and other names I care not mention. Is it possible to sink poles in the ground in this area given the fact that most posts out there are from fast grown lumber? I built a pole barn in 1983 with my father, but that was in sandy loam soil up near Oklahoma. I have 900′ of ranch fencing and poles are always rotting. DANIEL in ROYSE CITY

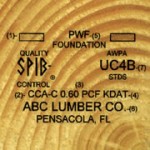
DEAR DANIEL: Your premature decay of fence posts has nothing to do with how fast lumber grows – it is them not being pressure preservative treated to UC-4B levels. All of our fully engineered post frame (pole barn) buildings utilize this level of pressure treating and it performs admirably. If you are yet concerned, there are options available such as plastic column sleeves, or pouring piers with wet set brackets to keep columns out of ground entirely.

Of greater concern would be your columns moving due to expansive soils (for extended reading: https://www.hansenpolebuildings.com/2020/07/barndominium-on-expansive-soils/).


DEAR POLE BARN GURU: Concerning fastening house wrap, can you use button staples as recommended by house wrap companies? I didn’t know if the button would show through the tin. I don’t want to lose house wrap before tin would be up as we live in a very unpredictable and windy area but also don’t want button to show through tin if that’s a possibility. Thanks! ADAM in COLBY

DEAR ADAM: Weather Resistant Barriers (aka WRB or house wrap) should be installed using flat staples, rather than button staples. Button staples, as you have surmised, may show through steel siding. You want to only install WRB directly ahead of where you are hanging steel, so as not to leave it exposed to winds any more than is necessary.

Condensation Control, a Bottom Track, and New Steel

This week the Pole Barn Guru tackles reader questions about adding condensation control to an existing structure, the installation of the “bottom track” of a sliding door, and how to finish an existing structure with wrap and steel.

DEAR POLE BARN GURU: hello – I just bought a large Amish shed for a workshop, and a cottage – I was a bit worried about the metal being directly screwed to purlins with no underlayment but bought then anyway… Is there any way besides spray foam to insulate and prevent condensation from the inside now? I assumed I could put closed cell rigid fiberglass between the rafters…am I wrong? ROBERT in LEBANON

DEAR ROBERT: Lack of a condensation control is probably problem number one when it comes to builder/installers selling on low price, rather than a great value.

Your best solution will be two inches of closed cell spray foam applied directly to underside of roof steel. You could try to use rigid insulation panels, however to be effective you will need to insure there are no gaps allowing warm, moist air from inside of your building to reach roof steel. This usually involved hours of patient and perfect cutting, working from ladders or man lifts, and lots of sealants.


DEAR POLE BARN GURU: How does the bottom track of sliding doors work so that you aren’t running over it when you have a concrete pad under barn? MISTY in CLIFTON

DEAR MISTY: Properly designed, sliding barn doors do not have a bottom track resting on top of your barn’s concrete slab on grade.

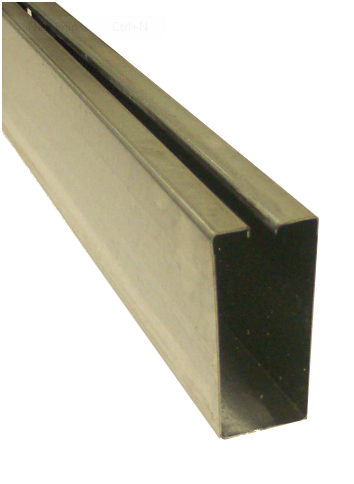
Your sliding door metal girts should look like this:

They are installed with slots down (towards ground).

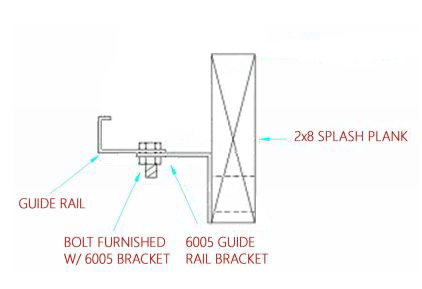
Mounted to wall in direction door opens will be a guide rail.

Guide rail is inside of slot in bottom door rail, preventing sliding door from swinging outward away from building, or banging into siding.


DEAR POLE BARN GURU: Hi there,

I have a 12×24 pole structure that was used as cover for some horses on the property I just bought and I want to finish it up.

They put a roof on it with asphalt shingles that is in good shape, but they simply put 7/16 OSB on for the walls and called it good. It’s about 5 years old. Surprisingly only a few of the OSB panels are swelled up from the elements which I have replaced.

I want to put metal siding and roofing on it.

I was going to lay some fanfold insulation down on the roof to create a flat surface for the metal. Any other suggestions? I don’t want to rip off all the shingles if I don’t have to.

For the walls would you recommend putting a building wrap around the OSB to protect it and then put the siding up? I’m not planing on insulating it. Was debating if it was needed at all.

This is in Spokane WA. Hot dry summers and dry cold winters.

Thanks, BRYCE in SPOKANE

DEAR BRYCE: Having been born, raised and spent most of my adult life in Spokane, I am vastly familiar with your weather.

In order to achieve a smooth surface for installing steel, place 2×4 flat on top of existing shingle roofing and nail through into underlying roof rafters or trusses with at least two 3-1/2″ galvanized nails or structural screws no less than every two feet. Do not rely upon attaching these only to sheathing. Fan fold insulation, by itself, will not provide an adequately smooth surface.

Building wrap is cheap – if in doubt, do it. Make sure to screw wall steel thru OSB into underlying wall girts (longer screws will be required).

Tyvek, Truss Attachments, and Polycarbonate Panels

Continuing to play catch-up with the Pole Barn Guru reader questions, Mike answers questions about adding Tyvek under wall steel, attaching trusses to header on sealed plans, and the use of polycarbonate panels for use on post frame building.

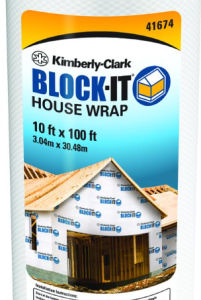
DEAR POLE BARN GURU: About to start the build of a 36 x 50 pole barn. Should I add a Tyvek or a “Block-IT” type material under the metal on the walls? I don’t know if I will ever finish the inside (maybe?) but where we live we get a ton of dust from farm fields etc. in the spring and winter before crops, and I am thinking that some type of material might help with drafts and dust. Seems quick and cheap to add now. Seems like everyone is squarely divided on yes/no. Thank you. MIKE in FREELAND

DEAR MIKE: Only reason to not have a Weather Resistant Barrier between your wall steel and framing would be if you were going to use closed cell spray foam insulation (in which case it should be applied directly to wall steel inside). It is so much easier to install now, than to wish you had done so after your building is completed.


DEAR POLE BARN GURU: My pole barn plans (architect designed & engineer stamped) show a double 2×12 header bolted into the notched top of the pole frame. Can the trusses sit directly on the top of the headers or should I put a typical double top plate on top of the headers (not shown on the plans). DAVE in PEYTON

Engineer sealed pole barnDEAR DAVE: You should erect your building exactly as shown on your engineer sealed plans, otherwise you have relieved your Engineer of Record of any responsibility for structural adequacy. Should you feel adding a top plate or plates to be necessary, please reach out to your engineer for clarification and a possible addendum to your plans.


DEAR POLE BARN GURU: Are some kind of translucent panels an option for pole barn roofing or siding? Similar to UPS Truck roof. Natural lighting. THOMAS in CHICAGO

post frame garageDEAR THOMAS: Polycarbonate panels may be used to provide natural lighting inside of non-insulated post frame buildings. In my opinion (as well as those of others) translucent panels should not be used in roof plane for a variety of reasons (https://www.hansenpolebuildings.com/2016/01/one-more-reason-to-not-use-skylights-in-steel-roofs/). They can be successfully used at top of one or both eave sidewalls or on triangles supported by end trusses.

Photos: https://hansenpolebuildings.com/uploads/polebarnquestions/cde6e9e0628de407178fc59261af7f68.jpeg


Tyvek Weather Barrier, Overhead Door Sizes, and Slab Insulation

This week the Pole Barn Guru answers questions about use of Tyvek weather barrier, best size for overhead garage doors, and insulation for a slab.

DEAR POLE BARN GURU: Hi, I was thinking of putting up a metal clad pole building and insulating it with R28 batt. Wondering your thoughts on adding Tyvek to the outside to help protect against the weather? Not sure if the cost is worth it? Most of the builders around here don’t recommend it. DOUG in REGINA

DEAR DOUG: Your local builders probably do not recommend use of a Weather Resistant Barrier (WRB) in walls because they fear increasing of prices on their quotes – they are selling low price, rather than best value for their clients.

If you are not going to flash and batt (https://www.hansenpolebuildings.com/2020/01/flash-and-batt-insulating-barndominium-walls/) your walls, then use of a WRB is an excellent choice as it allows any moisture from within your insulation cavity to escape outward. Use unfaced batts and then cover interior of your walls with well-sealed 6mil clear visqueen prior to an interior finish.


DEAR POLE BARN GURU: I’m fixin to build a barn, 40×40 12’ walls with 3 overhead doors. Going to put a lift in it. Have any suggestions on door size and spacing. I live in all sand so for my post I’m buying sono tubes so it won’t cave in on me. What size sono tubes? Planning on 6” concrete floor with thickened slab where hoist goes. Anything I’m forgetting? ANDREW

DEAR ANDREW: You actually probably need at least a 12′ ceiling for a lift. I always recommend at least 3′ from a wall and 3′ in between (it avoids door dings). With a 40′ wall – this will not quite work out (in my ideal world). I like 10′ wide doors, as they keep mirrors on much better. I also like 8′ tall doors, hardly any more than 7′ and gives room for racks, most lifts, etc.

In summary I would do (2) 10′ x 8′ (1) 10’x10′ (might as well take advantage of the ceiling height. Go 3′ from corners and 2′ in between.

Our third-party engineer will determine depth and diameter of sonotubes and they will be called out on your sealed plans.


DEAR POLE BARN GURU: Hi Mike, I am working on building a post frame home in Eastern Oregon. Looking for ideas on slab insulation detail at perimeter edge. The home will not have radiant floor heat.

I am having trouble deciding on how to insulate the perimeter slab. Oregon requires minimum R-15 for slab edge insulation. Ideally I would prefer to see concrete at exterior perimeter vs treated grade board that’s visible, however the treated grade board seems to be most cost effective in design. TRENT in WALLA WALLA

DEAR TRENT: I had just recently done this for one of our clients and we will be adding it to our construction manual. This hides your splash plank (grade board). Thicknesses and dimensions can be found here (https://www.huduser.gov/publications/pdf/fpsfguide.pdf Table 2, Page 6). Even though you are not using radiant heat, I would run Pex-Al-Pex tubes in my floor and do under slab insulation. It is a huge selling point and gives you flexibility to add radiant floor heat easily at a later date.

Brackets to Sonotubes, Housewrap, and Help with a Remodel

This week Mike the Pole Barn Guru gives some advice regarding the use of brackets with sonotubes, installation of housewrap, and the possibility of replacing a gable style roof with a gambrel.

DEAR POLE BARN GURU: Guru, I am looking at building a pole barn home. I like the idea of doing wetset brackets in concrete sonotubes, then after building is erected pouring the slab inside. My question is how will the grade board and slab be connected to the existing concrete and pole with wet set bracket. Thank you . STEVEN in COVINGTON

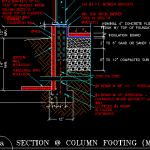
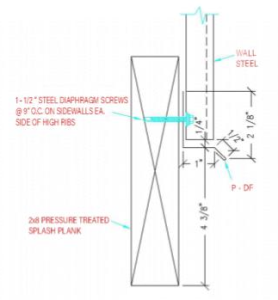
DEAR STEVEN: Your building’s grade board (aka splash plank or skirt board) will be oriented so upper 3-3/4 inches will be above top of slab. In this area, 10d common galvanized nails can be used. Below top of slab, fasten with two 3/16” x 3” Powers (www.powers.com) PC3DA-HDG galvanized steel split drive anchors (or equivalent).

Your building’s concrete slab can be connected to concrete in sonotubes by use of two five-foot lengths of ½” rebar bent to 90 degrees at center. Place one leg into tube leaving other leg out into future slab area at approximately 60 degrees from plane of splash plank (this will require cutting a short slot into top of sonotube.


DEAR POLE BARN GURU: Greetings, I’m at the point in construction where I need to read up on how to install house wrap prior to wall steel. I don’t have the Wall Steel chapter (Chapter 21) in my manual and I can’t find any mention of house wrap anywhere else. I’m assuming that I can’t put wall steel over cap staples unless they are under a rib. CARL in SPRUCE

Reflective InsulationDEAR CARL: Installation of housewrap will be a chapter in an upcoming version of our Construction Manual. Although it might be possible to install steel siding over cap staples, we are unaware of anyone who has tried it. To the best of our knowledge everyone has used just enough staples to hold housewrap in place and installed siding immediately. By running housewrap vertically you can place wrap right ahead of installing steel. Make sure to seal all seams with three inch wide tape.


DEAR POLE BARN GURU: I have a 24×47 detached garage and I wanted to remove the wood rafters and replace them with metal joist in a gambrel design with metal roof. Is that something your company would do? HARRY in SACRAMENTO

DEAR HARRY: We are not contractors, so could not assist with any form of construction. As post frame building kit suppliers, we do not use metal joists of any kind.

You might be able to find a contractor who would undertake this project, however my educated guess is it would be less expensive to demolish your existing garage and begin from scratch, than to do a remodel of this scope.


.

Hipped Roof, Adding a Ceiling, and a Leak

Questions about a Hipped Roof, Adding a Ceiling, and a Leak for the Pole Barn Guru

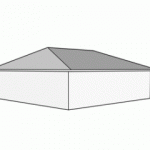
DEAR POLE BARN GURU: My home has a hip roof and I would like for my garage to have a hip roof as well. Would that be possible? Thank you. SCOTT in BILLINGS

DEAR SCOTT: It is very possible to have a full hipped roof on a post frame building. To the best of my knowledge, Hansen Pole Buildings is one of the few post frame building kit providers who engineers them regularly.
For more reading on full hip roofs: https://www.hansenpolebuildings.com/2015/01/full-hip-roof/


DEAR POLE BARN GURU: I want to use 1/2 drywall for my 32 x 18 pole barn. Rafters are 4′ on center. Can I run 2 x 4 flat against rafters on 16″ centers and attach my drywall to 2 x 4’s without adding any additional support between the rafters? STEVE in FORT WAYNE

DEAR STEVE: I will interpret your “rafters” as being prefabricated roof trusses. If they were not designed to support a ceiling (as is typical of most trusses designed for four foot on center spacing) then it is the end of the road for this project unless an engineered truss repair is done to upgrade the load carrying capacity of the truss bottom chords.

If your intent is to attach the 2x4s flat wise to the underside of the trusses, you may have some deflection challenges, depending upon the grade and species of the lumber.  You’ll want to use an engineered screw (not drywall screws) to attach the 2x4s, rather than screws – which may withdraw.

How I would do it…..

Provided the trusses are adequately designed, I would use 2×4 ceiling joists on edge between the truss bottom chords with joist hangers every 24 inches. I’d use 5/8″ Type X gypsum wallboard as it far less prone to wave and affords some fire protection.


DEAR POLE BARN GURU: Advisement of how to prevent insulation from becoming wet due as
there is no house wrap on his pole barn. JOHN in WISCONSIN

DEAR JOHN: If you have wall insulation getting damp, it is due to water getting inside of the siding – most generally this is seen where there are openings in the walls (e.g. doors and windows) or there is a roof leak above the eave girt. First step is to identify the source of the moisture – to eliminate a roof leak as the source, you can run water from a hose onto the roof and look for infiltration. If it is coming from the roof, fix the leaks.

Having eliminated the roof as the source, the best fix is to remove the steel siding a wall at a time and install a high quality house wrap, then screw the siding back in place. Make sure to seal all joints in the housewrap. Ensure all window and door openings are well sealed – use lots of high quality caulking at corners (especially above windows and doors).


Will Kilz Paint Stick after a Fire?

Welcome to Ask the Pole Barn Guru – where you can ask questions about building topics, with answers posted on Mondays.  With many questions to answer, please be patient to watch for yours to come up on a future Monday segment.  If you want a quick answer, please be sure to answer with a “reply-able” email address.

Email all questions to: PoleBarnGuru@HansenPoleBuildings.com

DEAR POLE BARN GURU: I`m building a 24’x36’ workshop and I want to know if I`m putting materials in the right place/order. I have 2×6 constructed walls with NO osb, 12’ high that are bolted to my slab. I plan on wrapping the walls in house wrap, putting my 2×4 girts on top of the house wrap and then metal siding over the girts. I`m wondering if 1 ½” space created between the metal siding and the house wrap would pose a problem?

On the inside I plan on fiberglass insulation up against the backside of the house wrap, then vapor barrier and then metal interior panels. IS this ok?

As for the roof, I was reading on your site about the reflective insulation from “www.buyreflectiveinsulation.com” and I went ahead and got the A1V and I plan on putting that down on top of my 2 foot spaced 4/12 trusses and then roof metal. These are common trusses so I will have a ceiling with blown in insulation on top of that. I`m just trying to avoid condensation, I will have 36’ breathable soffits on each eave and I am putting vented closure strip on the peak. I plan on heating the building on an “as needed” basis and I live in SE Wisconsin.

Is there anything wrong with the way I`m going about this? Is the house wrap on the walls even necessary? I`m doing all the work myself and trying to save as much money as possible but I know I only have 1 shot to get it right.

Thanks for your time. RICK

DEAR RICK: It sounds like you have studwall framed your workshop. If this is the case and your walls are 12′ tall, I hate to be the bearer of bad news – you do have a structural problem. Table 2308.9.1 of the Code (https://publicecodes.cyberregs.com/icod/ibc/2012/icod_ibc_2012_23_par170.htm?bu2=undefined) limits the height of load bearing stud walls to 10′.  Before going further, it would behoove you to consult with a Registered Professional Engineer to resolve the structural issues.

Moving forward –

With insulated walls, housewrap is an excellent idea and the 1-1/2″ space between it and the siding should pose no negative issues.

My personal choice for interior wall finish is sheetrock – it is less expensive than steel, absorbs sound, easier to attach things like shelves, cabinets, work benches, etc. A dent in a steel panel cannot be repaired, a dent or hole in sheetrock is easily fixed.

On your roof, with trusses two foot on center, you will need to lay 2×4 flat on top of the A1V and the trusses. The 1-1/2″ dead air space created by the 2×4 will actually improve the thermal efficiency of the system. If you have not yet ordered trusses, I’d recommend buying ones with raised heels to increase energy efficiency and reduce potential heat loss: https://www.hansenpolebuildings.com/blog/2012/07/raised-heel-trusses/

Be sure to use screws to attach the steel and use the right size screws in the right locations: https://www.hansenpolebuildings.com/blog/2014/12/screw-placement/

Mike the Pole Barn Guru

DEAR POLE BARN GURU: Have a pole barn that we used the prefinished pole barn steel panels for ceiling. Had an auto fire close to the ceiling. Replaced buckled panels and had a ServPro (https://www.servpro.com/) fire restoration company clean rest of panels of loose soot. They say Kilz paint primer will stick and seal the smoke residue so paint will adhere and stay. What do you think and recommend? ANTHONY IN MEDFORD

DEAR ANTHONY: With a fire producing extreme enough heat to have buckled steel ceiling liner panels, I am hoping your insurance company had a Registered Professional Engineer do an inspection of the roof trusses to ascertain if they were damaged. While the wood trusses may not have been exposed to the direct flames, the heat from the fire could have caused the lumber to shrink away from the steel truss connector plates and/or the plates could have lost their temper from the heat. If they did not, I would suggest it be done now, before a problem occurs which was unforeseen.

Provided the roof system was designed to support the weight, I would originally have recommended removal of all of the steel liner panels and replacing with 5/8” Type X Drywall. Read more about why here: https://www.hansenpolebuildings.com/blog/2013/08/steel-liner-panels/

The 5/8” Type X drywall is also fire resistant.

As you are past this point – Kilz paint (https://www.kilz.com) does make products which will adhere to the steel liner. I’d recommend a visit to the paint expert at your local The Home Depot®, where they can give you not only the proper advice on which Kilz®paint product to use, but also can make you a smoking hot (pun intended) deal on it!

Regardless of what product is used for painting, it is essential to properly prepare the steel surface prior to priming with Kilz paint. More information on repainting steel panels is available at: https://www.hansenpolebuildings.com/blog/2013/01/repainting-steel/

Mike the Pole Barn Guru

DEAR POLE BARN GURU: Good morning, Guru,I am an engineer and I am looking at a pole structure approximately 40 years old. First, is there a formula (given all the variables) to estimate the vertical load capacity of the poles? Second, being 40 years old, what is the likelihood there are footings at the base of the poles? Was it common practice to use footings in the mid-70s?

The sooner you can respond, the better.

Thanks in advance for your help! BOB IN MADISONVILLE

DEAR BOB: There is a formula which will calculate the capacity for the columns – which must resist both bending and compressive loadings. We’d be happy to check them for you, for free.

We would need to know the actual dimensions of the columns, as well as the species and grade, and their on center spacing.

From the building we would need to know the eave height (https://www.hansenpolebuildings.com/blog/2015/02/eave-height-2/), width and length, as well as roof slope and whether the columns are adequately tied into the concrete slab or not. We also would need to know if the siding and roofing are properly fastened so as to provide a diaphragm, as well as the materials used. Also is building fully or partially enclosed and are doors designed to support wind loads.

Digital photos of as much of the structure as you can provide would prove helpful.

Climactic information we would need includes ground snow load, use of building, if building is heated, design wind speed and wind exposure.

Lots of variables to consider, all of which we have checked by our proprietary program every time we even quote a building.

Footings – as most pole buildings currently being constructed have inadequate footings, do not count on this one being an exception. If you are potentially going to have a liability for them, I’d certainly recommend digging to the bottom of one or more of them to ascertain what indeed is really there.

Mike the Pole Barn Guru

Vertical Flush Walls

There is a builder in my neck of the woods who advertises as “the only company around that offers…Vertical Flush Walls, for your pole building, shop or garage, which allows you to sheetrock inside your building without having to re-frame the inside!”

In the photo with this article, wall girts have been placed “barn” style flat on the outsides of the columns, where they would have failed in bending (read why they fail on their own here: https://www.hansenpolebuildings.com/blog/2012/03/girts/).

vertical flush wallsTo me, vertical flush walls look like a stick framed stud wall has been built on the inside, which supports the wall girts and does exactly what it purports to do.
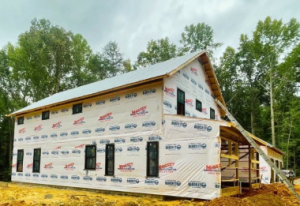
However there is an easier, faster and less expensive method, which provides for an insulation cavity deeper than the adding a second wall inside of the first, bookshelf style wall girts: https://www.hansenpolebuildings.com/blog/2011/09/commercial-girts-what-are-they/

In an typical 12 wide bay of this building, with a 14 foot high eave, to commercially girt a bay and be totally gypsum wallboard framed ready, it would require six 12 foot 2×8 for wall girts, a 12’ pressure treated 2×4, and 4 2x4x12 for blocking and backing. Total Board footage of lumber – 136.

As farmed in the photo shown, materials required are a 12’ pressure treated 2×6, seven 2x6x14 studs and a 2x6x12 top plate. Wall girts are six 12 foot long 2×6. Total board footage – 194, or 42% more lumber. Besides not making economic sense, the concrete slab is also required to be installed, in order to place the vertical stud wall.

Whilst it is wonderful for the builder to have added this interior “liner” wall in, there is something the builder missed, which is pretty important in buildings which will be insulated and climate controlled – building wrap (read more about building wrap here: https://www.hansenpolebuildings.com/blog/2012/11/house-wrap/).

Great sounding marketing ploy, but in reality, just not very effective.

Dear Guru: Is Toe Nailing a Good Idea?

Welcome to Ask the Pole Barn Guru – where you can ask questions about building topics, with answers posted on Mondays.  With many questions to answer, please be patient to watch for yours to come up on a future Monday segment.  If you want a quick answer, please be sure to answer with a “reply-able” email address.

Email all questions to: PoleBarnGuru@HansenPoleBuildings.com


DEAR POLE BARN GURU: Hello, The bottom of my 2 x 8 skirt board is about 2 inches into the ground.  Is it OK to measure 10 feet from the top of the skirt board since it is so low?

As long as the steel siding is long enough I would like to do this. If I measure from the bottom of the skirt board and add my 3  1/2  inch. of cement  then my ceiling is lower. I can add another skirt board on top of the one that is there. I can add dirt up against the outsides so it looks  OK

I hope to work on this in the morning so please answer as soon as possible.

SITTING IN SALEM

 DEAR SITTING: You could do as you suggest (measuring the 10′ from the top of the 2×8 skirt board), as long as you add another 2×8 skirt board on top of the one you have installed, then fill up to the top of the lower 2×8 skirt board before pouring your concrete floor.

All of the steel for the siding is pre-cut to fit based upon a 0 point being the bottom of the 2×8 skirt board. There is no way to increase your interior height without ordering new wall steel or adding wainscot – either of which will prove to be a significant expense to pick up a few inches of height.

Mike the Pole Barn Guru

DEAR POLE BARN GURU: I have a pole barn that I am insulating. I am using rigid foam on ceiling between truss chords, covered with steel. Walls are 4×6 poles with 2×4 purlins on outside, sided with steel. I am adding 2×6 vertical studs on 24″ centers between poles, and stapling craft-backed roll f-glass insulation to studs, then covering wall with OSB. Should I consider stapling tar paper or other barrier to inside of purlins before adding the studs and insulation? There will be an air gap between the f-glass insulation and the outer steel, and moisture can get in via corrugations in the steel siding, top and bottom. Thanks! BUILDING IN BELLEVILLE

 DEAR BUILDING: You should place a housewrap (think Tyvek) ideally between the wall girts and the siding, but if not there, on the inside of the wall girts.

You can read more about housewrap here: https://www.hansenpolebuildings.com/blog/2012/11/house-wrap/
Here are some hints as to how to minimize the cost of your framing to support the insulation, and reduce transference of cold/heat from the contact of 2×6 vertical studs with the exterior horizontal girts.

  1. Start by placing a pressure treated 2×4 on top of the slab, flush to the inside of the columns (this board will end up between the posts, as will subsequent ones).
  2. Cut 2×4 blocks to 22-7/16″ and nail one to the each post directly above the treated 2×4.
  3. Cut a 2×4 to fit between the posts, and place like a bookshelf on top of the blocks. Repeat this process throughout the building.For best energy efficiency, make sure to completely seal the facing of the insulation batts on the inside of the wall.

Mike the Pole Barn Guru

DEAR POLE BARN GURU: Hello, I purchased my Hansen Pole Building some time ago. I’m just now getting around to drywall, but have always been stumped with one part of the construction. How are you supposed to attach the drywall “L” top plate? (I have the commercial girt setup). There just isn’t anything to attach the top plates unless I’m toe nailing it to the posts which doesn’t seem correct to me. The girts were attached to girt blocks, but the “L” top plate doesn’t have anything like that. Like I said…this one has stumped me for some time and now that I’m getting around to drywall I need to get the top plate installed.

Thank you very much, HARRIED IN HARRISVILLE

DEAR HARRIED: The distance from center to center of your wall columns is 12’. Conservatively, the “L” supports a maximum of 12 square feet (1/2 of the distance to the first ceiling joist, which is at 24 inches on center). 5/8” gypsum wallboard weighs 2.31 pounds per square foot. This makes the weight supported by the “L” of just under 28 pounds.

The 2005 NDS® (National Design Specification® for Wood Construction published by the American Forest & Paper Association) addresses toe nailing connections in “Design Aid No. 2”. To keep the design conservative, we will use the lowest Specific Gravity value of the commonly used framing lumbers (G=0.42 for Spruce-Pine-Fir). With the specified 10d common nail (3 inch length x 0.148 inch diameter), the lateral design value for a toe-nailed connection is 83 pounds per nail.

Placing two toe-nails through each end of the vertical member of the “L” would allow the “L” to support up to 332 pounds, many times the needed design requirements.

If you are uncomfortable with toe nailing the “L”, you could cut a notch out of the top “flat” part of the “L” 1-1/2 inches deep, to fit it tightly to the face of the column above the ceiling line. Two 10d common nails could be driven through the remaining portion of the “flat” of the “L” into the column, in addition to toe nailing them.

Mike the Pole Barn Guru

Dear Guru: Can I Add Radiant Barrier?

Welcome to Ask the Pole Barn Guru – where you can ask questions about building topics, with answers posted on Mondays.  With many questions to answer, please be patient to watch for yours to come up on a future Monday segment.  If you want a quick answer, please be sure to answer with a “reply-able” email address.

Email all questions to: PoleBarnGuru@HansenPoleBuildings.com


DEAR POLE BARN GURU: I have an existing pole barn. Can a radiant barrier be added to the roof from the inside rather than taking the roof off and reinstalling? Thanks. CONSIDERING IN COUNCIL BLUFFS

DEAR CONSIDERING: Yes a radiant barrier can be installed from the inside. In order to be effective, it is essential to seal it tightly along all edges and seams.

I like products which come with adhesive tabs along one edge, for sealing to the next roll without having to use tape. Check out: www.buyreflectiveinsulation.com


DEAR POLE BARN GURU: I have an existing pole barn. I want to stop wind from coming in where the corrugated metal meets the trim at the top and bottom of the siding and wainscot. Would closure strips work for this? Or would housewrap be better. Can I add housewrap from the inside? Or do I have to pull the steel, wainscot, and trim off, wrap and reinstall? Thanks. INTERESTING IN IOWA

DEAR INTERESTING: In order to properly place closure strips, the building will now have to be stripped down to pretty much bare wall framing.

This is probably not the answer you wanted to hear, but the best way to solve your issues is to remove all of the siding, wainscot and wall trims and install a high quality house wrap AND install closed cell closure strips at every point possible. For the top of the angled panels on the endwalls, Hansen Pole Buildings has available a strip which expands to one inch square to entirely fill either beneath the tops of the panels, as well as between panels and rake trims. The same expanding closure also works well for beneath tops and bottoms of Outside Corner trims.

You can read more about housewrap here:

https://www.hansenpolebuildings.com/blog/2012/11/house-wrap/


DEAR POLE BARN GURU: Good afternoon, have you built any Fire Stations? if so pictures and cost, Thanks. DECIDING IN DELMAR

DEAR DECIDING: Thank you very much for your interest. As we are not contractors, we have not built fire stations (or any buildings) for anyone, anywhere. We have designed, provided the structural plans, delivered materials, provided assembly instructions and technical support for many. Because we do not do the construction ourselves, we are not onsite when the projects are completed, we have to rely upon our clients to send us photos – it turns out those we have received from our fire station customers are very limited. As to costs, those depend greatly upon the needs of the individual Fire Departments. Every building we provide is custom designed to best fit those needs. You might enjoy reading this article:

https://www.hansenpolebuildings.com/blog/2014/07/fire-stations/

To get the most accurate price quote on a new fire station (or any pole building for that matter), please go to our website and fill out the Request a Quote Form

https://www.hansenpolebuildings.com/freequote.htm

Are Concrete Piers OK in Earthquake Areas?

Welcome to Ask the Pole Barn Guru – where you can ask questions about building topics, with answers posted on Mondays. With many questions to answer, please be patient to watch for yours to come up on a future Monday or Saturday segment. If you want a quick answer, please be sure to answer with a “reply-able” email address.

Email all questions to: PoleBarnGuru@HansenPoleBuildings.com

DEAR POLE BARN GURU:Why are concrete piers not recommended for pole buildings in earthquake areas? YELLING FROM YELM

DEAR YELLING: Part of why I love what I do for a living is I get to learn new things every day. I’d never heard of concrete piers not being recommended for pole buildings in earthquake areas – and have researched it highly, without finding any data to back up the premise.

Post frame (pole) buildings perform admirably in earthquakes as they are very lightweight, as well as flexible, compared to most other construction techniques. The heavier a structure is, the more it will be impacted by seismic forces. Most pole building construction relies upon wooden columns which are embedded in the ground (usually in concrete). A true concrete pier (a hole entirely filled with concrete) with a bracket to attach a column to the pier could prove to be a different story. In the event of a seismic event, the bracket/column connection could very well act as a hinge point.

DEAR POLE BARN GURU:I’m building a Barndominium 36×40 and I wanted to know how should I insulate the walls? Without creating a mold and moisture problem. Should I wrap what type of plastic wrap around the outside of 2×6 outer walls between R-panel? Also on the inside of plastic wrap between Sheetrock walls put R-19? And put R-30 in attic? If I wanted to put tongue and groove piney knot boards on inside walls what should I put up over insulation and 2×6 studs to nail the tongue and groove boards up to? To also help insulate walls?

Do you recommend a certain size a/c and heat pump unit for a 36 x40 barndominum ? Thank you for your help. BARNDOMINIUM BOB

DEAR BOB: As for R-values, without knowing where you are geographically, I can’t speak to what level is appropriate for your specific climactic conditions.

Walls – I would housewrap the outside of my framing, use BIBs insulation, cover the inside with clear plastic for a vapor barrier. If you intend to run the boards vertically on the inside – you can use bookshelf style wall girts to create both the insulation cavity and the support for your inside finish.

Attic – make sure to order trusses with an “energy heel” – deep enough to allow for the full thickness of the insulation to extend to the outside of the building sidewalls.

As for HVAC – your local HVAC experts can recommend the proper size unit for the cubic footage of space you will be conditioning.

Tyvek Thermawrap R5.0 Review

As my long time readers know, I am a proponent of having a high quality housewrap between framing (or sheathing) and siding for any pole building which will be climate controlled.

Therma WrapI also try to keep abreast of new products and innovations. Here is one which sounds good, but may not deliver.

After two years of research and development, DuPont announced the launch of what it calls an industry first: insulating housewrap.

“This is arguably the most important introduction in our product group in a long time,” says Jim Ash, new business development manager for DuPont. “It’s taking us into the insulation business, which is a big strategic push for us, and hopefully the first of many.”

In its construction, Tyvek Thermawrap R5.0 comprises the maker’s long-standing Tyvek housewrap bonded to an insulation blanket. The combination has allowed DuPont to enter into the continuous insulation category – an area which is getting increased attention thanks to requirements by the 2012 International Energy Conservation Code which went into effect October 18, 2013. Up to now, the category comprised mainly rigid foam panels for exterior insulation. Thermawrap R5.0 provides builders with another alternative to insulating pole buildings from the outside. The goal is to offer a net effective R-value of R-5.

It may seem counterintuitive to put padded insulation in a situation where contact with moisture is almost a certainty. Ash says not to worry.

“We all know it’s not a question of if, but when, walls will get wet,” says Ash. “Thermawrap R5.0 is as permeable as housewrap, which hits on the product’s No. 1 value proposition: it can dry from the inside or the outside. It breathes moisture vapor.”

DuPont says the Tyvek on the outside of the blanket works just as it would if it was installed on its own by keeping air and bulk water out of walls, but also serving as a breathable barrier allowing moisture vapor to escape to the outside. In addition, in cases where wall sheathing (typically plywood or OSB – oriented strand board) DuPont says the blanket increases the temperature of the sheathing, which decreases the chance for interstitial wall condensation in heating climates. “This reduces the likelihood of getting moisture vapor inside the walls,” Ash says.

For installation, Thermawrap 5.0 doesn’t require any unusual materials. Designed to be installed like housewrap with cap staples or cap nails (DuPont recommends its minimum 3/4-inch Tyvek brand fasteners), the rolls feature an uninsulated flap along the bottom edge which overlaps the course below to further prevent moisture penetration. Cutting the material, however is slightly different. Ash says shears, rotary cutters, or even a carpet knife work well for cutting and trimming Thermawrap R5.0.

Worried about compressing the material beneath siding? Thermawrap R5.0 measures 1.5 inches thick and DuPont says it will introduce Insulated Battens in mid-2014 to provide a stable base for the installation of fiber cement, wood lap siding, manufactured stone veneer, and stucco. The battens, however, are not needed behind vinyl siding, brick, or stone. This author’s take is – I am not seeing how it is the listed installation would not crush the insulation. Installers will, however, want to use 2×4 wood buck bump-outs around windows and doors so the openings are on the same plane as the blanket material.

Thermawrap R5.0’s benefits will come at a premium. DuPont says the total installed cost (including materials and labor) will run 15% to 20% higher than the total installed cost of a premium housewrap plus 1-inch exterior rigid foam insulation. The company expects Thermawrap R5.0’s thermal benefits, along with Class A fire rating and other benefits as mentioned will make the new material an attractive proposition to the industry.

The insulation blanket is made of proprietary fibers, including 20% pre-consumer recycled Tyvek. The product is available in 4-by-40-foot rolls. Each roll weighs approximately 26 pounds and Ash estimates about 20 rolls would outfit the average home.

Here is the rub when it comes to typical post frame construction, if being applied over wall girts and beneath steel siding, the insulation is going to be crushed down to nothing (basically R-0) every time it crosses a framing member.

In my humble opinion, to get the most bang for the buck, go with a thicker wall cavity to provide for thicker wall insulation, then use a traditional housewrap.

Dear Guru: How Can I Add a Vapor Barrier Now?

Welcome to Ask the Pole Barn Guru – where you can ask questions about building topics, with answers posted on Mondays.  With many questions to answer, please be patient to watch for yours to come up on a future Monday segment.  If you want a quick answer, please be sure to answer with a “reply-able” email address.

Email all questions to: PoleBarnGuru@HansenPoleBuildings.com

DEAR POLE BARN GURU: I have a question about insulating my pole barn. I recently had a 32′ x 40′ x 12′ tall building put up by a local builder. I’m doing all the finishing work including electrical. I’m using steel liner panel for the walls and ceiling. The question is that I have already put up the walls and I did NOT put any vapor barrier up first. My plan was/is to blow in fiberglass in the walls but now I’m worried about mold growth and or moisture problems in the walls. I’m in SW Michigan and plan to heat the building. So the question is…Is there any safe way to insulate without taking all the metal down? I could probably drop sheets of Tyvek or plastic down the inside of the wall and then just blow the insulation in??  MEANDERING IN MICHIGAN


DEAR MEANDERING: First of all, Tyvek or other housewraps are not vapor barriers. For more information on housewraps see: https://www.hansenpolebuildings.com/blog/2012/11/house-wrap/

Second, unless you are going to use BIBS insulation, blowing fiberglass into a wall cavity is not probably the best solution, as in time, the insulation will settle. Read more about BIBS here: https://www.hansenpolebuildings.com/blog/2011/11/bibs/

Assuming you have not yet installed the interior steel liner panels, the walls can be insulated with your choice of a variety of products, then place a vapor barrier on the inside and cover with the liner panels. 

 If you’ve already put up the interior steel liners, I’d strongly advise you carefully take them off, and then follow my directions above.  You will be far happier with the result, as mold is not a pretty problem to deal with.  And yes, with steel, you need a vapor barrier.

DEAR POLE BARN GURU: I HAVE A HANSEN POLE BARN 30′ X 54′. IM ADD A SHED ROOF TO IT. IM HAVING A HARD TIME FIND THE RIGHT METAL FLASHING. TO CONNENT THE SHED ROOF TO THE SIDE WALL. THANK YOU. DETERMINED DAN

DEAR DETERMINED: We can provide any materials needed to add onto a Hansen Pole Building. A concern of ours is people who add onto their buildings, without a proper structural design analysis being performed. In the case of original buildings which were designed by an engineer, adding on to it, without engineering, will absolve the engineer of any liability from the original design. Many building failures are the result of inadequately design additions to existing buildings, some of which cause undue stresses and loads to be imparted upon the existing structure.  I encourage you to call our home office and discuss adding this shed roof, along with getting the right materials to make it water tight.

Dear Guru: Do I Need Vapor Barrier Under Insulation?

Welcome to Ask the Pole Barn Guru – where you can ask questions about building topics, with answers posted on Mondays.  With many questions to answer, please be patient to watch for yours to come up on a future Monday segment.  If you want a quick answer, please be sure to answer with a “reply-able” email address.

Email all questions to: PoleBarnGuru@HansenPoleBuildings.com

DEAR POLE BARN GURU: Is it a huge mistake to go without a vapor barrier on the walls?  How about Tyvek on the walls during construction?  I was thinking of doing Tyvek between the metal siding and the purlins to at least get that vapor barrier in there, just in case I decide to put insulation in my walls later when the budget allows.  Thoughts? CONTEMPLATING IN KANSAS CITY

DEAR CONTEMPLATING: If you EVER think you or the person(s) who own your pole building after you, will ever apply insulation to the walls of a building – then placing a quality house wrap between the wall girts and the siding (whether it be steel or any other material) is an excellent idea for a vapor barrier. At time of construction is the one single time in which it will be extremely easy to add.

To learn more about house wrap: https://www.hansenpolebuildings.com/blog/2012/11/house-wrap/


DEAR POLE BARN GURU Insulation – I read your warning about the steel skin acting like “unibody” construction, so it should be applied directly to framing. What is a good way to use foil-faced foam board for putting insulation on a roof? I want to avoid using the large rolls of insulation that will sag in 6-8 years? LEARY IN LOUISIANA

DEAR LEARY: I am glad you have been reading and paying attention.  Your new building will be well planned, with pleasing results. I just am seeing no way for foil-faced foam board to be a practical and economical solution for roof insulation. Here is a link to an article I wrote which might give you some further food for thought:

https://www.hansenpolebuildings.com/blog/2013/07/insulation-6/

Dear Guru: Housewrap, Concrete Brackets & Wobbly Trusses

Welcome to Ask the Pole Barn Guru – where you can ask questions about building topics, with answers posted on Mondays.  With many questions to answer, please be patient to watch for yours to come up on a future Monday segment.  If you want a quick answer, please be sure to answer with a “reply-able” email address.

Email all questions to: PoleBarnGuru@HansenPoleBuildings.com

DEAR POLE BARN GURU: Can I set my poles, or posts, on concrete rather than set in holes?  And, can I attach floor joists across the pole building to create a floor?  The planned width is 12-16′   SOMEWHERE IN SEDRO-WOOLLEY

DEAR SOMEWHERE: The answer to both of your questions is yes.

 For further reading on brackets for the columns please read: https://www.hansenpolebuildings.com/blog/2012/09/concrete-brackets-2/

 We design a fair number of buildings which have elevated wood floors, over “crawl spaces”. Please keep in mind, any beams or girders which are within 12 inches of exposed soil, or joists within 18 inches of exposed soil, must be appropriately pressure preservative treated to resist decay.

DEAR POLE BARN GURU: The instruction book is very clear about how to install roofing insulation, but silent on the correct way to install the housewrap on the walls.  I’ve used housewrap on stickbuilt walls, over the sheathing and under the siding, but never with the wrap just floating out there in space flapping between the girts.  Any tips to share about how to do this right? QUESTIONING IN CONNECTICUT.

DEAR QUESTIONING: When installing housewrap over bare studs in stick frame, or wall girts in a post frame building, run the housewrap perpendicular to the framing. In the case of a pole building –run in tightly placed strips running up the wall from the pressure treated skirt board, to either the soffit support (with enclosed overhangs) or the eave girt (with open or no overhangs).

Don’t leave the housewrap exposed to any wind.  Similar to putting the insulation on the roof with immediately putting roofing over it – do the same thing with your housewrap. Only put housewrap on as far as you can immediately cover sections with steel. On a day with little wind, you may be able to put housewrap on an entire wall before covering with siding.  On a windy day, you may have to do 3’ sections at a time to keep it all “tight” and intact.

The housewrap manufacturers typically recommend fastening to the framing with plastic capped staples or plastic capped nails long enough to penetrate the stud every 32 inches(vertically and horizontally).

 Although you will rarely find this done in the real world – ALL housewrap seams are to be taped.

DEAR POLE BARN GURU: Regarding knee braces; most of the comments above appear related to sheathed structures. What about their usefulness on open pavillion pole barns? Have a lot of movement in one barn and am putting braces on poles to beams and to trusses to try to alleviate this. Comments or suggestions welcome. WOBBLY

DEAR WOBBLY: Unless the roof trusses have been designed to support the loads being induced into them from the knee braces, don’t do it….a high wind could cause a catastrophic failure. Usually excessive movement in pavilions is due to one or more of the following: Columns are undersized or column holes are not completely backfilled with concrete. If you can provide the dimensions of your building, as well as some digital photos, I may be able to make some recommendations which would improve your situation.

DEAR POLE BARN GURU: Do you also offer wooden pole barn designs? LONGINGLY IN LANGLEY

DEAR LONGINGLY: As all pole barns are wood framed, I will assume your question is in regards to buildings which would have wood siding. The answer is yes. Any type of siding which can be used on any other structural building frame can be used on a pole barn. Whether you are looking for sheet sidings, such as T1-11, boards or planks, any can be utilized.

 Keep in mind, wood sidings are not going to be maintenance free – they require frequent staining or painting, in order to keep from deteriorating.


DEAR POLE BARN GURU: We have a customer with an existing Hansen pole barn with a metal roof.  We would like to install solar modules on the barn, but are not sure the structure can take the additional weight and/or the wind uplift from the modules.  Where can I go for more information?  We don’t have money in the project to hire a structural engineer, so if I could find some of the original structural calculations, that would be great.  SUNNY IN SANTA CRUZ

DEAR SUNNY: Although solar panels are relatively light weight, chances are the roof structure would not be designed to adequately support any extra load over maybe a pound per square foot. If you could provide for us the information on the original purchaser of the building, we could verify the actual capacity of the roof system. Give me a call and I’d be happy to research this for you.