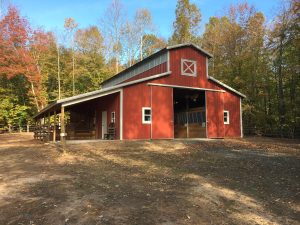
Minimizing Excavation In Combination With Post-Frame Frost Protected Shallow Foundations Part II
In our last thrilling episode Snidely Whiplash had tied our fair damsel in distress, Nell Fenwick, to railroad tracks.
Oops – railroad engineers are not what most of you were expecting!
Continuing with a simplified solution response to reader DAVID’s ideas regarding site preparation and Shallow Frost Protected Foundations (SFPF) for post frame buildings.
Dear David ~
Thank you for your patience. As you may know from reading this column, I tend to research everything to best of my abilities prior to writing an article or responding to questions. Areas of site preparation and concrete flatwork are ones where I have a more limited amount of personal experience, so I have been doing a plethora of reading and contacting (and discussing) with concrete experts. I also am not married to a position, as better information becomes available, I take advantage of it.
Article you reference in (1) has been updated since you last perused it. Even though many RDP (Registered Design Professionals – architects and engineers) specify sand over under slab vapor barriers, I have now become a “no sand above vapor barrier” school convert.
To follow, a summation of my thoughts in regards to this subject, with top of slab being fixed 3-1/2” above grade.
(a) Excavate entire site to remove organic materials. Area to be excavated should be a minimum of three feet outside of actual building foot print. Depth of excavation below zero point (grade) should allow for any concrete thickness greater than a nominal four inches (3-1/2″ actual), two inches of insulation board (if desired), two to six inches of sand or sandy gravel and six to 12 inches of sub base. Assuming a nominal four inch slab, total depth of excavation should be 16 inches if doing a FPSF.
(b) Auger holes for columns, stand columns in augered holes and backfill with concrete per engineered plans.
(c) Install splash plank/skirt board, with board bottom even with grade (zero). There would be no reason to increase dimension to greater than 2×8, as vertical insulation boards prevent any concrete in a slab thickness greater than a nominal four inches to “leak” to outside world.
Side bar – 2×10 or 2×12 pressure preservative treated material will be available, however many times only via special order. If any portion were to be entirely embedded below grade, then appropriate treatment level would more probably be UC-4B – as UC-4A treatment levels are strictly for ground contact.
(d) Place vertical and horizontal insulation boards for FPSF – backfilling with sand or sandy gravel sufficiently to hold vertical insulation boards in place.
(e) Place sub-base, then base material, compacting in lifts.
(f) Place 15mil vapor barrier (make sure to run it up insides of splash planks); Under slab insulation (as desired); pex (https://www.hansenpolebuildings.com/2016/08/pex-tubing/), rebar and/or mesh, and then pour the slab.
This minimizes excavation by eliminating need for a trench.
 building, it has to be able to clear the high ribs of the steel. Allowing for even a minimal clearance, this means a gap of an inch. There will also be gaps at both the top and the bottom of the door. For practical purposes, a sliding door will naturally seal down just about tight enough to allow a bird or your neighbor’s cat to enter the pole building. There goes your climate control…right out the door!


