Yesterday’s blog featured a discussion of the various foam board products with application for your new pole building. Used correctly, they provide good thermal resistance. Applied incorrectly can create a huge structural problem with pole buildings, along with safety issues.
Protect all types of foam insulation from direct sunlight. Over time, the sun’s ultraviolet rays can damage the insulation. For roofs, this is generally done by applying a coating such as tar, acrylic, silicone, or rubberized paint. You can also cover the foam with a rubber or plastic membrane, or a layer of asphalt and roofing felt. Make certain you are using compatible products. The solvents in some coatings dissolve certain plastics.
In cold weather, warm inside air containing water vapor can get past the wall finish and insulation, condensing inside the colder wall cavity. In hot, humid climates the same thing can happen, just in the reverse direction. Humid outdoor air in the summer can condense inside cool, air conditioned wall cavities. If enough of this happens and the water cannot escape, wood rot, mold, and other moisture-related problems can occur. For this reason, building codes often require installing a vapor diffuser retarder on the warmest side of the wall cavity.
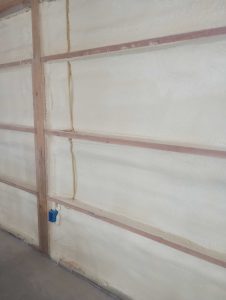
 Foam board insulation is commonly placed against the steel building siding, between the girts of exterior walls. To prevent air infiltration, place rigid insulation boards tightly together and seal the seams with tape or caulk. This practice may worry some in cold climates since the foam board may act as a second vapor diffusion retarder. Studies have shown, condensation rarely occurs in these areas unless something else is seriously wrong with the wall assembly (like massive uncontrolled air leakage into the walls from the building). If the assembly is constructed correctly, the inside surface of the foam board stays warm enough to keep water vapor in its gaseous state long enough for it to escape.
When insulating a foundation you need to consider, although insects don’t eat foam board, they can easily tunnel through it. Insect burrows reduce the R-value and structural integrity of the insulation. For these reasons, some manufacturers treat their foam products with an insecticide, usually a borate compound. Many building jurisdictions also mandate treating the earth around the building with insecticides. These jurisdictions may also want an inspection area several inches wide and all around the foundation of a house kept bare of insulation board.
A better solution for below-grade walls in need of insulation is to install the foam board over the interior of the basement walls rather than on the exterior, which is more common. Interior applications prevent ground-dwelling insects from finding the foam board at all, and they eliminate the need for the bare inspection area. Insulating interior walls, however, requires careful attention to moisture control.
Most jurisdictions also require installing a fire barrier over the interior foam board. While this adds extra cost, the thermal performance of this method is superior in most cases to the more common exterior foam board application. This equates with a dollar savings in energy which can repay many times over for the additional cost of an interior application. If converting a basement into a living space, there is almost no additional cost.
Foam insulation is relatively hard to ignite, but when it is ignited, it burns readily and emits a dense smoke containing many toxic gases. The combustion characteristics of foam insulation products vary with the combustion temperatures, chemical formulation, and available air.
Because of these characteristics, foams used for construction require a covering as a fire barrier. One half-inch thick gypsum wallboard is one of the most common fire barriers. Some building codes, however, do not require an additional fire barrier for certain metal-faced, laminated foam products. Always check with local building code/fire officials and insurers for specific information on what is permitted.
While rigid insulation boards may afford a relatively high R-value, if installed improperly they can provide less than desired insulating results, structural issues or pose a fire hazard. In many instances, other methods of climate control may be more cost effective.
 Now we do have a fair number of clients using wet set brackets, keeping their building columns above ground (https://www.hansenpolebuildings.com/2019/05/sturdi-wall-plus-concrete-brackets/).
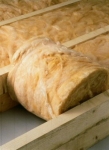
 The most common yardstick for measuring insulation performance will be R value, but there’s a problem. Insulation packaging shows lab analysis of R values, but it’s based upon used testing completely eliminating air movement from results. This matters a lot with fluffy insulation materials because air movement greatly lowers real-world insulation performance. Drafts and air currents often happen within wall cavities and attics and this will be why real-world insulation performance can be significantly lower than advertised values.
 The necessary R-value for the attic will depend upon the manufacturer and style of insulation chosen. Check with the manufacturer’s instructions on the packaging to determine how much insulation thickness is needed to achieve the desired R-value.
 Foam board insulation is commonly placed against the steel building siding, between the girts of exterior walls. To prevent air infiltration, place rigid insulation boards tightly together and seal the seams with tape or caulk. This practice may worry some in cold climates since the foam board may act as a second vapor diffusion retarder. Studies have shown, condensation rarely occurs in these areas unless something else is seriously wrong with the wall assembly (like massive uncontrolled air leakage into the walls from the building). If the assembly is constructed correctly, the inside surface of the foam board stays warm enough to keep water vapor in its gaseous state long enough for it to escape.


