Tag Archives: pole barn condensation

Condensation on Inside of New Vinyl Windows

Condensation on Inside of New Vinyl Windows

Is it a bad sign if you notice condensation forms on your new vinyl windows inside? is condensation on windows bad?

It isn’t a bad sign if you notice water collecting on window’s inside. But, there are a few things you can do to minimize window condensation and protect quality of your new windows.

What causes condensation? When warm air comes in contact with cool surfaces then condensation can form. Consider a time when you carried an ice-cold beverage outside on a hot summer day. Hot air outside comes in contact with a glass’ cool surface, and then moisture forms on glass’ outside. This reaction is why so many people are adamant about using coasters to avoid damage to tables and furniture.

In this same way, windows can “sweat” on a cold winter day. Inside, you are toasty warm while heat is running. Freezing air outside comes in contact with window glass causing moisture to form on inside of windows. Common daily activities can increase moisture in your post frame building, “sweat” found on windows. A hot bath or shower will release moisture into air. Cooking can also affect humidity levels in your post frame home or barndominium.

Risks of indoor air condensation can sometimes be higher with energy efficient windows. These products seal your post frame building and prevent drafty air from moving through frames. Since your building is sealed, heat and moisture are trapped inside. These features, making your windows more energy efficient, also lock in moisture thus increasing risk of condensation forming.

Many northern climates can be cold and dry during winter months, so many building owners welcome extra moisture inside. Increasing humidity levels make your post frame home more comfortable and reduce need to use lotion every day. Too much humidity can lead to mold growth and other damage to your post frame building. So, it is important you are proactive to reduce indoor humidity if you start to notice problems.

Improve air circulation by running fans. Ceiling fans are great for large rooms or use bathroom or kitchen exhaust fans. If weather is nice outside, open windows to bring in fresh air.

Exhaust Fan to Reduce Pole Barn Condensation Issues

Post frame (pole barn) building condensation problems are a re-occurring theme. With proper design and planning, condensation should not occur, however more often than not this is a penny wise, pound foolish event – caused by post frame building providers (either builders or vendors) not advising new building owners of possible challenges.

Reader JEFF in MICHIGAN writes:

“Hi Mr. Guru. I have a 1 year old, 2400 sq.ft. pole barn at my northern MI home. The barn is a wood frame, well insulated, drywalled, and Hardi board exterior barn with asphalt shingles. I’m not sure of a vapor barrier under the concrete floor, it was poured before I saw it.

I have 2ea. 56k BTU “standing pilot”, ventless heaters (no electricity required) to keep the inside temp above freezing (45-50*) in the winter for boat storage and occasional projects. I went powerless because this is more of a summer home at this point and I’m not up there much in the winter. If there’s a power outage, my barn will stay warm. 

That being said, I have a condensation problem. I’m thinking a louvered, 24″ exhaust fan running through a humidistat switch and an intake grill on opposite ends of the barn should cure the issue. I’m looking for verification that this will fix my problem before I buy the fan and cut holes in the walls or if maybe you have another, simple solution.

Thanks for your help.”

Mike the Pole Barn Guru writes:

For those unfamiliar with “standing pilot”:

A standing pilot is a standard ignition device for most natural gas burning heating systems, and has been for many years. It’s a continuously burning flame at heater bottom, responsible for starting burners actually generating heat for a post frame building. Though it’s a widely used technology, there are a few things giving it a less-than-stellar reputation.

Standing pilot lights are actually fairly simple in design. A gas line terminates in a small burner, where the flame is created. A bit of composite metal wire, called a “thermocouple,” connects the burner to a gas line valve. When the pilot light is lit, thermocouple registers heat and generates an electric current. This current travels down thermocouple to the gas valve and opens it. This is what keeps the pilot light burning. When the pilot light goes out, thermocouple’s electric current stops and gas valve closes. This is a safety measure to prevent gas from flooding your home.

Most common problem for standing pilot lights is the light going out. This tends to happen because the flame is unprotected from air currents or sudden draft. Though there is an ignition system on most heaters to relight the pilot light, other issues can occur.

Thermocouple for pilot light often wears out over time, eventually losing the ability to create an electrical current. This can occur from wear and tear, corrosion, becoming detached from volt meter, or simply becoming bent way from pilot flame. Regardless of how thermocouple stops working, the pilot light is unable to stay lit. If your pilot light seems to light without issues, but almost immediately goes out, it’s because thermocouple is no longer keeping gas valve to flame open.

Jeff’s starting point should be to eliminate, or at least minimize where moisture is coming from. Place a wrench on your floor overnight, if a dark impression remains on floor (sort of like chalk body outlines at murder scenes) when removed you know you have no vapor barrier underneath your slab. Seal your floor.

Next culprit is your heaters. You’ll want to read more here: https://www.hansenpolebuildings.com/2019/02/how-to-reduce-condensation-in-post-frame-buildings/.

Whether your proposed exhaust fan will be adequate or not will be dependent upon its CFM (cubic feet per minute) capabilities. You will probably want to plan for around 10 air exchanges per hour. If you have a 14 foot high ceiling, then 40 x 60 x 14 = 33,600 cubic feet X 10 times / 60 minutes per hour = 5600 cfm.

I hope this helps, and good luck!

Pole Barn Guru Blog Review

This is the third year the Pole Barn Guru blog has been in competition for the Best Construction Blog. Last year this blog was second in the world, tying for first in quality, however losing the popular vote. Part of this process is a review of each blog by Mark Buckshon of Construction Marketing Ideas (www.ConstructionMarketingIdeas.com).

Below is Mr. Buckshon’s review:

Hansen Buildings’ Pole Barn Guru: Practical information about post frame (pole barn) structures

By Mark Buckshon

 –March 23, 2019

The Pole Barn Guru is currently leading in the 2018 Best Construction Blog’s popular vote and unless there is a surprising surge from supporters of another blog by the popular vote’s conclusion on March 31, this blog will probably earn the popular vote win status.

There are reasons for this support — the blog combines depth and focus as a “go to” resource for post frame (pole barn) buildings; and it doesn’t avoid the challenges with these low-cost structures, often used for outdoor storage and as rural outbuildings.

I’ve been reading some posts, for example, dealing with issues relating to condensation and insulation, some initiated by questions from outsiders — that is folks who have a pole barn structure not provided by Hansen.

Rather than brushing off these external inquiries with a: “Hey, that’s not my problem” attitude, this blog provides some practical answers, even as it indicates the issues probably wouldn’t have been problems if they had been considered in the initial design and purchase.

That educational aspect makes this blog truly worthy.

Consider, for example, this question in a recent blog post:

Hello! 

I have a pre-existing pole building that I am having a ton of trouble with. It is partitioned into two rooms, the back room is heated to around 50F. The attic space/loft space has a lot of condensation and I cannot seem to get this fixed. I have tried a lot of solutions, none of which have worked. I know that you build these types of buildings so I am hoping that you can recommend someone who might be able to come in and look at this issue and help me with a solution that works. I have no idea what to do next and I am a local business owner – my business is at a standstill right now until I can get this issue fixed. If you can recommend any general contractor, or anyone who might have expertise in pole buildings who I can contact I would greatly appreciate it. 

Thank you so much!”

The question is posed after a brief introduction:

Long time readers should be thoroughly drenched with solutions to condensation issues by now. As post frame construction has moved off farms and into suburbia, climate control has brought with it a plethora of condensation challenges.

So, what are the answers?

To control your condensation challenge you need to either remove warm moist air from inside your building, prevent this air from becoming in contact with surfaces at or below dew point, heat and/or ventilate. Here’s a brief summary, followed by solutions specific to your case: https://www.hansenpolebuildings.com/2019/02/how-to-reduce-condensation-in-post-frame-buildings/.
If you do not have some sort of thermal break below your pole building’s roof steel – two inches of closed cell spray foam should be applied. This process will be best done by a professional installer. Make certain to not block ventilation intake and exhaust points.

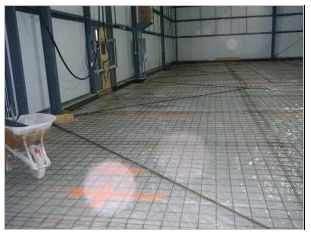
Unless you know for certain a vapor barrier was placed under your building’s concrete slab, seal the floor.  https://www.hansenpolebuildings.com/2019/02/how-to-properly-apply-post-frame-concrete-sealant/ 

and https://www.hansenpolebuildings.com/2018/11/siloxa-tek-8505-concrete-sealant/.

Vent any dead attic spaces. https://www.hansenpolebuildings.com/2018/03/adequate-eave-ridge-ventilation/.

Heating your building to a temperature above dew point will also solve this issue. Avoid heating with propane, as it adds moisture to the air.

Now in my opinion, that sort of detailed, practical advice shows how an effective, consistent and useful blog can provide real value to clients and potential customers alike (and serve a general community purpose, even for people who will never purchase a thing from Hansen.)

This value translates to search engine effectiveness and of course a reputation for knowledge and service. If you are thinking about purchasing a post frame structure, for example, I’m confident after reading through the relevant blog postings you’ll have the confidence to ask the right questions and share the site/usage observations to ensure that the structure serves its purpose and problems such as condensation or poor insulation don’t occur in the first place.
Vapor Barrier – An Unforgiving Pole Building Mistake

One of the beauties of post frame (pole barn) construction, is they are very forgiving during construction. A virtual plethora of errors can be made, and overcome, leaving a fine looking and well-functioning building.

There is one error, which is one of advance planning rather than installation skill, which is not so easy to rectify. The great majority of pole buildings are constructed with steel roofing and siding. Light weight, strong and durable – steel remains the covering of choice in creating a maintenance free structure.

With the idea of “having the lowest price”, far too many providers (both builders and package providers) neglect to discuss with their clients how important it is to have an insulated vapor barrier between the roof purlins (framing) and the steel roofing. Without a properly installed thermal break, condensation issues will arise. Once the drips start forming on the underside of the roof steel (trust me – it WILL happen), the beautiful brand new building, becomes not quite so functional.

Now there are some after the fact solutions for adding a vapor barrier.

Adding a significant R value per inch (albeit an expensive fix) is the use of professionally applied spray foam insulation. Priced this solution? If so, you better have been sitting down when the quote arrived.

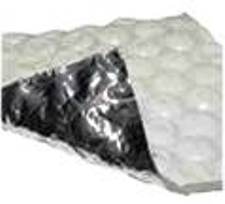
Another, less expensive method, is to apply reflective insulation as a vapor barrier to the underside of the roof framing. This application works well in both all steel as well as post frame buildings.

Reflective insulation can be applied from eave to eave beneath the framing, using double sided tape. In order to have the insulation be effective, it is imperative all edges be tightly sealed with appropriate tape. If the reflective insulation was not purchased with an adhesive pull strip tab on one edge of the rolls, the seams between each roll will also need to be taped.

While this is a fairly inexpensive solution, from a materials standpoint, it will require a fair amount of time, working above one’s head, and often at a considerable height.

Best solution of all – don’t end up being penny wise and pound foolish in trying to save a few dollars by leaving the insulation out initially. The drip-drip-drip of condensation will most certainly leave a bitter taste.