Tag Archives: pole barn insulation

Insulating a Room in an Unheated Pole Barn

Insulating a Room in an Unheated Pole Barn

Regular readers of this column recognize insulation as being a hot (pun intended) topic of discussion – not just entire buildings, but also of a room or rooms in an unheated pole barn.

Reader RICHARD in WOODSTOCK writes:

“I have a 50 x 75 pole barn with 15 foot side walls. The building is 8 years old and is unheated; I did insulate the roof during construction to prevent the traditional roof condensation which has worked well. Currently, I am in the process of building a 22 x 26 shop in one corner of the barn which will be heated and cooled.

Insulating WallsOn the two outside walls of the shop I placed 1 ½ inch foam board between each of the barn wall girts then built 2×6 stud walls in between the pole legs. I then placed built two remaining free standing 2×6 walls to complete the shop walls. I placed faced R19 insulation in all the stud walls and finished them off with ACX plywood on the inside of the shop and CDX on the outside (free standing) shop walls. I then placed 22 foot long TGI’s as ceiling joists so I can have storage above the shop which I then placed ¾ inch tongue and groove plywood on top. I am now at the point to insulate the ceiling and finishing it off with a suspended ceiling with a gypsum type ceiling tile. I plan on placing R30 unfaced insulation in each of the shop ceiling bays but don’t know if I should use a poly type barrier before putting up the suspended ceiling.

I am concerned about moisture in the shop ceiling and issues that would cause.

Any advice you may have would be greatly appreciated.”

Mike the Pole Barn Guru responds:

Normally ceilings do not have a vapor barrier because you want to have warm moist air rise and escape into the vented attic space. In your instance, you are creating a cavity which could very well collect moisture as the 3/4 inch T & G plywood is going to pretty much prevent moisture from escaping. If you use a vapor barrier on the underside of the TGIs, you have now trapped the moisture inside of the shop you have created. My instincts tell me to use the vapor barrier and be prepared to have some sort of exhaust fan to remove excess moisture in the room, or to have a dehumidifier. You can minimize the moisture in the room by using a good sealant on the top of the concrete slab. You might also look at using a product such as Roxul (https://www.hansenpolebuildings.com/2013/03/roxul-insulation/) in the ceiling, as its function is not reduced by any moisture which may become trapped in the cavity.


Vinyl Gable Vents for Pole Barns

Vinyl Gable Vents for Pole Barns

Attic venting for post frame (pole barn) buildings is a challenge which can be resolved by the use of vinyl gable vents.

Reader KEN in BERRYTON writes:

“I have a pole barn with the ribbed siding, 3/4″ high ribs at 9″ spacing, with two smaller ribs in-between at 3″ spacing.  I need to add end wall gable vents (because I failed to have it built with eaves) because I want to install insulation in the ceiling and walls.  In reading your web information on gable vents, it seems that the vents you offer fit over the ribs as opposed to what I might find at my local Home Depot.  Can you clarify whether the vent you provide fits over the ribs so that I can get a weather tight seal.  If not indexed for the ribs, I am at a loss to understand how you can seal the vent against the ribbed siding.  Any guidance you could share would be very much appreciated.

I also read in a Q/A that dividing the square footage by 300 gives you the number of square inches of vent required.  My building is 60×30 which gives 1800 square feet divided by 300 would be 6 square inches.  I wonder if this is a misprint, that it should be 6 square feet.” 

Mike the Pole Barn Guru responds:

The Hansen Pole Buildings vinyl gable vents are designed with a “snap ring” which goes on top of the high ribs of the steel. To install, remove the snap ring and use the inside edge of it as a template to draw the location of the vent on the siding. Remember to cut just outside of the line, so the vent can be pushed through from the inside. Once it is pushed through, snap on the snap ring and you have a sealed vent! Just this easy and requires no extra framing.
And it is square feet, not inches. In your case you would need to have at least three square feet of net free area venting on each endwall, and it would need to be located in the upper half of the dead attic space. Just as an example an 18″ x 24″ rectangular vent will typically provide about 140 square inches of net free area.

The 2012 IBC (International Building Code) ventilation requirements may be accessed here: https://codes.iccsafe.org/public/document/IBC2015/chapter-12-interior-environment please see 1203.2.


Bad Energy Efficient Pole Barn Advice

Bad Energy Efficient Pole Barn Advice from GreenBuildingAdvisor.com
Long time readers of this blog have seen ample posts about energy efficient post frame (pole barn) buildings. As most are aware, there is as much bad information (maybe more) than good available on the internet. Whilst I’d like to believe Martin Holladay at www.greenbuildingadvisor.com is fairly knowledgeable – when it comes to his answers on this particular subject, he has (in my humble opinion) missed the mark.

Here are a few of Martin’s comments:
“The main problem with insulating a pole barn is creating a good air barrier. There are many opportunities for air leakage: between the insulated sections of the wall and the vertical posts; at the base of the wall (which either meets dirt, gravel, or a concrete slab); and at the intersection of the wall and the insulated ceiling. You should strive for airtightness when you create this assembly. It won’t be easy — but do your best.”

“It’s tough to insulate a pole barn. First, there is the question about the floor. Do you have a slab or gravel? If it’s a gravel floor, it’s hard to air-seal the bottom of the walls. If you have a slab, we’ll need to know your climate zone or location, so we can recommend whether you need a horizontal layer of rigid foam under the slab. Next, you still have issues of how to support the insulation. In most pole barns, you don’t have studs. You have posts and horizontal nailers between the posts. This makes air sealing difficult, and using conventional insulation difficult. The best way to proceed is to work on the exterior side of your structural frame. Again, either SIPs (structurally insulated panels) or nailbase is one approach — and if you use SIPs, you could skip the pole barn structure, and just build a SIP building. Another approach is to install a stud wall on the outside of your pole barn to hold the insulation — but again, this raises the question, why not just build an ordinary building with stud-framed walls if you need it for insulation?”

“I’m afraid that ‘energy efficient pole building’ is an oxymoron. If you want to make a pole building energy-efficient, you pretty much have to build an entirely new building — either inside the pole building or outside the pole building — to create an air barrier and provide somewhere to install the insulation. That’s why people who are interested in energy efficiency don’t choose dirt floors or pole construction. However, if you decide to let go of the idea of energy efficiency, you can certainly build a dirt-floored tiny house with a pole frame.”

Mike the Pole Barn Guru Advises

Maybe the thought of all post frame buildings having dirt floors should be thrown out of the discussion. From experience the only post frame buildings which have dirt “floors” are ones which are always going to be pure agricultural or storage buildings and will never be climate controlled, or they are dwellings with wood floors elevated above a crawl space.

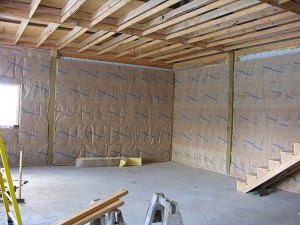
The air barrier issue for post frame construction is resolved the same way a stud framed building would be – utilize a quality building wrap between framing and siding, then insulate between girts (think studs run horizontally). Thermal transference in walls can be reduced by having an interior set of wall girts to support inside finish surfaces such as gypsum wallboard. This is far less material intensive than the double studwall system promoted by some stick frame builders.
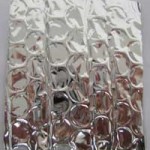
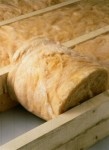
Wall insulation for post frame buildings can run the gamut from unfaced fiberglass batts, to BIBs (https://www.hansenpolebuildings.com/2011/11/bibs/), to closed cell spray foam or combinations thereof, just like studwall construction.

Top of wall to insulated ceiling transition is the same for either form of construction. Raised heel trusses (https://www.hansenpolebuildings.com/2012/07/raised-heel-trusses/) allow for full thickness of insulation above the perimeter walls, and should be utilized in any case with a climate controlled building.

For slab on grade applications frost-protected shallow foundations (https://www.hansenpolebuildings.com/2016/11/frost-protected-shallow-foundations/) are a practical solution, with post-frame holding an advantage in not having to have a thickened edge of the concrete floor.

Designing for energy efficiency? Look no further than post frame construction – at the corner where energy savings and cost savings meet!

Converting a Pole Barn to a Residence

Reader BAILEE in LARAMIE writes:

“Hi, I have a few questions about the structure of turning a pole barn to a residence in the Laramie, Wyoming area. The current project I am working on has pole spacing of about 10-12 feet. I wanted to know if this is still structurally stable with traditional framing with the wind in Wyoming? If not, would it be wise to double the sidewall girts for more support within the walls? Also, if we were to use the traditional framing with 8 foot spacing would that be stable?

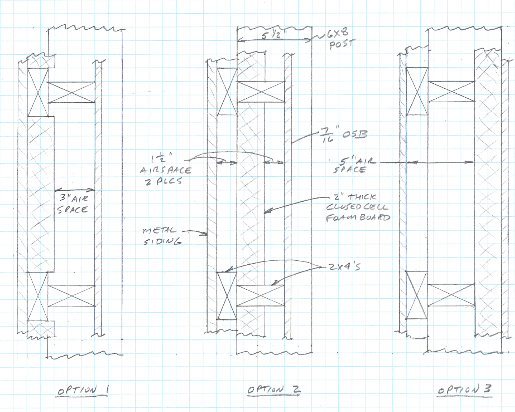
Next, do you have any window diagrams that detail the insulation and wall construction within residential pole barns that your company would be able to share?

Please let me know. Thanks for any help that you can provide.”

Mike the Pole Barn Guru Answers:

As to the structural stability of any post frame building, anywhere – it depends upon the climactic conditions to which the building was designed by its engineer of record (EOR). If this is an existing building, you may have some challenges, as most “pole barns” are at best designed as Risk Category I buildings – which pose little or no threat to human life in the event of a catastrophic situation. Residential buildings are to be designed to Risk Category II, which increases the needed design wind and snow loads.

In the event you are installing an interior finish other than steel liner panels (most folks sort of enjoy gypsum wallboard taped and textured) members which support these types of finishes need to be designed for far less deflection. Back to in the event this is an existing building – the EOR should be consulted to determine which members need to be upgraded to meet with your now intended use of the building. Under no circumstance attempt to do this without the consultation of an EOR, it is not worth risking the wellbeing of yourself or your loved ones.


If you are starting from scratch – invest in a building kit package which has been designed by a registered design professional (architect or engineer) who has clearly been advised as to your intended use of the building. The plans they provide will call out all of the members and framing details necessary to give you an end resultant which you and the generations which follow you can enjoy.


For a small nominal fee, you can invest in a Hansen Pole Buildings’ Construction Guide, the price of which can be credited towards your purchase of one of our complete post frame building kits. Contact Bonnie@HansenPoleBuildings.com if this is of interest to you.

Converting a Pole Barn to a Residence

One trend I have seen over the past ten years is folks purposefully designing post frame buildings to homes – they are recognizing the advantages, among them savings in foundation costs, speed of construction, flexibility of design and ability to insulate. Along with this, more and more post frame buildings are being re-purposed from pole barns to living spaces. This becomes a challenge when advance thought was not put into the original building design as to what future uses might bring.

Reader MARK from FOSTER is in the midst of wanting to do one of these conversions and he writes:

“DEAR POLE BARN GURU: I have a pole barn that has foil bubble wrap on both roof and wide walls. I’m wanting to convert this into living space. I have 7″ of space in the walls to put insulation. So to insulate this can I add un-faced batt insulation and then drywall. I know that the foil-bubble wrap is waterproof so I don’t think I need a vapor barrier before the drywall because if any moisture was able to get in, it would not be able to get out. For the ceiling do I add Faced Batts with the facing point towards the heated space and then Drywall. You are the Guru and I want to see what your experience has to say. Thanks for your time.”

DEAR MARK: As a living space, your pole barn (post frame building) will generate a significant amount of moisture which you do not want to have get into the walls. This means putting a vapor barrier on the inside face of the wall insulation. You will want to make sure the un-faced batts completely fill the insulation cavity, so you will need material with a greater thickness than the R-19 six inch batts sold at your nearby big box store.

Now the challenge – you need to poke holes in the reflective wall insulation to allow any chance moisture from within the wall to escape. Trapping water vapor between the two vapor barriers will only lead to eventual grief in the form of mold, mildew and/or rot.

For the ceiling, it is essential to ventilate the dead air attic space you will be creating. Ideally your building was constructed with vented eaves and ridge and life will be good. You will want to use either un-faced batts, or ideally blow in insulation above your ceiling. Do not place a vapor barrier in the attic – as you want moisture to be able to rise into the attic space and be exhausted through the ridge vents.


Planning a new post frame building? If your building will have dimensions which could ever lend themselves to some or all of the building being used as conditioned space (heated and/or cooled), it would be prudent to design for it now, rather than having to face doing more work (as well as spending more money) at a future date.

Sheetrocking Trusses Advice

How Advice Columns Get Interesting…

Just last week, I shared a question from TOM (a reader who reads my blog) in regards to finishing the inside of a fairly recently constructed post frame (pole) building. The dialogue has continued.

Tom: Obviously drywall for the ceiling would be a wiser choice. The truss manufacturer said the trusses were rated for steel 29 gauge panels and blown in insulation, at .65 lbs per square foot for 29 gauge versus 1.28lbs. per square foot for ultra light sheetrock.I’m tempted to roll the dice and go with sheet rock as it would only add 780 lbs of total load to the trusses. Of course with customer approval and he is a certified engineer. Truss manufacturer says it would void warranty. I’m sure they build with an overage percentage factored in but they wouldn’t say how much because of the liability involved.

Customer wanted drywall originally, but because the ball got dropped somewhere with the lumber supplier, the trusses shipped were under rated.

In the event that we go with the steel, would you advise a vapor barrier above the panels? Also would cellulose or fiber glass blown in be the wiser choice? Would the barrier be necessary with painted drywall”?

 Trusses are not designed/built with an “overage percentage” factored in. For any wood structural product for construction, we are able to only design for what is known as 40% of Pultimate (very simplified, it is 40% of ultimate failure strength). This is to account for all of the variabilities in lumber, as well as errors in either fabrication, or utilization on the jobsite. The published values used by engineers are already adjusted to this number.

The potential for receipt of “under rated” trusses is huge when purchased from a lumber supplier, rather than a firm which specializes in post frame buildings and has the knowledge to ensure the trusses ordered match the needs of the building and the building owner. In general, buying trusses from a lumber yard is going to be a gamble, which might leave one grossly disappointed in the results.

 Me: “Can you scan and email the truss drawings to me please?

The problem with steel liner panels is the warm moist air inside of the building will condense on the underside of the ceiling liner panels. With a sheetrocked ceiling, a vapor barrier should not be installed between the sheetrock and the trusses. I like fiberglass personally, but either should work. FYI – Lightweight 5/8″ drywall is 1.65 psf (1/2″ will sag on a ceiling spanning 2′).”

Tom: Here you go Mike, I appreciate you looking into this. One of my thoughts on strengthening the trusses was OSB gussets. There will be a huge 6′ ceiling fan in the woodstove area to help with the condensation issue.

I intend on laying 2×6 on 2′ centers flat to hang whatever goes on or do they need to be on edge. I know edge would be best, was going on lumber supplier’s estimator’s opinion.

Thanks again Mike”.

Me: “Thank you very much. The two psf they designed the bottom chords for would be questionable even to support a steel liner ceiling. For a small nominal fee (usually $25-50), they can design an engineered “repair” to increase the bottom chord dead load to five psf, which would support the sheetrock and any needed framing. The truss bottom chords are stressed fairly close to 100%, so do not be surprised if you have to add some additional webs to the truss, or a “scab” alongside of the bottom chord. Whether you use a steel ceiling or sheetrock, the joists between the trusses should be placed on edge, flat they would overly deflect and your client would not be pleased with the resultant.”

Tom: Hi Mike, Thanks so much for giving this your attention and advice. I am not an engineer but have been curious about laminating osb to the bottom chord and up the webs, say a foot. I joists are made with osb, I’m sure not a common grade, and I’m thinking it should help considerably. I’ve thought about trying it on my own house’s sagging floor joists by jacking them straight then laminating at least one side just as an experiment.

 Could you do the repair engineering if necessary?” 

Me: “Your laminations would only work if you were able to do so without a splice, or to overlap panels (two deep) with staggered splices. If you will notice I joists do not have splices in the OSB webs. On the truss, you would basically end up sheeting one entire side of each truss, with two layers of OSB. The truss repair engineering would be best done by the truss manufacturer (who is actually going to have the truss plate manufacturer do the repair and seal the drawing). It will be quickest and least expensive, both in terms of the cost of the engineering, as well as the amount of materials and time involved.”

Attic Insulation Guide

Pole Barn Guru BlogWelcome to Ask the Pole Barn Guru – where you can ask questions about building topics, with answers posted on Mondays.  With many questions to answer, please be patient to watch for yours to come up on a future Monday segment.  If you want a quick answer, please be sure to answer with a “reply-able” email address.
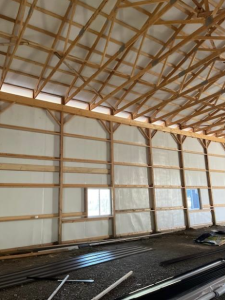
Email all questions to: PoleBarnGuru@HansenPoleBuildings.com

DEAR POLE BARN GURU: I am building a 24’x32′ pole barn type shop using 5 clerestory trusses in which I will install windows in the verticals for natural light. I want the roof shingled and insulated. Is there a way to frame in roof rafters between the trusses to carry the weight of the roof sheathing and to use batt insulation underneath? SCOTT IN ELLERSLIE

DEAR SCOTT: For sake of discussion, we will assume the trusses have been engineered to carry the weight of all of the materials you will be adding.

In order to use batt insulation as you propose, Code requires there to be at least a one inch air space between the top of the insulation (which must be unfaced) and the underside of the roof sheathing. This space must be vented at eaves and peak, and airflow must not be impeded.

Just off the top of my head (and knowing nothing about how your trusses are constructed), I’d probably look at placing a header at the eave and peak, which would carry 2×12 rafters placed every 24 inches and running the same direction as the trusses. Insulation batts up to 10-1/4 inches thick could then be placed between the rafters.

You should consult with the RDP (Registered Design Professional – architect or engineer) who designed your building, to confirm sizes and connections of members, as well as their adequacy to carry the imposed loads.

Mike the Pole Barn Guru

DEAR POLE BARN GURU: My name is Ben, and my husband and I plan to build a timber pole house in the mountains around Luray, VA. We are still in the planning stages, but are already working on the design stage of the house. I wanted to reach out and see if you offer the type of services we need, even though your website seems like you would be just perfect.

As a quick summary of our needs:

I am a 3d artist and am laying out the space in 3ds max to get an idea for room size, arrangement, and other proportions. However since I am not an architect, I need someone to go over the design, make it useable, point out any problem areas I am unaware of as a non-architect. Also being able to get all the materials cut and shipped to our building site is a huge plus.

Additionally, as we are still researching land, I would like input on what to look for based on our design, and then after land is procured, any adaptations needed for our plan to fit the space (the biggest thing I am worried about, is pile depth for the timber piles to pass code and be structurally sound). We plan on a 2 story building, so it’s likely the max timber height above ground would be around 35 feet for some of the timbers. We also plan to build on a mountain side, so the timber length would vary.

Is this the kind of service you can offer?

Thanks so much for your time,  BEN AND AGUST IN LURAY

DEAR BEN: We can supply columns up to 60′ in length, so you should not have any difficulties with what you have in mind – nor will needing various lengths be a challenge.

Our designs do not incorporate interior non-load bearing walls, as we have found room sizes tend to change greatly once the exterior shell is up and clients get a much better feel for what each room will do, as well as for orientation. Always try to work from the inside out – determine (at least close to) the area of the spaces you will need and then orient these spaces to be most functional for your lifestyle. Then create an envelope which fits around your spaces.

The ultimate location may (and should) play a great deal into the final design. Orientations should be such to take advantage of the most practical approaches to the site, as well as views and exterior living spaces (decks and patios).

Keep in mind – any pricing done now, is based upon where markets are at today. Lumber and steel are commodity items and prone to a great deal of variability which is beyond anyone’s control. Allow plenty of safety cushion in your budget, it is always a pleasant feeling to have more money left over, than having to scramble because things were planned too tight.

Mike the Pole Barn Guru

DEAR POLE BARN GURU: I am interested in pricing for a pole barn/apartment.  I am selling my house and will be purchasing roughly 15 acres of land.  I would like a pole barn constructed on the land.  I intend on building my own home which will take some time.  I would like a two story pole barn, with the upstairs being the finished apartment with somewhere around 900 square feet so I can live on my property while my house is being built.  Is this something that you would be able to do?  Thanks for your time. JEFF IN CINCINNATI

DEAR JEFF: Thank you very much for your interest in a new Hansen Pole Building. We provide post frame (pole barn) building kit packages similar to what you have in mind on a regular basis. You will be contacted shortly by one of our Building Designers to get more detailed information as to your exact needs.

Mike the Pole Barn Guru

Pole Building Climate Control

Welcome to Ask the Pole Barn Guru – where you can ask questions about building topics, with answers posted on Mondays.  With many questions to answer, please be patient to watch for yours to come up on a future Monday segment.  If you want a quick answer, please be sure to answer with a “reply-able” email address.
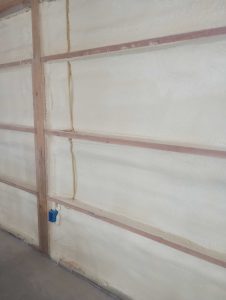
Email all questions to: PoleBarnGuru@HansenPoleBuildings.com

DEAR POLE BARN GURU: After reading many articles on this blog about insulating a new pole building I have come up with this conclusion. I will run this by the Guru for your opinion. Roof thermal break-: trusses with purlin on 2ft centers, A1V on top of purlins, steel roofing applied over A1V. sidewalls. Wall girts applied to posts at 2 ft centers, Tyvec House wrap around perimeter with steel siding applied over Tyvek. Vented eave and ridge. This should give thermal break to insulate interior of pole building and prevent thermal gain. Do you believe this is the proper path for insulating the interior for climate control? This is a great blog with lots of good information, thanks!

Question from KORN FARMER in BURR OAK, MI

DEAR KORN FARMER: I sincerely appreciate all of your kind words and will try not to let them go to my head! You’ve become one of my favorite readers. I would certainly agree you are on the track for success. You might want to read these articles in regards to your climate control issues:

https://www.hansenpolebuildings.com/blog/2012/04/climate-controlled/ and https://www.hansenpolebuildings.com/blog/2012/07/raised-heel-trusses/

Mike the Pole Barn Guru

DEAR POLE BARN GURU: Can an all wood pole building be built over a full new basement? MICHELE IN EAST HAMPTON, NY

DEAR MICHELE:  I happen to live on a lake, which is nestled into a mountain valley. For the most part, the parcels of land around the lake tend to be very narrow and very steep (only so much lake frontage exists, therefore the narrow lots). In my case, the lot gains well over 100 feet of elevation from lake to back, over the 250 feet of depth.

 With the lake as my “front” yard, on the back of my lot is a pole building upon which the site had 12 feet of grade change in 40 feet. The solution was to excavate to the lowest point, then construct a foundation on the “high” sides. In my case, we used eight inch insulated Styrofoam blocks, poured with concrete – one wall being 12 feet tall, and the other sides appropriately steeped to match the land contours. Steel brackets engineered to withstand moment (bending) forces were poured into the top of the walls to attach the pole building columns.

 The direct answer to your question is – yes. Whether a full basement, partial basement, or daylight basement (the last being closest to my particular case), pole buildings can be attached to any adequately designed foundation wall. We prefer to use wet set brackets (those embedded in the concrete wall at time of pour) as opposed to dry set brackets (those attached to the concrete wall with bolts) for a sturdier connection, but either one can be used. 

Mike the Pole Barn Guru

DEAR POLE BARN GURU: My ideal metal building size would be 26 x 46. Will this size work so metal and wood will fit without waste or extra labor? If no, what size would work best? BERNIE IN GARDEN CITY

DEAR BERNIE: As lumber comes in multiples of two feet and steel in multiples of three feet – the most economical is going to end up being divisible by six. To get the best total bang for your buck, multiples of 12 feet are the most cost effective in nearly every case – utilizing double trusses aligned with the columns and 2×6 or larger roof purlins on edge.

So what does one truly save by this? Usually a few pennies per square foot.

 In the end, build the largest building you can economically justify and which will fit on your property. I’ve never yet had a client tell me their new building is just too big!

Mike the Pole Barn Guru

Dear Guru: Is Toe Nailing a Good Idea?

Welcome to Ask the Pole Barn Guru – where you can ask questions about building topics, with answers posted on Mondays.  With many questions to answer, please be patient to watch for yours to come up on a future Monday segment.  If you want a quick answer, please be sure to answer with a “reply-able” email address.

Email all questions to: PoleBarnGuru@HansenPoleBuildings.com


DEAR POLE BARN GURU: Hello, The bottom of my 2 x 8 skirt board is about 2 inches into the ground.  Is it OK to measure 10 feet from the top of the skirt board since it is so low?

As long as the steel siding is long enough I would like to do this. If I measure from the bottom of the skirt board and add my 3  1/2  inch. of cement  then my ceiling is lower. I can add another skirt board on top of the one that is there. I can add dirt up against the outsides so it looks  OK

I hope to work on this in the morning so please answer as soon as possible.

SITTING IN SALEM

 DEAR SITTING: You could do as you suggest (measuring the 10′ from the top of the 2×8 skirt board), as long as you add another 2×8 skirt board on top of the one you have installed, then fill up to the top of the lower 2×8 skirt board before pouring your concrete floor.

All of the steel for the siding is pre-cut to fit based upon a 0 point being the bottom of the 2×8 skirt board. There is no way to increase your interior height without ordering new wall steel or adding wainscot – either of which will prove to be a significant expense to pick up a few inches of height.

Mike the Pole Barn Guru

DEAR POLE BARN GURU: I have a pole barn that I am insulating. I am using rigid foam on ceiling between truss chords, covered with steel. Walls are 4×6 poles with 2×4 purlins on outside, sided with steel. I am adding 2×6 vertical studs on 24″ centers between poles, and stapling craft-backed roll f-glass insulation to studs, then covering wall with OSB. Should I consider stapling tar paper or other barrier to inside of purlins before adding the studs and insulation? There will be an air gap between the f-glass insulation and the outer steel, and moisture can get in via corrugations in the steel siding, top and bottom. Thanks! BUILDING IN BELLEVILLE

 DEAR BUILDING: You should place a housewrap (think Tyvek) ideally between the wall girts and the siding, but if not there, on the inside of the wall girts.

You can read more about housewrap here: https://www.hansenpolebuildings.com/blog/2012/11/house-wrap/
Here are some hints as to how to minimize the cost of your framing to support the insulation, and reduce transference of cold/heat from the contact of 2×6 vertical studs with the exterior horizontal girts.

  1. Start by placing a pressure treated 2×4 on top of the slab, flush to the inside of the columns (this board will end up between the posts, as will subsequent ones).
  2. Cut 2×4 blocks to 22-7/16″ and nail one to the each post directly above the treated 2×4.
  3. Cut a 2×4 to fit between the posts, and place like a bookshelf on top of the blocks. Repeat this process throughout the building.For best energy efficiency, make sure to completely seal the facing of the insulation batts on the inside of the wall.

Mike the Pole Barn Guru

DEAR POLE BARN GURU: Hello, I purchased my Hansen Pole Building some time ago. I’m just now getting around to drywall, but have always been stumped with one part of the construction. How are you supposed to attach the drywall “L” top plate? (I have the commercial girt setup). There just isn’t anything to attach the top plates unless I’m toe nailing it to the posts which doesn’t seem correct to me. The girts were attached to girt blocks, but the “L” top plate doesn’t have anything like that. Like I said…this one has stumped me for some time and now that I’m getting around to drywall I need to get the top plate installed.

Thank you very much, HARRIED IN HARRISVILLE

DEAR HARRIED: The distance from center to center of your wall columns is 12’. Conservatively, the “L” supports a maximum of 12 square feet (1/2 of the distance to the first ceiling joist, which is at 24 inches on center). 5/8” gypsum wallboard weighs 2.31 pounds per square foot. This makes the weight supported by the “L” of just under 28 pounds.

The 2005 NDS® (National Design Specification® for Wood Construction published by the American Forest & Paper Association) addresses toe nailing connections in “Design Aid No. 2”. To keep the design conservative, we will use the lowest Specific Gravity value of the commonly used framing lumbers (G=0.42 for Spruce-Pine-Fir). With the specified 10d common nail (3 inch length x 0.148 inch diameter), the lateral design value for a toe-nailed connection is 83 pounds per nail.

Placing two toe-nails through each end of the vertical member of the “L” would allow the “L” to support up to 332 pounds, many times the needed design requirements.

If you are uncomfortable with toe nailing the “L”, you could cut a notch out of the top “flat” part of the “L” 1-1/2 inches deep, to fit it tightly to the face of the column above the ceiling line. Two 10d common nails could be driven through the remaining portion of the “flat” of the “L” into the column, in addition to toe nailing them.

Mike the Pole Barn Guru

Dear Guru: When Do I Add a Reflective Radiant Barrier?

Welcome to Ask the Pole Barn Guru – where you can ask questions about building topics, with answers posted on Mondays.  With many questions to answer, please be patient to watch for yours to come up on a future Monday segment.  If you want a quick answer, please be sure to answer with a “reply-able” email address.

Email all questions to: PoleBarnGuru@HansenPoleBuildings.com

 DEAR POLE BARN GURU: I am building a 24 X 40 pole barn that will eventually turned into a work shop down the road. It has a vented ridge cap and soffit for some ventilation. I will be constructing it initially as a storage unit in cold climate conditions and like to insulate and finish the interior at a later time (3 years). What type of vapor barrier do I need initially? Can I place a vapor barrier across the purlins before construction and still insulate and finish the interior later? The trusses are rated for the weight and ceiling load. MARCHING IN MANISTIQUE

DEAR MARCHING: I will assume your question pertains to a building with steel roofing to be installed over the roof purlins. If this is the case, you should install a reflective roof insulation with adhesive pull strips to seal the joints over the purlins and beneath the roof steel. Check out www.buyreflectiveinsulation.com  And yes, you can still insulate and finish the interior later, but the reflective radiant barrier should be installed during initial construction.

DEAR POLE BARN GURU: I am considering purchasing plans from your organization. I would like to receive the auto-cad (.dwg) file format as well as the printed plan Will you be emailing the electronic version or do you provide it on a memory stick. MINING IN MINNESOTA

DEAR MINING: For some more reading on our pole building plans: https://www.hansenpolebuildings.com/blog/2014/06/pole-barn-plans-3/

We also are unable to provide plans as a .dwg, as it would allow them to be edited from their original format. Whether intentional or by accident, changes could be made which would compromise the structural integrity of the finished building.

DEAR POLE BARN GURU: I sent a request for a quote on a barn. I noticed the one that is listed as the’ Roanoke AL. I like this type barn. You can put attachments for your tractor on the sides, and us the inside for animals or a tractor and hay.   If you have the plans, can you send them, or is there a charge for that?? VASCILLATING IN VIRGINIA

DEAR VASCILLATING: Yes, this style of building is very flexible and allows for a multitude of options. We have the plans for every custom building we have ever provided, however the differences in climactic conditions (snow, wind and seismic) from one individual site to another, as well as potential differences in Building Code editions make it impossible to reuse them.

Once you have invested in your new Hansen Pole Building kit package, plans specific to your exact requirements will be produced for you. These plans are included in your investment price.

Dear Guru: What Steps Should I Take to Add Insulation To My Pole Barn?

Welcome to Ask the Pole Barn Guru – where you can ask questions about building topics, with answers posted on Mondays.  With many questions to answer, please be patient to watch for yours to come up on a future Monday segment.  If you want a quick answer, please be sure to answer with a “reply-able” email address.

Email all questions to: PoleBarnGuru@HansenPoleBuildings.com

DEAR POLE BARN GURU: My question concerns insulation and ventilation. I have an existing 30 x 50 pole barn. It is split in half lengthwise, with one half enclosed and the other half open on one side. I am wanting to frame and enclose the open wall and make the building into a woodworking shop. I would primarily use this shop during the warmer months, but would like to be able to work in there in the wintertime on occasion. I am planning to re-tin the entire building including the roof. The current enclosed portion has trusses that span roughly 15 feet from wall to wall with a 12/3 pitch. The area that I am wanting to enclose is “lean to” construction with 2 x 10 rafters that span from the truss beams of the already enclosed area to a double 2 x 12 beam (approximately 15 feet). My building does not have soffit ventilation or ridge ventilation. From what I have learned from your blog, I am planning to add reflective barrier between the purlins and metal roof when it is replaced. I also know that my trusses are most likely not designed to bear the weight of a ceiling and insulation. I would like to either insulate the entire building or at least the newly enclosed area and keep the other as cold storage. I would like to know what options I have to make either of these a reality and what steps to take as far as insulation and vapor barrier is concerned? I have included my e-mail and I tried to include photos but could not attach them. Please respond with your e-mail and I will send the photos right away and any additional information you might need. Thanks so much! NO CRISIS IN KANSAS

 DEAR KANSAS: We did figure out how to get photos from your hands to our eyes, thank you very much for your efforts.

After seeing the photos, my response was, Rather than throwing a lot of dollars into your existing building, have you considered just leaving it as is for cold storage, and putting up a new woodworking shop?”

 I’ve written in the past about renovation and remodel work on pole buildings:

https://www.hansenpolebuildings.com/blog/2013/01/pole-barn-remodel/

https://www.hansenpolebuildings.com/blog/2013/05/renovating-a-pole-barn/

A little more input from this very kind gentlemen helped: “I was trying to use my existing building because it already has concrete floors and 200 amp electrical service.”

And back from me: “Trying to re-purpose and existing building is rarely the most economical or practical solution. Especially if it involves the cost of residing and reroofing (since these two items typically represent about 50% of the cost of the building). In looking at the photos, the way the concrete is poured leads me to believe you are going to have water coming in under the outside building wall.”

What clinched me having to help this guy out was: “The existing barn may be my only option due to the wife wanting its appearance improved regardless!”

If mama ain’t happy, ain’t no body happy!

As I do not know the version of the Building Code (if any) your building was constructed under, nor the applicable wind and snow loads, I can only make broad structural recommendations. In most permit issuing jurisdictions, they work you propose to do does require a building permit to be acquired. I’d recommend you confirm yes or no.

In the end, it would be an excellent idea to contract with a registered design professional RDP (engineer or architect) to confirm structural integrity of the existing building, as well as to appropriately size new members being added, as well as their connections.

Starting with the basics, remove all of the siding and roofing. Where an exterior wall will have a climate controlled area opposite, remove all girts. Install new wall girts at 24 inches on center, of a size large enough to be flush on the outside of the walls with existing pressure treated splash planks, etc. With 6×6 columns, it will take 2×8 girts placed like bookshelves. In order to keep wall screw lines even, you may want to opt to swap out the girts universally (it also allows the future ability to insulate other portions of the building at a later date).

As you will be down to bare framing, I would highly recommend adding enclosed vented overhangs on all four sides of the building. This will allow for an air intake, which is going to be essential to the overall system performance during steps outlined below.

Before installing new roof steel, install the reflective radiant barrier on top of the roof purlins. I recommend the A1V product from www.buyreflectiveinsulation.com, as it has tabs with adhesive pull strips to seal each piece to the prior one. Use high quality vented ridge closures under the ridge cap, to provide an air exhaust.

Wrap the building walls with a high quality building wrap.

Read more here: https://www.hansenpolebuildings.com/blog/2012/11/house-wrap/

In areas you want to climate control, install a 2x beam (or header) to the inside face of the columns. From beam to beam ceiling joists can be placed every two feet to support gypsum wallboard.

With the newly created wall cavities, you can use batt insulation or BIBs. For the ceiling, I’d suggest blowing in insulation, once the ceiling has been drywalled.

Assuming you move forward with this, I am hoping you won’t mind sharing progress photos.

When it is all done, it should look and function just like a new building.

Dear Pole Barn Guru: Can I Use Spray Foam Insulation in My Pole Barn?

Welcome to Ask the Pole Barn Guru – where you can ask questions about building topics, with answers posted on Mondays.  With many questions to answer, please be patient to watch for yours to come up on a future Monday segment.  If you want a quick answer, please be sure to answer with a “reply-able” email address.

Email all questions to: PoleBarnGuru@HansenPoleBuildings.com

DEAR POLE BARN GURU: In northern Idaho, just east of Coeur d’Alene, I had a pole barn put up without insulation figuring I would build 2×6 walls between the posts and insulate with batts and then plywood the walls later for a work shop. Can spray foam be used instead? Could I frame 2×4 walls instead of 2×6? Can it be sprayed onto the metal siding and roof without any negative effects showing up later? I will have a heater in there, but probably not on full time. QUIRYING IN COEUR d’ALENE

DEAR QUIRYING: Can you use spray foam? The answer is yes, however it is probably the most costly choice, and the Building Code requires any spray foam to be covered with non-combustible material (e.g. gypsum wallboard).

For the walls, you could frame a non-structural 2×4 studwall, holding it flush to the inside of the columns, and place batt insulation between the studs. The studs do not have to be the same depth as the insulation, and in doing so, you will eliminate a thermal bridge.

Beware, less costly (per inch of thickness, not R value) open cell foams are permeable to moisture – so condensation could become an issue. To obtain an R-19 rating from spray foam, be prepared to spend around $3 to $4 per square foot of insulated area.

While spray foam is relatively light weight, always check with the manufacturer of the roof trusses and the Registered Design Professional (RDP – engineer or architect) who designed your building to verify the weight of the insulation being added will not compromise the structural integrity of the building.

DEAR POLE BARN GURU: I sent in three pole barns that i am looking to get a quote for. my families barn just recently burned down a few days ago due to undetermined causes. We lost our animals in the fire which was devastating. Our pigs and chickens were our livestock and our food. We need to get a barn up and built soon to get our farm running again. I have a few questions about this, first off if i go ahead and purchase this kit how does it get delivered to my house. Second, if this is purchased is the supplies all in one kit that you ship out or is it a list a what we need and i have to get it? please get back asap thank you. NEEDY IN NEW YORK

DEAR NEEDY: I am deeply sorry for your losses. Fire is so devastating.

When you order from us, the materials are delivered to you via truck.

You are purchasing from us the design, the complete 24″ x 36″ blueprints which are specific to your building and show where every board is placed. Not only to we provide all of the materials for construction, but we give you detailed instructions as to how to assemble everything.

DEAR POLE BARN GURU:  What is your standard design practice to accommodate a wider O/C truss?  Double the truss? Or increase the truss member sizes?

VASCILATING IN VERSAILLES

DEAR VASCILATING:  Our most common practice design in general is a system using doubled trusses spaced most commonly every 12′ (although spacings 10′-16′ are also very common). The doubled (or more technically “ganged”) truss system affords some safety not found in single truss systems – as multiple trusses physically connected to each other all for true load sharing. The probability of two or more connected trusses having the exact same weak point is phenomenally low – reducing the risk of a catastrophic failure in an extreme loading situation. Ganged trusses also require less bracing than single trusses, adding to ease of installation, as well as lower costs and a “cleaner” finished appearance.  It also may mean no cumbersome (and expensive) truss carriers.  Lastly, if you put overheads in a sidewall, having the double trusses mean you could put as wide a door as 12’, and have plenty of room to put in a hoist system to lift a vehicle between the sets of trusses.

Vascilating then responded:

Thanks for the quick response. I assume, then, the practice is to utilize 12′ 2×6 purlins placed on edge on top of those trusses?

Is the spacing of 12′ the same for an attic truss? I recently got a quote from Hansen for a gambrel building with which I intend to have attic trusses. Is it common practice to finish a room using the knee walls of those trusses?

Dear Vacilating:

Every client gets my individual and undivided attention for as long as they need to get their questions answered.

The snow load will dictate purlin size, but they will be 2×6 or larger, joist hung between the trusses. Attic trusses will be the same, however may be more than just a 2 ply truss depending upon the span and load. Most typically people will finish those spaces with a knee wall.

Unless you are absolutely married to the gambrel look, the most efficient and cost effective design for multi-story space, is to just design a multi-story building. For about the same cost, you can get full room height from sidewall to sidewall


Dear Guru: Can I Use Cellulose Insulation?

Welcome to Ask the Pole Barn Guru – where you can ask questions about building topics, with answers posted on Mondays.  With many questions to answer, please be patient to watch for yours to come up on a future Monday segment.  If you want a quick answer, please be sure to answer with a “reply-able” email address.

Email all questions to: PoleBarnGuru@HansenPoleBuildings.com


DEAR POLE BARN GURU: I am finishing a 36x40x14 pole building. The roof is asphalt shingles on osb and the siding is typical metal (.026 I think). I want to use dense pack cellulose blow in in the walls which will be covered with OSB and painted. There is no plastic or vapor barrier, just metal on the 2×4 frame members. Do I need to install plastic or housewrap with the insulation? Can I staple housewrap to the inside framing to hold the blow in insulation until I install the OSB wall sheathing?

I had a metal ceiling installed when they built it but no insulation exists.

I want to use blow in R38 for the ceiling and cellulose seems to be ok to use but I have read that it may corrode the metal.

Please give me your recommendations to insulate my pole barn. Thank you. CELLULOSED IN CRAWFORDSVILLE


DEAR CELLULOSED: The issues with cellulose insulation appear to be if it is or gets wet. There are two sides to the argument.

Side A (it is no problem) says: “There have always been concerns about insulation causing corrosion when in direct contact with metal building components such as sweaty pipes, electrical wires or metal boxes, etc. Consequently, ASTM standards for every insulation material contain testing which specifically addresses these concerns. In addition, in 1979, the CPSC promulgated a law, which regulated the fire and corrosive characteristics of cellulose insulation. A statement of compliance with these requirements is required on every bag of cellulose insulation. The types of metal tested with all insulation materials are copper, aluminum, steel, and additionally in Canada, galvanized steel. Our test requires placing soaking-wet cellulose insulation with an imbedded .003-inch thick metal coupon inside a humidity chamber under conditions that are ideal for promoting corrosion. After 14 days, the metal coupons are removed, cleaned, and examined under a light to detect the smallest pinhole. In all, there are two coupons of each metal and all must be free of even one pinhole. This is a very strict test!”

Side B can be read about at: https://www.chemaxx.com/cellulose.html

My recommendation would be to use fiberglass insulation. https://www.hansenpolebuildings.com/blog/2012/02/fiberglass-insulation-2/

For the walls, use BIBS (read more about BIBS here: www.hansenpolebuildings.com/blog/2011/11/bibs/). A vapor barrier should be installed on the inside face of any wall insulation, before the interior finish is applied (whether osb, drywall or steel liner). Housewrap is NOT a vapor barrier, and should not be installed on the climate controlled side of insulation.

DEAR POLE BARN GURU: I am having a local contractor build a pole barn cabin with a steel roof and vinyl siding. They do use bubble under the roof girts. I am having them use 2×10 for a vaulted ceiling so I can finish a loft. I want to insulate between the 2×10’s -24 on center. Just wanted to know how to best insulate between these and put a tongue and groove ceiling in. MASSILLON MARK

DEAR MASSILLON: My answer will assume your roof purlins are being installed the length of your building, rather than from eave to ridge (like rafters). On top of the purlins, install 2×4, laid flat (3-1/2” face towards the purlins) running from eave to ridge. Then install the reflective insulation. Next place 2×4 laid flat the same direction as the purlins, then the roof steel. Make certain to adequately ventilate the eave and the ridge. The insulation between the purlins should be unfaced, and no more than 9-1/4” thick.

Before you blow insulation into the attic space, make sure you have adequate attic ventilation. While this article is written with steel roofing in mind, the same ventilation requirements and solutions apply: https://www.hansenpolebuildings.com/blog/2012/08/ventilation-blows/

Ceramic Insulation

Ceramic Insulation

In the 1990’s I owned Momb Steel Buildings in Spokane. We provided pole building packages and also constructed post frame buildings from a bricks and mortar location.

As the sales team grew in size, we would have weekly meetings for educational purposes. The resultant of these became known as “stump the expert” (aka me). It wasn’t very often the crew could slip one by me.

Eric, one of the owners of Hansen Pole Buildings, caught me with a curveball on Monday, as he innocently asked me what I knew about spray on ceramic insulation. The sum total of my knowledge base equaled….zip…zero…nada.

Knowing Eric (and him knowing me), I’m sure he knew this would set me off on a wild flurry of Google searches. Which it did.

Ceramic Paint

The ceramic insulation concept resulted from pre-owned steel shipping containers being converted to other uses, primarily housing. One of the major problems of these containers is insulation. The inside dimensions are fairly small, so furring them in and adding insulation leaves very little space. Insulate the outside and the shipping container look goes away, which IMHO (in my humble opinion) is a distinct plus, but some folks like the industrial look.

The supplier of the spray or paint on ceramic insulation claims the product addresses all three modes of heat transfer – radiation, convection and conduction. They also call “R-Values” (the standard measure of insulation) a “fairy tale”, which seemingly would result (if true) in throwing out most of the science of insulation.

On the Environmental Protection Agency Energy Star website it states, “EPA does not recommend paints and coatings be used in place of traditional bulk insulation. We haven’t seen any independent studies which can verify their insulating qualities.”

Alex Wilson at Building Green writes “To say that there is a lot of hype about insulating paints and radiant barrier coatings is an understatement. The Internet is rife with claims of paints that dramatically reduce heat transfer–usually based on some technological magic spun off from NASA. While these products may have some relevance in the extreme conditions of outer space, manufacturers of paints containing “ceramic beads” or “sodium borosilicate microspheres” are making claims that defy the laws of physics–and independent test results–when they claim they can save significant energy in buildings.”

In actual practical use – the ceramic insulation turns out to be effective against radiant heat from direct sunlight, as well as to keep heat from a radiant heater inside. However it proved to be useless for preventing condensation or for maintaining any sort of interior comfort level. Trying to keep the inside warm in winter? Turn off the heat source and the space immediately becomes cold.

The reality is, ceramic insulation (either spray or paint on) falls into the realm of being a radiant barrier. This being said, a single R-value does not describe a radiant barrier very well, as the insulation effect is very dependent on how it is used. There is, however, a technical parameter which describes the performance of a radiant barrier well, emissivity. One ceramic insulation product lists the emissivity as being from 0.21 to 0.36, which is somewhat better than most plain paint. However, it is nowhere near as good as a foil radiant barrier, which has emissivity of 0.03 to 0.05.

For a pole building….my recommendation would be to run, do not walk, away from any consideration of a ceramic insulation as being a practical solution for controlling interior climate, or condensation issues.

Dear Pole Barn Guru: What Type of Insulation Should I Use?

Hansen Buildings new feature for each Monday is “Ask the Guru” where you can submit questions for Mike the Pole Barn Guru to answer on future Monday blogs.

Email the Guru at: PoleBarnGuru@HansenPoleBuildings.com

DEAR POLE BARN GURU:  I purchased one of your pole building kit packages late last summer, and have just finished constructing it. I was wondering if you had any recommendations on how I can best insulate it?                COOL IN MARYLAND

DEAR COOL: You and your Building Designer worked very well together to craft a new building for you which is ideally set up to be insulated.

You ordered the following features which will allow for the building to be easily insulated:
The ridge has a continuous vent,
The enclosed overhangs have vented soffits,
The roof trusses are designed to support the weight of ceiling framing, drywall and insulation,
Ceiling joists are in place every 24″ to support drywall,

Reflective radiant barriers are between the roof purlins and the roof steel to prevent condensation issues in the attic,

And your walls are framed with commercial girts every 24″, which creates both an insulation cavity, as well as allowing for a flat finished interior wall surface.

Most heat loss is up (as heat rises), so this is the most important area to tackle. We would recommend hanging 5/8″ drywall from the ceiling joists. You could then blow in as much fiberglass insulation as you desire into the attic space, the cost of insulating has as much to do with the installers having to make a trip and do the work, so paying for what may seem to be a few extra inches of insulation, is a bargain compared to having to add more at a later date.

For the walls, I always recommend BIBS. This is a netting stapled to the wall girts, with insulation blown behind it under high pressure.

For more information on the BIBS system: https://www.hansenpolebuildings.com/blog/2011/11/bibs/

As an alternative, you can also use R-19 batt insulation between the girts, which is less expensive because you can install it yourself.  But BIBS will be a far superior product, in my humble opinion.

DEAR POLE BARN GURU: I’m renovating a 60′ x 80′ Wicks Pole Barn and one of the things I want to do is put in a metal ceiling and insulate. The “barn” which is really a machine shed was built in the mid 1970’s and the trusses are in good shape, they are of a “A” design, arched up on the underside a few degrees.

Did the manufacturers use the same trusses whether or not the building was going to be finished off with a ceiling and insulation?

I don’t want to have the thing come down around my ears after putting all that time and money into it!                   COLD IN INDIANA

DEAR COLD: Typically, unless specifically ordered otherwise, pole building trusses are NOT designed to support the weight of anything other than their own weight, necessary bracing and minimal weight from wiring and lighting. Whilst it is possible the trusses could have been designed to support weights beyond these, it would not be safe to assume they can.

I’d recommend have a RDP (registered design professional – aka engineer) do a thorough investigation of the trusses and provide a sealed letter to confirm they are indeed adequate for your intentions, or if not, to design an engineered repair to upgrade them.

Yours is a case where an ounce of prevention, is more than worth the pound of cure.

Today In: Ask the Pole Barn Guru

I recently got this email, and as The Pole Barn Guru, I am happy to respond to building questions which are not from Hansen Building clients, either prior or future.


Hello 

I live in Indiana.

I have a pole barn garage. I didn’t build it. It was built when I got the house. It has a metal drop ceiling. I am looking to insulate it. It will only be heated when I am working on stuff in the winter and not all the time. It will not be conditioned in the summer. I am not sure what the best way to insulate above the drop ceiling. Can I use blow in insulation? If I go this route do I need to put plastic down on top of the metal first then blow it in? I am using 1 inch Styrofoam board in the walls board since I can put it directly against the metal and moisture won’t affect it. I will eventually cover it with plywood. What should I do for the drop ceiling?”

The initial step is to find out what the load capacity of the trusses is. Very few pole buildings have trusses which are designed to support the weight of a ceiling and insulation. You should be looking for a minimum bottom chord dead load of five psf (pounds per square foot). If the prior owner did not provide you with the information about the building, the design loads are supposed to be stamped on the trusses.

Assuming the trusses can support the load, an insulated vapor barrier must be placed beneath any roof steel. If the building was not originally constructed with one, reflective radiant barrier (aluminum side up/white face down) can be added to the underside of the roof purlins. It is essential to have all seams tightly sealed. See www.buyreflectiveinsulation.com to calculate needed quantity and price.

Ventilation must be provided for, as you have a dead attic space. Hopefully the eaves have enclosed vented soffits – to provide an air intake. Along with this – a vented ridge is required, in order to give an outlet.

Finally, once all the above have been taken care of, insulation can be blown in directly above the steel ceiling liner panels. You do not want to have a vapor barrier directly above the existing ceiling, as it could allow moisture to collect above the liner panels and this could cause premature deterioration.

Do you have a burning building question (no pun intended) for The Pole Barn Guru?  Email me today!


Rigid Insulation Boards Part II: Foam Board

 Yesterday’s blog featured a discussion of the various foam board products with application for your new pole building.  Used correctly, they provide good thermal resistance. Applied incorrectly can create a huge structural problem with pole buildings, along with safety issues.

Protect all types of foam  insulation from direct sunlight. Over time, the sun’s ultraviolet rays can damage the insulation. For roofs, this is generally done by applying a coating such as tar, acrylic, silicone, or rubberized paint. You can also cover the foam with a rubber or plastic membrane, or a layer of asphalt and roofing felt. Make certain you are using compatible products. The solvents in some coatings dissolve certain plastics.

In cold weather, warm inside air containing water vapor can get past the wall finish and insulation, condensing inside the colder wall cavity. In hot, humid climates the same thing can happen, just in the reverse direction. Humid outdoor air in the summer can condense inside cool, air conditioned wall cavities. If enough of this happens and the water cannot escape, wood rot, mold, and other moisture-related problems can occur. For this reason, building codes often require installing a vapor diffuser retarder on the warmest side of the wall cavity.

Foam board insulation is commonly placed against the steel building siding, between the girts of exterior walls. To prevent air infiltration, place rigid insulation boards tightly together and seal the seams with tape or caulk. This practice may worry some in cold climates since the foam board may act as a second vapor diffusion retarder. Studies have shown, condensation rarely occurs in these areas unless something else is seriously wrong with the wall assembly (like massive uncontrolled air leakage into the walls from the building). If the assembly is constructed correctly, the inside surface of the foam board stays warm enough to keep water vapor in its gaseous state long enough for it to escape.

When insulating a foundation you need to consider, although insects don’t eat foam board, they can easily tunnel through it. Insect burrows reduce the R-value and structural integrity of the insulation. For these reasons, some manufacturers treat their foam products with an insecticide, usually a borate compound. Many building jurisdictions also mandate treating the earth around the building with insecticides. These jurisdictions may also want an inspection area several inches wide and all around the foundation of a house kept bare of insulation board.

A better solution for below-grade walls in need of insulation is to install the foam board over the interior of the basement walls rather than on the exterior, which is more common. Interior applications prevent ground-dwelling insects from finding the foam board at all, and they eliminate the need for the bare inspection area. Insulating interior walls, however, requires careful attention to moisture control.

Most jurisdictions also require installing a fire barrier over the interior foam board. While this adds extra cost, the thermal performance of this method is superior in most cases to the more common exterior foam board application. This equates with a dollar savings in energy which can repay many times over for the additional cost of an interior application. If converting a basement into a living space, there is almost no additional cost.

Foam insulation is relatively hard to ignite, but when it is ignited, it burns readily and emits a dense smoke containing many toxic gases. The combustion characteristics of foam insulation products vary with the combustion temperatures, chemical formulation, and available air.

Because of these characteristics, foams used for construction require a covering as a fire barrier. One half-inch thick gypsum wallboard is one of the most common fire barriers. Some building codes, however, do not require an additional fire barrier for certain metal-faced, laminated foam products. Always check with local building code/fire officials and insurers for specific information on what is permitted.

While rigid insulation boards may afford a relatively high R-value, if installed improperly they can provide less than desired insulating results, structural issues or pose a fire hazard. In many instances, other methods of climate control may be more cost effective.