Tag Archives: pole barn trusses

Code Requirements for Residential Roof Trusses

Code Requirements for Residential Roof Trusses

Reprinted from a March 2019 article in Structure Magazine authored by Brent Maxfield, P.E.

Part 1 of 3:

There are many roles played in the design and delivery of residential wood roof trusses. Engineers can play various roles in this process, and it is essential to understand which role you play. This article discusses the scope of work required of the various roles as defined by the various codes and standards for residential roof truss. If a building falls within the IRC, all roles can be played by non-engineers, unless the jurisdiction requires the construction documents to be prepared by a Registered Design Professional.

Code Requirements

The International Residential Code (IRC) is the governing code for one- and two-family dwellings. It is a prescriptive code. For those elements that fall outside of the prescriptive criteria, engineering design (i.e., using the IBC) is required (See IRC R301.1.3). The IRC does not have prescriptive provisions for the design and installation of prefabricated wood trusses, but they are allowed per Section R801.10. The applicability limits for trusses are found in Section R802.10.2.1. These must be followed in order to stay within the purview of the IRC. The limits that apply when snow loads control the design are:

· Building width not greater than 60 feet perpendicular to the truss span

· Truss span not greater than 36 feet

· Minimum roof slope of 3:12

· Maximum roof slope of 12:12

· Maximum design wind speed of 140 miles per hour (63 m/s), Exposure B or C

· Maximum ground snow load of 70 psf (3352 Pa), with roof snow load, computed as 0.7pg


The IBC becomes the governing code for the truss design and associated load paths if the structure falls outside of these limits (See IRC R301.1.3).

Come back Thursday August 29th for part two

Things My Pole Builder Didn’t Discuss With Me

Things My Pole Barn Builder Didn’t Discuss With Me

Somehow I feel as if this should be a Jeopardy question for $400…..

Reader MATT in BUFFALO writes:

“Hi there, my pole barn has recently been constructed and I’m now looking forward to insulating and finishing the inside. My hope is to drywall all interior surfaces including the ceiling. I realized as we were finishing the build that this was never really a discussion with our builder, specifically for the ceiling. I would like to add 2×4 or 2×6 ceiling joists 24″ on center and hang 5/8″ drywall for my ceiling finish and insulate somewhere in the r38 range with fiberglass. I do not intend on having any storage above the bottom chord, but will leave access to the space. My truss plans show a bottom chord dead load of 5.0 psf and states in the notes that the truss has been designed for a 10 psf bottom chord live load, although under loading it shows a bcll of 0.0. It also mentions for bottom chord bracing that a ‘rigid ceiling directly applied or 5-8-15 oc bracing’ is allowed. I think 5.0 psf leaves me just barely enough to finish this how I’d like, but I’d like to run it past someone with experience. I’ve unfortunately had the hardest time getting a hold of the truss designer/manufacturer. Thanks!!”

Mike the Pole Barn Guru writes:

Oh – things somehow never being discussed before a build gets started…..

Don’t get me wrong, I am not blaming you.

Any responsible builder or building provider should thoroughly know their client’s eventual end use for their building and offer some reasonable options to achieve those goals. Sadly – so many “professionals” know only how to sell on a cheap price rather than value added benefits to potential building owners.

Let’s run through possible challenges –

Condensation control. Unless some provision was made to keep warm moist air from rising and touching underside of roof steel, it will “rain” in your attic. Solutions at time of construction (in order of preference) would be: a factory applied integral condensation control (https://www.hansenpolebuildings.com/2020/09/integral-condensation-control-2/), a well-sealed reflective radiant barrier (it really isn’t insulation https://www.hansenpolebuildings.com/2014/04/reflective-insulation-wars/), installing over solid sheathing (OSB or plywood) with 30# felt or a synthetic underlayment, or Metal Building Insulation (https://www.hansenpolebuildings.com/2011/11/metal-building-insulation/).

If no provision has been made, your option now would be two inches of closed cell spray foam applied directly to the underside of roof steel.

Ventilation. When creating a non-conditioned attic space, it must be adequately vented. Gable vents can be Building Code conforming, however from a practicality standpoint, they only ventilate well closest to their location (building ends). Best design solution is intakes at eaves, exhaust through ridge. Here are your requirements: https://www.hansenpolebuildings.com/2018/03/adequate-eave-ridge-ventilation/.

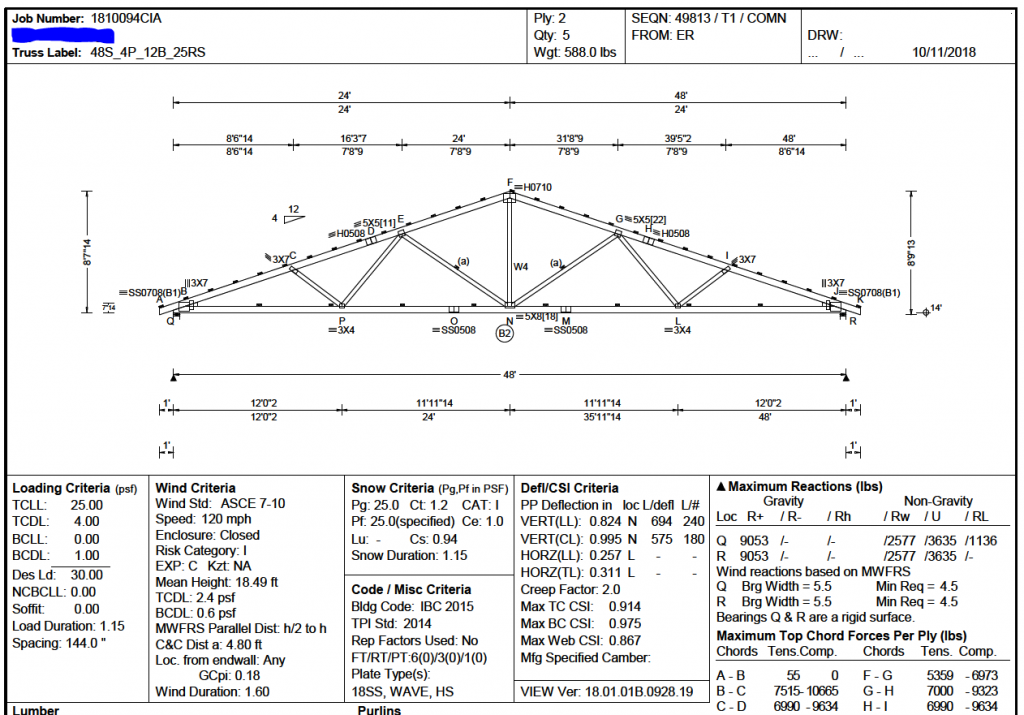
Most pole barn trusses are designed for a one psf (pounds per square foot) bottom chord dead load (BDCL) – inadequate for any type of ceiling. On truss spans of up to and including 40 feet, we include a five psf BCDL as a matter of practice (too many clients decide later on they want a ceiling) and if we know in advance a ceiling is to be installed, we use 10 psf BCDL. You have been fortunate to have at least a five psf BCDL. Your 10 psf bottom chord live load is a non-concurrent (assumes no other live loads are being applied such as snow) one and basically is there to provide a minimum degree of structural integrity allowing for occasional access to an attic space for maintenance purposes.

Depending upon span between trusses, size and grade of ceiling joists can be looked up at www.codes.iccsafe.org/content/IRC2021P2/chapter-8-roof-ceiling-construction#IRC2021P2_Pt03_Ch08_SecR802 scroll down to Table R802.5.1(1). In order to support 5/8″ sheetrock, ceiling joists should be spaced no greater than 24 inches on center.

Your actual dead loads will be roughly 1 psf for truss bottom chord itself (includes minimal wiring, lighting and truss bracing), 2×6 ceiling joists 24″ o.c. (I use one psf although actual load is slightly lower https://www.hansenpolebuildings.com/2013/02/2×6-lumber/) and your blown fiberglass (about a pound per cubic foot), so you should be okay. Cellulose or rock wool insulation are about three times as heavy as fiberglass, pushing to BCDL capacity, although my recommendation would be rock wool over other products as it is unaffected by moisture (fiberglass with even 1.5% moisture content can lose roughly half of its R value).

An Advance Article Preview for The Advertiser

Besides being a semi-regular contributor to Rural Builder magazine, I have also had articles published in several other lumber and wood truss periodicals. I’ve been asked to write an article for The Advertiser (https://www.componentadvertiser.com/), which I share with you below:

Increase Your Post Frame Sales

Nearly every U.S. and Canadian metal plate connected wood truss manufacturer has one or more clients who either construct pole barns or sell kit packages. Not much excitement though in dealing with typical orders of usually anywhere from four to 10 trusses per building.

Money can certainly be made in post frame industry sales. My 1990’s truss plant, based in Spokane, Washington, almost exclusively built pole barn trusses. It was not unusual for us to have backlogs of weeks and when it came to post frame trusses. We dominated Northwest U.S.

How we did it.

We tailored our inventory to best build to our client’s needs. By having 2×6 2850msr and 2400msr in wider widths, we could provide smaller dimension chords than our competitors, with lighter trusses. Considering jobsite manhandling involved, lighter weight trusses are an advantage! And let’s face it – those high grades have very few visual defects, resulting in some very pretty trusses!

Also in our inventory, for web stock, was msr 2×3. Many truss webs can be higher grade 2×3, rather than 2×4. Again, much 2×3 msr was much prettier wood than 2×4 visually graded material others were using, not to mention saving truss weight.


Webs requiring lateral bracing were checked to see if a larger dimension or higher grade would eliminate bracing. Installing job site bracing take both material and labor, reducing braces for a minimal investment makes for happy clients.

Be a Consultant.

Being able to be different in the post frame industry gives one a leg up, where virtually everyone does things alike. When a truss client can say, “I do things just like everyone else and also provide….” to their potential customer, it gives them an advantage.

Most post frame roof trusses will be 40 foot spans or less. Point out very small price differences to add five or 10 pounds per square foot (psf) of load to top chords. Many post frame trusses are designed with a bottom chord dead load of one or two psf. One of my most asked questions of my Ask The Pole Barn Guru™ advice column – is how to add a ceiling to post frame buildings. A five psf bottom chord dead load would solve this dilemma. Both of these are points your client can use to sell why he has a better building than Brand X.

Offer More Stuff.

Your delivery truck starts spinning dollar signs an instant a key gets close to an ignition switch. Since you are going to make a jobsite trip, why not add more product?

True glu-laminated post frame building columns are a wonderful thing – strong, light weight and straight. In most instances a product of 1650f three ply 2×6 glulam will replace 6×6, 6×8 and in some cases 6×10. Downside of glu-lams – current lack of distribution, as manufacturers are primarily in South Dakota, Wisconsin and Pennsylvania. Work with a manufacturer to bring in ¼ or ½ of a truckload of 14 to 24 foot lengths, they might even help to floor some inventory. Once builders start using them, they will never go back to solid sawn columns. This provides another differentiation for your client and it helps to tie them to you as their supplier.

Sell them msr lumber.

With 2×6 1650 msr being over 40% stronger than best commonly used visually graded #2, you can do your client some favors in helping to point out strength and quality benefits. Side benefit for you – quicker inventory turns. Buy more lumber get better negotiating power with wholesalers and mills.

Glu-lam column and selling lumber margins are not going to be as high as your truss margins, expect maybe 20%, however consider this a bonus profit you would never have otherwise had. I always felt 20% of something beat 100% of nothing every day.

Expand your post frame building industry view and increase your bottom line!

Post Frame Scissor Trusses

Post Frame Scissor Trusses

I’d spent summers working for my dad and uncles framing buildings and being low man when it came to a totem pole of laborers, I did my fair share of strong back, weak mind work – such as setting trusses. As a teenager, I had not given much thought to complexities involved in engineering trusses. I just knew they could do things we could not possibly stick frame. They made jobsite building assembly go quicker, as long as trusses were correct (a gamble from some manufacturers then).

When I was newly introduced to prefabricated roof trusses as a sawyer back before many of you readers were born (1977), my eyes were opened to an entire world of structural possibilities. My truss buddy Bret Hansen and I were so obsessed with being best truss builders ever, so we spent our own time nights and weekends going to view our trusses upon buildings under construction. We saw slightly sloped commercial trusses, steep sloped trusses, hips, valleys and scissor trusses.

I’ve written about scissor trusses before, with https://www.hansenpolebuildings.com/2016/10/scissors-trusses-post-frame-buildings/ being one of my favorites.

Reader JIM in GRAND RAPIDS triggered today’s musings when he wrote: “Can a pole barn have a vaulted/cathedral ceiling? I have been told NO by one pole barn builder only to see references to using scissor trusses in pole buildings on the Internet. Thank you, GURU, for clearing this up.”

Mike the Pole Barn Guru responds:

Reality check – over half of all builders did not graduate from high school. In this we are talking about a big pool of builders, where those making up a pie piece segment known as pole barn builders may (from personal experience) be even less educated. The builder who told you no, frankly just doesn’t know. Chances are fairly good, if it can be done it wood, it can be incorporated into a post frame (pole barn) building.

25 years ago I had built for myself a rather unique post frame building. Located upon the back portion of our steeply sloped Newman Lake, Washington lot, it’s a one of a kind structure.. Interested readers can find out just a bit more about this building here:  https://www.hansenpolebuildings.com/2012/02/grade-change/.

When my younger brother Mark and I were but tykes, we were introduced to a noble game, ping pong (aka table tennis) by our mother’s dad – Grandpa Boyd. We’d play for hours in their duplex basement, where a low ceiling caused many shots to be caromed off.

In designing my new building, I wanted to make provision for an upper level to be able to be a general purpose rec room, where my then young (now all grown and gone) children could play ping pong without challenges posed by our grandparents’ low ceiling. A solution was as simple as scissor trusses.

In order to match existing house and detached garage rooflines, a 7/12 roof slope was utilized. This lent nicely to being able to have a 4/12 interior scissor truss slope. With a width of 30 feet, room center height approaches 13 feet – plenty enough to do some lobbing with a ping pong ball!

So yes, Jim, you certainly can have a vaulted/cathedral ceiling!


Why Build Roof Before Walls?

Why Build the Roof Before Walls?

Sometimes I can get so deep into a forest I cannot see trees – I miss things which should be otherwise obvious.

For whatever reason a client contacted his Hansen Pole Buildings’ Designer, rather than first contacting Technical Support. Building Designer Gregg aptly forwarded client’s request directly to our Technical Support team:

“….who has already purchased, he had a question from the manual on what size (diameter) rebar to use on the corner post, according to attached photo. He also wanted to know if he could put in girts before he places trusses, as the everything else arrived except for trusses so far, the manual says do trusses first.”

Mike the Pole Barn Guru writes:

Last half portion of client’s request is what pushed my “McFly” button!

Please refer to Detail in upper left corner of sheet S-2 of your engineered plans (plan view at corner columns) and Chapter 7 of Construction Manual.

Rebar is measured in 1/8th inch diameters, therefore a #4 rebar is 1/2″ diameter (four divided by eight).

We strongly recommend you frame roof prior to placing wall girts.

In reading through the Construction Manual today, I find (very beginning of Chapter 19: Girts) where it says, “Prior to installing ANY wall framing, return to Chapters 13 through 17 to insulate and put steel on roof.” This seems to be an issue of challenge to people – not just do-it-yourselfers, but also those who portray themselves to be construction professionals. We tell installers not to, but do not explain why. Here goes:

Trusses extend from a minimum of outside of column to outside of column (not to mention any overhangs). If walls have been framed (girts, headers and door jambs placed) trusses will have to be jockeyed around to be lifted in place from inside of building.

A great majority of post frame buildings have one or more columns not perfectly placed along building length. Accept it, this is just going to happen no matter how perfect you or your builder might be. Most buildings have a far greater number of roof purlins per bay, than wall girts per bay. By framing roof first, all purlins can be cut to same length in each bay, this is determined by engineered plan column spacing, less thickness of truss assemblies. When trusses are in place, tops of columns will easily move forward or backwards so all truss supporting columns end up spaced per plans. This also aids in creation of an overall building roof length matching expectations.

During truss placement process (regardless of method used) there will come times when it is highly convenient to be able to walk ‘through’ a wall. Girts in place means having to fit through girts or walk around the building walls- either one slows the construction process.

It is far easier to square up a roof without resistance of wall framing members. Once roof sheathing or roof steel is in place, it makes it far easier to plumb building corners.

With roofing in place and walls open, a concrete slab may be installed if desired. Having the roof completed before wall girts are in place helps protect concrete pour from weather elements, especially rain or heat in summer. Pre-mix trucks can access and chute through any accessible sides or ends. This can negate needs to pay for a pump truck.


Can 2×4 Roof Purlins Span 12 Feet?

Can 2×4 Roof Purlins Span 12 Feet?

Reader DAVE in MICHIGAN writes: Hi, I saw on your webpage the Pole Barn Guru stated the trusses could be spaced 12’ apart (I called and was told it is a double truss one on each side of a post that is on 12’ centers).  That is exactly what I have, double trusses on each side of a post on 12’ centers.

My question is can I use 2” X 4” on edge spaced 16” or 12” apart?  I intend to have a metal roof on top.

Thanks for your help!

nailing trussesDEAR DAVE: My preferred method of post frame construction actually places the two trusses face-to-face nailed together and notched into one side of the column. In this fashion they truly act as a two ply member. Spacing them on each side of the column causes the trusses to work independent from each other and takes away the advantages of the true double truss system (load sharing and minimization of truss bracing).

Could one use 2×4 roof purlins in this system?

Let’s do some math and find out. (You can brush up on bending moments here: https://www.hansenpolebuildings.com/2012/09/bending-moment/)

Here is the formula for calculation of a roof purlin:

[(COS of Live load + dead load) X (COS of the purlin spacing) X (purlin span squared)] / [8 X (Sm = Section modulus of the member) X (Duration of Load = 1.15 in areas with snowfall) X (Cr repetitive member factor of 1.15 where members are 24″ on center or less)] = Fb (Fiberstress) required

The COS of the Live Load is due to us only having to check for bending about the strong axis of the member as the purlin is restrained in bending in the weak axis direction by the roof steel.

The COS of the purlin spacing is because the load on the purlins is vertical and the purlin spacing is with the run of the roof.

For sake of discussion we will assume a minimal roof snow load of 20 psf (pounds per square foot) and a 4/12 roof slope.

Dead load will be the actual weight of the roof steel and the roof purlins.

[(20 psf X .949) + 1.5 psf) X (12″ X .949) X (11.625′)^2] / [8 X 3.0625 X 1.15 X 1.15] = 972.75 psi

HemFir has a base Fb of 850 psi multiplied by the size factor of 1.5 = 1275 psi

In bending, 2×4 #2 purlins would work at 12″ on center, however I personally would not want to walk on top of them. Without even running the calculations, I would say there is a good chance the 2×4 purlins will not make the deflection criteria required for a roof framing member supporting steel.

Rather than having 2×4 purlins every 12″ it would make far more sense economically to use 2×6 purlins every 24″. Less expensive (1/3rd less board footage of lumber), fewer pieces to handle, fewer joist hangers to have to attach and only one half as many screws to attach the roof steel.

The Search for Building Steel Trusses

In my several years of being involved in the metal plate connected wood truss industry only twice times did we ever fabricate trusses which were over 80 foot in length. As the forces which have to be carried by a truss are increased by the square of the span, say a 120 foot span truss has to withstand 225% of force than an 80 foot span! Not only do the costs of wide span wood trusses increase dramatically beyond 80 feet, most fabricators do not have the equipment to build or deliver them.

The requirements for independent bracing design and inspection for prefabricated wood trusses of 60 foot span and greater also increases the associated challenges. (Read related article here: https://www.hansenpolebuildings.com/2013/12/wide-span-trusses/).

Because of this I have been keeping my eyes peeled for a fabricator of webbed steel trusses who could fill the niche of providing post frame building trusses which could span 80 to even 150 feet with a high degree of quality and a realistic price.

I recently saw a Facebook page for a company which builds steel trusses, so I commented on their page asking if they could produce wider spans. While I never got a reply from the company (obviously they do not keep up with their own social media), I did get an interesting message from one of their not too happily satisfied clients:

“Good morning Mike, you don’t know me but I wanted to express my concern to you about a post I saw you wrote on Sxxxxxxx Pole Barns Facebook page about large span trusses. I myself ordered an 80x100ft clear span kit from Matt Sxxxxxx. After the incomplete project of Matt and his 2 workers he left me with an incomplete kit and trusses that look good but aren’t strong. I am fixing a completely broken truss now and out of 11 trusses 8 are cracked at welds. He used too small of steel and welding and fabrication work is less than impressive. He has cost me over $30,000 so far and I’m still left with installing this building myself. I do not recommend him to anybody for anything. I will be pursuing him legally. I really just wanted to make you aware of my situation because I myself am dealing with the clear span kit as well.”

Certainly appears this company is not one which we will ever be doing business. Maybe somewhere in the future it will be Hansen Pole Buildings in the steel truss business, where we can control the quality of the product with a high degree of certainty!

My words of caution for anyone considering a webbed steel truss – ask for engineer sealed drawings to match the loading conditions of your particular site. Confirm the trusses are being welded by certified welders, and ask for documentation of passing independent third party inspections on no greater than a quarterly basis as a verification of quality control.

Carport Attachment: Part II

We Don’t Always Do Things Perfect, But We Do Listen Part II

Last summer Hansen Pole Buildings Supplied a pole building kit package to a client who experienced a few challenges and took the time to address them.

Here is a portion of the email I was responding to:
“On the design flaws, and other issues, here is what I have experienced.

If you just joined in this blog – read yesterday’s blog for Part I in a 4 part series from a client who experienced some construction challenges…

“2-Carport attachment.

My plans have a 12 foot carport section on the front.  The engineering on this section is very confusing.  The plans state that the double truss system is supposed to be used but, the outside truss is supposed to lowered by roughly 6 inches to make room for the purlins to travel over the top of it.
With this system there is no double truss.  There is one truss that is supporting the load of two sections of roofing.  To further complicate the matter, the trusses that were engineered and supplied were constructed with 2 X 6’s.  What does this do, well, when I lowered the outside truss 6 inches there is absolutely NOTHING to attach that truss to the other truss.  A few spots of webbing is it.  This seems like a totally weak link in the system and I cannot figure out why this was done this way.
It seems to me that you would have run a normal double truss and then nailed a siding backer onto the outside truss for tin placement.  This dropped truss created other issues as well.
When placing the X bracing for the carport as well as the first bay in, the X is placed at 2 different locations on the bottom attachment.  On the carport section the X bracing is attached to the outside dropped truss, 6 inches below the other truss.  On first interior bay the X is attached to the upper truss.  The two braces are not pushing on each other.  And, I have no idea how I am going to place the tin on this section because I have a 2X4 10 inches above my garage door.  Am I supposed to cut around the 2X4 and try and figure out how to make it work?”
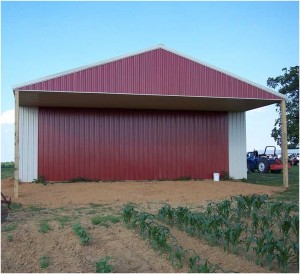
carportMy response: Actually in the hundreds of buildings we have provided with carports, you are quite honestly the first person who has ever brought forth any of these issues as being challenges. Your bringing this to our attention is greatly appreciated.

With Hansen Buildings knowing the carport to enclosed portion the trusses were not going to be at the same height (per the plans), the trusses for your building were ordered and designed to work with a single truss placed every six feet (the worst case scenario).

One truss does not support two sections of roofing, as the end of the purlins in the direction of the carport rests on top of the top chord of the lowered truss. Each truss at this juncture is supporting six feet of roof, just as it was designed to be.

Your recommendation of keeping both of these trusses at the same height and having a siding backing nailed to the face will be taken under serious advisement. The challenge will be, in many instances, the wall columns in this area are 4×6, oriented with the wide face against the wind. In those circumstances, it would be impossible to notch three inches into a 3-1/2” thick column. We are in the process of discussing with our engineers turning the corner and endwall columns 90 degrees to be able to notch in the two trusses, as you suggest. Because we do so many different applications, we need to see if this will cause other challenges.

The idea of the X braces is not to push against each other – it is to create a rigid brace frame which is restrained against buckling in both directions and transfers load into the roof diaphragm. There is no structural reason for them to be at the same height.

Install the steel siding on this wall first, then the X brace. A small slot can be created, using a punch, to slide the Simpson LSTA12 bracket through for attachment.

“3-Girt Spacing

The girt spacing is an interesting way to save a few hundred bucks, probably not mine.  The plans call for the girts to be about 40 inches on center.  I know this is not exact but close enough.  This is the absolute maximum allowed by the tin specs, I know because I called and spoke with the engineer.  Common practice is girts places 2 feet on center.  It does not take a rocket scientist to know that when those girts are placed in a funky location, like 40″ OC, you cannot hang insulation, drywall or anything else without a bunch of waste or owner supplied materials.  I chose to purchase my own 2X6’s to build the thing at 24″OC.  It cost me a whopping $250 for the lumber and a bunch of headache every place else.  I now need to order more screws because I do not have enough for attachment.  You would think that for $25,000 it could be done right without cutting corners.”

My response: There exists no “common practice” for the spacing of wall girts, other than what is needed to support the given load conditions.  Your building, with the loads imposed on it – came out to what we designed, 37-5/8″ spacing.

This is not about “cutting corners”, as with any structural member of a post frame building, the wall girts are located and spaced to carry the loads (in this case wind) being placed upon them, without added pieces being placed “just because”.

The information provided by you, in your request for your initial quote, indicated: “insulation_options: cold”, which precluded us from knowing your intention was to insulate the walls of your building. This is just one of the many reasons why we have each of our clients review and approve their building plans online prior to materials being ordered. At time of review you could have asked why the girts were spaced at 37-5/8” on the plans, or requested any spacing you desired, which would have gotten you not only the extra lumber, but also the screws. There is no indication in the notes in our records your intentions of insulating the building at a future date, or even of it having been discussed.

As for the spanning capabilities of the steel – your building’s steel roofing and siding is Imperial Rib® manufactured by American Building Components. In looking at the span tables for this product, for 29 gauge over three spans (crossing three or more framing members) and spanning 3.5 feet (42 inches), the allowable minimum loads in pounds per square foot (psf) are 54 for positive wind force and 53 for negative wind force. The formula to convert wind speed in mph (miles per hour) to force is Speed^2 X .00256 = psf, so force to speed is the square root of psf divided by .00256, or 143 miles per hour. AS the design load for your building is 100 mph, it doesn’t appear “This is the absolute maximum allowed by the tin specs”. I’d be happy to supply a copy of the chart, should you desire.

Tomorrow’s part III of a 4 part answer from Mike the Pole Barn Guru to a challenged client deals with ceiling loaded trusses. See you then

Pole Barn Kits

All Cheese Does Not Come From Wisconsin

In providing pole barn kit (post frame) packages all over the United States, we do NOT ship roof trusses from our facilities in Browns Valley, Minnesota. Hansen Pole Buildings is about being efficient for our clients, which means outsourcing components when it is the most practical solution. As such, we have developed relationships with roof truss manufacturers all across America.

When a website comes across my desk with, “BEST PRICE GUARANTEE ON POLE BARN TRUSSES FOR SALE” I just had to check it out – even though the website (in my humble opinion) is one of the cheesiest productions I have ever seen.

My spelling hat right away catches the word “Manufacure” boldly displayed on the website!

Having spent my entire adult life either manufacturing or purchasing trusses all across the U.S., I am afraid I call B.S. on this one.

When I see stuff like this, I just can’t resist checking everything out.

Nowhere on this website (or many other ones I found which are owned by the same person) does it give any address – but I did a reverse search from the phone number and found…..

The “business” or “businesses” are located in a small Northeast town. The owner appears to be a small time remodel contractor under more than one name. I could not find any information at all on him or any business of his with the Better Business Bureau, or his state’s business registration division.

pole barn contractorBesides offering the Best Price Guarantee on pole barn trusses, he also offers a “$250 Guaranteed Best Pole Barn Kits Prices on Pole Barn Kits For Sale”!! On the website is “Our Experience Counts”…. considering I know pretty well everybody who is anyone in the pole building industry – they may not be counting very well.
Not interested in pole barn kits or pole barn trusses today? Don’t need a remodel, deck, drywall or masonry work? Don’t fret, as the same guy also offers a book (appearing to be of similar quality to his websites) on “Retail Furniture Selling Techniques”. I am just scratching my head on this one.

I didn’t take away a lot from Architecture school, but I did learn, “Presentation is Everything”. A great quality website doesn’t guarantee a great buying experience, however a poor one generally guarantees it will be an experience you will want to forget.

Usually I have no problem listing URL’s for websites such as these, but in this case I feel I’d be sending folks to their doom.

I did go through what materials they use, their basic design, and sorry to say – this is a blog for another day. I’m still trying to recover from seeing so much…cheese, and all in one place.

The moral of the story – thoroughly vet out ANY BUSINESS or individual you are considering making a major investment with. Including us!

Come back tomorrow and I’ll give you tips on how to check out an internet business – such as – Hansen Buildings.

Dear Guru: How Can I Upgrade My Trusses

Welcome to Ask the Pole Barn Guru – where you can ask questions about building topics, with answers posted on Mondays.  With many questions to answer, please be patient to watch for yours to come up on a future Monday segment.  If you want a quick answer, please be sure to answer with a “reply-able” email address.

Email all questions to: PoleBarnGuru@HansenPoleBuildings.com

DEAR POLE BARN GURU: How can I upgrade my pole barn probably built with normal 25-5-2 truess to handle a upgrade to drywall or metal ceiling with insulation. Can the truess have an added bottom piece to them to handle load. ceiling now has R19 insul between truess. Thanks. SAGGING IN SALINE

DEAR SAGGING: Your situation is very common, as most pole buildings (and their trusses) are not designed to support a ceiling load.

 You’ll have two issues to address. The first will be the footings beneath the columns. There is a strong possibility they are not adequate in diameter to properly distribute the weight of the building, with a ceiling and a snow load. An engineer can do an analysis to determine the correct diameter, which will result in having to dig down to the base of a column to compare the “as built” to what would be required.

 The second issue will be the trusses themselves. If they are prefabricated pressed metal connector plated trusses, the manufacturer should have placed a stamp on each truss. If you can find the stamp, and the fabricator is still in business, they can be contacted to determine the adequacy of the trusses to support the extra load, or to design a repair, if needed.

 If you are unable to contact the manufacturer, the solution then also falls back to a RDP (Registered Design Professional) – an engineer – who can do an onsite evaluation of the trusses, and make the proper recommendations.

DEAR POLE BARN GURU: We are working with a pre-existing pole barn structure with 9′ post spacing and want to have 12′ post spacing.  What is the best method for making this alteration and removing the old posts?  The new posts at the desired 12′ spacing are already in place.  More details:  24’x27′ pre-existing structure, making 24’x36′.  Premanufactured trusses 2′ apart.  Currently on 9′ long 2×10″ boards which end on the original posts. EXPANDING

DEAR EXPANDING: You are ambitious! You case is why I encourage people to design their pole buildings around columns spaced every 12 feet to begin with, as it gives the flexibility of wider future sidewall openings, without having to do a total remodel.

As I do not know what your roof loads are, I will work from the assumption the existing “truss carriers” were adequately designed to support the roof loads, which should be adequate to carry a total roof load (live plus dead) of about 33 psf (pounds per square foot). The 2×10 will need to be removed and replaced by a 3 ply 2×12 #2 or a 1-3/4” x 11-1/4” 2800f LVL (laminated veneer lumber).

 When all of this is said and done, I feel chances are good you will ask yourself why didn’t I just construct a brand new building with the dimensions I needed?


Ask the Pole Barn Guru: What Size Trusses Do I Need?

Welcome to Ask the Pole Barn Guru – where you can ask questions about building topics, with answers posted on Mondays.  With many questions to answer, please be patient to watch for yours to come up on a future Monday segment. 

Email all questions to: PoleBarnGuru@HansenPoleBuildings.com

DEAR POLE BARN GURU: I am having trouble determining what sort of trusses I will need for my barn.  The walls are 2x6x12, 16 OC with a double plate on top.  I need a two foot overhang all the way around.  I am going to sheet with steel and using purlins.  How do I build the overhangs and what trusses will I need? The pitch is 4/12 and I wish to use a 12″ energy heel. WONDERING IN WISCONSIN

 DEAR WONDERING: I have to confess, I am wondering too. The International Building Code (IBC) , in Section 2308 spells out the requirements for conventional light-frame construction, “Other methods are permitted to be used, provided a satisfactory design is submitted showing compliance with other provisions of this code” (which means a registered design professional (RDP)– engineer or architect has provided the design). Section 2308.2.2 of the IBC states, “Bearing wall height shall not exceed a stud height of 10 feet.” This very same language is in the Wisconsin Building Code.

The building plans you paid your RDP to design, should have all of the necessary information on them, for a truss manufacturer to be able to adequately quote the trusses required for your project. Give a copy of the plans to the truss company, and they can take it from there.

If, by some chance, you were erroneously issued a Building Permit without RDP designed plans – you may want to consider consulting with an engineer.

On to the specifics of your question. The truss company needs to know the dimensions of your building – width, length and height. Given you have used stud walls, I would recommend spacing the trusses 24 inches on center, so you will need a quantity of the length of the building divided by two, plus one. The span of the trusses will be the measure from outside of stud wall, to outside of stud wall. Tell them you want two foot overhangs, and a 12 inch energy heel.

Given your location, I would recommend a design with 40 pounds per square foot (psf) roof live load, at least 7 psf roof dead load and at least 5 psf bottom chord dead load. If your building site is open to the wind in one or more directions – be sure the trusses are designed for a “C” wind exposure.

DEAR POLE BARN GURU: My mom is dieing and I’m having to sell things, do you know what I should sell the pole barn fame for? The walls from the ground to the bottom of the roof trusses is 10 ft 5 In it is 27 feet long and 24 feet wide, the poles are 6×6, it has opening for 2 big doors one in the front and one in the back, it has never had any plywood put on it it is a open frame , not sure if the poles are just drop in the ground or cemented in, but I need to sell it and I need to get a good price, anyone have a good idea what to charge ? It has no doors just a wood frame no skin on it at all. Muddling in Michigan

DEAR MUDDLING: While this is not the answer you want to hear – the reality is the cost of the labor to take it apart and haul it away, is greater than the value of the materials. Even if you were lucky enough to get someone to pay a few dollars for it on Craigslist, unless they are insured, the risk of them being injured as they are taking it down, is not worth what little you might gain.  You may have enough to deal with right now, but taking it down and the selling the parts may be less risky – for both parties. All my best to you in this difficult time.

Pole Barn Truss Spacing Rerun

Happy 4th of July!

On holidays, I take a day to relax, and “re-run” some of my most highly read blogs.  From over a year ago, today’s subject has been viewed close to 8,000 times.  Yes, that’s 8 thousand. So here you go, for what I consider one of the hottest topics in pole building design: Pole Barn Truss Spacing

What do you mean they aren’t 2 feet apart?

Back in the day (early 1990’s) I was on the National Frame Builders Association (NFBA) Board of Directors. One of my fellow board members from the Midwest wanted to take a peek at how pole barns were constructed in the West, so I invited him out for a tour.

After spending a day looking at several of our building projects, his comment to me was, “The inspectors in our area would never let a pole building be constructed with roof trusses placed every 12 feet”.

Twenty years later, I beg to differ. Hansen Buildings has buildings in each of the 50 states and all of them have roof trusses on what my board member friend would describe as being “widely spaced”.

Framed Pole Barn

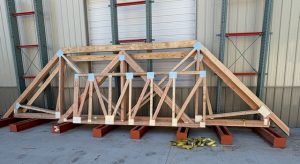
Modern truss design is highly computerized. Enter the span of the truss, bay spacing and load conditions and the engineering programs will design a truss spacing which will meet the design criteria. The lumber and steel plates the trusses are constructed from, have no idea how far apart they are going to be placed.  They are inanimate! Yet, somewhere in the deep, dark reaches of history, lies the theory wood trusses must be spaced no more than 24” on center, or maybe 48”, or perhaps even eight or ten feet? The reality is, there is no magic number.

While H. Howard Doane is credited with being the innovator of the modern pole barn, it was his Agricultural Service farm manager, Bernon Perkins, who is credited with refining the evolution of the modern pole building to a long-lasting structure.  It was Perkins who pioneered roof purlins being placed on edge. With this design change, roof trusses could be placed 12 feet apart, making it possible for roofs to support the loads to which they would be subjected.

I’ve had roof truss manufacturers try to convince me it is impossible to place wood trusses at spacings of over every 4 feet. Their defense is, “Our engineers will not allow us to”. The manufacturers of the steel roof truss plates (also referred to as gussets or Gang-nails), provide the engineering design for pre-fabricated wood trusses. Their programs will allow for trusses to be placed on 12 foot or even 16 foot centers, and their engineers will place their engineer’s seal on the drawings to verify.

The practicality, cost effectiveness and ease of construction of pole buildings is based upon efficient use of the fewest amount of materials, to do the most work, within safe engineering design. Hundreds of thousands of pole barns are in use today with truss spacing every 12 feet, or even more. They stand as a tribute to the ingenuity of modern pole building design.


Roof Trusses: Planes, Trains and Automobiles

Roof Trusses: Planes, Trains & Automobiles

Usually none of these get hung from the bottom chords of roof trusses, however lots of other things can be.

Standard pole building truss designs will support only the extra weight of minimal lighting and electrical. Don’t panic, virtually anything can be supported from your pole barn trusses and we can design for it – as long as you let us know what it is, in advance.

I know I’m going to get “the eye” from my wife if I tell this story, but sometimes I just can’t help myself!  One day ten years ago shortly before my wife and I got married, I happened to look up into the trusses in her garage.  I don’t know a better way to say this, but after my jaw hit the floor, I wasn’t sure if I should stand there and risk having 20 years of “stuff” come crashing down on me, or just do the smart thing and….RUN for my life!

Up above in her trusses was camping gear, and I’m talking serious camping gear: tents, chairs, camp stove, and….a huge tent.  This was just the beginning.  Ski gear with tow ropes, at least 3 sets of skis, a dozen life vests, wake boards and boat ladder occupied another corner of the “loft” area.  Close to the front door was the “garden section”: pots and planters of all sizes, rolls of black liner for garden beds, weed eaters (one gas, one electric) and for some odd reason, snow shovels.

Junk stored above the trusses

Do you have junk in your ...truss?

Next was the “seasonal decorations” area – Christmas, Easter, Halloween and enough tubs of Christmas lights to outfit 5 or 6 homes!  Lastly and probably the most confusing, was an assortment of “miscellaneous” boxes.  I’m talking 18 to 20 boxes, some of which I could barely haul down they were so heavy. To my dumbfounded query, “what IS all this stuff?” she quipped, “You know – those things you really don’t need any more but can’t bear to part with”!

Being the compassionate, sensitive, guy I am (read this as scared!) to really voice my major objections to this unfathomable “load” in her trusses, I gently broached the subject: “Um darlin’, so – you had the trusses of your garage designed to carry all this extra load….right?”  I cringed and dove for cover as she indignantly answered, “Load?  All the stuff FITS up there, doesn’t it?  And after 20 years it’s not fallen down yet, so what’s the problem?”  Since I sensed a bit of exasperation in her voice, I carefully explained the importance of supporting “whatever you are putting up there”.

And I am now happy to report, after ten years of marriage and letting her sons take turns living in her former home, she finally consented to bringing down all the “stuff” in her garage.  (OK, so I nagged a bit about it – I’m a Building Guru, what do you expect?) But now if the roof on her old garage falls down, “you know who” is going to be saying, “Told you so”!

So back to designing your roof trusses for increased loads.  The most popular – is 5/8” sheetrock, attached to ceiling joists hung between the trusses. Ever considering having a dry walled ceiling? If so, just order your new pole building with ceiling loaded trusses.

Just killed or planning on killing an elk? An average adult male elk weighs about 1000#. Tell us in advance and we can have the trusses designed to be able to support the extra weight.

How about pulling engines? That 700 to 800 pound V-8 engine can be accounted for – again, we just need to know about it, as well as where on the trusses you plan to pick up the load.

Moveable crane? While tracks are best and easiest attached to the inside of the sidewall columns, the tracks can also be mounted to the bottom of the trusses.

Whether it is light or heavy, your favorite toy or your spouse’s hundred plus boxes of “stuff I just can’t part with”, if you want to hang it from your trusses, just let us know!

To receive more pole building tips and advice subscribe to the pole barn guru blog!