Tag Archives: pole building construction

5 Places or Spaces Perfect for Pole Buildings

Gambrel Concessions BuildingWe took a look at some of America’s most wide open spaces and thought hard about how climate, severe weather, wind, and seasonal changes affect the ability of a sturdy pole building to provide housing, commercial office space, and industrial warehouse storage.

It may come as no surprise that the majority of the locations we selected were part of the American South. That doesn’t mean that our great northern states aren’t wonderful places to experience life, but it does mean that the bounty of land and the relative calm of the southern warmth make for some unbeatable pole barn conditions.

Texas

One of the most spacious states also happens to be one of the calmest when it comes to natural disasters. A pole barn suits Texas quite well. Although the coastline falls into the Gulf of Mexico, inland Texas only sees an occasional flood. It lies just outside of tornado alley, which means storms from the north and south typically weaken before they hit the heart of Texas.

On top of that, snow in Texas is rare. You may see an inch or two of snow in most parts of the state once every 5-10 years. That means you don’t have to worry about load-bearing for heavy snow or complex heating systems. You will, however, probably need to consider serious insulation and an efficient air conditioning system.

Still, the countless acres of ranch land that are constantly up for grabs rest outside the city limits of most major cities, which means it’s easier for you to get the permits you need to build and your restrictions will be, well, less strict. We’d still recommend some quality grading for wind, however, for the occasional storm that has a hard time dissipating.

Georgia

Georgia may not have the same massive tracts of land that Texas does, but it still has gorgeous weather and has about the same propensity for natural disasters that Texas does. Floods are its most frequent trouble, but planning your pole building accordingly should negate any severe damage.

Northern Georgia does see the occasional winter storm, most of which are quick to knock out power. If you want to build your pole barn in the northern part of the state, make sure you prepare your roof to handle large amounts of snow that build up rapidly.

Other than that, Georgia enjoys four distinct seasons in most of the state. That means with proper ventilation, you can save money on heating and cooling your pole building. Plus, you can build outside of the city limits of cities like Atlanta and still commute to and from work!

Oregon

What’s unique about Oregon is its topography, which lends itself to a climate that changes depending on where you are in the state. While pole barns in Oregon need lots of support for snow and top-quality heating systems, there’s also lots of rolling land on which smart homeowners can build affordable pole buildings.

Its proximity to the Pacific Ocean doesn’t open the state up to many disasters. More than floods and tsunamis, Oregon contends with landslides and earthquakes. However, major occurrences are extremely rare and most pole buildings can be built to withstand minor jolts and impacts.

Arizona

Drought and dust storms are nature’s claim to fame in the dry lands of Arizona. What’s cool about the state, though, is that its sandy and rocky terrain make it easy for builders to quickly assemble pole buildings that are graded for wind-resistance.

Land in Arizona is relatively inexpensive, and when you combine the cost of land purchase with the construction of a pole building, you’ll find that the total cost of putting together a workspace or a home in Arizona is incredibly low. Though you may need a combination air conditioning and heating system to contend with fluctuating temperatures, you’ll save plenty in pole barn construction and maintenance to purchase one.

Nebraska

Though parts of central Nebraska are prone to tornadoes, we recommend placing a pole building on the east or west side of the state. In the east, you can build a home or office space just outside of Omaha and stay within arm’s reach of the big city.

Lincoln also isn’t far off in the East, and there’s land to the North and South between the two cities that’s likely more lenient when it comes to building pole buildings. Nebraska also sees some rough winters and summers, but only in the depth of each. The rest of the seasons are fairly mild, so conditions stay ideal for pole buildings for most of the calendar year.

Your New Building: Can You Build It Yourself?

Can you really build your own pole building?

In short – of course you can!

For those who will look at the plans and read the directions, you will build a far better building than hiring it done. Why?  ‘Cause you will follow the instructions and take the time and care with your building! As I tell most clients who are doubtful they have what it takes –“Hey – it’s not rocket science!” You just have to be willing to read and follow all the directions.

Those people who say to me, “I can build anything” are the ones who really scare me.  I get far more phone calls from these types saying they are “short” or “long” on pieces…and neither one is the right answer. Just about every single time it’s because they did not read the directions!

 Take this simple test to see if you can build it yourself:

  1. Have you read this far and understand what I’m talking about?

Good!  One down and one to go!

2. Do you know what a hammer is because you’ve seen it in the garage or found

one in the kitchen drawer?

Yes? You SCORE!    You are my type of builder – you can build a nice building.

OK – maybe it’s not quite that simple.  But the attitude of “this is a kit and I will have to do cutting, pounding nails and reading the plans and directions” – goes a long way in my book.

Important factors to consider prior to taking on a build it yourself project are physical ability and …time. We’ve had individuals in their 80’s build their own buildings, but they were in good physical condition.  Nothing like Ma out there on top of the building putting on the roof steel – cuz’ Pa is afraid of heights!

Ok  – I’m tattling on myself here – because when my wife and I recently helped one of our grown sons to build a garage…well….yep – I confess – it was my darling bride up there on the roof in the hot Tennessee sun putting on the roof steel and ridge cap. Made me want to marry her all over again!

Time is….yes…money.  You need to weigh in the average number of hours involved in constructing your own building as compared to paying to have it built. The “break even” cost is about $20 an hour.  If you can make $40 an hour doing what you do for a living, you may want to consider paying to have your building constructed for you.  This assumes you are relatively “construction challenged”  – i.e. – “unskilled labor”.

And then there are those who really relish the whole “weekend warrior” thing and take pride in constructing their own building.  I’ve known guys who round up their buddies for a several weekends and take turns working on each other’s new garages.  The equipment, tools, labor…and the beers they tossed down at the end of the day were shared with camaraderie and pride in their joint accomplishment. One family got their entire host of relatives gathered while “Dad” was on vacation – and built him a new workshop/garage…as a surprise. The look they captured on his face when he returned home and had a new garage for his RV was amazing!

Whether you decide to construct your own building to save money, or just enjoy the challenge and adventure of a build it yourself project, make sure you get easy to read and understand plans and directions. These should be plans most engineers would endorse.  This is not a place to “make it up as you go along”.  And definitely is not where you take direction from an old friend because “he built a garage once and it looked ok”.  Do diligent research, get your tools (and friends or relatives) lined up, and then…have fun!

Solving a Massive Pole Building Grade Change

Solving Massive Post Frame Building Grade Change

Most everything about post frame building construction is predicated upon “your clear, level site”. But, what happens when (like most of our planet) there is not a flat level place to start with – instead there exists massive amounts of grade change?

Hansen Pole Buildings’ Designer Doug ran into one of these situations recently and shot up a distress flare looking for some advice:

“Anybody have an opinion on what be the most cost effective or least painful
course of action for this soon to be-I hope-client?”

Here is information from Doug’s client:

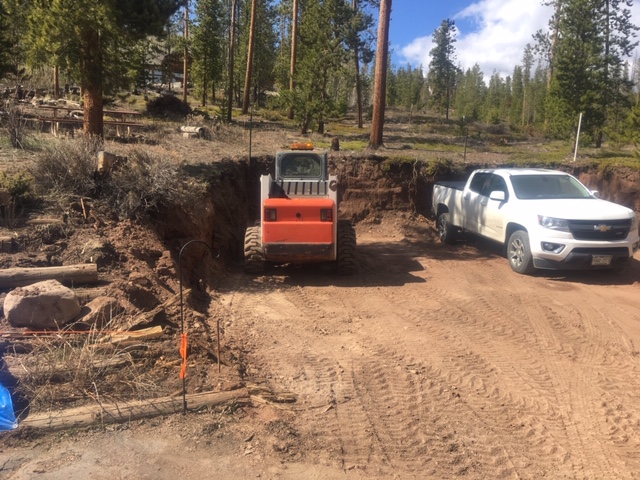
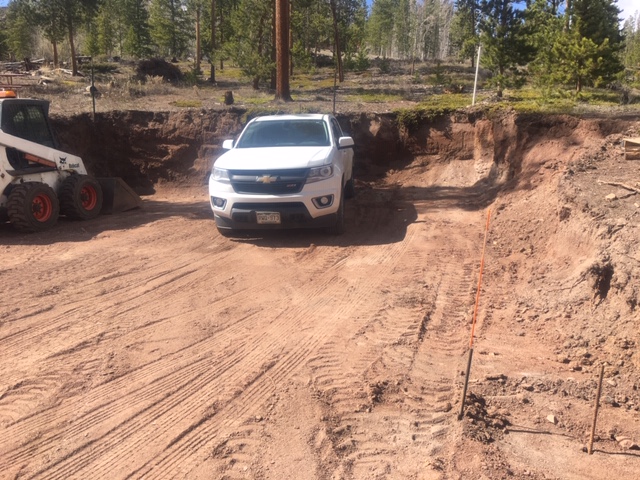
“Attached are pictures of the dig to the right of my driveway cutting into
the hillside. On the left side in front of the Bobcat appears to be close to
finished grade. The cut at that point is nearly 7 feet tall. The soil type
is decomposed granite. With a few spots of stubborn rock.

My options at this point are to build a engineered retaining wall to hold
back the soil before building a pole barn on the flat spot, with drainage
coming from around the back to the front. The other option is to just do a
spread footing with a foundation wall. and then a curb wall of a 2 x 6 on
top of that.

The most creative thought would be to do both in the same wall. The wall
would be supported in and by itself, and the building would stand next to the
wall, supported on posts with loads at the post, and not on top of the wall.
Is that even possible?
Thanks
Bobby”

Mike the Pole Barn Guru writes:

Well, luckily or unluckily, I have a similar situation on one of my own personal post frame buildings at Newman Lake, Washington. Here was what we came up with as a best solution: https://www.hansenpolebuildings.com/2012/02/grade-change/. In this scenario, our post frame wall columns are mounted to ICFs on “cut” sides and traditionally embedded on flat or low sides.

Post frame construction is moving pedal to floor into residential markets where these types of scenarios are going to appear more and more.

I can see these types of scenarios being eventually added as options to Hansen Pole Buildings’ “Instant Pricing™” system where we could not only design and price but also provide blocks, connectors and needed rebar.

Just more moves in providing “The Ultimate Post-Frame Building Experience™”

Considering constructing on a less than ideal site? Call 1(866)200-9657 and discuss your situation with a Hansen Pole Buildings’ Designer today.

5 Places or Spaces Perfect for Pole Buildings

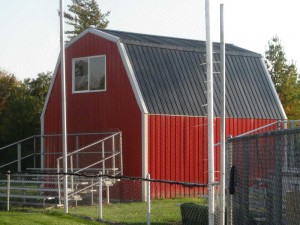
Gambrel Concessions BuildingWe took a look at some of America’s most wide open spaces and thought hard about how climate, severe weather, wind, and seasonal changes affect the ability of a sturdy pole building to provide housing, commercial office space, and industrial warehouse storage.

It may come as no surprise that the majority of the locations we selected were part of the American South. That doesn’t mean that our great northern states aren’t wonderful places to experience life, but it does mean that the bounty of land and the relative calm of the southern warmth make for some unbeatable pole barn conditions.

Texas

One of the most spacious states also happens to be one of the calmest when it comes to natural disasters. A pole barn suits Texas quite well. Although the coastline falls into the Gulf of Mexico, inland Texas only sees an occasional flood. It lies just outside of tornado alley, which means storms from the north and south typically weaken before they hit the heart of Texas.

On top of that, snow in Texas is rare. You may see an inch or two of snow in most parts of the state once every 5-10 years. That means you don’t have to worry about load-bearing for heavy snow or complex heating systems. You will, however, probably need to consider serious insulation and an efficient air conditioning system.

Still, the countless acres of ranch land that are constantly up for grabs rest outside the city limits of most major cities, which means it’s easier for you to get the permits you need to build and your restrictions will be, well, less strict. We’d still recommend some quality grading for wind, however, for the occasional storm that has a hard time dissipating.

Georgia

Georgia may not have the same massive tracts of land that Texas does, but it still has gorgeous weather and has about the same propensity for natural disasters that Texas does. Floods are its most frequent trouble, but planning your pole building accordingly should negate any severe damage.

Northern Georgia does see the occasional winter storm, most of which are quick to knock out power. If you want to build your pole barn in the northern part of the state, make sure you prepare your roof to handle large amounts of snow that build up rapidly.

Other than that, Georgia enjoys four distinct seasons in most of the state. That means with proper ventilation, you can save money on heating and cooling your pole building. Plus, you can build outside of the city limits of cities like Atlanta and still commute to and from work!

Oregon

What’s unique about Oregon is its topography, which lends itself to a climate that changes depending on where you are in the state. While pole barns in Oregon need lots of support for snow and top-quality heating systems, there’s also lots of rolling land on which smart homeowners can build affordable pole buildings.

Its proximity to the Pacific Ocean doesn’t open the state up to many disasters. More than floods and tsunamis, Oregon contends with landslides and earthquakes. However, major occurrences are extremely rare and most pole buildings can be built to withstand minor jolts and impacts.

Arizona

Drought and dust storms are nature’s claim to fame in the dry lands of Arizona. What’s cool about the state, though, is that its sandy and rocky terrain make it easy for builders to quickly assemble pole buildings that are graded for wind-resistance.

Land in Arizona is relatively inexpensive, and when you combine the cost of land purchase with the construction of a pole building, you’ll find that the total cost of putting together a workspace or a home in Arizona is incredibly low. Though you may need a combination air conditioning and heating system to contend with fluctuating temperatures, you’ll save plenty in pole barn construction and maintenance to purchase one.

Nebraska

Though parts of central Nebraska are prone to tornadoes, we recommend placing a pole building on the east or west side of the state. In the east, you can build a home or office space just outside of Omaha and stay within arm’s reach of the big city.

Lincoln also isn’t far off in the East, and there’s land to the North and South between the two cities that’s likely more lenient when it comes to building pole buildings. Nebraska also sees some rough winters and summers, but only in the depth of each. The rest of the seasons are fairly mild, so conditions stay ideal for pole buildings for most of the calendar year.
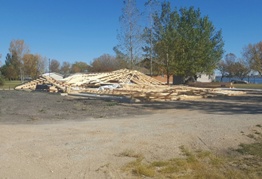
Steel Stretcher Needed

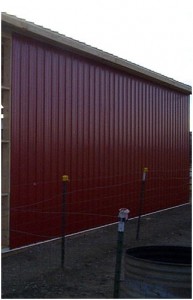
Along with this photo came the message: “The Contractor I hired to put up the building will be sending you video from his cell phone sometime today.

In the meantime I have taken two photos: one of the gable end and the other of the side wall. The side wall panels are perfect and the end gable ends are 6 inches too short on the high side.”

Just at a cursory glance, the workmanship on the building looks pretty clean. Now I am going to take you just a little closer into it.

Well, maybe this photo needs to be revisited…..

steel stretcherLook up at the top of the red wall steel. What do you see?

If you said, “wood”, you are correct about what you are seeing.

Unfortunately for the builder, there is not supposed to be wood showing at this part of the building! The wall steel is supposed to run up into an inverted piece of J Channel trim which is placed tight against the underside of the roof steel.

What does all of this mean?

It means the building is built six inches too tall!

My loyal readers have read over and over with me harping on this subject so many times they probably have blood shooting out of their eyes at the very thought of another builder who didn’t pay attention to the measure of eave height being shown on the plans five times on three different pages. Not to mention the Construction Manual which is almost annoying outlining how to measure eave height over and over again throughout the chapters.

One might notice the symbolism between the number of times eave height is mentioned in the Hansen Pole Buildings Construction Manual (51) and the infamous Area 51 of UFO and conspiracy theory claims. When it comes to some building contractors, I’m wondering if the extraterrestrials experimented on them!

This is a builder who could have used my patent pending eave height tape measure (https://www.hansenpolebuildings.com/blog/2015/02/eave-height-2/).

Camels Have Humps: Fascias Should Not

We are on day 4 of working on a garage for my oldest step-son’s father-in-law in Happy Valley Tennessee.  You might want to skip back to Monday of this week, and skim through to catch on my day by day account of building a garage. – Last I left you, we encountered a problem of a “bump” in the fascia…which needed to be fixed before moving on. After running all kinds of stringlines and checking all of our measurements, we found the problem with the camel’s hump…er, fascia.

Pole Building FasciaThe truss notch on the left side of the building, where we set the first truss, was 1-1/2” higher than it should have been! The fix to the fascia was easier than one might imagine. The eave purlins were removed at this point, and the 5” ledgerlocks which held the trusses to the column were removed. Using his trusty Sawsall, step-son Jake cut the notch 1-1/2” lower, the truss was dropped into place and the fascia straightened itself right out.  Whew!  Major crises averted.
Aren’t pole buildings wonderfully forgiving? All of this fix was handled in less than the time it took for the dew to evaporate so more roofing could be installed. The right side was completed and it was on to the left.

The left side was not quite as perfect as the right side – it was off by 1/8” in diagonal, which was quickly fixed by just leaning a 2×6 against a corner column!  Once corrected and roof steel screwed into place, we had a roof with absolutely perfect dimensions.

No other challenges came up on the roof (other than unbearable heat).

Now it was time to run soffit. The right sidewall had a slight issue. Remember the truss we placed by hand? Not only was the left side too high (fixed above), but on the right side, where the end of the truss bottom chord should have been even with the outside edge of the column – it wasn’t!

The top of this one post was out by ¾” of an inch. The solution was easy.  We removed the 2×4 soffit support “L”, cut into it by the ¾” and reinstall. Soffit was now straight and the top of the wall would be straight. The ¾” across the wall from top to bottom would be impossible to see in the siding.

Granted, some of the “issues” we encountered should not have happened.  But even for the most experienced of crews, when you have many hands working on a project, sometimes “stuff happens”.  This is just a good illustration of how “forgiving” pole buildings can be.

Dial 9-1-1 for Pole Building Contractor!

When I opened my first business, back in 1981 (yes, I am dating myself), my first regular repeat client was a fireman from Woodburn, Oregon. He was a great person to deal with, always paid his bills on time, and never complained. I’d nearly forgotten about him, until I heard the following saga from a couple who had some interesting contractor experiences.

A couple years ago, they had purchased a 1960’s home and needed a combination garage and shop. As first-time home owners, they were prepared for the noise, dust and dirt of construction. What they weren’t prepared for how hard it was to find a good contractor.

They phoned contractors with websites having great customer testimonials and reached out to friends of friends, producing a short-list of candidates who they expected would be professional and provide fair price estimates.

Right.

The first contractor arrived with professionalism and a sense of humor.  He even took off his shoes upon entering their home.  He knew all the right things to say, promising great things for their new pole building.

“This is so easy!” they said to themselves excitedly. They never heard from him again.

The second contractor seemed like a cross between a newly sprung criminal and the creepy guy who offers candy to little girls. To top it off within the short time he was there, he said they needed $4,000 worth of electrical work to put in a temporary power pole to plug in all of his tools while the crew put up the building.  Yet their house, with a 20 amp GFI outlet was only 30 feet away. They let him stay for 10 minutes then escorted him out.

The third contractor was a friend of a close friend.  He and his business partner seemed like nice guys, until they wanted to charge $5,000 to scrape the sod off where the new building would be–or as they liked to call it, for “site prep.”  Not to build the building.  Just to literally remove the lawn where the 30 x 36 pole barn would be.

To them it seemed they had made a major mistake by already buying the pole building kit package. The materials sat in their backyard, with “lovely” blue tarps over them. The contractors no doubt realized they weren’t going to make money off of the customary mark-up they would have taken. Plus, they appeared to be in a desperate situation.  Either the contractors thought “let’s get ‘em on obscene labor charges” or it just wasn’t a big enough ticket job.

Fortunately, they had been smart enough at the outset to ask another friend of a friend —a contractor who couldn’t do the job because he wasn’t licensed in their state—for his estimate.  He came and gave his estimate before any of the contractors came.  So they had a number to work off of to prepare the site, erect the pole building and pour the concrete floor and approaches.

After the three contractors came and went, the wife came up with a brilliant idea: One of their friends was a volunteer firefighter and knew firefighters who were contractors.  Apparently, many firefighters work in construction for their second job, since they have so many hours off.  Their friend put them in touch with his friend, a firefighter-contractor.

When he walked through the door, they had an instant feeling of sanity.  He was clean, well-spoken, understood their budgetary concerns and in the end, gave them a reasonable estimate which was only ¾ of their budget number.

The work went swimmingly.  They were happy with the craftsmanship, the contractor’s crew (firefighters, EMTs and other heroic professionals), adherence to Building Department rules and the overall time of two weeks total to complete the entire job.

Through the project they learned if you want the job done right, try your friendly, neighborhood firefighter. Maybe one day there’ll be a 911 for pole buildings!

Your New Building: Can You Build It Yourself?

Can you really build your own pole building?

In short – of course you can!

For those who will look at the plans and read the directions, you will build a far better building than hiring it done. Why?  ‘Cause you will follow the instructions and take the time and care with your building! As I tell most clients who are doubtful they have what it takes –“Hey – it’s not rocket science!” You just have to be willing to read and follow all the directions.

Those people who say to me, “I can build anything” are the ones who really scare me.  I get far more phone calls from these types saying they are “short” or “long” on pieces…and neither one is the right answer. Just about every single time it’s because they did not read the directions!

 Take this simple test to see if you can build it yourself:

  1. Have you read this far and understand what I’m talking about?

Good!  One down and one to go!

2. Do you know what a hammer is because you’ve seen it in the garage or found

one in the kitchen drawer?

Yes? You SCORE!    You are my type of builder – you can build a nice building.

OK – maybe it’s not quite that simple.  But the attitude of “this is a kit and I will have to do cutting, pounding nails and reading the plans and directions” – goes a long way in my book.

Important factors to consider prior to taking on a build it yourself project are physical ability and …time. We’ve had individuals in their 80’s build their own buildings, but they were in good physical condition.  Nothing like Ma out there on top of the building putting on the roof steel – cuz’ Pa is afraid of heights!

Ok  – I’m tattling on myself here – because when my wife and I recently helped one of our grown sons to build a garage…well….yep – I confess – it was my darling bride up there on the roof in the hot Tennessee sun putting on the roof steel and ridge cap. Made me want to marry her all over again!

Time is….yes…money.  You need to weigh in the average number of hours involved in constructing your own building as compared to paying to have it built. The “break even” cost is about $20 an hour.  If you can make $40 an hour doing what you do for a living, you may want to consider paying to have your building constructed for you.  This assumes you are relatively “construction challenged”  – i.e. – “unskilled labor”.

And then there are those who really relish the whole “weekend warrior” thing and take pride in constructing their own building.  I’ve known guys who round up their buddies for a several weekends and take turns working on each other’s new garages.  The equipment, tools, labor…and the beers they tossed down at the end of the day were shared with camaraderie and pride in their joint accomplishment. One family got their entire host of relatives gathered while “Dad” was on vacation – and built him a new workshop/garage…as a surprise. The look they captured on his face when he returned home and had a new garage for his RV was amazing!

Whether you decide to construct your own building to save money, or just enjoy the challenge and adventure of a build it yourself project, make sure you get easy to read and understand plans and directions. These should be plans most engineers would endorse.  This is not a place to “make it up as you go along”.  And definitely is not where you take direction from an old friend because “he built a garage once and it looked ok”.  Do diligent research, get your tools (and friends or relatives) lined up, and then…have fun!

Pole Building Construction: Why Not Stick Frame?

If you didn’t read my blog from yesterday- it’s well worth reading, and short, so I’ll wait while you go back and pick it up.

Got it?  That’s right, stick framed construction, while being more of the “norm” than pole building construction, is habitually wasteful of materials and manpower.  I’m not saying there are “places to use stick built construction”….but to continue my story from yesterday…

Same size pole building.  Rent a skid loader, have it delivered, and under two hours will auger all of the holes. Concrete? 2 to 3 yards. Total cost, around $600.

The stick frame version added at least five dollars per square foot to the building cost, before getting anything happening above grade! At 20 times or more the cost of the pole building foundation….it is no bargain. Not to mention the time difference. By the time the concrete foundation is ready to be built upon, the pole building has been completed and is being used.
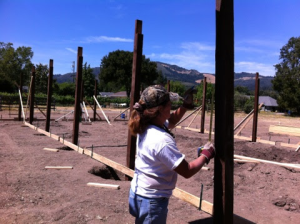
Remember Dorothy’s house flying away in the Wizard of Oz? Modern stick frame construction relies upon ½” anchor bolts or light gauge steel straps to connect the house to the concrete foundation. How many disaster photos have you seen with homes picked up from their foundations? Make you feel confident? With pole buildings, the pressure preservative treated columns, which form the main supports, run continuous from about four feet in the ground and embedded in concrete, all the way to the roof system.

You may be surprised to discover the International Building Codes actually do limit conventional stud wall construction. Bearing wall floor-to-floor heights shall not exceed 10’. Average dead loads shall not exceed 15 pounds per square foot (psf) for roofs and exterior walls, floors and partitions. Floor live loads are limited to 40 psf. Ground snow loads shall not exceed 50 psf. Wind speeds are limited to 110 mph in Exposure B, or 100 mph in Exposures C and D. Roof trusses can only span to 40 feet between vertical supports. Cases where any of the above are exceeded, require structural analysis by a registered design professional (an architect or engineer).

Pole buildings can be designed with bearing wall heights of 20 and even 30 feet or more. Floor live loads of 125 psf are not unusual. Ground snow loads approaching or over 200 psf – no problem. Wind speeds of 150 mph, even in severe wind exposures and truss spans of 80 to 100 feet are also very much “doable” with pole barn design construction.

When it comes to cost, speed and flexibility of design, pole building construction beats stick frame construction hands down.

I didn’t come by this lightly.  My Daddy was a framing contractor –and my three uncles with him,  for stick built stud wall construction.  That’s right, stick built.  I was “born and raised” in stud wall construction.  But years of experience and plainly visible evidence changed my focus.  Having Scotch blood in me didn’t hurt either.  You just can’t argue with strong, safe design, and saving a few dollars along the way!

Preventing Frost Heaves in Pole Building Construction

Hopefully you’ve been riding along with me here on my frost heave “horse” over the past two days, with background information provided by Harris Hyman, P.E.  If not, you can quickly click on the past two day’s blogs, and catch up.  Or…. skip ahead here if you want the “down and dirty” on what to do about frost heaves.

A solution to frost heaves in pole building construction is relatively simple and is supported by the building codes. When digging the holes for the building columns, make sure the bottom of the hole is below the frost line. Widen out the bottom of the hole, so it is several inches larger in diameter than the upper portion of the hole. Backfill the bottom of the hole, including the column base with premix concrete. The weight and size of the concrete plus the weight of the earth above the footing will hold the post down.
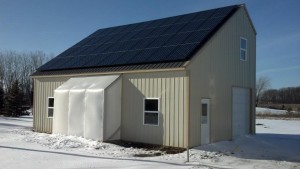
Good building site preparation can minimize or eliminate potential frost heaves beneath concrete slabs. Remove all sod and vegetation, as well as topsoil (which can be stockpiled for later use in finish grading). Remove any clay or silty soil from within the future building “footprint”. Replace subsoil removed from around building with granulated fill to help drain subsurface water from building.

Distribute all fill, large debris free (no pit run), uniformly around site in layers no deeper than six inches. To maintain frost-free soils sub-base should be such that no more than 5% (by weight) will pass the No. 200 sieve, and it is further desired no more than 2% be finer than .02 mm.Compact each layer to a minimum 90% of a Modified Proctor Density before next layer is added.  Usually, adequate compaction takes more than driving over fill with a dump truck, or earth moving equipment. A large vibratory compactor, or road roller (aka “steam roller) is best used to achieve a proper degree of compaction.

Prior to pouring concrete,  spread 2” to 6” of clean and drained sand or sandy gravel below where concrete is to be poured. Mechanically compact the fill, so as not to cause the slab to sink. Install a good well-sealed vapor barrier (such as 15mil black plastic) below any interior pour, to stop moisture from traveling up into slab through capillary action. If not using fiber-mesh or similar reinforcement additives to concrete mixture, place wire mesh or rebar (reinforcing steel or fiberglass rods) in slab center to add rigidity to concrete to aid in minimizing cracking.

And there you go!  As the saying goes, “an ounce of prevention is worth a pound of cure.”  We’ve followed these practices over the past over 33 years of 14,000 plus buildings, and I’ve yet to have anyone report their building “heaving” due to frost.  If you don’t work to prevent it, I can guarantee the “cure” will not be pretty!  Have a good weekend all – see you back Monday with “Why not stick-built construction”?

Green Pole Barns

Green building is one of the most dynamic market forces in construction today. Pole buildings are considered sustainable, but until very recently little documentation existed on the energy efficiency and the reduced impact on the environment created by pole barns.

“Green building” is based on producing more sustainable buildings and is the basis for green building certification systems. These include the Leadership in Energy and Environmental Design (L.E.E.D.), Green Globes, National Green Building Standard and the International Green Construction Code. These certification systems encourage many building practices including the use of recycled, regionally produced and rapidly renewable materials.

Current pole barn construction methods contain many green elements. Green pole barns support reduced site disturbance, less wood required for the structural system, engineered roof systems, wall and roof cavities with room to accommodate insulation to meet International Energy Conservation Code requirements (a must for many green building systems) and flexibility of interior design due to the absence of interior walls and partitions.

One area of study to help support the claims of pole building construction as a green building method is the building’s life cycle — a collection of all inputs (materials and energy) and outputs (product, waste, emissions) required by a structure for the intended service life of a building. The IGCC, the National Green Building Standard and Green Globes include a whole-building Life Cycle Analysis, however currently no green building certification system requires it. It’s important to note, however, green building systems are constantly undergoing evolution. The need to document the environmental effectiveness of buildings, particularly green pole barns, will only continue to increase.

Life-cycle costing (LCC)   is a method to determine the entire cost over a product’s intended life cycle. For buildings, the main factors considered are initial cost, operating costs, replacement costs and maintenance or repair costs. This economic assessment includes detailed energy modeling of the structure. It does not include environmental impacts of the building and is not currently included in any of the green building certification systems. The main use for LCC is a purchasing tool for predicting the expected costs of a structure, rather than focusing only on the initial construction costs.

Building owners, engineers, architects and other specifiers should be aware – in most low rise buildings, pole building systems can reduce the amount of structural materials used compared to other types of construction.  As Green Buildings become more popular and in higher demand, pole buildings in comparison to other types of building designs, will be the hands down winner.

Happy 4th of July!

Fireworks by the family pole building

Fireworks by the family pole building

Independence Day

The Fourth of July means lots of things, to lots of different people in the United States. For many, it is the holiest of fireworks oriented days off from work. For others, it means working while everyone else plays.

In doing research for this blog, I was inspired by material written by Fenzel (he is a writer from Cambridge, MA). He was writing about the movie Independence Day and its lots of small and solitary scenes:

They’re scenes for an American way of life — doing our part away from the group; away from the cushion of culture and community. The broader American way of life encourages individualism and independence in common cause — a trust that our combined efforts, though largely uncoordinated, will bring about great things…”

The rugged individualism of the American spirit is what evolved the modern pole building concept. During World War II, determined to hold wartime public spending to a minimum, the United States government placed a $1500 ceiling on what could be spent on a new barn.

As much as apple pie, the barn had become a staple in the fabric of rural Americana. The ingenuity which had fueled American innovation was not absent in finding solutions to this dilemma. Working from the concepts originated during the Great Depression, by pioneers such as Howard Doane and Bernon Perkins, these rural heroes arrived at a solution.

By utilizing the concepts of pole building construction, the materials required to build a pole barn were reduced by an amazing two thirds! Besides being material and cost efficient, pole buildings have also been proven to be tremendously resistant to climactic loads, such as wind and snow.

Over the last few generations, pole barns have evolved from being just economical farm buildings, to being utilized for a plethora of solutions. Now, after you are done enjoying your holiday, it is very possible your “toys” (the RV, camper, boat, jet ski or motorcycle), will be parked back in your own pole building, when you return to work on Tuesday. Happy 4th Everyone!