Tag Archives: pole building foundation

Foundations

Foundations – Post Frame Keeps It Simple

Post frame (pole building) construction affords a plethora of savings for a new building owner, chief amongst these are foundation simplicity. I’ve previously expounded upon foundation savings in post frame construction as compared to stick frame buildings: https://www.hansenpolebuildings.com/2011/10/buildings-why-not-stick-frame-construction/.

Today I will add some graphics to reinforce (pun intended) complexities of non-post frame foundations.

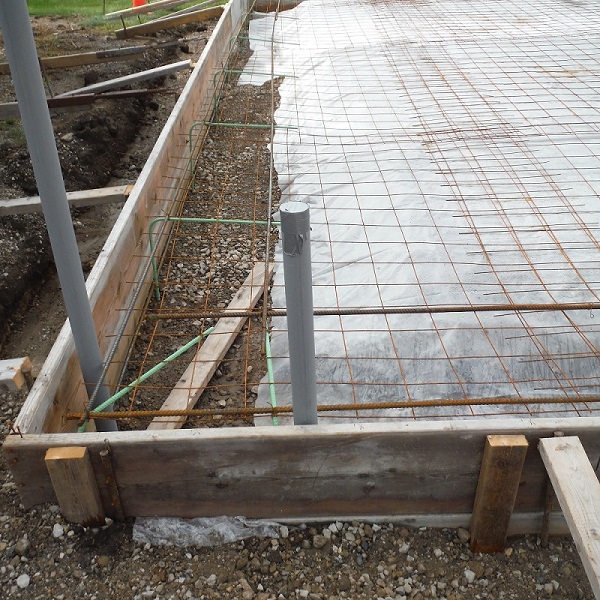
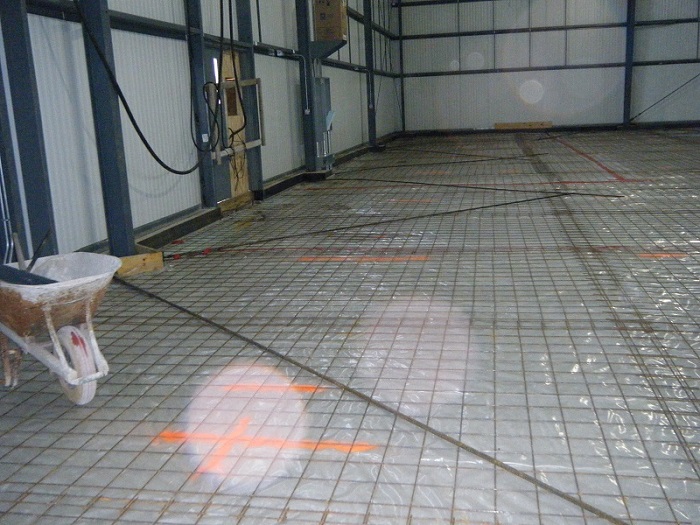
Excavation, rebar and welded wire mesh in place for a thickened edge slab foundation for stud wall construction. In this case slab edges require a double row of rebar where thickness will be 16 inches. This foundation and floor system assumes a light weight building and must be poured upon undisturbed or properly compacted soil with adequate load bearing capability. Shallow foundation and concrete slab on grade are poured concurrently.

For an engineered steel building, foundations are more complex than for post frame construction. There is a continuous footing and foundation wall around the building perimeter, with reinforced piers to support steel column bearing points. Piers have embedded anchor bolts (requiring exact and accurate placement) to attach steel frame bases.

Top of foundation wall allows for attaching steel wall panels as well as support for any masonry veneer, if required for aesthetic purposes. Each steel column base has a rebar hairpin (usually two 20 foot long rebar sticks). These hairpins tie columns into concrete floor to reduce the tendency of column bottoms to move outward when loads are applied to the building.

Post frame (pole barn) construction utilizes a low-tech foundation system able to be successfully completed by even semi-skilled workers or an average DIY building owner. Face it, augering a hole in the ground makes for a fairly simple and affordable foundation system – eliminating any need for extensive excavations, often with a need for expensive equipment.

Looking for a design solution for your new building with flexibility and cost effectiveness? In most cases, look no further than post frame construction!


Post Frame Homes Proliferate

Post Frame Homes Proliferate

Post frame homes have been a well-kept secret for decades. Well, not only is the bag the cat was in open, but the cat has also leaped out and is running rampantly!

Here at Hansen Pole Buildings, we have noticed a significant surge in requests for quotes, as well as general interest, in residential post frame construction. And, it isn’t just us who are noticing the trend.

Cindy Orschell is the executive director of the Franklin County (Indiana) Area Plan Commission and Building Department. When questioned about what is hot in building she reported, “The trend we are seeing a lot of are pole construction homes”.

There are many possible reasons for the increased interest, one of which is cost.  My brother wrote his thesis on the savings of post frame construction for Habitat for Humanity homes probably 30 years ago, so this is nothing new. It was seven years ago when I penned an article outlining the savings in foundation costs (which have only increased since): https://www.hansenpolebuildings.com/2011/10/buildings-why-not-stick-frame-construction/.

Virtually any stick frame building floor plan or elevation can be converted to a post frame building. For this reason, Hansen Pole Buildings does not offer choices for post frame homes on our website. See something you like? It can be done.

How much is it going to cost?

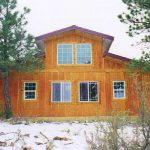
Hansen Pole Buildings GuesthouseThe structural system of a post-post frame home, its engineered plans and foundation are all going to prove to be less expensive than stick frame. Everything else is going to be pretty much the same – cabinets, fixtures and floor coverings do not suddenly become less expensive just because they were in a post frame building.

There is one place where you may end up spend a bit more up front than you might have with a stick built home – insulation and energy savings! Post frame buildings have fewer structural members which touch both interior and exterior surfaces, reducing the direct transfer of heat and cold. With deep wall cavities, more insulation can be added to the walls. Trusses with raised heels allow deeper insulation from wall-to-wall: https://www.hansenpolebuildings.com/2012/07/raised-heel-trusses/.

Where is the extra upfront investment? Paying for more insulation – which results in savings over the life of your home!

You can do it yourself!

Provided you can and will read the assembly instructions, tens of thousands of dollars can be saved by doing the work yourself. Post frame construction is extremely friendly to those who have the desire and inclination to self build.

Ready to build? We’re here to assist: sales@hansenpolebuildings.com

Poured Foundation or Block: Neither!

What’s better: A poured foundation or block? How about – neither? Try post frame footing design!

Even though my lovely bride and I are now living 98% of the time on the eastern border of South Dakota, I still read the online version of my formerly local newspaper – The Spokesman Review, from Spokane, Washington. This morning’s edition (November 12, 2016) had an article written by Tribune Content Agency columnist Tim Carter titled, “What’s better: A poured foundation or block?” The article can be read in its entirety at: https://www.spokesman.com/stories/2016/nov/12/whats-better-a-poured-foundation-or-block/

The gist of Tim’s article is the strength of either a poured concrete or a block foundation comes from the judicious and frequent use of steel rebar (learn more about rebar here: https://www.hansenpolebuildings.com/2016/01/rebar/).

Tim’s article does ponder somewhat the cost of the two choices presented. Whether the foundation is blocks or poured concrete, neither is for the faint of heart, or light of pocketbook. I’ve elaborated at length on this very subject, as opposed to a far less expensive alternative – post frame here: https://www.hansenpolebuildings.com/2011/10/buildings-why-not-stick-frame-construction/.

When it comes down to foundation costs and what choice to pick, the vast majority of potential building owners are just not aware of post frame footing as being an alternative.

Why is this?

Several reasons – the largest of which is lack of education to the general public, building officials and building contractors about post frame footing design.

The National Frame Building Association (NFBA) has long been the advocate for educating the public as to the Code conformance of post frame construction. This story was published in Frame Building News magazine and is quite appropriate to this subject: https://www.nfba.org/uploads/Advantage_-_Its_Code_Conforming.pdf

To give a perspective on why the message of the NFBA is lost in the shuffle, according to the United States Census Bureau, 2013 construction of all buildings in the U.S. was roughly $930 Billion. The post frame industry was somewhere around $7 billion (or under one percent).

Considering a new low-rise building (in most cases three or fewer stories and a wall height of 50 feet or less) in your future? Give a look at post frame construction – it could very well save you both money and time, while offering some unique design features and advantages!

Pole Building Pool Cover

Welcome to Ask the Pole Barn Guru – where you can ask questions about building topics, with answers posted on Mondays.  With many questions to answer, please be patient to watch for yours to come up on a future Monday segment.  If you want a quick answer, please be sure to answer with a “reply-able” email address.

Email all questions to: PoleBarnGuru@HansenPoleBuildings.com

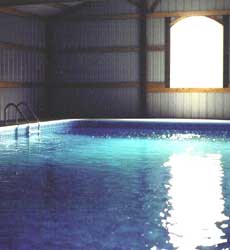
Pole Barn PoolDEAR POLE BARN GURU: I am thinking of including an indoor in-ground pool in my home project. Can a pole barn house be built to also enclose the pool as part of the house? The pool would have to go in first then the structure over it. Then finish the concrete floor around the pool. JOHN IN PENNSVILLE

DEAR JOHN: Yes, a pole (post frame) building would most probably be the ideal solution for an in-ground pool cover.

DEAR POLE BARN GURU: I recently stumbled across your blog after a Google search regarding pole building post footings.  I have since spent the last couple of evenings reading many of your posts! Thanks for all the great information!

But, back to my original search regarding post footings…I found your article from 4/19/2013, “Bonding a Pole Barn Post in Concrete” in which you discuss how the concrete and post bond together essentially providing a larger footprint for the post. I then went on to read some other posts that discussed the use (or reasons not to) of concrete cookies and similar products. In these posts I came to the conclusion that to be code compliant the footing under the post needs to be a minimum of 6″ thick.

This all makes sense to me, my question is pertaining to the use of concrete poured around a post that is sitting on the bottom of the hole as discussed in the above mentioned article.  Due to the bond strength of the concrete to the wood this should provide a sufficient “foundation”. The problem, which I believe you stated in the comments, is simply convincing building officials all over the country that this is sufficient. So finally, the question…Is this method compliant to the IBC even though there is not 6″ of concrete under the post?

Sincerely,
Which foot(er) to stand on ~ Dan

DEAR DAN: Thank you for reading my articles!

The IBC technically requires a concrete footing beneath the columns. Keep in mind, the Building Codes generally create a guideline from which many structures can be designed and built prescriptively, without the need for involvement of a RDP (registered design professional – engineer or architect).

Presuming you were going to construct a pole building which is designed by a RDP, it is very possible they could provide calculations which would meet with the scrutiny of most Building Officials.

Mike the Pole Barn Guru


Floating Poles

In an article last year I included a reference to “floating poles”: https://www.hansenpolebuildings.com/blog/2014/05/one-pour-reinforcement-cage/

But how would one go about actually floating poles?

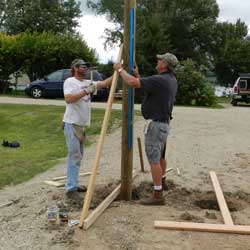
Once all of the column holes have been dug, distribute the poles about the perimeter of the building, laying them perpendicular to the hole they are to be placed in, with one end of the pole directly above the center of the hole. On any columns which are not perfectly square (e.g. a 6×6 is square), make sure to orient them so when tipped into position, the correct dimension is towards the wind.

Columns should also be placed so any “crown” is up (https://www.hansenpolebuildings.com/blog/2014/06/crowns/).

floating-polesUse duplex (double headed) nails, or similar fasteners, to temporarily attach a roof purlin at “column depth below grade” across what will become the interior face of the column when it is placed in the hole. In most instances, with frost depths of 40 inches or less, this will be 32 inches from the end of the pole which is towards the hole.

Prior to placing columns in holes, remove any loose materials or debris from hole bottoms.

Starting with the four corners, tilt columns up into place. All columns should be set to plumb at grade. Unless the posts are perfectly straight (which could occur, but will be rare) the top of the posts should now be leaning out, due to any column crown or bow being towards the inside of the building. This is contrary to “stick” building stud walls.

Why have the tops leaning out?

Trees rarely grow perfectly straight, so chances of getting a perfectly straight treated timber are fairly small. By having the tops lean out, the roof system can be used to pull the tops in. This will take some (if not all) column crown or bow out, making for a much straighter finished wall.

You now have floating poles, and are ready to do a monolithic concrete pour around every column. Once you get started with attaching the temporary braces and tipping them into place, it’s really not as difficult as the directions may first appear. After the concrete hardens, the purlins used as temporary bracing can be removed and put where they are intended – into the roof framing.

How to Calculate Post Hole Concrete

Part of being able to determine a budget for a new pole building is the cost of the premix concrete needed to backfill the holes with.

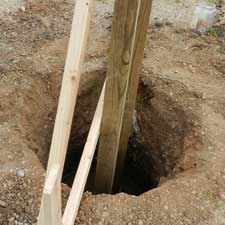
Post Hole ConcreteAt Hansen Pole Buildings, our engineers calculate the minimum amount of post hole concrete required to prevent your new building from settling (due to the dead weight of the building, as well as when carrying applicable roof loads), as well as from uplifting or overturning.

In most cases the lower hole portion only (usually about 1/2 to 2/3) will be filled with pre-mix concrete. This is known as a concrete collar. (Read more about concrete collars at https://www.hansenpolebuildings.com/blog/2012/02/concrete-collars/)

The design is done so the footing (concrete below the column) and the collar can be poured all at one time. Usually the total depth of the concrete required is 18 inches.

Determine concrete volume required:

Multiply ½ hole diameter (in feet) squared, x 3.14 x concrete collar depth (in feet) times hole number, divided by 27.

Like math in high school? This is what formula looks like:

(½ X hole diameter)² X 3.14 x concrete collar depth X # of holes

27

Although it depends upon many factors (such as soil bearing capacity, actual building dimensions and applied loads), the majority of buildings require only 18” diameter holes.

Let’s take a peek at a 36’ x 48’ building, which would typically have around 14 holes (number may be more depending upon positioning of doors).

Inserting the variables into the formula:

(½ X 1.5’)² X 3.14 x 1.5’ X 14

27

The result is 1.37 cubic yards. Even if the holes were all two feet in diameter – 2.44 cubic yards. Not much concrete, but still part of the total budget to be factored in.

But, the pole itself is taking up a portion of the upper 10 inches, why not deduct for it?

The answer is pretty straightforward – it is pretty challenging to get an exactly round and perfect hole! If all of the columns in the example above were 6×6, the volume of them is only 2.45 cubic feet (or under 1/10th of a yard).

Of course more concrete can be placed in the hole. However a caution – do not overfill any holes with concrete! Excess concrete may interfere with later skirt board installation. Doubly important, for animal safety (especially in equestrian facilities), is to have post hole concrete end below grade level. Native soil can fill in the top 2-3 inches for a level grade surface.

Dear Guru: Have You Used SIPs?

Welcome to Ask the Pole Barn Guru – where you can ask questions about building topics, with answers posted on Mondays.  With many questions to answer, please be patient to watch for yours to come up on a future Monday segment.  If you want a quick answer, please be sure to answer with a “reply-able” email address.

Email all questions to: PoleBarnGuru@HansenPoleBuildings.com

 DEAR POLE BARN GURU: Do you have any experience with SIPs? Would it be possible to construct a pole frame building with SIP panels for the roof and floor joists across the top of the building? This would create a full width storage area above without trusses. Matt in Coeur d’Alene, ID

DEAR MATT: I’ve actually never used SIPs (Structural Insulated Panels) personally, however I’ve been researching them and their application to pole building frames over the past few months as I believe they may have some applications.

For those unfamiliar with SIPs, they are structural facing material (think oriented strand board – OSB or plywood) with a foam core.

Using SIPs is probably not for the faint of pocketbook. Much of the cost, like a new pole building to begin with, is deciding you are going to do it at all. Once you have made the leap, you might as well go all the way. An R-16 SIP is going to run $4 to $4.50 per square foot, while TRIPLING the R-value only adds about $1.50 per square foot.

A SIP wall will offer about twice the R-value as an equally thick stud framed wall with fiberglass batt insulation.

The higher R-value SIP is also going to be able to span greater distances, however the thickness is going to have to be considered. I would surmise a fairly thick SIP panel would span 12 feet between supports under the majority of wind and snow load conditions. This is not going to eliminate the need for trusses, or other beams being required to support the SIPs, albeit without the need to have wall girts or roof purlins!

SIP panels of other than minimal dimensions are going to be heavy and will require lifting equipment. They also cannot be left exposed to the elements and require the use of appropriate underlayment between the panels and roofing and siding materials.

Let me know if you go this direction and how it works out for you.

Mike the Pole Barn Guru

DEAR POLE BARN GURU:   I would like to know if you’re interested in building my new building?  I have the prints and need a quote.  I want r38 in ceiling and R19 in the walls.  Let me know?  I am attaching the plans.  I am in the process of getting quotes for a heating and air system, if you want to quote that I am open to your thoughts. SHERRY IN MITCHELL, IN

DEAR SHERRY: We are interested in doing the design and providing the materials for just about any pole building.

We are not contractors and do not construct buildings for anyone, anywhere. We do work with builders in nearly every state, who may be able to provide assembly, or we can assist you in finding a builder on your own. We do not ever recommend any particular builder – so it will be up to you to thoroughly vet them. (Read how to check out a contractor here: https://www.hansenpolebuildings.com/blog/2013/07/contractor-6/)

One thing we do not do is to provide materials based upon structural designs provided by others. We most often find the plans to be either structurally under designed, or overkilled. Our services include complete structural drawings, where every member and connection is verified to be able to support the design loads. Our plans are always designed to Code and can be sealed by an engineer if you so choose.

We can most certainly design to meet the insulation R values you desire, and in many cases supply the insulation itself.

Mike the Pole Barn Guru

DEAR POLE BARN GURU: On your blog you say the best post footings are achieved by supporting the post 8″ above the bottom of the hole and filling the hole 24″ or so with concrete. What is the method of supporting the pole while placing concrete until the concrete sets. GAYLA in MOUNDS,IL

DEAR GAYLA: Stand the post in the bottom of the hole (column depth below grade) specified on the building plans) and align the exterior face as if the column were going to be concreted in – then pull it upwards 8” (leaving an 8” space below the column) and temporarily nail it to a purlin or other piece of lumber laid across the hole to keep it in this “finished” position. Pour the concrete – you can shovel or push it in and around the column with another stick of lumber so the mono-pour encases the pole. Once the poles are “set”, hammer the temporary piece of lumber (like a purlin) off the column –to use where it is designated. Sometimes I use two pieces of temporary bracing to support the column to be concreted in – so the pole is basically suspended in mid-air within the hole…until the day after concrete is poured. Remove temporary braces and reuse them. You won’t “hurt” the lumber used as temporary bracing.


Mike the Pole Barn Guru

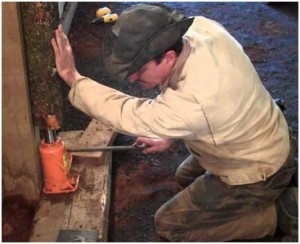
How to Repair a Sagging Pole Barn

My bride tells me I spend an inordinate amount of time surfing the ‘net. She is probably right, but I surf with a goal in mind – researching topics so there are more satisfied pole building owners!

I stumbled across an interesting video on “How to Fix a Sagging Pole Building” today at: https://wn.com/how_to_fix_a_sagging_pole_building

Now, I know the easiest solution to this problem….DON’T LET IT HAPPEN IN THE FIRST PLACE!!

Yes, I was yelling when I used CAPS!

Inadequate footings beneath columns are one of the banes of my existence. In the name of saving a few dollars in concrete, there are so many wrongs which are never going to be added up together to create a right. Here is one of my previous takes on footings: https://www.hansenpolebuildings.com/blog/2014/08/footings/

There are numerous instances of famous structures which had inadequate foundations. Perhaps the most famous being the Leaning Tower of Pisa (read more at: https://www.hansenpolebuildings.com/blog/2011/11/soil-compaction/)

The old armory in St. Paul, Minnesota actually sank over 20 feet into soft clay!

I spend a lot of time dispelling bad advice found on the ‘net. The video above, includes some of this same bad advice.

sagging-barnThe “star” of the video relates his supposition as to there being either no or inadequate concrete beneath the sinking columns. He also tells us the sagging pole barn is in frost country. His restorative process is all well and good, until he pours what would be otherwise known as a “top collar” around the column. Provided the four sacks of premix adequately bond to the column (read about concrete-to-wood bonding here: https://www.hansenpolebuildings.com/blog/2013/04/pole-barn-post-in-concrete/) a brand new problem has been created – frost heave! https://www.hansenpolebuildings.com/blog/2011/10/pole-building-structure-what-causes-frost-heaves/

Our “star” is planning upon the concrete top collar to only have to hold the post in place until a concrete slab is poured. My prediction – frost heave will cause the concrete slab to crack (or entirely break) at these columns.

The solution should have included excavating to the base of the 6×6 (yes it would have been more work) and providing an adequately sized concrete footing pad below the frost line. Involving a competent engineer, rather than winging it (in my humble opinion), would have been dollars well spent to fix his sagging pole barn!

Up-Lift Plates for Pole Barns

Having spent two decades directly involved in the prefabricated metal connector plated roof truss industry (with titles running from just above the janitor, to owner of two plants) steel truss plates have always fascinated me.

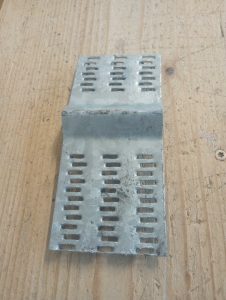
Up-lift PlateFrom Pro-Footer® comes the UP-Lift plate, which is an ingenious adaptation of truss plate technology. They are designed to help save time, money and meet or exceed post uplift requirements. The affordable plates are field applied to opposite sides of an embedded column, with just a framing hammer. No special tools are required.

The numerous metal teeth of the plates ensure a firm attachment to wooden columns. The galvanized coating of the UP-Lift plate ensures extra protection and long life.

Once the UP-Lift plates are positioned, the columns can be placed in the augured holes, braced and the hole backfilled with concrete as specified by the RDP (Registered Design Professional – architect or engineer).

The accepted bond strength of concrete to wood is 30 pounds per square inch (read more at: https://www.hansenpolebuildings.com/blog/2013/04/pole-barn-post-in-concrete/). In the example in the article, a 4×6 (3-1/2” x 5-1/2”) column surrounded on the lower 10 inches with concrete would provide the ability to resist 5400 pounds of uplift force from the connection itself. This condition is known as a “bottom collar”.

Pro-Footer has a detailed analysis done on the capacity of the UP-Lift plates. For those with the “need to know more”, the analysis can be read here: https://pro-footer.com/pdf/Uplift_Plate_Analysis.pdf

For those who are taking the short version of the course, the result is a pair of UP-Lift plates attached to the column provided 8888 pounds of uplift resistance, or 164% of the concrete only design solution.

Before looking at the UP-Lift plates as the total “solution” to uplift issues, a complete and detailed analysis of the column embedment should be undertaken by an RDP, as many other factors influence the system’s ability to withstand uplift forces. These include (but are not limited to) design wind speeds and wind exposure, soil bearing capacities, building dead weight as well as how the area of the column above the concrete lower collar is backfilled.

Unsure of the ability of concrete to bond to wood? Then UP-Lift plates may be the solution for you. Please note, this product does not carry an IBC ESR approval, so may not be accepted in all Building Department jurisdictions.

Sutherlands® – Calling them Out

I have a serious case of “like” for The Home Depot®. When my children were little, every time we got near one, they would start to chant (in unison), “Home Depot…..Home Depot”.

Yesterday morning I was in The Home Depot® at Grand Junction, Colorado. It was a special moment, when a gentleman came up to me (having perhaps recognized the red Hansen Pole Buildings shirt I was wearing) and told me he had purchased one of our buildings, and was constructing it now!

It isn’t very often I get to meet one of our clients, and even rarer when they are still building – so this was great fun for me.

He related to me how he was originally intending to order his new pole building kit package from Sutherlands® Lumber in Grand Junction. They had even provided him with plans, which he had submitted to the local Building Permit issuing authorities to acquire his Building Permit.

The Sutherlands® plans (which were approved by the Building Official) had a foundation composed of throwing a 90 pound bag of Quikrete® in the bottom of the hole. The pressure preservative treated column would then be placed, and another bag of Quikrete® dumped in around the post.

Pole Barn FootingIt turns out the customer decided the Sutherlands® building was going to be inadequate. His only complaint at all with a Hansen Pole Building was the size of the holes and amount of concrete it took. Even then he admitted Hansen was a better buy, even with the extra concrete costs.

The loyal readers of this column certainly will recall my railing against concrete cookies, in earlier posts: https://www.hansenpolebuildings.com/blog/2012/08/hurl-yourconcrete-cookies/ and https://www.hansenpolebuildings.com/blog/2014/03/concrete-cookies/

In my humble opinion, what is being purported to be adequate by Sutherlands® (whether the Building Official approved it or not) is close to criminal.

Our client’s building has 40’ span prefabricated wood roof trusses, with a double truss every 10 feet. In his 30 psf (pounds per square foot) roof load, it results in each truss bearing column having to support 6860 pounds of load. Added to the fun is a soil bearing capacity of only 1500 psf.

The International Building Codes (IBC) require footings to be a minimum of a nominal six inch thickness. So let’s explore the design solution promulgated by Sutherlands®.

At 90 pounds per bag of Quikrete® it would take about 1.65 bags to make a cubic foot. If this was all poured to a nominal six inch thickness as a footing pad beneath a column, it would roughly form a two foot diameter footing. Now granted, this is not how Sutherlands® would like to see it done, however we are going to give them the benefit of the doubt.

A two foot diameter footing has an area of 3.14 sft (square feet). Multiplying by the 1500 psf allowable foundation pressure, a pad such as this would support 4710 pounds….when it needs to support 6860 pounds – it is overstressed by nearly 50%!!!

Talking with a building kit supplier (such as a Sutherlands®) who is recommending bags of Quikrete® to backfill the bottom of a column hole? Might want to really think about the design being bought into.

Bagging it? Prepare for the possibility of a roof line with some humps and bumps in it, at a future date.

When people such as Sutherlands® provide under designed buildings, it gives our entire industry a bad name. I’m calling Sutherlands® out here – and challenging them to actually provide Code conforming pole building kit packages

SquareFoot™ Concrete Footing Forms

I really, really enjoy interactive clients. The ones who pay attention to what is going on (chances are, if you are reading this, you are one too). They help keep me on my toes, as well.

I’ve been enjoying interacting with John. Over the weekend he came up with this for me:

Squarefoot FormI looked at each of the suppliers of pole frame kits and was not impressed with the cookie base with treated pole foundation. I only found one that included a preformed concrete pillar with a top flange. I like this system. A little more labor and a wee bit more concrete but it seems to make for a better quality foundation. Whaddya think?”
https://www.soundfootings.com/Index.php

My gentle readers who are long time followers know my feelings about concrete cookies. Here is an article I wrote about them:

https://www.hansenpolebuildings.com/blog/2012/08/hurl-yourconcrete-cookies/

I’ve never used the product John found, so this is a good time to check it out.

Before digging into the SquareFoot™ concrete footing forms, an examination of the standard pole building footing would be in order.

One of the beauties of pole barn construction is it is fairly low tech in the field. Holes are augured  into the ground (most typically using a skid steer), usually to a depth of either 40 inches, or greater if needed to get the bottom of the footing below the frost line.

Unless an attempt is going to be made at dropping a pre-formed chunk of concrete into the hole (aka cookie) to support the columns, the hole itself becomes the form for any poured concrete.  Columns can be placed, suspended above the bottom of the holes, and premix concrete monolithically poured to flow beneath the base of the column (as a footing) and up the sides of the column (as a bottom collar).

Pretty simple.

The premise behind the SquareFoot™ concrete footing forms is to eliminate the need for wooden footing forms. They are a unique, patented square footing form which provides a one-step process for excavation, backfill and pouring concrete.

As a simplified description – a hole is dug with a backhoe or mini-excavator, and the SquareFoot™ is placed in the hole with a construction tube inserted (aka Sonotube®). For pole building construction, a pressure preservative treated column would be inserted into the tube and suspended in the assembly, then premix concrete would be poured in.

Having built plenty of footing forms, in my younger days, I can see the advantages of the SquareFoot™ for typical residential and commercial stick frame construction. For pole buildings, I just am not feeling the love (and the soundfootings.com website does not show post frame as an application).

Why add the expense of a plastic footing form and a construction tube, plus the time and effort needed to place, when the nicely augured hole, does everything needed?

Add to that – my largest concern structurally comes with filling in around these forms with dirt.  If they are not compacted to the density of pre-excavated soil, there is a propensity for lateral motion of the columns.  So there is more work again – having to refill dirt around the concreted columns and having to tamp…tamp….tamp!  With a monolithic concrete pour into a cleaned out augured hole, once the concrete is poured, you are done!

Ask the Pole Barn Guru: Can I Build on Bedrock?

Can I Build on Bedrock?

Email all questions to: PoleBarnGuru@HansenPoleBuildings.com

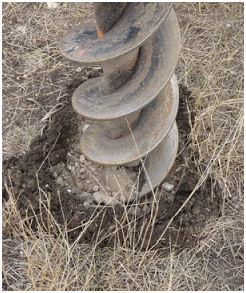
drilling column holeDEAR POLE BARN GURU: It looks like on two of my pole footings (24 x 36 barn) I’m going to hit bedrock about 2.5 feet down into my 4′ footing.  Is my only option to rent a jack hammer and keep chunking away at the bones of the earth until I hit depth, or do I have another option? BEDROCK IN BOLTON

DEAR BEDROCK: My first recommendation would be to contact the engineer who designed your building. Often times, a larger diameter hole can be utilized to offset the lack of depth. In the column embedment calculations, the depth of the hole is squared, while diameter is not, so (depending upon the design wind load) you may end up with some fairly large holes. If the original design does not call for the holes to be backfilled with concrete, you should consider doing so with these two, to prevent uplift issues.

 If you opt to try for a lesser depth, you should also discuss with your building official. In the end – if the Building Inspector ain’t happy, ain’t nobody happy.

 Me – I’d probably be out there with a jack hammer.

DEAR POLE BARN GURU: How to anchor a pole barn on solid rock? I’ve an almost perfectly flat expanse of bedrock that I’d like to set the building on as I’m unable to use it for any other purpose (and apart from the rock, the location is ideal). Is it possible to use anchor bolts drilled & epoxied into the rock? Building use would be agricultural storage. GNASHING IN NASHVILLE

DEAR GNASHING: While the bedrock may appear to be exactly what it is, you might want to consider having a Geotechnical Engineer take a look at it, to determine if indeed it actually is adequate to support a building.

 Assuming the bedrock is adequate, there are brackets we can provide which can be used to anchor buildings to solid rock (they are actually designed to attach columns to existing concrete foundations or floors). When you put in a request for a quote, make sure to let us know the circumstances, as well as the amount of grade change from high point to low across the rock.

Dear Pole Barn Guru: Pole Building Basement Foundation

DEAR POLE BARN GURU:  Can these pole barn kits be placed on a basement foundation? MOTIVATED IN MEXICO MISSOURI

DEAR MOTIVATED: I happen to live on a lake, which is nestled into a mountain valley. For the most part, the parcels of land around the lake tend to be very narrow and very steep (only so much lake frontage exists, therefore the narrow lots). In my case, the lot gains well over 100 feet of elevation from lake to back, over the 250 feet of depth.

 With the lake as my “front” yard, on the back of my lot is a pole building upon which the site had 12 feet of grade change in 40 feet. The solution was to excavate to the lowest point, then construct a foundation on the “high” sides. In my case, we used eight inch insulated Styrofoam blocks, poured with concrete – one wall being 12 feet tall, and the other sides appropriately steeped to match the land contours. Steel brackets engineered to withstand moment (bending) forces were poured into the top of the walls to attach the pole building columns.

 The direct answer to your question is – yes. Whether a full basement, partial basement, or daylight basement (the last being closest to my particular case), pole buildings can be attached to any adequately designed foundation wall. We prefer to use wet set brackets (those embedded in the concrete wall at time of pour) as opposed to dry set brackets (those attached to the concrete wall with bolts) for a sturdier connection, but either one can be used.  Stay motivated and good luck! 


DEAR POLE BARN GURU:  Do you have or know of plans for a pole “cabin”?  I am thinking of something small, 16×16, with four outside poles and one center pole.  The center pole would have a circular stair and have a lookout poach at the very top.  maybe 3 stories. LOOKING FOR A SWEETER HOME IN ALABAMA

DEAR SWEET HOME: There are numerous pole cabin plans available on the internet with prices ranging from free to highly affordable. With building plans, you get what you pay for. I would encourage you to use NONE of them, as they are not Code conforming structures. Why anyone would invest thousands of dollars in materials, plus all of their time, to construct a new building which has a high risk of failure – is totally baffling to me.

What you need is a custom designed pole building plan. This means hiring a RDP (Registered Design Professional – an architect or engineer) to design your building, or to deal with a pole building kit package producer, who can provide engineered plans for your project.

In regards to your particular building, the circular (or spiral) stairs in the center could pose some challenges. From the 2012 IBC (International Building Code) Section 1009.12:

Spiral stairways are permitted to be used as a component in the means of egress only within dwelling units or from a space not more than 250 square feet in area and serving not more than five occupants, or from technical production areas in accordance with Section 410.6. 

A spiral stairway shall have a 71/2-inch minimum clear tread depth at a point 12 inches from the narrow edge. The risers shall be sufficient to provide a headroom of 78 inches minimum, but riser height shall not be more than 91/2 inches. The minimum stairway clear width at and below the handrail shall be 26 inches.”

 From a practicality standpoint, the stairs are going to chew up a space in the center of the proposed cabin of about five feet across. Allowing for the thickness of the exterior walls, this leaves about five feet of usable space between the walls and the stairs. The central stair location might not be the ideal place to put it.

 Given the area of each of the three stories is over 250 square feet, another set of stairs (which is not spiral) would also be required. Which is a good thing…..considering the impossibility of getting a bed, desk, dresser, couch, or most any other piece of furniture up a spiral staircase.

 There is nothing wrong with your basic plan – I’d just suggest you have a company who can do a custom designed pole building give you a quote on what both meets code, and gives you the building of your dreams. 

Bonding a Pole Barn Post in Concrete

In Robert J. Hoyle, Jr. and Frank Woeste’s 1989 textbook “Wood Technology in the Design of Structures”, in Chapter 21 (Post-Frame Building Design) on Page 336 is the following:

post in concrete“Concrete encasement of the post in the ground contact area enlarges the friction surface and can generally be credit with a wood-to-concrete bond strength of 30 psi.”

Now what does this mean in plain language?

Let’s take a look at a very small pole building column, a nominally sized 4 x 6 (3-1/2 inch by 5-1/2 inch surfaced). Placed suspended into a 40 inch deep hole, so the bottom of the column is eight inches above the bottom of the hole, an 18 inch thickness of redi-mix concrete is poured around it. This poured concrete is known as a bottom collar.

The distance around the 4×6 is 18 inches. With 10 inches of concrete in contact with the sides of the column, the total surface area of the column, in contact with the surrounding concrete, is 180 square inches. Applying the 30 psi wood-to-concrete bond strength from Hoyle and Woeste, the union of the two materials results in the ability to resist 5400 pounds of force! Obviously bonding of a pole barn post in concrete is nothing to discount.

One of the forces which a pole building column must be able to resist is uplift – the columns literally being sucked out of the ground by the wind.

There are some who would believe the column is going to somehow shrink away from the concrete encasement. Keep in mind, the top of the 18 inch thick encasement is 22 inches below grade, which makes it unlikely surface forces will influence any possible column shrinkage.

Ignoring totally the bond strength between wood and concrete, I’ve seen cases where either numerous large nails have been driven into the column (in the collar area) before the concrete encasement has been poured. As well, I’ve seen holes drilled through the same area, and short pieces of rebar placed through the holes. Neither of these solutions offers the same amount of vertical resistance, as what is naturally provided. They won’t hurt anything, but it does seem to be a waste of both time and materials. The bonding of any pole barn post in concrete will provide the uplift resistance needed to keep your building…where you intended it to be.

Concrete Pier Design

A Hansen Pole Buildings client in California has just today approved the plans for his new post frame building and poses the question:

“We are in a no frost area with no snow load, so why are the concrete piers so

large and deep??”

In response:

“The column embedment (depth and diameter of the holes) has to resist several forces, including:

Concrete PierResisting uplift – the columns, their encasement (the concrete attached to the base of the column) and the “cone” of soil above the concrete bottom collar, must have sufficient mass to keep the building from being literally “sucked” out of the ground.

Resisting overturning – prior to the engineering studies done over the past few decades, the “rule of thumb” was 1/3 of the column should be below grade. Modern research and technology has allowed this design to be far more scientific.

Keep the building from settling – while you state your building has no snow load, the information on your order has your building designed for a ground snow load (Pg) of 35 pounds per square foot. The concrete piers must be able to support the dead weight of the structure PLUS any live loads which would be applied to it. These live loads include the weight of any snow, or potential snow. Your building also is designed for a light storage load attic space. Any roof truss design with this type of load must be designed to support a 10 psf (pounds per square foot) dead load across the entire truss bottom chord (12,960 total pounds on your 36′ x 36′ building) by Code. The storage area adds another 20 psf for another 8640 pounds. All of these weights have to be distributed by the concrete encasement, to the soils beneath the building, with minimal settlement.”

In areas where frost is a consideration, the column encasement (footings) must also extend in depth below the frost line, in order to alleviate frost heaving.

Continuing with my response:

“Your building has been designed with a 2000 psf soil bearing capacity, which is higher than what is allowed by most California jurisdictions. The use of this number, has actually allowed for the concrete diameters of most of the holes to be far smaller than if a lower number had to be used.”

An engineered post frame building might appear to be “just another pole barn”.  They are, in reality, highly complex structures. All of the components of the building, down to the last screw or nail, are placed through an extensive series of calculations.  They must ensure adequacy against the myriad of conditions which a building must resist in order to be Code conforming. And, most importantly, to perform admirably for not only the original building owner, but also for future generations who will utilize the building.  The concrete piers are as important as the rest of the structure they support…to be designed “just right”.

Concrete Footing: How Thick Should it Be?

Alan was a post frame building contractor for years, prior to becoming a Building Designer for Hansen Pole Buildings. If I had to estimate, I’d venture Alan constructed well over 200 of our buildings.

Recently, Alan had a client question the thickness of the concrete footings, beneath the columns, used to support the pressure preservative treated columns. It seems Alan’s client had engaged a local engineer to do the site design and she had put some ideas in client’s mind of our footings being inadequate.

15,000 buildings – I suppose I was due for the first client to question this one!
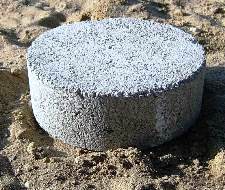
Concrete Pole Barn FootingThroughout the industry, a nominal six inch thickness of concrete (actual thickness is 5-1/2 inches) poured beneath columns is pretty well accepted as being adequate. Many individual Building Departments provide handouts for non-engineered post frame buildings, none of which I have ever seen as providing for a footing of greater than six inches of thickness. Personally, I have never heard a report of a column supporting a post frame building having “punched” through the footing beneath it.

In the case of the engineers for Hansen Buildings, they are using a design with a full eight inches of concrete under each column – over 45% thicker than would be the common industry standard.

But – is this actually adequate? Good question, so I started doing the Google thing.

From decks.com…”This footing type involves pouring a pad or “cookie” footing at least 12” thick at the bottom of your hole below the frost line.” No basis, in their website, for where this thickness came from.

Fao.org (Food and Agriculture Organization of the United Nations) … Isolated piers or columns are normally carried on independent concrete footings sometimes called pad foundations with the pier or column bearing on the centre point of the footing. The area of footing is determined by dividing the column load by the safe bearing capacity of the soil. Its shape is usually square and its thickness is governed by the same considerations as for foundation footings. They are made not less than 1 1/2 times the projection of the slab beyond the face of the pier or column or the edge of the baseplate of a steel column. It should in no case be less than 150mm thick. As in the case of strip footings, when a column base is very wide, a reduction in thickness may be effected by reinforcing the concrete.” For those of us who have forgotten everything we were ever taught about the metric system, this would be a minimum of 5.9 inches thick.

Now if this was a stick framed building, a nominal eight inch wide concrete foundation wall will support a two story structure, with a 16 inch wide by eight inch thick continuous footing below.

From ConcreteNetwork.com…. (in reference to footings under framed walls)…When a footing must be widened to boost bearing ability, it should also be reinforced or deepened. An unreinforced footing that is too wide may crack close to the wall, overloading the soil beneath. Without reinforcement, codes say the thickness of the footing should be at least as great as the distance it projects next to the wall.

If you increase the footing width, the code requires an increased thickness as well. That’s because a footing that’s too wide and not thick enough will experience a bending force that could crack the concrete. The projection of the footing on either side of the wall is supposed to be no greater than the depth of the footing. So, for example, a 32-inch-wide footing under an 8-inch wall would need to be at least 12 inches thick. Instead, however, you could rein-force the footing with transverse steel (running in the crosswise direction, not along the footing). In most residential situations, #4 rod at 12 inches o.c. will be plenty for 8-inch-thick footings up to 4 feet wide. The steel should be placed about 3 inches up from the bottom of the footing.”

If the same was to be held true for a post frame building, the maximum diameter of an eight inch thick concrete pad, under a nominal six inch square column (5-1/2” square actual), would be 21.5 inches, without adding rebar.

At jjgarcia.com/webengineer/footing.html, an Individual ‘Pad Footing” Table is provided. Most jurisdictions accept a design maximum soil bearing pressure of 2000 psf (pounds per square foot). From the table using 3000 psi (pounds per square inch strength concrete) a ten inch thick footing (this happens to be the minimum footing thickness in the table) and three feet square with four Number three (3/8” diameter) rebars will support 17,000 pounds of load. This load is roughly the equivalent of a 60’ clearspan pole barn, with columns spaced every 12 feet and a roof load well in excess of 40 psf! For most post frame buildings, this would be a bit on the overkill side.

The same site’s recommendation for rebar placement: The placing of the rebars are to be a minimum of 3 inches from the dirt on the bottom of the Pad Footing and 3 inches clear of the side dirt walls. The bars are placed in a checker board pattern and tie together with bailing wire at the points where they intersect. The spacing between each rebar should be equal.”

 If all of this information left my readers as confused as it left me – then we are sailing on the same ship. For now – I’ll leave it in the good hands of our engineers.  They have the knowledge and experience from successfully designing thousands of post frame buildings.
Mona Lisa Smile: Concrete Cookie

Client calls into our office at the end of the day Friday and talks with Sheila. He tells her his Building Official will only accept his new pole building construction with holes 48 inches deep, with a six inch thick concrete cookie in the bottom of the hole, and no concrete backfill around the columns.

Here is some background….

The building is a commercial pole building 34’ x 60’ x 13’ in Iowa. Because it is a commercial building, the client purchased engineered plans for the building, which includes all of the supporting calculations for the design.

While a hole for a pole building post might seem to be just a hole in the ground, lots of things are happening below the ground. The embedment has to be deep enough to put the bottom of the footing below the frost line. The footing beneath the column has to be large enough in diameter to keep the building from settling. The design must also provide for the resistance for uplift.

In this particular building, the downward load on the footing is just over 5400 pounds. The uplift force is 1120 pounds.

Now it is 4:50 on Friday afternoon, so I ask for the phone number for the Building Department, client instead, has me call him…..now the Paul Harvey appears….

The issue turned out to have absolutely nothing to do with any Building Official, and everything to do with the client’s builder (I know, a shock).

The builder insists upon digging the holes with the 12-inch diameter auger he has mounted on the back of his farm tractor. He refuses to set the posts in concrete, because if he doesn’t get a post in the right place, he wants to be able to move it around in the hole. His idea is to dig a four foot deep hole, and drop a 12-inch diameter concrete cookie in the bottom of the hole!

I can foresee a myriad of potential problems coming up, even without breaking out my Ouija board, or shaking the Magic 8 Ball.

Problem Numero Uno – if these holes are approved by the field inspector, someone is either blind, or an envelope got passed. If the Building Department accepts anything which is contrary to the engineer sealed and approved plans, they have opened themselves up for an entire world of liability.

Assuming somehow they are able to pass the hole inspection – a 12 inch diameter concrete cookie covers roughly 0.76 square feet of surface. Applying a load of 5400 pounds to it, means the soil bearing capacity would need to be somewhere in the neighborhood of 7000 pounds per square foot (psf). Table 1804.2 of the International Building Code gives a value of 4000 psf for sedimentary and foliated rock and 12,000 psf for crystalline bedrock. Neither of these types of soil would be touched by the 12-inch farm tractor auger. The probability of settling issues on one or more of these columns – right darn close to 100%.

The diagonal distance across a 6×6 (actual dimensions 5-1/2” x 5-1/2”) is nearly eight inches. Those 12-inch diameter holes better be pretty much spot on and perfectly plumb, or there are going to be some very interesting looking walls (as in not very straight at the ground line).

Builder does not want to backfill any of the holes with concrete (builder says it will also rot the posts) to prevent uplift. With a hole this tiny, there is no way to even begin to attach an uplift cleat to the sides of the columns.  There is also no way to adequately tamp compactible materials into the space between the column and the sides of the hole.

A registered design professional has designed this pole building. He has years of experience and has designed literally thousands of successful buildings. At his fingertips are the most powerful computer design programs. This design is nothing short of a work of art.

The resultant, we have the Mona Lisa being whitewashed over by a builder with a farm tractor.

Post Holes: How do I get the Bottoms Even?

In construction of a typical standard stick frame (stud wall), masonry, all steel, or probably just about any other type of building, it is essential for the footings and foundation walls to be level. In layman’s terms – all at the same height.

Pole buildings are much more forgiving than other types of construction, and afford a much greater margin for errors, particularly in the hole digging phase.

To answer the question as posed, the answer is to dig the post holes with a skid loader (aka Bobcat), having a auger attachment. By placing a mark on the auger shaft (a dot from a rattle can of spray paint works well), the holes can all be dug to a similar depth below the natural grade.

But….unless the natural grade is perfectly level and every hole is dug exactly the same, the bottoms of the post holes are not at the same level.
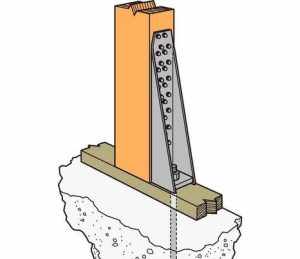
The solution, is at hand….other than in cases of extreme frost depth, or high winds, the bottom of the column embedment for Hansen Buildings is shown as being 40 inches below natural grade. Further, the designs place the “low” end of the column eight inches above the bottom of the hole. This allows for up to 16 inches of grade change, across the building site, without having to order longer length columns.

So, if the site does happen to be perfectly level, and the post holes are all perfectly the same depth, what happens to the extra length of the building columns, above the building eave height?

Once the trusses have been properly placed for height, and the roof framed up, the remaining portion of the columns above the roofline are cutoff.

A word of caution – do not burn the cutoff column portions. These scraps contain pressure treatment chemicals and should be properly disposed of in a landfill.

The Foundation Design Game

Often our clients are comparing the costs of a post frame building against those of an all steel building. Pole (post frame) buildings with pressure preservative treated wood columns embedded in the ground include the design of the foundation in the building plans. Provided engineered building plans have been ordered, no other engineering is needed for the structure itself, unless you are in a jurisdiction which requires an engineered soils report.

This is an actual quote from an all steel building provider website:

You’ll need to check with your local code department to ensure that the foundation for your metal building meets all the relevant local codes. Because the foundation is so important to safely and efficiently erecting your metal building, manufacturers recommend having your foundation designed and/or built by a professional foundation engineer. The larger your building will be, the more important it is that you bring in a pro to design the foundation.

The manufacturer should have provided you with an anchor bolt diagram, which specifies where the anchor bolts for your building must be located for safe and proper installation. The foundation itself must be square, even and level. Whether you pour the foundation yourself or have it poured by a professional, however, be sure to allow enough time for the concrete to cure before you start building on it.”
If I was a consumer, these statements would scare me and I have construction experience!

With an all steel building, you have been provided with no foundation design, so how is it supposed to be able to meet all the relevant local codes?

Because your building’s foundation IS so important, Hansen Buildings does provide it as part of the building design. Order an all steel building, and you are going to need to budget in for an engineer to design the foundation for you. You will also have the time involved to even find an engineer who will do the work.

Oh yeah, I should mention the steel building company also neglected to tell you how much more concrete the foundation for the all steel building will take. Because they have not designed the foundation, they don’t know! With a pole building, the amount of concrete can be calculated within a yard, allowing you to create a budget which truly reflects your building costs.

Anchor bolts….sounds easy until you get to, “must be located for safe and proper installation”. Unlike wood frame pole buildings, all steel buildings are unforgiving. The foundation must be absolutely square and perfectly level. All of the anchor bolts must be exactly placed. Anything off even ¼” and you have problems, ones which are not easily solved.

One of the largest advantages of the post frame construction technique is the buildings are remarkably forgiving. Unlike an all steel building, this allows the average unskilled person, who can and will read instructions, to successfully build for themselves a beautiful new building.

Lying or Just Plain Stupid?

Yesterday afternoon, one of our senior building designers sent me this instant message:Kid ready to make a bad decision

“So what do you do with a customer who is being sold a bill of goods by his contractor? Starting from, client was told he needed to pour footings and build with 2×6 studs because pole buildings ‘move too much’. All the way to – ‘you need to sheet your walls and roof with plywood before you put steel on’. This is because of security and dust coming through the walls. Not to mention on the roof for a vapor barrier.”

It amazes me the ignorance about pole buildings after over 80 years of solid pole building construction.

A bit more about this particular client’s building. It is 40’ x 80’ with a 14’ eave height. The client initially contacted the builder to get a labor quote only –  to construct a Hansen Building kit.  The client specifically asked for one of our pole buildings.  The builder told this client a pole building would be way too complicated to construct and the stick frame building would be less expensive.

Let’s look at the realities of the situation. To construct a stick frame building will take excavating a trench around the perimeter of the building to below the frost line (and it DOES freeze deep in Maine). A footing must be formed and poured. With a wall this tall, I’d imagine at the least it would have to be eight inches thick and 16 inches wide with rebar in it. On top of the footing will need to be formed up a foundation wall. This foundation is going to be a minimum of four feet tall, due to the frost depth. The wall should probably be an eight inch wall, but assuming six inch thick, three truckloads of concrete will be used for the footings and foundation! With the pole building, holes are augered in the ground and around five yards of concrete are required for the backfill. Pretty low tech and saves a bunch of money in equipment, materials and labor.

A kicker the contractor may not have considered, or has ignored….the maximum stud wall height allowed (according to code) without engineering is 10’. His building is going to need to be designed by a registered professional engineer in order to meet code requirements.

As far as “movement”, steel roofing and siding has shear values nearly equal to those of 7/16” osb or ½” plywood. Imagine the steel as being very thin, very strong plywood. It is the sheathing of a building which holds the frame stable, not the framework. With steel and plywood virtually equal for strength, it takes away the “movement” issue. Our Hansen pole building office is 44 feet high from ground to roof peak and has no noticeable movement in even the extreme wind loads of South Dakota.

Moving on, let’s address the issue of “eliminating dust”.  Each steel panel overlaps the adjacent panel which prevents dust infiltration. Base trim (aka “rat guard”) keeps dust from entering around the base of the building. All other steel edges have trims which cover possible infiltration areas. The eave edge of the roof steel and under the ridge cap are sealed by form fitting closure strips, which seal those areas.

The only place for dust to enter either style of building is going to be via an open door! Same goes for security – your building is only going to be as secure  as the quality of the doors. Chances are the builder is going to provide entry doors with wood jambs, which is an invitation to enter via a good swift kick. The commercial steel doors we provide have steel jambs as well.  No one is going to break those jambs with a kick.

As for a vapor barrier, our buildings come standard with a reflective radiant barrier for under the roof steel. With our exclusive PSA (pull strip attached) adhesive strips, proper installation assures the elimination of condensation. A side benefit being the increased insulation value and the reflective radiant barrier is superior against heat gain. Using plywood on a roof proves to be expensive, adds weight to the roof system and requires the use of asphalt felt paper or other similar and materials to create a water tight seal.

If ignorance is bliss, this particular contractor is either very happy, or he is feeding a line to the client. If the first, he is doing no justice to the client, if the second, he’s worse yet.  My guess is… stick framed is all he knows.  He is just too lazy to try something “new”, easier….and cheaper for the customer, while being just as solid, air tight and long lasting.