This Wednesday The Pole Barn Guru answers reader questions about extending an existing 60′ long pole building by twelve feet, the best way to insulate outside walls to prevent sweating, and the reasoning behind setting purlins flush with the top of the truss top chords.
 DEAR POLE BARN GURU: I have an existing 40 x 60 pole building, built in the late 80’s. It has double trusses spaced 12 ft apart. I would like to extend it from 60 to 72 ft. We originally were thinking we would extend using stick frame construction but now I am wondering if this will affect the integrity of the existing building. I would like to leave the end of the pole building in place and add a door into the new space at each end. Your advice on the best way to go about this? The extension is planned for a bathroom and laundry space and would have a concrete floor. Thanks for your help. WENDY in VANCOUVER
DEAR WENDY: Adding as a post frame (pole) building will be your most economical and easiest route to go, especially as your Building Department will require engineer sealed drawings and verifying calculations. In order to determine how best to achieve your end goals, we would need detailed photos of inside and outside of your existing building, measurements at eave sides and dead center from bottom of pressure preservative treated splash plank to underside of roof steel, spacing of existing endwall columns, etc. We make deliveries into Western Washington and Northwest Oregon frequently, so freight costs will be quite reasonable. Please forward your information to Caleb@HansenPoleBuildings.com along with site address and best contact phone number.
DEAR POLE BARN GURU: I built a pole barn last year and am having the floor poured this week. Once completed, I will begin building an apartment inside the barn area. What is the best way to insulate the outside walls for great R value and prevent sweating? DAVID in PORTSMOUTH

DEAR DAVID: If you placed a Weather Resistant Barrier (think Tyvek or similar) between your framing and siding, then fill your insulation cavity with Rockwool and have a well sealed vapor barrier before interior finish. If no WRB, then have two or more inches of closed cell spray foam applied to inside face of your siding, then fill balance of cavity with rockwool and no interior vapor barrier. Depending upon what you do with your under slab and roof for vapor barriers and insulation, you may need to mechanically dehumidify in order to prevent condensation (sweating), as your walls alone are merely a small piece of a big puzzle.
DEAR POLE BARN GURU: I understand your roof design is with purlins flush with the top of the truss. Why do you use this design? Sorry if this info is on your website, I didn’t see it. Regards, STANLEY in DOSWELL
DEAR STANLEY: Here is an article on this subject: https://www.hansenpolebuildings.com/2019/02/where-oh-where-should-my-purlins-go/
Having roof purlins flush with top of trusses has many advantages:
It does not take up extra height (purlins over top of trusses either reduces interior clear height or increases eave height).
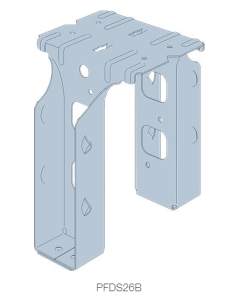 Purlins are then in perfectly straight lines, allowing for pre-drilling of roof panels (this eliminates misses). Others may try to align purlins over top of trusses using butt end splices. This makes for a very poor connection attempting to get adequate fasteners into 3/4″ (1/2 width) of truss top chords. When purlin joints are lapped, it causes a stagger of the purlins, resulting in inability to pre-drill and a significant chances of screw misses.
Purlins can be connected to trusses using engineered and Code conforming parts (in our case, quick to install Simpson Strongtie PFDB26B). Codes (as well as sound engineering practice) require purlins on edge to be solid blocked or otherwise prevented from rotation at ends. A nailed only connection would not meet this requirement).

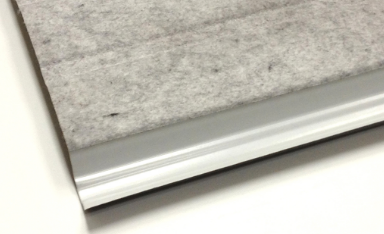 DEAR GREG: Sounds like you are creating a dead attic space. You should order roof steel with a Integral Condensation Control (
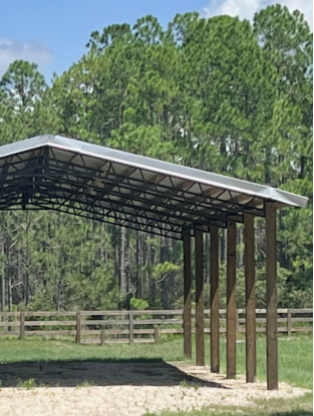
 DEAR JOHN: Your new Hansen post-frame building kit includes full multi-page 24” x 36” engineer sealed structural blueprints detailing location and attachment of every piece (as well as suitable for obtaining Building Permits), all lumber, trusses, roofing, siding, doors, windows, etc., to provide a complete ‘dried-in’ shell. Any raised wood floors (lofts, mezzanines, second or third floors) and applicable stairs. Our industry’s best, fully illustrated, step-by-step installation manual, and unlimited technical support from people who have actually built post frame buildings. Even better – it includes our industry leading Limited Lifetime Structural warranty!
 DEAR SAM: Think of a hole being drilled through as being an “open knot”. Lumber grading rules refer to these as being “Unsound or Loose Knots and Holes” due to any cause. Most structural framing – like wall girts and roof purlins or posts and timbers are graded as Number 2.
 DEAR POLE BARN GURU: Combination business and residential? Square footage of 7000. Can it be done? KEVIN in FLORISSANT
 On the walls I plan to cut-to-fit the 1.5″ closed cell rigid foam board and install between the girts. After foam board is installed I intend to line all interior walls with painted OSB.
  DEAR JERRY: In most instances floor joists will be supported by beams attached to wall columns. If you are looking at a design with zero barrier (think wheel chair accessibility) then you can excavate down and we can engineer a permanent wood foundation between columns. This allows for floor joists to be supported by short pressure preservative treated wood foundation walls and reduces your building’s profile.
  In order to do this right you have only a couple of choices – you can spend a lot of money on an architect and/or engineer who physically comes to your site (could be as high as 20% of project’s finished costs). Or you can provide lots of information to us on what we are attaching to, as well as conveying your expectations. We will do anything reasonable to assist you in not making a mistake you will regret always. If I thought anyone else could not just actually do it but also do it better than us, with you being able to construct yourself, I would in all honesty let you know.
 DEAR DAN:
 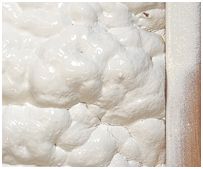 If you spray foamed roof deck and have a dead attic space due to a flat level ceiling (we provided ceiling loaded trusses as well as ceiling joists) then you could experience condensation issues and potentially mold and/or mildew in attic, especially if attic is not made part of conditioned space (heated and/or cooled) with living area. If flat ceiling has also been insulated look out for trouble (keep a close eye on situation by doing visual attic inspections), as attic space could become quite a bit cooler than area below ceiling. Your spray foam contractor should have been talking with you about this prior to doing his or her application.
 DEAR POLE BARN GURU: Should I put plastic down under the stone floor in a steel building? BOB in WYALUSING
 LOAD (in psf – pounds per square foot) X (½ building width plus sidewall overhang in feet X 12”) X Distance spanned by beam squared (in feet)


