Tag Archives: post frame building

Adding a Lean-to aka Side Shed

Adding a Lean-to aka Side Shed

Reader PATRICK in REDMOND writes: “I have an existing pole barn that was built in 1999 that I would like to add a lean-to onto. I read your previous blogs about verifying the footing that supports the existing poles – but how do you verify that? Is there a way to inspect that? Your previous blog also stated if the trusses are supported by truss carriers(which mine are) then then the trusses could not support extending the roof(I think I read that correctly) if I wanted to drop my lean-to roof line below the existing roof line would still be a concern? Thank you.”

Thank you for your photos.

In order to verify actual diameter of your footings, if your building has holes entirely filled with concrete, you could measure across top of concrete encasement at ground level. If holes were backfilled with compacted soil, sand or rock, it would take having to excavate along outside of a column until footing was reached and measure across it.

In your instance, trusses are not bearing on truss carriers, but rather bearing blocks placed below truss heels, on each side of columns.

If you drop top end of lean-to below existing eave height, you need to account for added weight of snow slide off and drifting. This can result in larger dimension and/or higher grade lumber being required in order to carry this extra weight.

We can engineer and provide your plans and materials for your lean-to, knowing all of this information below:

Information from your Building Department (listed in these two articles): https://www.hansenpolebuildings.com/2020/08/building-department-checklist-part-i/ https://www.hansenpolebuildings.com/2020/08/building-department-checklist-2020-part-ii/

While we have this information on file from most jurisdictions, we always want to have it verified before you get to deep into your project.

Width (span) of existing building from outside of column to outside of column. Length of existing building
Existing building sidewall column spacing
Existing building eave height (https://www.hansenpolebuildings.com/2017/10/rehashing-eave-height/)
Existing building roof slope
Existing building column footing diameter
Any overhangs
Will high end of lean-to be at eave height of existing building, or lower? If lower, how much? Width of lean-to Any low eave or endwall overhangs

One of our Building Design team members will be reaching out to you to further discuss your building wants and needs.

A Checklist to Follow, Setting Piers, and to Plumb, Level, and Square

This Wednesday answers reader questions about a barndominium checklist to follow, if one should set piers on virgin ground when adjusting for grade changes, and to plumb, level, and square a building before adding roof sheathing.

DEAR POLE BARN GURU: I remember you had a checklist to follow when building a barndominium or pole barn but I’m not sure where I saw it. Can you email where I can find it again? Thank you! Appreciate your time. MONICA in COLOMA

DEAR MONICA: This is usually what my readers find most valuable: https://www.hansenpolebuildings.com/2021/02/a-shortlist-for-smooth-barndominium-sailing/

Please reach out any time with questions, or call 1.866.200.9657 to speak with one of our team members.


DEAR POLE BARN GURU: The area where I plan to build a pole barn required fill to bring the grade up to the driveway level. My plan is to install concrete piers with the column brackets installed on top of the pier. My question is do I need to have the concrete pier depth into the virgin ground? The fill was not compacted but has been setting for one year. Also, if the pier does need to engage with virgin ground, how deep into the virgin ground does the pier need to be? CRAIG in EAST WATERBORO

DEAR CRAIG: At very least, piers need to rest on virgin ground, and should also be at or below frost line, unless other provisions are made to prevent frost heave. It would probably be most ideal to engage a geotechnical engineer to visit your site and determine actual strength of your fill. This could easily save you a small fortune in excavating and concrete, or prevent your building from later having structural issues.


DEAR POLE BARN GURU: My contractor failed to plumb, level and square up the wall of my 40×40 pole barn before he installed the trusses and purlins. Can this be fixed before he installs the sheathing for the standing seam metal roof? Thanks in advance, PAUL in SMITHFIELD

DEAR PAUL: Provided footprint dimensions are accurate and square at grade, building length is correct at trusses and trusses are placed at proper height, there is no reason to square up roof planes until just prior to installing sheathing for roof. Provided roof planes are squared, corner columns do not need to be adjusted to plumb until roof is complete.

Can This Building Be Saved?

Can This Building Be Saved?

Reader BRAYTON in NORTHEAST WASHINGTON writes: “I’ve been previewing your website and am glad I found it!

Question:

I have been contacted recently by a potential client who had a 40′ x 60′ pole building constructed. The original contractor walked off the job. This client wants me to fix the building.

Here’s the situation:

The trusses are sheeted with OSB on one side of the gable trusses. The trusses are leaning toward one gable end. They appear to be warped and seem to have been installed this way. I figure this because the gable ends are not leaning as much as the trusses. The roof purlins are mounted to purlin blocks on top of the trusses and have joints meeting at each set of double trusses (the trusses are mounted on either side of the post).

The trusses were not braced laterally across the bottom chord, nor cross-braced at either gable end. There are missing wall girts and there doesn’t appear to be any bolts and/or hardware attached. The structure sat through a north eastern Washington winter like this. Half of the OSB roof sheathing was installed this spring, when the contractor walked.

The posts are not in line. The posts at the gable ends are inset from the wall posts. The owner states the posts were backfilled with sand. The existing soil has a lot of clay/dirt.

So, is this building salvageable? I was considering temporarily bracing the trusses, removing the roof sheathing, loosening the purlins at one end, and then truss by truss attempt to plumb them – bracing them as I go.

If you have any suggestions, I’d appreciate it.

Thank you.”

Thank you for your kind words. We would be interesting in talking more with you about future builds (please reach out to Rachel@HansenPoleBuildings.com 1.866.200.9657 Friday). Yes, it can be fixed. It will not be cheap – personally I would look at quoting either an hourly or daily rate, plus any equipment rental, as you will have no idea what you are getting into, until you are there. I’d think if you get it stripped down to framing, you could properly align columns (make sure to check if it is even square). Get one endwall straight and plumb, then adjust purlins bay-by-bay, as needed, to straighten each set of trusses.


Barndo Living, Bracing a Roof Only, and Housewrap

This week the Pole Barn Guru answers reader questions about “barndo living” and the how to’s of post frame construction in Pagosa Springs, CO, bracing a roof only structure for working cattle, and if sheathing and housewrap are needed for a post frame building using wet-set brackets.

DEAR POLE BARN GURU: Have you ever constructed any barndominium‘s in Pagosa Springs Colorado area? Also, ball park figure, what is the square foot price of finished barndo living space in this area. I’m talking very, very simple nothing fancy finishes. What do you mean DIY? Is that in reference to assembling the kit? And would we need something like an extended boom forklift to assemble it, or no need for such equipment? If we’re building something with 12 foot doors, so presumably need at least 2 more feet for roll up doors then even more for trusses, how would we do that without some sort of boom fork or crane? Scaffolding maybe? SAM in PAGOSA SPRINGS

DEAR SAM: I personally have never built in Colorado. Hansen Pole Buildings has provided nearly 300 fully engineered post frame buildings to our clients in Colorado. Chances are good, several are in your area.

Fully engineered post frame, modest tastes, totally DIY, move in ready, budget roughly $70-80 per sft of floor space for living areas, $35 for all others. Does not include land, site prep, utilities, permits.
DIY – as in Do It Yourself In most instances, no heavy equipment is required. Skid steer (aka Bobcat) with an auger is handy for digging holes.
For information on lifting trusses, please see: https://www.hansenpolebuildings.com/2019/11/winch-boxes-episode-v/


DEAR POLE BARN GURU: I’m building a steel truss kit just like this one for working cattle. To me it doesn’t seem very stable with just post in the ground. How’s the best way to brace this style of building? The long sides of the building will have guardrail 3 rails high down the side so I know that will help some but unsure of how to brace the gable ends. RICKY in KINGSPORT

DEAR RICKY: Provided your columns are adequately sized for the wind load and embedded in fully concrete filled holes, it should prove to be fairly stable (follow the recommendations of the engineer who designed the plans). Ideally, you would have enclosed endwalls so shear loads can transfer from roof to ground through them.


DEAR POLE BARN GURU: Was wondering if I could ask you a question I’m getting ready to build a barndo was going to use wet set brackets do you recommend me using sheeting on it as well or just house wrap? Having problems with this issue thanks. DOUG in INDIANA

DEAR DOUG: If your steel has adequate shear strength, then there is no structural reason to sheet it. Housewrap is a must unless you are planning on closed cell spray foam for insulation.

Here is some extended reading on Weather Resistant Barriers: https://www.hansenpolebuildings.com/2016/01/determining-the-most-effective-building-weather-resistant-barrier-part-1/
https://www.hansenpolebuildings.com/2016/01/determining-the-most-effective-building-weather-resistant-barrier-part-2/
https://www.hansenpolebuildings.com/2016/01/determining-the-most-effective-building-weather-resistant-barrier-part-3/

Is a Two Story Barndominium Possible?

Is a Two Story Barndominium Possible?

Reader BROGEN from HOUGHTON LAKE writes:

“I’m looking to build a 40×60 pole barn dominium with the whole downstairs being a garage space except 10 foot off the back wall making the total garage space a 40×50 and having a 10×40 space walled in for stairs and a storage/mud room or possible bathroom. Then the whole upstairs be living quarters. For the garage height I was thinking 10-12 foot high and the upstairs being 8 foot with either a flat ceiling or have it be vaulted trusses so it could be 8 foot in the corners of the room to possibly 10 foot in the center of the building. I have a rough sketch I made to get an idea of what I want with each square representing 2 foot (I’m no artist these drafts are rough). Basically I’m wondering if this is possible or should I just go with stick built, and any sort of cost reference, because I haven’t seen many two story pole buildings of this sort. I will also be the one building and erecting everything. Unless the price is right and it’s cost efficient otherwise. Thank you for your time.”

Mike the Pole Barn Guru writes:

I have been to Houghton Lake several times, calling on your local Home Depot (our post frame building kits are available through them), as well as being a guest presenter on post frame construction to a meeting of your area’s Building Officials. Having spent much of my life as a lake dweller, I can appreciate Houghton Lake’s scenic beauty.

Fully engineered post frame (pole barn) lends itself very well to multiple story buildings of nearly any type – especially homes (barndominiums and shouses – shop/house combinations). I built my first personal barndominium back in the mid 1990’s, three stories! Our current shouse has 8000 square feet of finished space on two stories plus a mezzanine (yes, we have not one, but two elevators).

Post frame is going to be more economical than stick frame – saving a boatload of concrete and being more material efficient than stick built. It also lends itself well to DIY, especially when engineered plans are accompanied by detailed step-by-step assembly instructions and unlimited Technical Support from those of us who have actually erected post frame buildings.

Your new Hansen Pole Building kit is designed for an average physically capable person, who can and will read and follow instructions, to successfully construct your own beautiful building shell, without extensive prior construction knowledge (and most of our clients do DIY – saving tens of thousands of dollars). We’ve had clients ranging from septuagenarians to fathers bonding with their teenage daughters erect their own buildings, so chances are – you can as well!

This may prove helpful in making your decision: https://hansenpolebuildings.com/2022/01/why-your-new-barndominium-should-be-post-frame/

Post Frame Building Doors-Coil or Sectional?

Post Frame Building Doors – Coil or Sectional?

In my 40 plus years of post frame buildings, I have provided tens of thousands of overhead steel sectional doors and not so many coil roll-up doors.

Where we park our vehicles is pretty darn importantish for us Americans. Our garages and shops serve as a unique space for us to carry out different important projects. And as it usually contains a lot of pricy and critical equipment, our doors need to be just perfect.

First –  rolling steel doors. These may be a perfect pick for commercial settings, especially self-storage. People will also refer to these as overhead rolling, coiling, or roll-up doors. Same thing, different names.

Coil doors most often have three inch multiple layer steel slats. As the door opens, these slats roll together in a circle. Diameter of the circle will depend upon the height of the door.

These doors will be exceptionally durable and, in fact, can withstand a higher design wind load than most average doors. These doors might be bent but they will not break. Coil doors robust construction materials allow them to withstand heavy usage and be able to withstand wear and tear for an extended time.

One option includes a thin layer of foam, acting as a minimal insulation material.

Aesthetics is typically a strong deterrent for coil door usage in residential applications. Face it, they do look rather industrial.

Sectional steel doors will utilize panels – most often of 21 or 24 inch heights. Typically, when retracted, they will rest parallel to the ceiling. However, it is possible to order with tracks to high lift up or to follow the slope of the roof to minimize ceiling space being covered. Sectional doors also can have windows with a variety of insert patterns as an available option. Much higher insulation values than coil doors are available.

For extended reading on sectional steel overhead door insulation, please see https://www.hansenpolebuildings.com/2020/07/barndominium-high-r-value-overhead-doors-part-i/ and https://www.hansenpolebuildings.com/2020/07/barndominium-high-r-value-overhead-doors-part-ii/

Sectional steel doors, in most cases, will require roof or ceiling support. These will require a comparatively higher amount of overhead space, as opposed to wall mounted coil doors.

Additionally, factor in how many resources are there in your headspace. If there are HVAC vents, lighting, sprinklers, hanging signs, or hanging storage shelves, sectional doors might block them.

Steel sectional doors are going to be more cost-effective initially, however rolling doors have a comparatively lower lifetime cost, with little or no required maintenance.

Lastly, consider overall durability offered by either choice. Even though sectional doors boast a one-piece construction, they have comparatively more moving parts to wear and tear. 

Now, my humble opinion – if aesthetics and/or insulation value are my dictates, I will pick sectional doors every time.

Building Codes and Requirements in Contract Terms

Building Codes and Requirements in Contract Terms

Disclaimer – this and subsequent articles on this subject are not intended to be legal advice, merely an example for discussions between you and your legal advisor.

Please keep in mind, many of these terms are applicable towards post frame building kits and would require edits for cases where a builder is providing erection services or materials and labor.

BUILDING CODES: The Total Cost of this Agreement is based upon an agreement between Purchaser and Seller, for Seller to perform according to a specific scope of work, per code and loading information as stated in the Agreement. Total Cost to Purchaser may be increased depending upon the review completed by one or more of Purchaser’s permit approval granting agencies, which include, but are not limited to building and land use departments, in which event either the Seller or Purchaser shall be relieved of further obligation under this Agreement if the increase in Total Cost is greater than ten percent (10%). 

In the event the building department, any other governmental agency or agent may require revision(s), further documentation, or explanation of any work after one initial plan check/review, Seller will advise the Purchaser of any required changes or modifications. Upon notification by Seller of extra work or materials required, Purchaser shall authorize Seller to perform such according to Section xx of this Agreement, “Change Orders”. 

Seller is not responsible for any plan check fees, re-inspection fees, special inspections, analyses or reports which are not ordinarily provided by Seller to a building department, plan check or inspector, including, but not limited to any additional charges resulting from unfamiliarity of said person(s) with either post frame buildings in general or the work as specifically designed by Seller. 

Once the approved plans and specifications have been reviewed by the applicable jurisdictions and building permit has been issued, both Seller and Purchaser may rely upon those approved plans and specifications as conforming to all applicable regulations and building codes of the jurisdictional building authorities. 

Total cost, unless otherwise specified, includes two sets of engineered 24″ x 36″ plans. Extra sets are available at time of order for $xx per set. Plans will be made available online (once drafted) and must be fully reviewed and approved by the Purchaser prior to deliveries being scheduled. Time spent handling calls or Emails made by the Purchaser, Purchaser’s agent(s), or Purchaser’s permit issuing agencies to engineer of record will be paid for by Purchaser, directly to the engineer, at engineer’s prevailing rate. 

In the event any conflicting information is found on the plans, Purchaser agrees to immediately notify Seller. Seller will promptly clarify or correct any conflicting information (at no charge to Purchaser), this being Purchaser’s sole remedy. 

Building Codes require attics above insulation to be ventilated with a net free area (NFVA) not less than 1/150 of area of space being ventilated. NFVA may be 1/300 of area of space ventilated, provided 50 percent of required ventilating area is provided by ventilators located in the upper portion of space to be ventilated at least 3 feet above eave, with balance of required ventilation provided by eave or gable vents. Purchaser to make provisions for adequate ventilation, if not so included in Agreement.

My commentary: permit issuing authorities can and will do some absolutely bizarre things. Often all it takes is one new person in a department who is fresh out of school and wants to prove their brilliance by upsetting an apple cart. This caps these unforeseen costs to both parties.

PER ANSI/TPI 1 LEGAL REQUIREMENTS MANDATE: In all cases where a Truss clear span is 60 feet or greater, the Owner (Purchaser) shall contract with any Registered Design Professional for the design of the Temporary Installation Restraint/Bracing and the Permanent Individual Truss Member Restraint and Diagonal Bracing. In all cases where a Truss clear span is 60 feet or greater, the Owner (Purchaser) shall contract with any Registered Design Professional to provide special inspections to assure that the Temporary Installation Restraint/Bracing and the Permanent Individual Truss Member Restraint and Diagonal Bracing are installed properly.

For extended reading on this subject, please visit: https://www.hansenpolebuildings.com/2019/09/responsibilities-where-the-legal-requirements-mandate/

Bigger Options, Taller Options, and a “Rocking” Building

This Monday the Pole Barn Guru answers reader questions about bigger options for the Charlotte 40×50 on the Home Depot site, Raymundo asks if a building can be made 2 ft. taller, and how to brace a building to stop it from “rocking” in the wind.

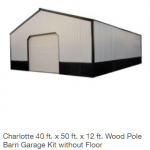
DEAR POLE BARN GURU: Good morning. I saw on The Home Depot® your Charlotte 40x50ft. Do you have bigger options? Could you send me the size of your biggest buildings with prices? ANTONIO in GOLDSBORO

DEAR ANTONIO: Thank you for your interest in a new Hansen Pole Building. We have an ability to provide any fully engineered post frame building with a clearspan width of 80 feet or less (100 feet in some markets – due to fabrication and shipping limitations) and up to 40 foot high walls with three stories (with sprinklers for fire suppression 50 foot and four stories). One of our Building Designers will be reaching out to you Monday for more information.


DEAR POLE BARN GURU: Hi, still really early in the planning phrase. What’s included in your kits? And can I make the barn 2ft taller? RAYMUNDO in HARTFORD

DEAR RAYMUNDO: Hansen Pole Buildings provides fully engineered, custom designed post frame buildings, with multiple buildings in all 50 states. Our buildings are designed for average physically capable person(s) who can and will read instructions to successfully construct their own beautiful buildings (and many of our clients do DIY). Our buildings come with full 24” x 36” blueprints detailing location and attachment of every piece, a 500 page fully illustrated step-by-step installation manual, as well as unlimited technical support from people who have actually built buildings. We furnish all components to seal in your building, with exceptions of concrete, rebar and nails normally driven by a nail gun.

We can provide any building up to 40 foot tall walls and three stories (or, if you add fire suppression sprinklers – 50 foot tall and four stories).

DEAR POLE BARN GURU: What bracing is used to keep the pole barn from rocking against the wind? The base is ok but the top rocks back and forth and creeks a lot. RAY in SAPULPA

Lean BuildingDEAR RAY: If your building is still under construction (in framed up stage) you should be able to stand in middle of roof and rock building back and forth by several inches, just by shifting your weight. Here is where temporary diagonal bracing of wall columns comes into play (especially if some or all of your building columns are not backfilled with pre-mix concrete.
If your building is completed, you should be reaching out to whomever provided your building’s fully engineered plans, as it sounds like there is a serious design flaw or flaws. Provided your building does not have an excess number of endwall openings (doors, windows, etc.) you can stiffen it up by replacing all of your siding and roofing screws with 1-1/2” long diaphragm screws next to each high rib, into every underlying framing member. At top and bottom of each steel panel, place screws on both sides of high ribs.

To further stiffen it, use #12 x 1-1/4” stitch screws at roughly nine inches (or less) on center through overlapping ribs of steel panels.


Avoid These 4 Mistakes in Your Post Frame Building

Avoid These 4 Mistakes In Your Post Frame Building

Today’s guest blogger is Katherine Rundell, a construction writer and editor at Assignment Help and College Paper Writing Service. She is also a contributing writer at Buy Essays. As a professional writer, she coaches college students on how to write in various fields.

Yes, buyer’s remorse can happen during construction. That’s especially true for when you’re building a post frame building or pole barn, because when buying the materials and putting them to work, it can easily get caught up in the vision of having a durable and attractive pole barn for your home, business, vehicles, tools, etc.. And that’s where buyer’s remorse comes in – What if the building is built in the wrong size? What if you’ve had the wrong materials to begin with?

So, since having a post frame building is a significant investment, it’s important to keep it that way by avoiding these 4 mistakes during the construction process:


1- Making Your Barn Too Small

“Size matters when you build a pole barn,” says Piper Porteus, an editor at Essayroo and Paper Fellows. “If you build your barn too small for its intended use, then you’ll immediately regret it, once you realize that you can’t fit your RV inside it, can’t move around your workshop tools, or aren’t able to house your livestock. Therefore, make it your job to learn what you want to put into the barn, and then construct it with those things in mind – your tools, your vehicles, your livestock, etc. Make sure that the barn will have room for anything and everything inside.”
“In roughly 20,000 post frame buildings spanning a 40 year career, I have never had a client tell me later it was just too big,” says Mike Momb, Technical Director for Hansen Pole Buildings.

On the other hand…


2- Making Your Barn Too Big

… you can’t make your barn too big either. Although you might be able to fit a lot of things into a large barn, the downside is that it can turn more into an eye sore rather than something to be proud of in your location. 
So first, when outlining your pole barn design, set some time to go to your building site, and then measure the area and dimensions required for the project. And, take into account how much space that you truly need, rather than settle for extra space that you won’t use after all. 


3- Working With No Plan

Engineer sealed pole barn“One of the biggest mistakes that people tend to make during pole barn construction is not having a solid plan for it,” says Eva Gilray, a writer at State Of Writing and OXessays. “For first timers, this mistake is crucial, because assuming that pole barn building is easy can be costly – from the project itself, to extra expenses for the replacement of unplanned damages during construction.” 
Therefore, having a good plan for the construction of a post frame building should include the following:

  • Thoroughly detailed engineered blueprints, specific to your building, at your site. These should depict every member, as well as all connections.
  • A detailed list of materials (i.e. the cut sizes and other materials) recommended for the specific style of post frame that you want to construct. Your building kit supplier should provide this.
  • Step-by-step instructions to walk you through each stage of construction.
  • Unlimited professional support while you build.


4- Purchasing Wrong Materials

stick frame building collapseFinally, keep in mind what kinds of materials that you’ll need for your project. Buying the wrong materials, or getting too much or too little materials, can be a costly mistake, especially when taking up a project like this one. This is where your chosen post frame building kit supplier should guarantee they will be providing all materials necessary for assembly per engineered plans.
Post frame construction, like any other building project, takes plenty of consideration and planning. In fact, there are hundreds of options to choose from when selecting the materials for your pole barn. However, as you make your selections, be sure to not fall into the trap of spending more or less than you need to. The ultimate goal here is to build a safe, durable pole barn with great-quality quality materials. 

Just keep these objectives in mind:

  • Buy what you need, keeping future uses in mind.
  • Don’t over or underspend.
  • Rely upon properly pressure preservative treated lumber.
  • Don’t wait until you order or receive your materials to think twice about how you intend to build and use a pole barn.


Conclusion

So, as you can see, having a durable pole barn depends greatly on the planning. That means that there’s no room for mistakes in construction. 

Therefore, be sure to do your homework ahead of time, and buy what you need. But more importantly, have a plan ahead of time, so that you know what to do step-by-step. Plus, having a plan allows you to research the various styles of pole barns available, the sizes, and the recommended materials. 

If you’re building a pole barn for the first time, then take into account these mistakes, avoid them, and good luck!


Doesn’t Like Idea of Concrete Slab on Grade Foundation

Doesn’t Like Idea of a Concrete Slab Foundation

Loyal reader ASHLEY in KELSO writes:

“I will be building in southwest Washington – Cowlitz County. We are wanting around a 2800 square foot home. I do not like the idea of a concrete slab “foundation”, we are going with crawl space (I read your blog on that =) ) I have just a few questions. Do you offer your services in Cowlitz County? What permit codes should I be looking for when contracting out/doing it ourselves to make this into a home? Not only is this our first build, it will be done by us so Will contracting out be more expensive for a pole barn home since it’s not a typical stick built? Or is the work roughly the same? Hope this all makes sense. Thank you so much.”

Well Ashley makes total sense.

Hansen Pole Buildings actually provides more buildings in Washington State than anywhere else in the country! In Cowlitz County alone, I would not be surprised if you couldn’t find well over a hundred of our buildings.
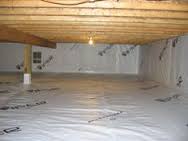
You will find crawl spaces to be a very effective alternative to slab on grade using fully engineered post frame construction and we see more and more people interested in this as a design solution. Personally, my knees would scream at me if I had to stand on concrete for more than perhaps 15-20 minutes.

Self-contracting will save you a good chunk of change (often 25% or more) and if you are reasonably physically capable and will read our step-by-step assembly instructions you can successfully erect your own beautiful building shell yourself. You will find a post frame building shell goes together quicker than stick built, because there are frankly fewer pieces to handle!

Any subcontractors for electrical, plumbing, HVAC should be roughly similar in price whether stick or post frame – your savings comes from being your own general contractor, DIYing as much as possible and a huge reduction in foundation investment.

Here is your Planning and Building Department ‘homework’ to get you started:

https://www.hansenpolebuildings.com/2020/01/your-barndominiums-planning-department/


https://www.hansenpolebuildings.com/2020/08/building-department-checklist-part-i/

Steel Roofing and Siding Over Purlins

There is just plain a lot of bad (and scary) information floating around out there on the internet. For whatever reason, people will believe a random unqualified answer from a stranger, rather than going to a highly educated expert (e.g. Registered Professional Engineer).

Reader DYLAN in BEDFORD writes:

“I am building a 50×60 using 2×6 stud frame walls. Trusses 4’OC. The garage area (30×60) will have around 12’ceiling. The living area (20×60) will go back and stick build ceiling rafters 2’OC to make 8’ceilings. 12’ ceiling on the living area is just more to heat and cool – not necessary. My builder right now plans on putting 2×4 purlins and 2×4 girts on roof and side walls. Then wrap the whole thing with tyvek and out metal on. 

My question starts with is this ok? 

Should I consider plywood/osb on the roof or walls in lieu of 2×4 purlins/girts?

Are 4’oc trusses ok if I am going back to the living area and building ceilings 2’oc?

Are 2’oc rafters ok assuming I finish the ceiling with 5/8” drywall or wood tongue groove or similar?

I will probably spray foam insulation in the living area. This should help with noise during rain on the metal roof.”

Mike the Pole Barn Guru responds:

My recommendation would have been for you to erect a fully engineered post frame building, rather than spending tens of thousands of extra dollars in an attempt to make a stick framed house look like a pole building.

Ultimately how your building is assembled structurally should be up to whatever engineer you (or your builder) hire to provide your home’s engineered plans. Building Codes do not allow for stick framed walls taller than 11’7″ without engineering, so you should be there already.

Steel panels should not ever be screwed into OSB only and even plywood only would only be on roofs if you are using a standing seam (concealed fastener) steel. I (and most likely your engineer) will specify 2×4 or even 2×6 girts and/or purlins in order to provide a proper surface to screw steel panels to. Your trusses every four feet may be adequate in your living area, it will depend upon how your engineer designs structural attachment of your furred down ceiling, as well as weight supported by it. Rafters 24 inches on center will provide sufficient support for 5/8″ drywall.

You should not place Tyvek between roof framing and roof steel – as Weather Resistant Barriers (WRB) allow moisture to pass through. This could allow condensation to be trapped between your home’s WRB and roof steel, causing premature deterioration.

Post Frame Purlin Blocking

Every time I begin to rest on my laurels and think I have covered all post frame (pole barn) building basics up jumps yet another one to bite me where I deserve to be bitten due to my overlooking it.

Our independent drafting team at Hansen Pole Buildings (thanks Kristie) came up with this question recently.

“As we are building our building, a question came up: what is the reason for purlin blocking? Why do we need it? What’s the important purpose for it? We will be doing this step tomorrow and actually considered skipping it (sorry, bad of us I know). Is this all explained in the CM, because I have looked and couldn’t find the why’s. I bet ALOT of people skip this step and just wanted to see why we have it.”

Well, our 500 page Construction Assembly Manual covers lots of “how tos” and very few “whys”. Biggest reason is we would hate to make it into a 700 or 800 page manual. We try to cover it all and continually add to it and improve it, so every time we get a question not covered by it, we add more information. Even though these subjects do not make a dime for Hansen Pole Buildings, we have recently expanded sections on Site Preparation and Concrete Floors. It is all part of us delivering “The Ultimate Post Frame Building Experience™” https://www.hansenpolebuildings.com/2019/05/the-ultimate-post-frame-building-experience-2/

Back on task – I will preface this by letting you readers know Kristie and her husband are currently erecting their own Hansen Pole Building.

There exist two types of purlin blocking:

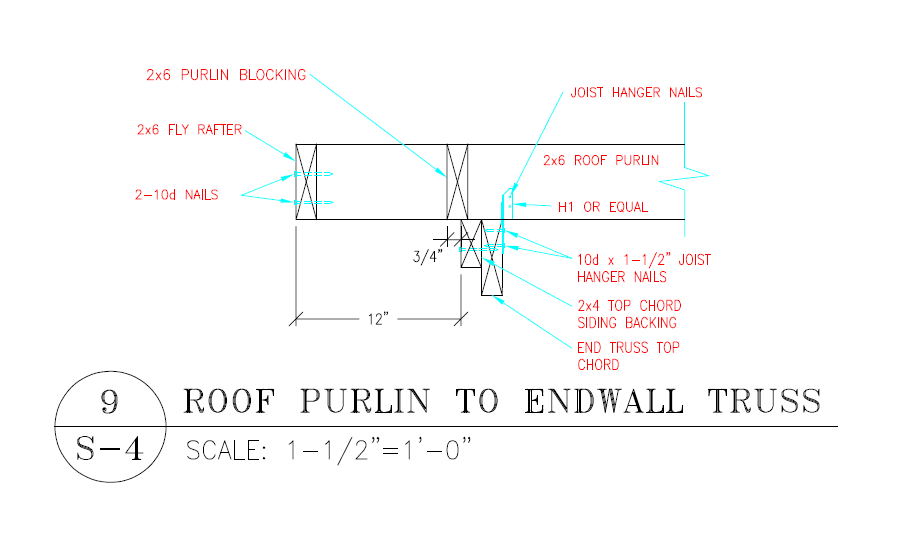
At endwalls (this is Kristie’s case) – Building Codes require airflow from vented soffit on gables overhangs be blocked off. Ventilation for dead attic spaces must be accomplished by either a combination of eave and ridge vents or by gable vents. Venting through end overhangs will disrupt airflow for a properly ventilated attic space.

Structurally a solid load path must be provided in any building to transfer wind shear loads from roofing to ground. Purlins overhanging an end truss and attaching with a hanger such as a Simpson H-1 do not accomplish this. Brackets will not prevent purlin rotation under extreme loads. Properly placed, endwall overhang soffit panels can be attached to these same blocks, as they serve a plethora of duties.

Purlin blocking can also be “mid-span” – when a 2×10 or larger member (girt, purlin, floor joist, etc.) is 2×10 or greater mid-span blocking is required if a member is unsupported for more than eight feet.

There you have it and if you win on Jeopardy thanks to this, I will work for a percentage.

What Makes Some Buildings Better Than Others

I answer literally hundreds of building related questions every day. These questions come from many different sources – our staff, drafts people, engineers, architects, building officials, clients, builders and social media (just to name a few).

This question, posted in a Facebook group, is an exceptional one and I felt it necessary to share:

Pole Barn Guru Blog“What makes some buildings better than others? And at what point does it not matter? (Ex: building A frames with 2x4s. Building B uses 2x6s and building C uses 2x12s obviously B is better than A but C is overkill) Does the metal come down just to the thickness of it? Thicker is probably better but to what end? I’m talking straight materials not warranty or service of a company. Thank you.”

This answer actually has a remarkably simple answer. It all comes down to what loads a building is engineered for.

Period.

Not what some under educated person says makes it better, but what a highly trained Registered Professional Engineer is willing to stake their career upon by putting their name and seal on a set of plans.

You want a stronger building (whether post frame, weld up, PEMB, stick frame, etc.) then increase snow and/or wind design loads. 

It is seriously just this simple.

It does no good to have super thick siding and roofing, if the supporting frame is not able to carry equivalent loads.

I once had a client who was “concerned about snow loads” so wanted 2×8 roof purlins (when 2×6 would easily have carried the loads). I asked him what was going to hold those purlins up (a sky hook maybe) when his building’s trusses failed beneath them.

A building is a complete system.

When you hear a supplier or builder talking about how their bigger/stronger/thicker whatever makes their building best, think B.S., because they do not have a clue about structural design.

When you find the rare gem who advises you they are providing a fully engineered building and recommends above Code required minimum loads – stick to them like super glue, as this is truly a better design solution.

Here is just one example of when bigger isn’t always better: https://www.hansenpolebuildings.com/2014/08/lumber-bending/

I hired my first staff engineer roughly 35 years ago, Jenny Wong.  Jenny’s previous experience was as a design engineer for a nuclear power plant (seriously). Jenny knew absolutely nothing about post frame buildings, but was willing to totally trust me – provided I could find documentable proof from reliable sources. This one requirement alone shaped my professional career.

Ask me any post frame building questions, any time. If I cannot get you an answer, I will let you know. My answers will always be based upon factual evidence. If you find some method or component with an ability to make buildings better, without unduly penalizing new building owners financially please share it with me – I will perform due diligence to prove or disprove it and if it is truly beneficial, expect to see it in your next Hansen Pole Building.

Barndominium Airplane Hangars and More

I really suppose it is unfair of me to limit this article to just airplane hangars, as I have had instances to design hangars for helicopters as well.

As an elementary school student, my pre-teen friends and I were all very impressed when a girl down our street’s father landed his helicopter in a field behind their house. We made certain to keep this area free from weeds, so he could land more often!

When I was a post frame building contractor, we were approached by a gentleman who lived in a very exclusive neighborhood a few miles north of our office in Millwood, Washington. His idea was to land his helicopter in his driveway and roll it away into its own post frame hangar to be attached to his home. Somehow his neighbors were not overly enamored of this idea and sadly mounted successful efforts to see his idea did not come to fruition.

A project actually coming together as it should have was a barndominium/hangar just outside of Las Vegas. When most think of how difficult it could be to acquire a Building Permit in Clark County, Nevada, they turn tail and run. Either I was not smart enough, or was too stubborn, to realize it could be a challenge and happily dove right in.

Our client wanted to combine living and flying. Moreover, he wanted to live above his hangar. This would be no simple accomplishment, as he required a 42 foot clearspan width to allow for his hangar door as well as to provide enough wall each side of this door to prevent racking due to wind shear. Our client’s original idea was an attic truss, one giving a bonus room at center. This proved to be too limiting as he would end up with only a long and narrow room at the middle of his second floor.
Instead, we designed for a solution using 42 inch deep parallel chord floor trusses and placed a second floor on top of this system. Post frame to his rescue!

Looking to live where you fly? Or fly from where you live? Give Hansen Pole Buildings a call today 1(866)200-9657.

Airplane Hanger

Interested in more light reading on hangars? Go to www.HansenPoleBuildings.com – navigate to SEARCH at upper right and click on it. Type HANGAR in this search box and ENTER. Magically you will be treated to numerous relevant articles on hangars for your reading enjoyment. You can do this with any term, try BARNDOMINIUM for instance.

Exciting Times for Post Frame Construction

Exciting Times for Post Frame Construction

Welcome to 2020!

My fifth decade of post frame buildings and I could not be more excited.

Pole Barn Guru Blog40 years ago today if you would have told me I was going to embark in an exciting career in post frame buildings I would have looked at you quizzically – and then asked what a post frame building was!

Now I realize 40 years is greater than a lifetime for many of you readers. Or, if you had arrived on this planet, you might have not yet been school aged even! A few of you may look upon me as being ancient. Trust me I know ancient –  probably 20 years ago my son (in all seriousness) asked me what it was like watching space aliens build the Great Pyramid!

 I have no qualms about being 62 years old – and am still excited to see what each new day will bring.

Well, back on task, if you would have told me a post frame building was a pole barn, at least I would have heard about them.

I had migrated from Northern Idaho to Oregon late summer of 1979, when home mortgage rates topped 10% and home loans were no longer available there due to a state mandated cap on interest rates. By January 1980, interest rate issues brought housing starts in Oregon to a screeching halt as well.

 My truss plant typically produced eight to 10 buildings worth of trusses a day. In January 1980 we had only four orders in an entire month! Not good – however there was a single common denominator among those four orders, they were all for pole barn trusses. I didn’t have the slightest idea what a pole barn really was, but it was time to find out. Long time pole barn builder George Evanovich allowed me to pick his brain and I was an apt student!

Frankly (knowing what I know now) these buildings were not very good. I suppose they do resemble some buildings I see people buy from their local lumberyards – a great price and not much else! At least I established quickly a firm policy of always supplying all materials to assemble a building. It might not have been much of a building, but it was all there.

Virtually every building 40 years ago was nothing more than a barn. Very few ever required building permits and if they did, engineer sealed truss drawings usually got a permit acquired!

Technology has changed our everyday lives. I grew up actually dialing a rotary phone! These same technologies allow us today to structurally design intricate post frame buildings for virtually any use – with walls up to 40 feet in height and three stories high (add 10 feet and another story for sprinklers).

True residential construction, not just a garage or shop out back, is becoming a driving growth force for post frame buildings. Today’s post frame homes (also known as barndominiums and shouses) are quickly becoming our business core. They can be erected quickly, even by DIYers, are more cost effective than any other Building Code conforming permanent structure and can meet exacting demands of energy efficiency.

Ready for your new building? Think no further than post frame construction. Call Hansen Buildings at 866-200-9657 and talk to a Building Designer today!

Ideal Post Frame for Growing Cannabis

Today’s guest blogger is Alan Wood.  Alan Wood is the founder of Weekend Gardener. He has a strong passion for plants and gardens. Alan spent his life long to research and test new techniques in this field. With the aid of his son and three other associates who aren’t just fond of but are titled experts in different fields, he always tries his best to give you the latest updates and new knowledge regarding gardening.

For a hobbyist, amateurs and commercial growers of marijuana who reside in places where seasons show dramatic shifts in temperature, humidity, and climate, growing their crops inside a post frame building or a greenhouse may be the only way they can truly ensure their crop’s health. In fact, in many extreme cases, planting inside these structures maybe the only way a grower can truly cultivate these plants.

A post-frame building is ideal for extending cannabis growing season and also for protecting seedlings from various environmental conditions. As a grower, do you know what is an ideal post frame building for growing marijuana?

With complete honesty, there is no one specific all-cure design for a post frame building. Especially for cannabis, building an ideal post-frame building depends on many factors. So instead of teaching you what an ideal post frame building is for growing cannabis, we will try to guide to help you decide, strategize and build an ideal post frame building for growing your cannabis.

GUIDE #1: SELECT A POST FRAME BUILDING BASED UPON CLIMATE

When planning growing structures for your crops, make sure to build a type of post-frame  building most suitable to ambient temperature and humidity in your area. Understand there are two types of post frame buildings – hot and cold. Cold frames are structures usually built to protect crops from strong winds and rain. For countries in the tropics where climate can be either very dry or very wet, cold frames are ideal. However, if you live in a colder environment where frost can potentially kill your crops, a heated post frame building, known as Hot Frame, is most suited.

GUIDE #2: DETERMINE SIZE REQUIREMENTS. 

Growing a tall variety of cannabis in a small post-frame building will limit plant growth and can easily take up too much space. It is very important to plant shorter strains of cannabis ones not growing above your waist. One great type of an Indica variety is Royal Cookies (80% Indica) strain. This cannabis is well known for being short. Its structure does not spread out. Another strain perfect to grow in a post-frame building is Tutankhamon. It is a Sativa-dominant strain and is quite compact and small. You will notice how short it is after just 15 days of growth.

GUIDE #3 CONSIDER YOUR SPACE. 

Create a plan for your post frame building on paper. Layout how many plants your post frame building’s floor area and its estimated height will fit. 

Cold frames are usually built to be smaller than hot frames. They are also normally set directly on the ground. Hot frames will have a heat source installed to warm the whole structure. Thus, hot frames will need a higher ceiling. As we mentioned, there is no one specific ideal type of post frame building. Do not believe anyone who says otherwise. Who best can tell you what you need but yourself? 

Follow these guides above to help assess and build your ideal post frame building for cultivating cannabis.

Where to Invest in a Pole Barn

Is This Where You Want to Invest Your Hard Earned Dollars?

This excerpt is from an online publication called “Insiders” who promotes to provide advice from local experts. It happens to be from a “Do-It-Best” in Northwest Oregon:

“And if you’re still thinking of installing a pole barn, come in and see us. We have five sets of different engineered plans. Pick a set and we will give you a rough bit (bid), though you can customize it, too and we can help you. If you don’t want to build it yourself, we have a list of guys who can do that for you. We sell pole barns all year long, but before the rains really come down it’s an opportune time to build one. Pricing has remained steady starting at $8,000 for simple designs to $40,000 for barns with all the amenities.”

Those of you who read yesterday’s article should have a feel for what capabilities Hansen Pole Buildings has – if a building fits within Building Code parameters, we would like to believe we can competitively design and provide it. Offering a choice of only five sets of different engineered plans sounds archaic to us!

Pick a set and we will give you a rough bit (I know – it should be bid)…

Seriously? 

Rough?

Before you get started on your new post frame building, we want you to know exactly what you will be investing with us!

Now ignorance is bliss and some folks, well they are very, very happy. Legally (not to mention morally) an engineered set of building plans cannot be customized, without a revised set of engineered drawings being produced. An engineer puts his or her career on the line when they seal a set of drawings – it does not come with free rein to make any changes!
My dad was the oldest of eight siblings. He told stories of how excited he and his oldest brothers were when grandma was expecting, as it meant there would soon be a new baby carriage they could pilfer wheels off from to build a new home made conveyance. While I am sure there were limitations to pre-teen vehicular design, somehow they cobbled together something!

I liken this to being not too far removed from what your local lumberyard can provide for a pole barn kit. They are as far removed from what Hansen Pole Buildings can provide, as my dad’s vehicle was from a shiny new Tesla!

Some of you are content with huge risks of non-engineered buildings. Then I strongly suggest you invest in lots of insurance. Me, I will put my faith in sound, state-of-the-art custom engineered designs.

How to Assemble a Cupola Kit

Cupolas are often an afterthought when it comes to a new post frame (pole barn) building or barndominium. In a previous article, I discussed how to determine proper size, spacing and quantity of cupolas (https://www.hansenpolebuildings.com/2015/09/cupola/).

Cupolas as a kit can be easily assembled – without a requirement for specialized skills. My lovely bride put one together once for a demonstration building.

We happen to have a cupola on our barndominium home. It has a wooden base inside with eight light bulbs in it, two of each color red, yellow, blue and plain white. On clear nights our cupola lights can be seen from miles around. My wife has fun changing the color of the light bulbs, depending on the season.

For your viewing pleasure, we had a representative from our current cupola provider assemble one in Hansen Pole Buildings’ warehouse. See how he did and give him a shout out:

Hansen Pole Buildings’ Construction Manual also gives step-by-step written assembly instructions along with detail drawings of assembly.

Ready to plan your new post frame building with a cupola (or maybe two)? Call 1(866)200-9657 today to speak with a Hansen Pole Buildings’ Designer!

A Shouse in Andover?

Shouse (from www.urbandictionary.com):  “A portmanteau of “shed” and “house”; A structure that outwardly resembles a shed (typically having a roll-formed steel-sheet exterior) that is primarily used as a dwelling / house. Though not required to fulfill the definition, a shouse generally has garage(s) incorporated into the structure.”

I did not even realize I was shousing before it became cool! My first personal shouse experience was at our home at Newman Lake, Washington over 25 years ago. We needed a garage to winter our boat in. One thing lead to another (including an expensive lawsuit with our neighbors – we won) and before we knew it, we were putting up a three story garage. Well, more technically a three story post frame building with a garage/shop on lowest floor and two more habitable floors above! Oh, and a rooftop deck!

Some jurisdictions are having challenges grappling with getting their heads wrapped around shouses and barndominiums. Here is a case in point:

From a June 4, 2019 a Quad-City (Davenport, Iowa) Times article by Lisa Hammer

“Someone has approached Mielke (Village President Mike Mielke) and asked about building a combination shop/house in a pole building, called a “shouse,” in village limits. Mielke did not give him a definitive answer. Village attorney Mike Halpin will look into it and bring back suggestions. It was noted Andover already has one such structure. “We have one, but it just kind of happened,” Mielke said. The existing “shouse” is located between Cedar and Elm on 7th Street and originally had a farmhouse on the property that was eventually taken down. Village Clerk Bev Josephson noted there can’t be only a pole building on a property without a house, so people would have to build both at the same time.”

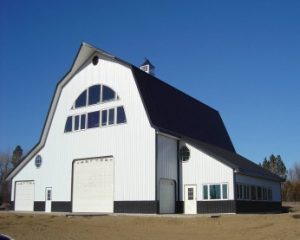
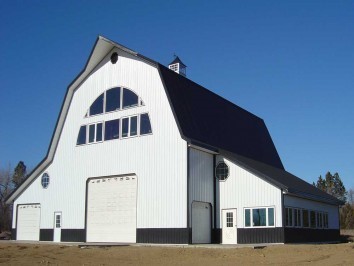
Gambrel roof pole barnAs long as your proposed shouse or barndominium meets planning and zoning requirements – adequate setbacks, allowable footprint, within any height restrictions and doesn’t use unapproved siding and roofing materials you should be good to go. Post frame (pole) buildings are Code conforming – so an attempt to prohibit one strictly due to its structural system is a battle I will take up for you at no charge.
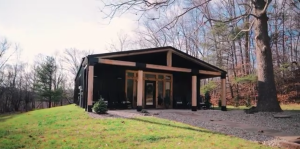
I will add that in fact my bride and I live in a 48×60 shouse with a full garage on the lower level, the “house” portion on the second level (complete with an elevator), a 18’ width boat shed/shop on the west side and my 18’ width office on the east side. It is a beautiful building, inside and out and we love it! The attached photo is our lovely shouse.

Ready for your new shouse? Give a call to a Hansen Pole Buildings’ Designer at 1(866)200-9657 today to get started!

New Pole Buildings Cost Money

New Buildings Cost Money

As I recently mentioned, I have joined several Barndominium Facebook groups. It has proven to be enlightening and has given me a great deal of information towards authoring a book or books on Post Frame Barndominiums.

In asking for input on chapters for my endeavor, I had one person respond with:

“Maybe you could have a chapter on how building a new building cost money. And that you shouldn’t expect other people have spent money to just give you their plans and all their knowledge that they spent their own hard-earned money on to get.”

Yes, building a new building of any sort is going to be an investment (not a cost or expense) of both time and money. Done correctly, it absolutely should be.

I have my opinions of plans sharing – everyone’s circumstances, wants and needs are individual. Copying or borrowing someone else’s plans with an idea they will be ideal for you is totally misguided. If their plans are sealed by a RDP (Registered Design Professional – architect or engineer) as they SHOULD BE, it is unlawful (other than with RDP’s written permission) to either share them or to use them anywhere other than upon the originally intended site (not to mention it could come with serious, if not fatal, design deficiencies due to variances in load conditions).

I have been freely sharing my four decades of construction and post frame knowledge through writing blogs and my “Ask The Pole Barn Guru™” column since 2011. I do significant research and reading, besides reaching into a wealth of good to use and bad to avoid learned from personally participating in around 20,000 post frame building projects. Whether you are considering a new building, already have one and it has challenges, are a contractor, design professional or Building Official – I will gladly assist.

Why?

Because I care deeply about our industry – post frame building. Every properly done post frame building adds to the credibility of post frame as becoming a method of choice for homes and barndominiums. Whenever there is a failure or someone is dissatisfied with their end result I am saddened, as these circumstances are easily avoidable.

Job Site Storage of Polycarbonate Panels

Polycarbonate panels to be used for eave and/or gable end triangle “lighting” or ridge caps should not be used within living areas of post frame homes and barndominiums. They do often afford a cost effective method of getting natural lighting into accessory areas such as unheated shops and garages, barns and equipment storage buildings.

Recommended storage procedure for Polycarbonate panels (eave or ridge lights):

Store panels horizontally, on flat sturdy pallets, equal or longer than longest panels. Stack short panels on top.

Store polycarbonate panels in a cool and shaded place, avoiding direct sunlight, ideally indoors in a cool, dry, well-ventilated area. Avoid covering panel stack with dark or heat-absorbing materials or objects, to prevent solar heat buildup. When stored on skids, stack panels no more than 250 pieces on a skid. Avoid double stacked skids, or stacking anything atop panels. Prevent moisture from collecting on or between panels.

When necessary to store panels outdoors, cover stack with a white opaque polyethylene sheet, corrugated cardboard or other materials not absorbing or conducting heat. Verify entire stack is covered.

Polycarbonate panels are tough, requiring no special care. We recommend some cautionary steps: avoid stepping on or driving over the panels while on the ground, or folding during handling and installation. Avoid dragging panels on the ground, scraping against structural elements or any other sharp or rough objects, to keep from getting scratched.
Polycarbonate panels are resistant to a variety of chemicals and exhibit limited resistance to a second chemical group. A third chemical group may attack and damage panels. Damage degree and severity depend upon chemical type and exposure duration. Polycarbonate panels will melt down at approximately 400 degrees F.

In today’s as well as most recent four previous articles I have covered how to protect your valuable investment’s materials prior to assembly. All of this information and more is a portion of Hansen Pole Buildings’ Construction Manual – nearly 500 step-by-step pages to guide do-it-yourselfers and construction professionals to successfully completion of every post frame project.

Ready to stop pondering and start your journey to a happy new post frame building? Call Hansen Pole Buildings today 1(866)200-9657 to speak to a Building Designer.

General Material Storage for Barndominiums

General Material Storage

I have recently signed up to join several barndominium groups on Facebook. If you are unfamiliar with this term, here is a detailed explanation: https://www.hansenpolebuildings.com/2016/04/the-rise-of-the-barndominium/.

Overnight I have had an ‘ah-ha’ moment where a light bulb turned on and I decided to take a plunge. I am going to write at least one book on post frame barndominiums. I posted my mission in these groups – looking for advice on what chapters would prove to be most meaningful. And I have received feedback. Lots and lots of feedback.

One of my fellow group members has suggested a chapter on how to store post frame building materials once received. In looking at how chapters appear to be laying out so far, it appears this subject may not get covered until Volume Two of my series. Of course this gives me an ability to have commercials like – “Call in next 10 minutes and we will throw in Volume Two at no charge – you just pay for shipping and handling!”

This happens to be a subject covered at length in Hansen Pole Buildings’ Construction Manual, so rather than having to wait for book publication, here is how to safely store materials.

General Material Storage

Store off ground any materials not being used within construction’s first few days (or more than a week after delivery) and cover with a tarp.

  • Some materials will be delivered in cartons. Avoid storing cartons in stacks.
  • Store cartons protected from falling materials or tools as they could damage enclosed contents.
  • Keep cartons dry. Best place to store cartons is indoors.
  • If cartons are stored outside, cover with a loose-fitting, light colored tarp, arranged to allow ventilation. This is critical, because some materials (especially vinyl) can be damaged if heat builds up around cartons.
  • Take special care storing any screws.
  • Store bolts, nuts and washers in a location where they will stay dry to avoid rust.
  • Windows, entry and overhead doors will frequently be delivered in cartons or crates. Store upright leaning against a solid surface such as a wall or workbench.

Stay tuned in for subsequent articles on how to safely store materials for your new building!

Solving a Massive Pole Building Grade Change

Solving Massive Post Frame Building Grade Change

Most everything about post frame building construction is predicated upon “your clear, level site”. But, what happens when (like most of our planet) there is not a flat level place to start with – instead there exists massive amounts of grade change?

Hansen Pole Buildings’ Designer Doug ran into one of these situations recently and shot up a distress flare looking for some advice:

“Anybody have an opinion on what be the most cost effective or least painful
course of action for this soon to be-I hope-client?”

Here is information from Doug’s client:

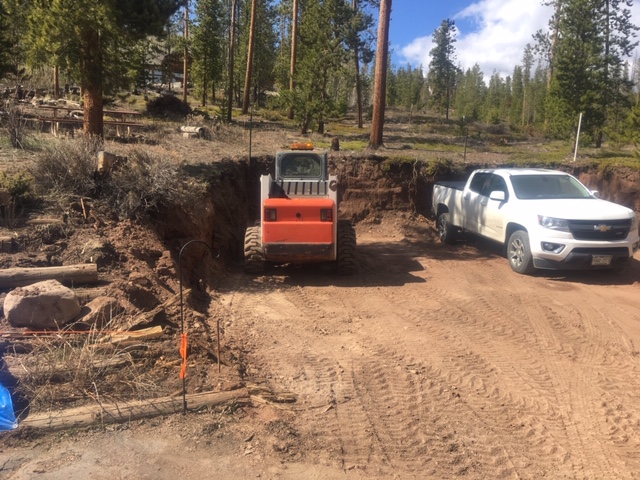
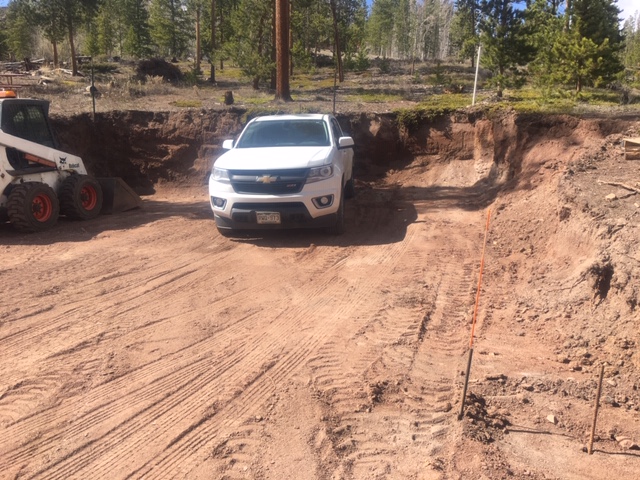
“Attached are pictures of the dig to the right of my driveway cutting into
the hillside. On the left side in front of the Bobcat appears to be close to
finished grade. The cut at that point is nearly 7 feet tall. The soil type
is decomposed granite. With a few spots of stubborn rock.

My options at this point are to build a engineered retaining wall to hold
back the soil before building a pole barn on the flat spot, with drainage
coming from around the back to the front. The other option is to just do a
spread footing with a foundation wall. and then a curb wall of a 2 x 6 on
top of that.

The most creative thought would be to do both in the same wall. The wall
would be supported in and by itself, and the building would stand next to the
wall, supported on posts with loads at the post, and not on top of the wall.
Is that even possible?
Thanks
Bobby”

Mike the Pole Barn Guru writes:

Well, luckily or unluckily, I have a similar situation on one of my own personal post frame buildings at Newman Lake, Washington. Here was what we came up with as a best solution: https://www.hansenpolebuildings.com/2012/02/grade-change/. In this scenario, our post frame wall columns are mounted to ICFs on “cut” sides and traditionally embedded on flat or low sides.

Post frame construction is moving pedal to floor into residential markets where these types of scenarios are going to appear more and more.

I can see these types of scenarios being eventually added as options to Hansen Pole Buildings’ “Instant Pricing™” system where we could not only design and price but also provide blocks, connectors and needed rebar.

Just more moves in providing “The Ultimate Post-Frame Building Experience™”

Considering constructing on a less than ideal site? Call 1(866)200-9657 and discuss your situation with a Hansen Pole Buildings’ Designer today.

Local Building Supply is Wrong Choice

With an advent of internet providers such as Amazon (www.amazon.com ) there has been more pressure to “buy local”. Sometimes buying local can be a blessing, but when it comes to a new post-frame (pole barn) building – even an attempt to buy local can prove to be an experience (and not a pleasant one).

Reader MAGNUS in HUDSON writes:

“I’m looking for a quote on a 36’x60’ pole barn. I’m pretty motivated to get this going – I’d like to start raising walls in mid-June. I’ve been trying to work with my local building supply (small town, stay local if possible) but they’re just letting me down on timing, and at this point I’m looking for solid alternatives. I’m pretty impressed with all the info on your site (in fact, I spent a bunch of time there over the past few months getting educated, and almost went with you without even checking with the locals.)

I’ve got cash in hand for this, so at this point it’s just trying to get plans in hand so I can get my permit and get some ground prep started. I’m leaving the country for about 2 weeks from the end of May to mid-June. My goal has been to get the earthwork done (some grading and fill + gravel pad) before I leave so I can begin erecting as soon as I get back. That’s feeling pretty tight now, though I thought I had plenty of time a month ago when I started with the locals.

I know I’ve forgotten a few important details as I put this drawing and notes together tonight. I’m available by phone most of the day Monday and Tuesday for any clarification questions. I’ll try to get the few items from your checklist that I don’t know filled in on Monday.”

Mike the Pole Barn Guru writes:

Your local building supply probably is staffed by very nice people. They probably know most people in town by first name. They are not post-frame (pole barn) experts. In fact, if they are above novice level you would be doing well!

There is a chance there is someone on their staff who can actually sort of do a material’s list for a pole barn. Keep in mind, there is not a “plan” they are working from, so no one is checking for adequacy of structural design. This list of pieces may, or may not, even be enough pieces to sort of put a building together. My experience is a list such as this will be inaccurate for quantities, will leave things out, add in a few unnecessary pieces and result in waste, confusion and a less than satisfactory end resultant.
Some local building supplies have gone as far as investing in computer software, supposedly capable of putting together a list of materials. I have yet to see one of these programs able to do an accurate list on anything beyond a basic box – and they cannot supply engineering. Again, it is nothing better than a guess list!

Even if your local building supply somehow had a relationship with an engineer, who could provide sealed plans for your new post frame building – they are not specialists. At Hansen Pole Buildings we have buying power to get post frame building specific products in massive quantities at wholesale prices. Some of these are items we have manufactured specifically for us, when we found commercially available products were lacking in quality or features.

Let’s say your local building supply was somehow able to provide engineer sealed plans specific to your building, do an accurate material takeoff, get product to your building site – they are not going to have detailed assembly instructions to guide you through to completion. Chances are no one there has ever constructed an engineered post frame building, so when you or your builder get stuck, or make an error, it is up to you to solve it!

If you, or anyone, believes there is another post frame building kit supplier offering a better value to their clients, let us know what they are doing Hansen Pole Buildings isn’t. Frankly, we do not believe it to be possible.

Ready for “The Ultimate Post Frame Building Experience”™? Dial 1 (866) 200-9657 and speak to a Building Designer today!

Ignorance is Bliss and Sometimes Architects are Happy

Ignorance is Bliss and Sometimes Architects are Happy

Portions of this article (in italics) are from “County explores options for new Highway building” April 29, 2019 by Nathan Bowe at www.dl-online.com

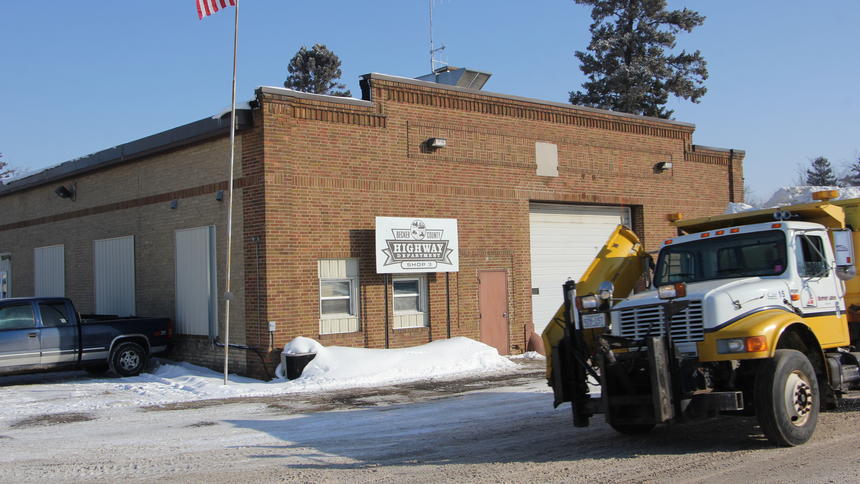
A city plow truck goes by the main shop building at the Becker County Highway Department complex in Detroit Lakes. www.dl-online.com File photo

Dear Architect friends ~ I didn’t learn much in architecture school, however one nugget was, “It is all about presentation”. Before you need to give a presentation including a possible post frame building, please discuss it with me, or at least read a few of my pertaining articles. I want you to come across as being as knowledgeable as possible.

“Hoping to save money on a new Becker County Highway Department facility, made of precast concrete and estimated to cost about $8 million, commissioners are exploring other types of buildings.

They are considering options including precast concrete, steel, and pole barn, and will tour facilities in the area made of those materials.

The firm working on the project, Oertel Architects of St. Paul, said in a report that any type of material could essentially be made to work, but a pole barn-type building would have to include steel in places to support a 5-ton crane in the maintenance area, for example.”

Post frame (pole barn) buildings can easily be designed to support a 5-ton crane: https://www.hansenpolebuildings.com/2013/07/overhead-crane/

“A less-expensive pole barn building also comes with a much shorter projected lifespan, and generally brings more problems with leaks and maintenance, unless a better grade of roof is used.”

Post frame buildings are permanent structures easily capable of generations of useful lifespan. Properly installed steel roofing will last decades without leaks or needs for maintenance.

“A pole barn is considered an agricultural type building in the industry, and is also referred to as timber frame. This is essentially like building a structure like an old-fashioned barn, with large timber columns and frames. It is typically made without a perimeter foundation. The wood frame structure is typically covered with a metal skin and the low-gable roof type is typically of metal. Its lifespan is projected at 15-30 years, depending on maintenance and other factors.”

Post frame and timber frame buildings are totally different animals. Post frame buildings have been used commercially longer than I have been in this industry (nearly 40 years). Very few buildings provided by Hansen Pole Buildings would be termed as being purely agricultural – nearly all are residential or commercial.  Isolated columns embedded below frost depth preclude needs for expensive and inefficient continuous concrete foundations. (Check out foundation costs here: https://www.hansenpolebuildings.com/2011/10/buildings-why-not-stick-frame-construction/). Most typically post frame buildings have 4/12 roof slopes (rather than “low” as in all steel buildings).

Amazingly, it appears my now 15 year-old million-dollar post frame home is due to expire any time now (like Windows 7)! In reality a properly engineer designed and constructed post frame building will outlive any of us who are reading this article.

“One way to meet the highway department needs and still meet code using pole barn construction would be to build three or four separate buildings, or build one building at different heights for vehicle maintenance, vehicle washing/storage, and office space, Oertel reported.”

Post frame buildings can be easily designed with a multitude of different wall/ceiling heights.

“Pole barns tend to be less energy efficient over time.”

As post frame buildings use exact same insulations as other similar construction types, if this is true it would be applicable across all construction spectrums. Post frame lends itself well to creation of deep insulation cavities and is far easier to insulate than all steel or precast concrete.

“Structural steel works better in a public works facility, with more salt and moisture in the air than usual, since these are made of heavy steel, just like a steel bridge. It is the less substantive metal materials that are a concern. A pole barn uses thin steel gusset plates and there is not much material to last over time if corrosion is present. Metal panels commonly used in pole barn buildings are also easily marred or dented by heavy duty operations.”

In highly corrosive atmospheres, steel can be isolated from corrosion (as in galvanized steel “gusset plates” used to connect roof truss members). Any type of siding – or even precast concrete or masonry, can be damaged by careless operations. Use of strategically placed bollards (https://www.hansenpolebuildings.com/2017/05/lifesaving-bollard/) can eliminate possibilities of significant damages.

“However it’s constructed, the new public works building will need the same mechanical, plumbing and electrical systems, floor loading, earthwork and mechanical systems, Oertel said. Costs can vary, but all of that might add up to perhaps 60 percent of construction costs, with the actual building structural shell 20 to 25 percent of the total project cost. So cost savings from a cheaper type of building might not be all that commissioners might hope for, compared to the long-term drawbacks.

“More could be said about the differences between pole barn construction and a more heavy duty construction using precast concrete,” the report sums up. “It mostly comes down to a lower front-end cost with a pole barn, at the sacrifice of longevity…””

Post frame construction is going to provide a greater value, without being “cheap”. Post frame buildings will have a usable lifespan as great as any other permanent building.

And – have you ever tried to remodel a precast concrete building?

5 Reasons to Use Post Frame Construction in Sustainable Architecture

Green building concepts are not a new trend, and so our planet can breathe a sigh of relief, there is increasing pressure on construction industries to go for green initiatives and use sustainable building materials having greater strength and stability. Post-frame construction is proving to be a huge asset to a building industry demanding delivery of high-quality sustainable architecture with good value.    

So what makes post-frame construction an ideal solution for green building concepts?

Growing Role of Post-Frame Construction in Sustainable Architecture

Sustainable architecture aims to design and construct socially beneficial, eco-friendly structures. Sustainable structures may cost more upfront but they pay off immediately. These buildings have a smaller carbon footprint and their environmental impact is also much less. Post-frame construction provides great benefits when combined with clever designing, well-supervised construction and high-precision execution.

Here are five reasons why post-frame construction is perhaps a best alternative when it comes to sustainable architecture:


  • Makes Use of Natural Materials able to be Recycled at End of Life

Traditional construction materials are environmentally harmful but post-frame construction involves use of eco-friendly materials being equally strong, reliable, and durable. Also, post-frame components used in each building are made of wood and steel so they can be easily recycled.  

This ensures responsible management of waste with materials recovery and scrap recycling. Recycling construction waste not only boosts a brand’s public image but the company also receives government incentives for its recycling efforts.   

Requires Less Construction Materials

Post-frame construction requires fewer building materials to achieve required load capacities. This is because post-frame structures are supported by few large-sized columns  spaced far apart instead of installing many smaller supports. Post-frame design requires fewer materials meaning less waste and less environmental impact.


  • Reduces Use of Energy  

Post-frames are made from wood and it requires very little energy to convert wood to timber. This is because embodied energy in timber used for construction is low. In fact, it is lowest of most sustainable building materials.


  • Ensures Energy-Efficiency with Excellent Insulation

A timber frame provides more insulation space as compared to brick and mortar buildings and ensures superior air infiltration. Its natural thermal insulation properties require less power for heating and cooling, meaning less use of fossil fuels.


  • Lasts Longer Even With Little to no Maintenance

Building materials used for construction of post-frame buildings make a structure so strong it can easily last beyond 50 years with little to no maintenance. Traditional architecture puts all weight on walls constructed on flooring supported by a continuous foundation. So, if any component is compromised, the entire architecture is at risk.  

Post-frame construction is very different and so it does not crack or collapse when the structure is stressed. Timber columns flex and roof trusses attached to the post-frame keep it from separating from balance of the structure.

Post-frame construction is low-cost, eco-friendly, sustainable, uses fewer materials, consumes less energy, offers great insulation, is easy to work on, does not limit design concepts and build time is quick. All of these reasons make post-frame construction the best choice for green building concepts.

Also, with buyers becoming increasingly eco-conscious these days, sustainable architecture has become a new industry norm. Post-frames are one of many sustainable building methods. There are several other ways builders can go green and win buyers, post-frame possibly being best.  

Author Bio: Erich Lawson is passionate about environment saving through effective recycling techniques and modern innovations. He works with Compactor Management Company and writes on a variety of topics related to recycling, including tips and advice on how balers, compactors and shredders can be used to reduce industrial waste. He loves helping businesses understand how to lower their monthly garbage bills and increase revenue from recycling.

Hansen Pole Buildings Pictures

Hansen Buildings Pictures

Today’s blog courtesy of one of Hansen Buildings’ owners, J.A.Hansen.

Pictures! I know I can speak for myself and the rest of the Hansen Pole Building staff when I say we love to get pictures emailed to us showing the completed kit, the new building in all its glory.

We get tons of photos of holes, poles being concreted in and even those with trusses being raised into place. But very few of the final building. I can only surmise by the end of the building process the clients are so happy with being done with their building and putting their building into use, pictures are the furthest thing from their minds.

And what about those pictures we do get? There is only one way to explain 75% of the pictures sent to us. Most people are crappy picture takers! I know that’s a bit harsh, but how something so easy gets so messed up is beyond me. So what does it take to get a good picture of a post frame building…or anything else that’s outside?

Follow this step by step process and you’ll take better pictures…of your new pole building, or anything else you want to photograph.

1. Start with choosing a cloudy or even an overcast day. Why not a sunny day? The sun makes shadows on the building so when you get the final picture the siding or steel looks like its a different color. The “other color” is dark and detracts from the beauty of the building. And the portion of the building in the shadows does not look pleasing to the eye. If you have people in your pictures, they are probably squinting and their expressions are not the most pleasing. One sees grimacing instead of smiling.

2. This step should probably precede step one….choosing a cloudy day. When you finish with putting on the last piece of trim or driving that last nail or screw, clean up the building site! Piles of cut off lumber, discarded pieces of siding or steel, tarps and garbage cans need to be cleaned up and/or moved. They really stand out in a picture and detract from the beautiful building you have just spent countless hours to build. Take an hour or two to clean up!
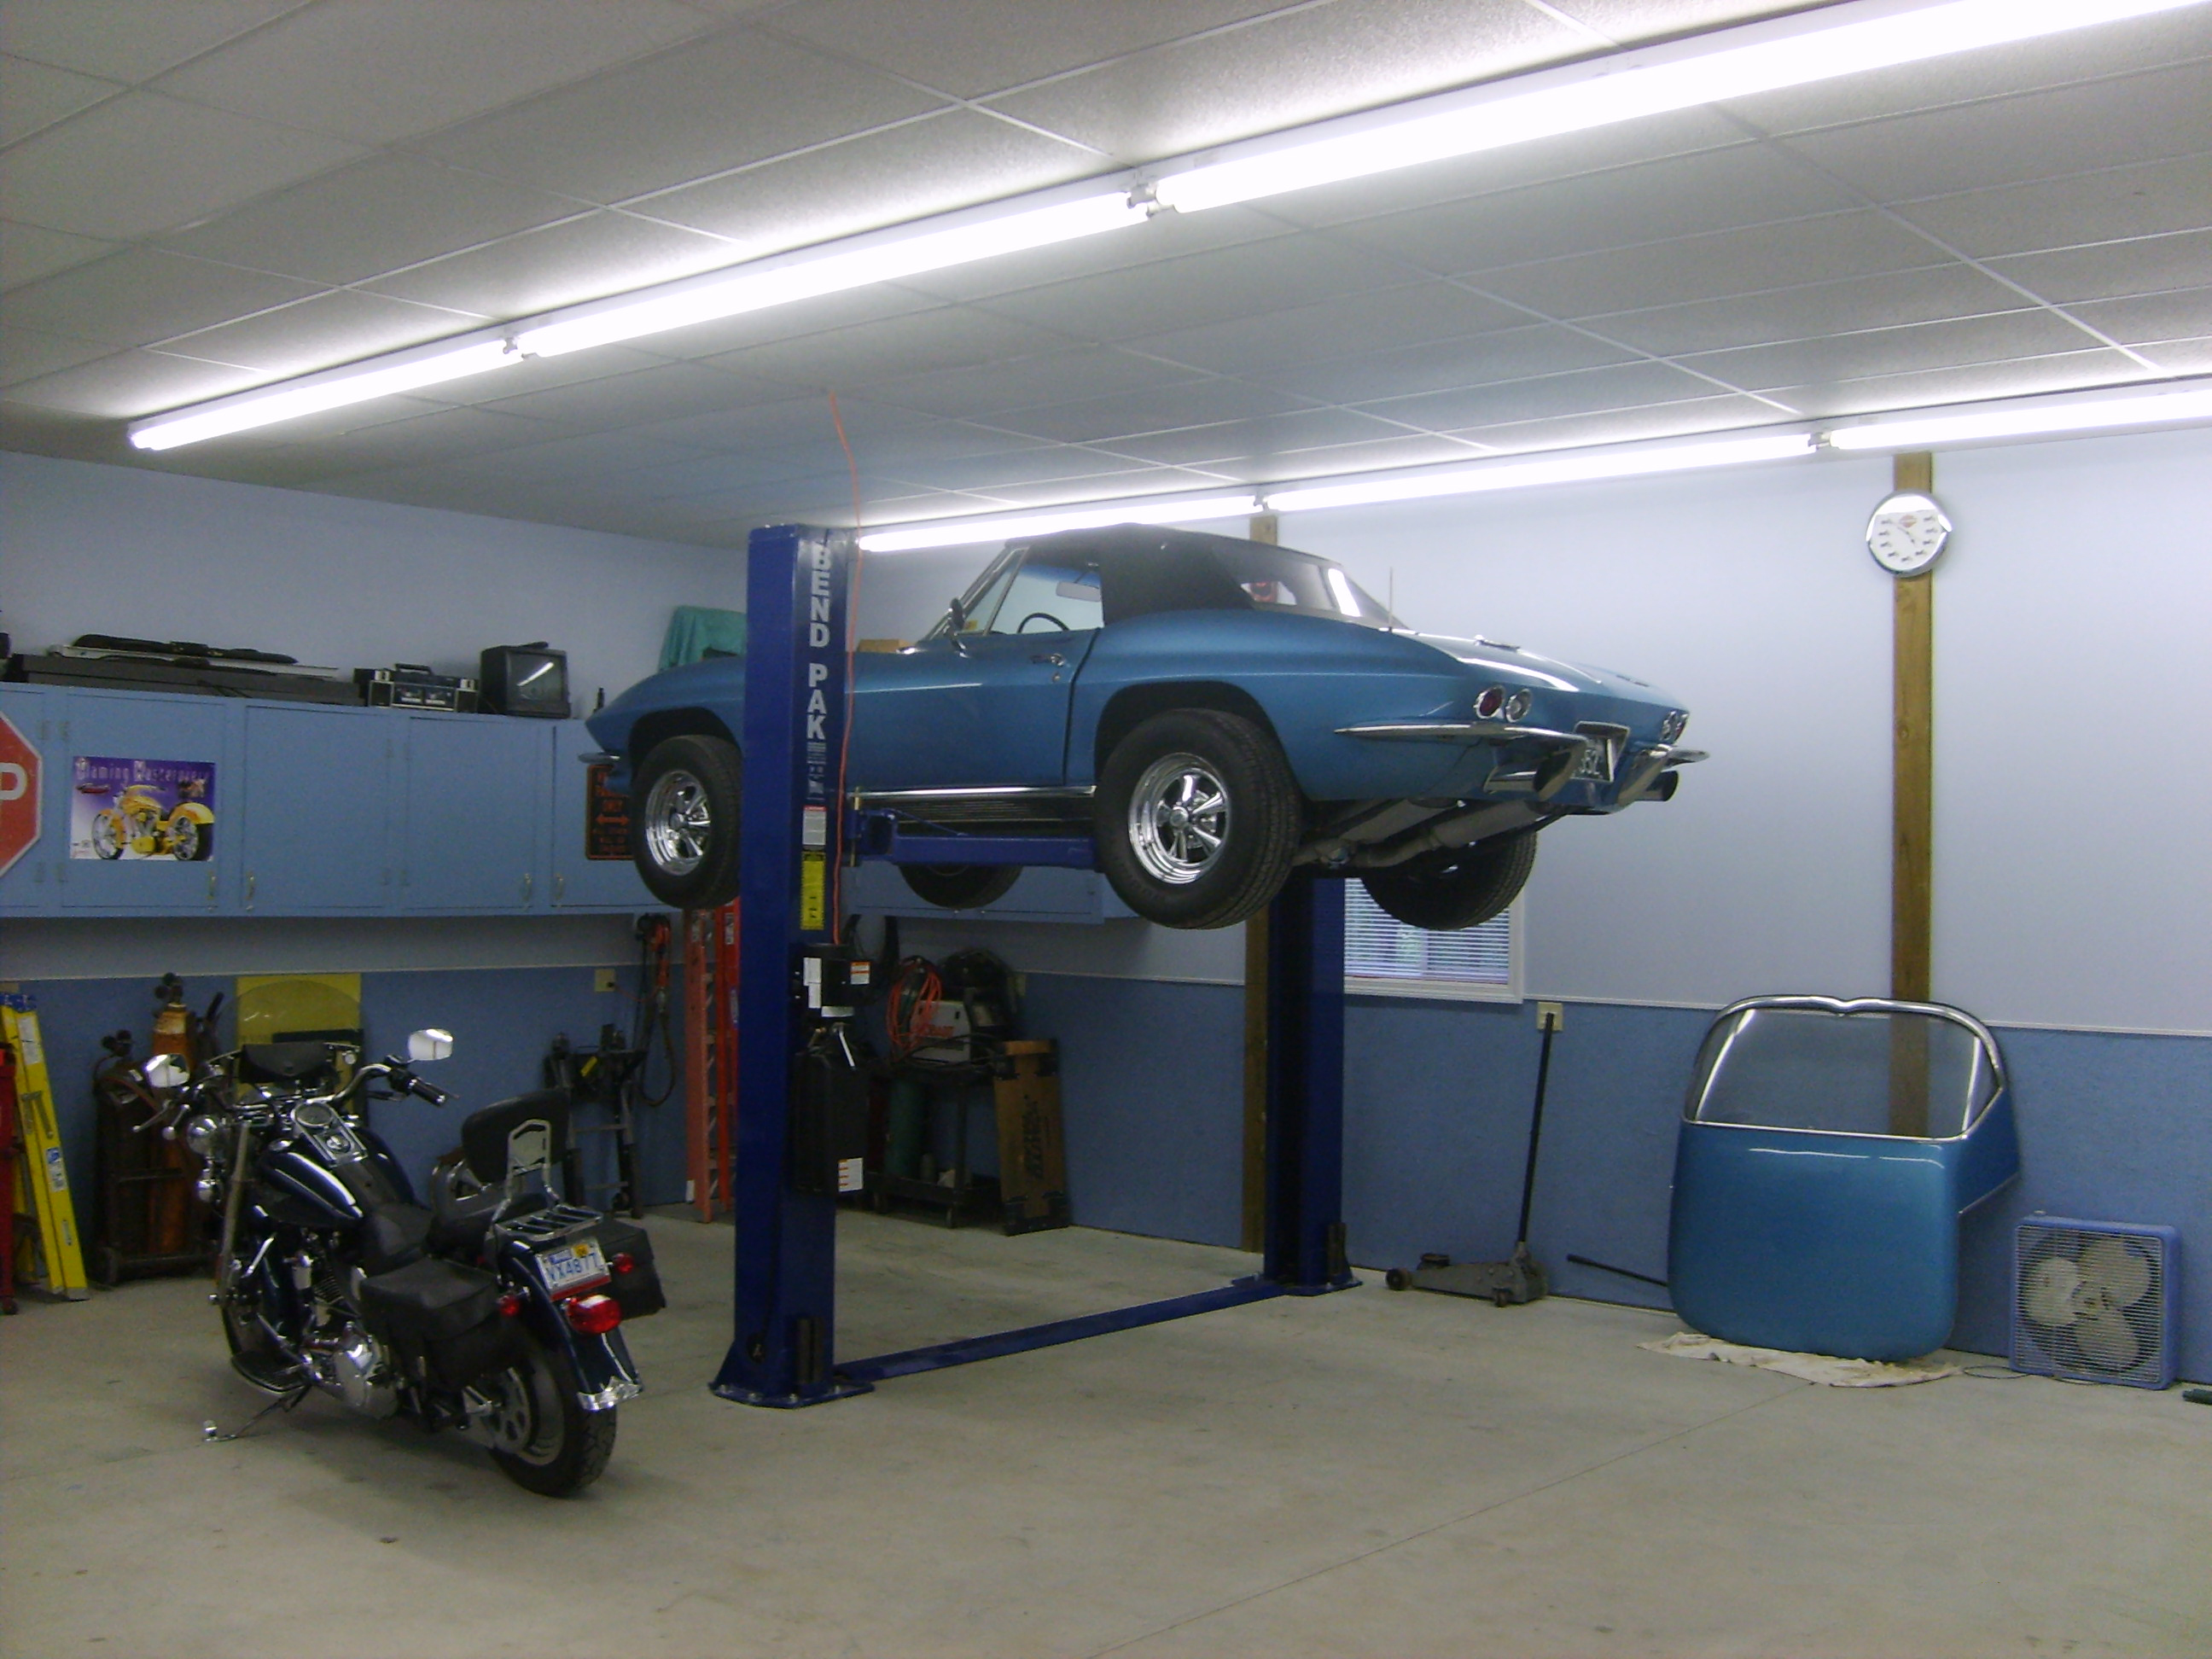
3. Take pictures from several angles. Don’t forget to take a few from a corner, showing two sides of the building. These angled shots are really the best. They make even a small building look grand.

Car Shop Interior

4. Take several pictures with the animals or farm equipment in them showing what the building is being used for. Don’t forget interior pictures! It’s time to show those classic cars or motorcycles which make the building shine! One picture on our website and in the Hansen Buildings’ brochure that’s a favorite of clients, readers and our staff shows a classic car…a Corvette up on a hoist. It makes clients want to have a building to house their favorite “toys” or hobbies.

5. Don’t forget to put people in the pictures. We love to see the smiling faces of the proud building owners…and their family. And please move the pickup sitting in front of the building! We want to see the building, not your favorite truck.

6. Finally…email these pictures to us. We’ve worked hard too…putting your building kit together, scheduling all the deliveries and lending a listening ear when you needed tech support.

You don’t have to be a professional photographer to take pictures that are vivid and tell a story. No matter what you are photographing, following these steps will guarantee pictures which are clean, beautiful and are website or brochure worthy.

Happy picture taking!

Secrets of a Pole Barn Salesman

Secrets of a Pole Barn Salesperson

Back in 1980 I was a pole barn (post frame) building industry newbie. So new, I considered myself to be rather clueless.

Then I was working for a now long defunct company, Mac Truss in McMinnville, Oregon. I’d pick the brains of anyone who was willing to listen to my pole barn questions and give me answers. One of my clients was a builder (I use this term loosely as he didn’t build anything himself) named Hal Mueller. Once upon a time Hal had apparently been fairly reputable, however by then, rumor had it, he had developed an affinity to dark colored bottles and had pretty much lost everything he had including his family. By 1980, his business model was to make $500 on every building he could sell – and with his low margins he did manage to sell quite a few buildings.

One day Hal called me to let me know a friend of his from my home town of Spokane was coming to Portland for a visit. His friend was a highly successful pole barn salesman (according to Hal, the “world’s greatest”) and Hal wanted to know if I was interested in meeting them for lunch.

I looked upon this as an opportunity of a lifetime!

Hal’s friend was selling over four million dollars of pole barns a year in a tough economy. Surely this man had some secrets I had to know. I was ready to glean insights and become brilliant!

I could hardly sleep a wink for days prior to this meeting, thinking about a myriad of questions I wanted to ask. Finally, it was lunch day.

After exchanging pleasantries, I quickly found out Hal’s friend’s success secrets.

Hal’s friend worked for a man who generously sent him to Las Vegas for a high rolling gambling junket every three months. First class air, lots of booze, nicest hotel suites, probably even some female companionship.

Now boss man was brilliant – his salesman got this trip for free (unbeknownst to his salesman) because his salesman was an unlucky gambler and would lose tens of thousands of dollars over a long weekend. Losing enough so he would come back after a trip flat broke and desperate to earn money! Of course Hal’s friend thought his boss was World’s Best who would give him such wonderful trips!

As for my questions about pole barns and how to sell them….I found out Hal’s friend actually had very little idea what he was selling and knew even less than I did!


My Cousin Did Not Buy a Pole Building From Me

My Cousin Did Not Buy a Building From Me

I truly love my cousin Randy. In the past few years he and his lovely bride have had a home and a post frame shop constructed on their farm southwest of Spokane, WA. Through a set of unfortunate circumstances Randy did not get a Hansen Pole Building.

Here is Randy’s Facebook post today:

“Feeling Hacked Off !!!!
Went to do a roof repair on my shop today because a plumber did a half assed job running the vent pipe through the roof and the snow took it out this winter. As cousin Scott McCartney and I are working on it, I discover that the builder used Stitch Screws instead of regular 1 1/2 in screws to attach all the roof metal and Wall Metal. Stitch Screws are only for fixing metal to metal, not metal to wood. This Is Unacceptable !!!!!!!
Now because I’m a stickler for this kind of stuff, I will probably spend weeks of my spare time changing out screws on my shop. Pisses me off !!!!!!!
Rant Over .!!!!!!!!”

Now my cousin Randy is nobody’s fool – he was also a MEI slave back in the day (for a tale of a MEI slave, read here: https://www.hansenpolebuildings.com/2014/03/roof-sheathing-clips/). I think enough of Randy to have had him drywall my three story post frame shop back in the 1990’s. He also worked for me when I was building post frame buildings – running our skid loader to layout most all of our buildings and predrill the column holes for the crews. There isn’t most anything Randy can’t do (or hasn’t done} and do extremely well.

Why a builder would do this totally baffles me, as stitch screws are not any less expensive (at least not good ones). Of course this building is over a year old, so the builder does not have to do anything about it, by statue!
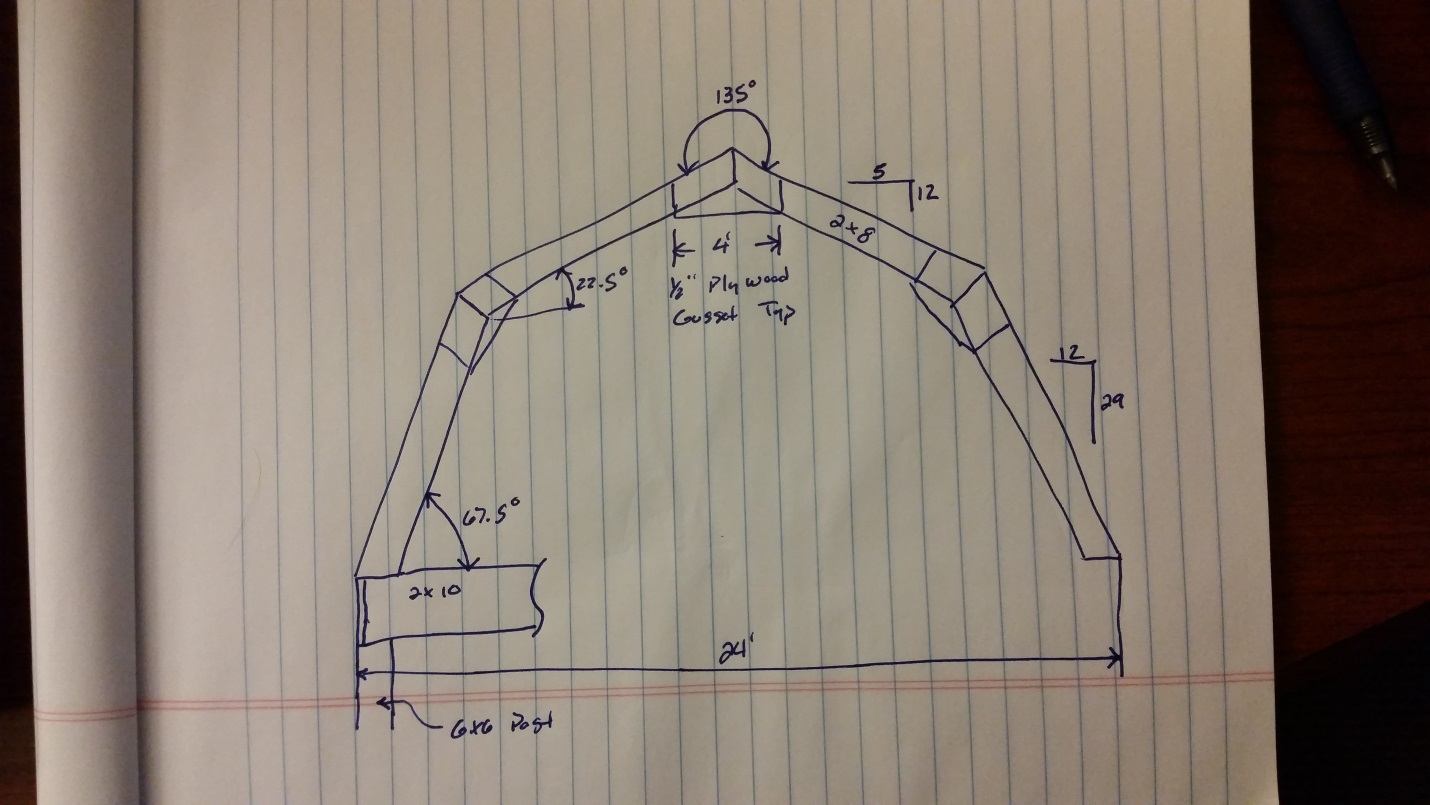
This is just one of a myriad of reasons people should, as often as possible, either construct a pole building themselves or have direct supervision of those who are doing the construction.

Hiring a contractor or general contractor to construct your new pole building is certainly no guarantee of a job done right – just ask Randy!


Building Your Own Gambrel Barn Wood Roof Trusses

Gambrel style rooflines are often enticing, they offer the feeling (however not the reality) of getting added space for free. Building your own gambrel barn trusses might appear on the surface like a way to make this even a greater savings.

This was prompted by an inquiry from reader DON in WAYNE. Don writes:

“I am building a 24 ft. wide x 40 ft. length barn. I am going to build a gambrel truss with 2×8 and with 4 ft. wide gussets. How far apart should I space them using purlins and should I use 2×4 or 2×6 purlins. I was thinking of going 4’ wide with the trusses and using 2×4 spaced 2 ft. wide for the purlins.”

Mistake number one is even considering building your own trusses, on site, unless you are constructing them from drawings designed and sealed by a Registered Design Professional (RDP – licensed architect or engineer). Chances are way too good (100% guaranteed) you are dooming your building (and possibly its occupants) to failure. In all seriousness, prefabricated steel connector plated wood trusses are the only way to go – you will save money in the long run and you will be able to sleep soundly at night.

Your second mistake is in trying to be your own building engineer. If it was my own building (depending upon the design wind and snow loads), I would probably be using a single truss on each endwall and double (two ply) trusses every ten feet, bearing directly upon the columns. In my humble opinion this will give you the safest end resultant as the trusses can be notched into the columns and not possibly slide down the columns (or have a questionable connection to a header or truss carrier). You can then utilize 2×6 (or 2×8 depending upon loads) roof purlins on edge to support the roofing.

Your idea of using 2×4 (I am guessing flat over the tops of the trusses) every two feet and spanning four feet will not work unless you have the availability of lumber graded higher than the Standard and Construction material from your local lumber yard.

To avoid making crucial mistakes, which could waste your hard earned money, I would recommend you invest in a fully engineered post frame building kit package.


Construction Marketing Ideas

Construction Marketing Ideas Reviews This Column

Construction Marketing Ideas holds an annual competition for the best blog in the construction industry, world-wide. This column happens to be one of only 17 selected to compete – win or lose, it affirms the message is being shared effectively. My thanks to Mark Buckshon for his review, which I share below.

Hansen Buildings’ Pole Barn Guru: An example of how a solid blog provides useful content and effective marketing promotion

By Mark Buckshon

March 23, 2018

I like Hansen Buildings’ Pole Barn Guru blog because of its singular, comprehensive and effective focus: You’ll find the blog useful if you are considering or have interest in post frame (pole barn) structures. Not surprisingly that is this company’s business.

Ask The Pole Barn GuruThe blog provides “relevant education, information and entertainment regarding all things post frame buildings every day Tuesday through Friday PLUS on Mondays (and some bonus Saturdays) an “Ask the Pole Barn Guru” column where three questions from readers are addressed,” nominator Mike Momb wrote.
However with focus there is diversity, reflecting the fact that pole barn structures have a variety of applications, serving quite different markets, ranging from residential accessory buildings, to agriculture, to public works and institutional environments. You’ll almost certainly find a relevant post (bad pun here) on the topic when you search through the entries.

Here’s an example: Pubic Works Pole Barns, and Labor Costs

The blog post’s theme relates to the challenges many public organizations have in facing high labor costs under the  Davis-Bacon Act’s prevailing wage requirements.

I’ll stay out of the debate here about the merits of prevailing wage legislation, but respect blogs with a point of view and perspective — and ideas about how to work with and adapt to rules. It’s a great blog.

Mike the Pole Barn Guru comments:

Also a shout out thank you to the many loyal readers who voted for this column as the best construction blog this year – your approval helps to get my writing through the masses and in front of the eyes of the judges who will make the final decisions!


Bad Energy Efficient Pole Barn Advice

Bad Energy Efficient Pole Barn Advice from GreenBuildingAdvisor.com
Long time readers of this blog have seen ample posts about energy efficient post frame (pole barn) buildings. As most are aware, there is as much bad information (maybe more) than good available on the internet. Whilst I’d like to believe Martin Holladay at www.greenbuildingadvisor.com is fairly knowledgeable – when it comes to his answers on this particular subject, he has (in my humble opinion) missed the mark.

Here are a few of Martin’s comments:
“The main problem with insulating a pole barn is creating a good air barrier. There are many opportunities for air leakage: between the insulated sections of the wall and the vertical posts; at the base of the wall (which either meets dirt, gravel, or a concrete slab); and at the intersection of the wall and the insulated ceiling. You should strive for airtightness when you create this assembly. It won’t be easy — but do your best.”

“It’s tough to insulate a pole barn. First, there is the question about the floor. Do you have a slab or gravel? If it’s a gravel floor, it’s hard to air-seal the bottom of the walls. If you have a slab, we’ll need to know your climate zone or location, so we can recommend whether you need a horizontal layer of rigid foam under the slab. Next, you still have issues of how to support the insulation. In most pole barns, you don’t have studs. You have posts and horizontal nailers between the posts. This makes air sealing difficult, and using conventional insulation difficult. The best way to proceed is to work on the exterior side of your structural frame. Again, either SIPs (structurally insulated panels) or nailbase is one approach — and if you use SIPs, you could skip the pole barn structure, and just build a SIP building. Another approach is to install a stud wall on the outside of your pole barn to hold the insulation — but again, this raises the question, why not just build an ordinary building with stud-framed walls if you need it for insulation?”

“I’m afraid that ‘energy efficient pole building’ is an oxymoron. If you want to make a pole building energy-efficient, you pretty much have to build an entirely new building — either inside the pole building or outside the pole building — to create an air barrier and provide somewhere to install the insulation. That’s why people who are interested in energy efficiency don’t choose dirt floors or pole construction. However, if you decide to let go of the idea of energy efficiency, you can certainly build a dirt-floored tiny house with a pole frame.”

Mike the Pole Barn Guru Advises

Maybe the thought of all post frame buildings having dirt floors should be thrown out of the discussion. From experience the only post frame buildings which have dirt “floors” are ones which are always going to be pure agricultural or storage buildings and will never be climate controlled, or they are dwellings with wood floors elevated above a crawl space.

The air barrier issue for post frame construction is resolved the same way a stud framed building would be – utilize a quality building wrap between framing and siding, then insulate between girts (think studs run horizontally). Thermal transference in walls can be reduced by having an interior set of wall girts to support inside finish surfaces such as gypsum wallboard. This is far less material intensive than the double studwall system promoted by some stick frame builders.
Wall insulation for post frame buildings can run the gamut from unfaced fiberglass batts, to BIBs (https://www.hansenpolebuildings.com/2011/11/bibs/), to closed cell spray foam or combinations thereof, just like studwall construction.

Top of wall to insulated ceiling transition is the same for either form of construction. Raised heel trusses (https://www.hansenpolebuildings.com/2012/07/raised-heel-trusses/) allow for full thickness of insulation above the perimeter walls, and should be utilized in any case with a climate controlled building.

For slab on grade applications frost-protected shallow foundations (https://www.hansenpolebuildings.com/2016/11/frost-protected-shallow-foundations/) are a practical solution, with post-frame holding an advantage in not having to have a thickened edge of the concrete floor.

Designing for energy efficiency? Look no further than post frame construction – at the corner where energy savings and cost savings meet!

Halloween Store Not a Pole Barn?

Narrowmindedness drives me literally crazy. Post frame (pole barn) buildings can look like absolutely any other building. The only differences being the structural system – post frame and saving a fair amount of hard earned money.
From the Marion, Indiana Chronicle Tribune February 21, 2018:
“The Marion City Council will review a rezoning request for 1427 W. 10th St. for a third time before voting.
Fireworks store owner Ron Vielee made the request, saying he wants to expand his reach from his current business at 1421 to include a new Halloween store and parking lot in the properties west of the his current store. The council voted to move the request to a third reading following a discussion at Tuesday’s meeting.
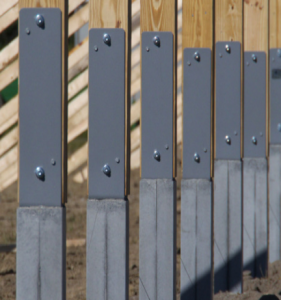
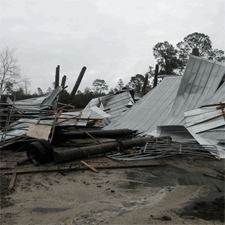
The request to rezone would classify the property as “General Business,” it is currently zoned as a residential. Vielee said he intends to purchase both this property and the adjacent property at 1423 W. 10th St. The 1423 property has already been rezoned, according to Sam Ramsey, advisory plan director.
A burnt house occupies the location at 1423 W. 10th St. Vielee said he will tear it down, once the sale goes through.
Council member Jim Brunner said he was appreciative of Vielee’s effort to tear down the vacant structure.
Vielee said he intends to make an offer to the owner of the 1427 property. In all, including demolition, purchasing the properties and building a new store, Vielee said he will invest nearly $300,000 into the community.
“The whole neighborhood is going to look better, for one,” he said. “It’s going to be nice. It’s not like I’m going to put up a pole barn.”
Vielee answered a number of questions from the council on his intentions and his businesses. The business owner said the Halloween store, much like fireworks store, would be open for about a month out of the year.
Council member Deb Cain noted when the fireworks store went in, the council granted a tax abatement. However, Cain said the business plan was for the store to be open year-round, selling Thanksgiving and Christmas decorations.
Vielee said that was true and also gave permission for the council to consider doing away with the tax abatement.
“If you want to just discard it and charge me full taxes, I’m fine with that,” he said.
Council member Alan Miller asked Ramsey what sort of businesses could take occupancy at the location if rezoned and Vielee’s business did not last.
“Pretty much anything you see up and down the bypass,” Ramsey said. “General Business is our broadest zoning districts in town.”
This would include tobacco stores, liquor stores and convenience stores.”
Considering new construction for virtually any sort of retail business? If you want a structure which is aesthetically pleasing, cost effective and goes up quickly, then post frame construction might just be your ticket to success. And yes, it may be called a “pole barn”.

The Perma-Column Price Advantage?

My good friend John owns (among other things) Heartland Permacolumn. I’ve borrowed this from his website (https://www.heartlandpermacolumn.com/products/the-perma-column-price-advantage/):
“Perma-Column products give you the ultimate price advantage. You simply cannot put up a building on a concrete foundation for less money.

Yet some may say, “They’re too expensive…”

HOWEVER, the only people who ever say this install buildings using treated wood posts embedded directly in the soil.  They think adding between one and three thousand dollars to a building makes the price “outta sight…”

It is true that there is one type of building that is less expensive than a Perma-Column building…one built on a treated wood foundation.  Treated wood posts may last a very long time in soil contact in some cases…and not so long in other cases.  This is part of what makes post-frame buildings the most economical of all building types.

But there are several other reasons why post-frame is so economical and efficient.  First, it is much quicker, easier and less resource-intensive to stick a post in the ground and build from there than it is to build any other type of building on a typical foundation.

Second, by using posts that are 8′ or more on center, you have far fewer structural members to install compared to other types of buildings.

Third, because the structure is made of wood it is less costly, requires no fancy equipment or specialty trades, is easier to work with, is very environmentally-friendly and is energy-efficient.

Furthermore you can build exceptionally high sidewalls (usually 24′, sometimes more) and exceptionally wide clear-spans (100′ or more without supporting walls or columns) for ultimate design efficiency and flexibiliity. All of these advantages remain firmly in place when you build on concrete piers or a continuous concrete foundation using Perma-Column products.

When one takes a close look at costs per linear foot, the upgrade is not really very much at all.  A Perma-Column upgrade is typically between $10 and $11 per linear foot compared to the price of building on treated wood posts embedded directly in the ground.  This may increase the price of a really small and inexpensive agricultural building by more than 10%, but it may also add less than 4% to the total cost of a really nice one…or to a typical commercial, residential or industrial building. Click here to download a PDF that provides a cost comparison.

So if you want a REALLY cheap building and don’t care when or if the post foundation will rot, you should build a post-frame building on a treated wood post foundation…

…or for roughly 10% more, you can build using Perma-Columns and have an investment that will hold its value for a very, very long time.”

Mike the Pole Barn Guru writes:

Perma-Column

This particular article has been triggered by a question posed by reader MATT in WABASH who writes:
“What is the cost of a perma-column? I am looking at a 40 x 56 building most likely at a residence that I will live long term and thought perma-columns would be a good investment, but I am having trouble finding the cost online for them. Thanks!”
Well Matt, as near as I can tell, the budget should be around $200 per column by the time they get delivered to your jobsite. Next challenge is going to be unloading and properly placing the several hundred pound Perma-columns exactly in the holes, on top of a poured concrete footing.
With the thought you are trying to avoid placing pressure preservative treated wood into the ground, there may be a more affordable (and easier to install) alternative. Assuming four foot deep two foot diameter holes, one could pour under one-half yard of premix in the hole and mount a bracket in it for roughly $100. Same longevity, same concept, easier to install.

Both Ends Open, Pole Barn Wind Load Challenge

The Both Ends Open, Pole Barn Wind Load Challenge
There are plenty of people who just do not understand the basic concepts of how wind loads are transferred through a pole barn (post frame building) to the ground. Included amongst these would be those who desire buildings which are enclosed on both long sidewalls and open on both ends. This is one of the worst possible design concepts one can come up with in a new post frame building.

Of course somewhere along the discussion between the Building Designer and the client this statement always seems to come up:
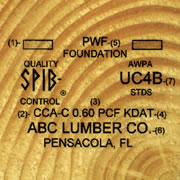
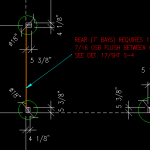
“Well Joe Blow has one down the road and his is still standing”.
My response to this is – “Joe has just been phenomenally lucky”.

In my years living in Eastern Washington, we made numerous trips from Spokane to Seattle. Driving across Interstate 90, one passes through the towns of Moses Lake and Ellensburg. This is prime grass growing country, where numerous hay storage buildings have been constructed over the years, with both ends open. The majority of these now have complex systems of braces and/or extra diagonal columns added to their sidewalls in attempts to maintain them standing vertical. More than a few of them only remain standing up because they are full of hay – the contents alone are what is keeping the buildings standing.

I’ve hashed through this challenge in the past, however it is apparent too few people have read and grasped the situation (read more here: https://www.hansenpolebuildings.com/2017/04/open-endwalls-hay-barn/).

For those of you who enjoy audience participation, please go find an empty shoe box and a pair of scissors.
Remove the lid (and the shoes) from the shoe box. Place it open side down on a table top. Push down on the box – pretty stable, isn’t it?
Next, cut both of the narrow ends completely out of the box. Again place it open side down on the table and push on it…..
Flat as a pancake, isn’t it?

The very same concepts work to keep buildings standing. Remove too much or all of the ends and the building does a fall down, goes boom.

Just because Joe happens to have a building standing which sound engineering practice says it should not be, does not make it right. Most folks are going to make a significant financial investment into a new post frame building and my personal preference is for them to not have their insurance company paying to replace the building.

Will My Poles Rot Off? Not If They Are Properly Pressure Treated Wood!

Do the poles start to rot out after so many years? That depends on whether or not they are pressure treated.

This question was recently posed to me by reader MARK in WOLCOTT. Typically my answer would include some snarky comment such as: “Most certainly, however it might not be during your grandchildren’s grandchildren’s lives!”

The reality is, I know lots and lots of people in the lumber and post frame building industry. Having spent my entire adult life in it tends to add to these. I have yet to meet anyone, who can tell me they have actually experienced a properly pressure preservative treated wood building column rot.

Of course there are always those who have stories such as, “My Uncle’s cousin says he knows of somebody, who knew somebody who had all of their pole barn poles rot off”. Could be – and they probably were not pressure preservative treated at all!

In order to put this matter to rest and ease my already untroubled mind, I utilized the power of the internet and Google to do some research.

Well, it turns out four fine people named Stan Lebow, Bessie Woodward, Grant Kirker and Patricia Lebow got their collective thinking caps together and wrote an article entitled “Long-Term Durability of Pressure-Treated Wood in a Severe Test Site”. Said article was published in Advances in Civil Engineering Materials, Vol. 2 No. 1, 2013 on pages 178-188 (for those of you who want to read it in its full and unabridged glory: https://www.fpl.fs.fed.us/documnts/pdf2013/fpl_2013_lebow001.pdf).

Our team of authors was motivated, as stated in the introduction to the article, by this:
“Pressure-treated wood has been widely used as a durable construction material in the United States for over a century. However, despite its long history of use, there are relatively few reports on the long-term decay and insect resistance of pressure-treated wood”.

Now, as it so happens, the USDAFS (U.S. Department of Agriculture Forest Service) has a test site located near Saucier, Mississippi. The plot has a relatively high annual rainfall and warm temperatures which create a harsh decay environment. Eastern subterranean termites are active at the site. The location is within American Wood Protection Association (AWPA) Deterioration Zone 5, Severe Hazard, which is the most severe hazard classification.
As a control, some untreated posts were placed and all failed in less than three years!

The current Code standard for pressure-preservative treated lumber for structural use is UC-4B (read one of my better articles of all time regarding pressure-preservative treating here: https://www.hansenpolebuildings.com/2012/10/pressure-treated-posts-2/). UC-4B requires a chemical retention for many water borne treatments such as ACZA, CCA-B and CCA-C of 0.60 lb/ft^3 (pounds of chemical per cubic foot of lumber). With retention levels LESS than the current UC-4B requirement, there have been ZERO failures in these chemicals in tests of up to 61 years!

I will stand upon my initial remarks for lifespan.

Put the Architect in Charge?

Put the Architect in Charge?
I spent several years paying off my college student loans from Architecture school, so I do have a profound respect for architects who have been able to make a living practicing their trade. This, however, does not mean I feel the intervention of an architect is appropriate in all situations and circumstances.
Case in point, from a copyrighted article in the Greenfield, MA “The Recorder” of November 29, 2017:
“BUCKLAND — Accepting the recommendations of the Highway Garage Building Committee, the Selectboard is asking Wilbraham, Vt., architect Roy S. Brown for a price proposal on the design and cost estimates for building a 5,000-square-foot town highway garage and a 5,000-square-foot pole barn to store equipment.
The town bought the 4.7-acre former Mayhew Steel property in March 2016, but needs a municipal garage that meets state building code. The plan includes demolishing most of the old Mayhew Steel complex.”
There is a strong possibility Hansen Pole Buildings could have saved the 1902 residents of Buckland, MA some of their tax dollars. At absolutely no charge to municipalities and governmental agencies which are looking at new structures which could or should be post frame buildings, we will provide both a free cost estimate, as well as engineer sealed plans and specifications which can be utilized when sending the project out for bid.
Why?
We happen to be taxpayers as well and we care deeply about the squandering of our contributions on government projects. If we can help to hold down the costs and provide for the public true value for their investment, we sleep well at night.
Do you know of a town, city, state or even federal need for a new building? If so, let us know whom to contact.
Get A Free Quote! For more reading on this subject: https://www.hansenpolebuildings.com/2016/11/free-engineered-pole-building-plans/.

Can Wall Girts Be Installed Before Trusses?

Can Wall Girts Be Installed Before The Trusses?

In my travels over the years I have seen more than a few post frame buildings under construction. When I find one being constructed by a building contractor, if the wall girts are installed before the roof, it is an immediate giveaway to the builder having been a framer at one time.

Why?

Because the correct (and easiest) way to assemble a post frame building is to construct the roof first, then place the wall girts.
But does this sound counter intuitive??

Client ED from CLINTON wrote to Hansen Pole Buildings’ Mistress of All Things Being Delivered, Justine, recently:
“I do have another question.  I am very limited on Whidbey Island concerning  options for setting the trusses and I do not believe I will be ready for the trusses when they arrive on site, so paying the truss company to set them at the time of delivery is not an option. .  It appears that Hansen’s recommends that the trusses get placed after the skirt boards are installed and before the wall girts are installed.  Do you see any issue with installing the wall girts prior to installation of the trusses?

Mike the Pole Barn Guru Writes:

Well, there could be some issues.

The majority of our clients (as well as most professional post frame building installers) frame up portions of their roof on the ground and then lift entire bays using either post top winch boxes, or a crane. Having girts in place would make this an impossibility as the girts would be in the way of raising the trusses.

In the event you decide installing the girts first is the direction you really want to go, it is crucial to have the tops of the columns held in place along the length of the building at exactly the column spacing. It is far easier to have to custom cut a few girts to various lengths and be able to keep all of the purlins in each bay the same length.

There are always methods to our madness, which is why the Hansen Pole Buildings’ Construction Manual leads clients (or their builders) through the process of assembly in the correct order to make the process as easy and pain free as possible.

The Case of the Termite Shields

When it comes to post frame building construction, I know a little bit about a lot of things. I get asked a lot of questions about how to solve post frame building challenges and do a pretty fair job of answering them. When I do not know an answer I feel confident in, I have no problems with doing the research or reaching out to an expert. Such was the “Case of The Termite Shields” (sound almost like a Sherlock Holmes story).

In this case, I went to “The Bug Doctor” Jerry Schappert of www.pestcemetery.com

Here was my question:

mr owl tootsie roll pop“We have a Building Official asking for a termite shield for a post frame (pole) building. The building utilizes pressure preservative treated columns embedded in the ground with a treated splash plank around the base of the walls. At the bottom of the steel wall siding is what is known as base trim, it is steel and extends outward from the splash plank 1-1/2″ with the outer edge being a downward bent lip. This should serve to function just like the steel termite shields we have viewed online. 4-5/8″ of the pressure preservative treated splash plank is visible below the base trim. There is a product called a plastiskirt which is vinyl and designed to wrap the splash plank. In your opinion, what would be the best design solution to protect the building from termites as well as to meet the requirements of the Building Code?”
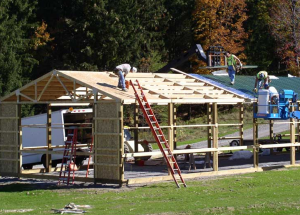
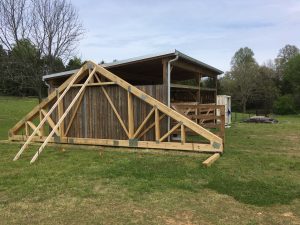
The good doctor replied (in very short order I might note):

It sounds to me you’ve met the code already? What more does he or she want?  There are ‘pipe shields’ on the market but they are just basically what you describe. Pole barns here in Florida basically have very little code requirements and we are the termite capital of the world.  So without knowing what more the inspector is looking for I wouldn’t know how to answer.

Need a bug expert, try Jerry. Need a post frame building expert? I will give my best impression.


So You Want to Become a Post Frame Building Installer?

So You Want to Become a Post Frame Building Installer? I’ve dealt with a broad variety of post frame building installers over the years. Just like our clients, they come in all shapes and sizes, as well as all levels of price and quality. One of the better pole builders I have encountered was a gentleman named Tony Storm. I first met Tony back in my early days in the post frame industry when I managed the light gauge metal connector plated wood truss plant for Lucas Plywood and Lumber in Salem, Oregon. Tony was retired from his first career and needed a garage/shop to tinker in. He invested in a post frame building kit package from me, which he and his son constructed. They had so much fun with putting the building up, they decided to make it a profession. Along the way, they set aside enough money in two years of building, to pay for the son’s college education! Tony was pretty astute and I learned a few secrets from him. One of these I have shared previously: https://www.hansenpolebuildings.com/2016/02/strait-roof-steel-overhangs/. One of my readers recently wrote: “Hi my name is Stacy. This may be an odd request but I live in Calhoun, La and am just had a pole barn built on my property.  I was not at all pleased at the time frame nor quality of the finished product.  I started doing math in my head and am looking into starting a competitive pole barn business in my area.  The only one in my immediate area has terrible reviews with the BBB and I now see why.   My questions revolve around how and where you guys get your metal/ lumber/ garage doors/ etc.  Do you provide kits for other pole barn business owners around the country? I am not a competitor of yours and plan on covering only 50 mile radius of my home since this will be my second job to begin.  I was hoping for some advice on where to get the product and negotiating some prices to make them as profitable as I can. I look forward to hearing back from you.” To which I responded: We supply complete post frame building kit packages which include the doors. We sell to both contractors and end users. Our advantages – every building is engineered, we provide complete assembly instructions (designed for the average do-it-yourselfer) and all of the components are laid out on the plans, so there is no guesswork. Most builders prefer to have their clients buy the kit direct from us, then they contract only for the labor (typically at 50% of the price of the kit) to construct on a clear level site. This protects you from a client who stiffs you for the materials (it does sadly happen) and we effectively do the selling for you. Client pays for concrete. Builder provides nail gun nails. Considering a new part or full time profession? The building industry in general, and post frame specifically has a severe shortage of pole barn builders who can both think and who actually care about what they do. Want to find out more? Just ask, the advice is free. Mike the Pole Barn Guru

Save Me, My Trusses Do Not Fit!

Here is a case where investing in a post frame building kit from people who have actually constructed buildings is a huge asset (am surmising this is not the case, since this person sent the Hansen Pole Buildings Technical Support email address a plea for help).
Reader James writes: “I have a 24 x 60 pole barn. I pulled my outside dimensions from outside of skirt board now on my trusses are an inch and a half long on each side how can I fix this?”

Dear James ~

Since I do not know who supplied your post frame building kit package, I will have to do some guessing as to how your post frame building was designed. Typically questions like this can be answered by whomever provided your plans and materials – and if it is an engineered building, the building engineer should be consulted as well.

A quick solve for anywhere in the country and any method of construction – to the eave outside of all corner and sidewall columns, attach a pressure preservative treated 2×6 from grade, up to the level of the trusses. In most cases two 10d galvanized common nails spaced every nine inches will be an adequate connection. As these 2×6 will be in contact with the ground, they should probably be treated to at least a UC-4B standard. Your building’s skirt board and any other exterior mounted framing can now be attached to the face of these 2×6. Using this method allows for siding to be installed normally, without any undue compensations to get it to lay out properly.

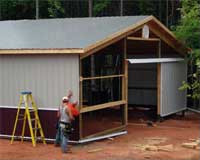
Another possibility – provided the heel plates of the prefabricated light gauge metal connector plated trusses are not in the way, you could cut 1-1/2″ off of the end of each truss, making them 29’9″ to match the width of your building from outside of column, to outside of column. In no case cut through a steel truss plate.

Or, (in cases with recessed or joist hung purlins) attach the eave girts between the overhanging 1-1/2″ of each truss. The end connections end up being a bit trickier here as it requires nailing through the end of the truss, into the end grain of the eave girt.

With stacked purlins, the eave girt can be nailed to the outside face of the columns above the truss.

If the chosen path is any of the last three choices, when the endwall steel is placed, start the first panel of steel 3/4 inch PAST the corner of the building. The corner trim will cover this and it eliminates having to do a lengthwise rip on the last sheet of steel on the opposite corner.

Mike the Pole Barn Guru

Six Reasons to Not Invest in a New Hansen Pole Building

No, I did not hit my head, there are some legitimate reasons not to invest in a new Hansen Pole building.

1. Land

For some it is they do not own “the dirt” and in a few cases never will. For those who do not yet own the dirt, or don’t have it picked out, I would encourage you to get the dirt first. Then design your new post frame building to best fit with the needs of your property.

2. Finances

Other people need funding for their projects. Some of these folks have inadequate credit scores to be able to qualify for financing. For the first group, options are available (https://www.hansenpolebuildings.com/financing/). For the second, focus serious efforts on improving your credit score – at times negative reports on credit scores can be cleared up.


The top two are fairly general and could be applicable to most any post frame building kit supplier or builder.

Being specific…..

3. You don’t like us.

As much as we would like to believe everyone should be friends, there are some cases where two people just do not click. The Hansen Pole Buildings team endeavors to provide “The Ultimate Post Frame Building Experience™”. To every client, every time. Should you experience unresolvable issues, please contact Eric@HansenPoleBuildings.com immediately. It is a quick and easy fix to reassign you to a different Building Designer.

4. We can’t deliver fast enough.

Every post frame building kit package Hansen Pole Buildings provides is 100% totally custom. It is designed just for you to best meet with your needs as well as satisfy the climactic conditions (wind, snow, seismic) imposed by your Building Officials governing your specific site.

We are also busy.

Our clients understand it is ultimately “All About the Building”. Hansen Pole Buildings does it right. Right, however, always wins in a race against quick and wrong, as the cost in time, effort and money to fix wrong is painful.

5. We cannot provide what you want.

If it is structurally sound and a post frame building, we can provide it. We cannot and will not build your new post frame building for you. We can give you a fair idea of estimated hours for construction, what we feel is fair market value for erection and assist you in finding possible builders whom you may vet. We also will not agree to under-design your building. No matter how much money you think it will “save” you.

6. Our Buildings Are Too Expensive.

As compared to what?

It could be everyone’s prices appear to be out of budget. If this is the case, your Hansen Pole Buildings’ Designer can assist with alternative such as all or partial financing, adjustments of dimensions and/or features to arrive at the best end results.

If we have not provided evidence of our benefits to you being of more value for your investment, then we have not done you the service we mean to provide. If we have not adequately expressed this, please let us know immediately what we have done wrong, so we do not repeat our errors.

I firmly believe Hansen Pole Buildings offers the best possible value for the post frame building investment. We continue to make improvements in our buildings and our systems to provide, “The Ultimate Post Frame Building Experience™”.

Hire a Local Engineer and Work With a Lumber Yard?

Should I Hire a Local Engineer and Work With a Lumber Yard?

Let’s hope not. Here is the email which triggered this article:

“Hello, 

I am building a 50×60 pole building with 22′ eaves. I’m shopping right now to either hire a local PE to design the structure and work with my local lumber yard to supply the package or maybe buy a kit like the ones you sell. Do you do custom sizes? Would you be interested in quoting my project?

I live in Lake Stevens, Washington.

Sincerely, 

Tim”

DEAR TIM ~

Thank you very much for your interest in a new Hansen Pole Building.

About Hansen BuildingsThe heart of our business is providing totally custom designed post frame buildings of any size, as such your contact information has been forwarded to one of our senior Building Designers who can assist you with the process.

Some advice – hiring a local engineer to do the structural design will result in one thing for certain, and probably a second. The certainty is you will spend probably 8 to 12% of the value of your building on the engineer. In our case, the engineering is included with your investment in a new post frame building kit package. Our engineers do thousands of buildings for us, so your engineering costs are minimal.

The second is – most engineers are not specialists in post frame building design. You might get a great deal on the engineering itself, only to later find out your spent thousands (or tens of thousands) of dollars more than was necessary due to your engineer not being familiar with the most current advances in post frame design, as well as the plethora of materials options which could be incorporated to make your building the most efficient structure it can possibly be.

Your local lumber yard is most probably like most – they are nice, friendly, hard working folks, who know a little bit about lots of things. However, they are not going to be post frame building experts. The outcome, again, is probably going to prove to be one of less than ideal results.

My encouragement, whether you eventually invest in one of our post frame buildings or not, is to deal with folks whom you know are truly experts. We’d like to believe somewhere approaching 20,000 successful buildings might be heading us in the right direction.

Mike the Pole Barn Guru

Looking for a Contractor to Build a Post Frame Home

More and more consumers are seeing the practicality, unique architectural and energy savings advantages as well as cost savings from a post frame home. This includes loyal reader Brian who writes:

Engineer sealed pole barnHello, my wife and I are considering building a post frame home. We contacted a designer who actually had plans for a home that is close to what we were wanting. He suggested it may be difficult to find a builder that would be comfortable building a pole barn home – so that is why I am contacting several builders to develop a list that could be considered in the future if we move in this direction.
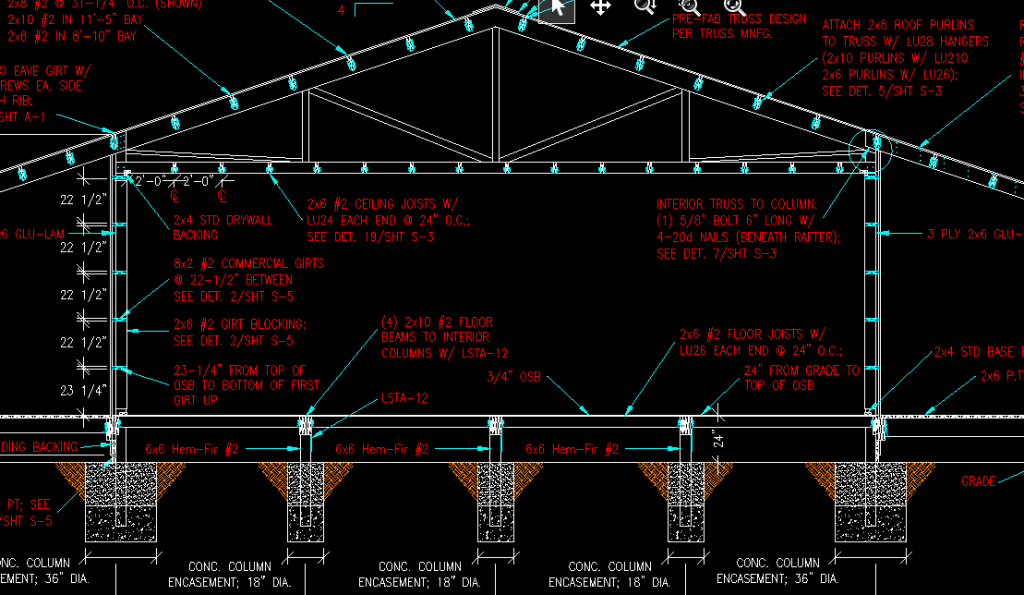
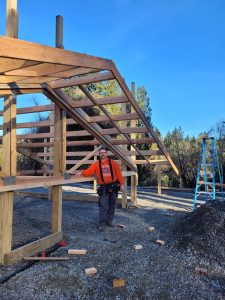
Please find the attached plans he provided as a reference and let me know if this is a project you would be willing to tackle. Although we have not bought land we are currently looking in Warren and Clinton counties in Ohio.

Dear Brian: Thank you very much for your interest in a new Hansen Pole Building. We design and provide building plans, installation instructions and materials for totally custom post frame buildings. Your proposed plan (as would be any other plan) is totally doable as a post frame (pole barn) home.

What we do not do is build. Our buildings are designed for the average do-it-yourselfer to successfully construct their own beautiful building, which is why the majority of our clients do their own work. Those who construct themselves, end up with a far better finished result than what you would get from any builder.

In the event you do hire a builder (technically an erector), any builder who can and will read and follow the plans and instructions should prove capable of doing a satisfactory job. Given your geographic location, just a caution based upon experience – there are members of a well know religious group which construct many post frame buildings in your area of the country. While their prices sound too good to be true, it is our experience they do not always build to the provided plans or follow instructions. Again, just a caution. Otherwise a capable erector should be able to construct the building shell for about 50% of what your investment in the materials is.

About Hansen BuildingsI am not normally a fan of “canned” plans for any type of construction, as they are rarely going to meet with the true needs of the client. My best advice is always going to be to determine the spaces needed, determine how large each of those spaces need to be. A good way to find the right size of rooms is to take a note pad, writing tool, and a tape measure and start visiting open houses and home tours.

Once room needs and sizes have been determined, starting putting the pieces of the jigsaw puzzle together – place rooms where they are most efficiently grouped for ease of access and use. This may take some adjustments of individual room dimensions, however the resultant will be the most effective. Now, and only now, should you put the “box” around the contents!


Thoughts on a Floor

Thoughts on a Floor:  

Brought to you by reader ANDREW in LEBANON:

“Hi! I am looking at purchasing a post frame building to use as a new home. We are well on our way with being under contract for the land and one of your recommended builders is meeting me at the site this week to make sure the land is good/flat enough.

I will be hiring the construction of the exterior and then build the interior myself.

With that said, here is my question (I will do my best to describe it by typing.) Instead of pouring a huge concrete slab (building will be 60×96), I want to do a typical crawl space to be easier to run plumbing and such, plus make changes as needed. Also, concrete slabs are expensive, especially for 5,000+ sqft. What are your thoughts? I will run 2×10 side by side (doubled up) the entire 96′ length supported every 12′ by concrete footers and building columns. This will be roughly 24″ from the ground (haven’t fully decided on the height yet). Along with that, going to 60′ width, I will use 2×8, 16″ OC. I forgot to mention, along the inside perimeter of the posts, I will be running 2x10s attached to the posts. The ends will have the 2×10 laying on top (along with concrete/building posts every 12′), and the joist ends resting on the eave sides.

With all that said (hopefully legible and not rambling), what do you think? I think it is a pretty solid plan and will not only save a lot of money by not doing a slab, I will effectively have a crawlspace. Yes, I know this will raise the entry points so the door looks like it will be off the ground 3+ feet, but I will be putting a decent sized deck on the front as well as a smaller one on the rear point of egress. A quick reply would be greatly appreciated so I can hopefully discuss more with the builder as well as for my own personal planning purposes. Thanks a lot!”

DEAR ANDREW:  I am a fan of living on wood instead of concrete, so crawl space makes total sense to me.

The right way to do this is to have your floor incorporated into the original engineered plans for your building. This will assure you of several things – the footings will be designed with an adequate diameter to resist settling (last thing you want is to have a post or posts sink. It also will make sure the size of the members will be adequate to support the loads both from a weight bearing standpoint as well as deflection. Your doubled 2×10 idea for supporting the floor joists is hugely under designed and it is very possible it would create a failure condition, not something you want to have occur in your new home.

Floor deflection is an under discussed realm (you can read more here: https://www.hansenpolebuildings.com/2015/12/wood-floors-deflection-and-vibration/). 2×8 #2 at 16 inches on center and 2×10 #2 at 24 inches on center are going to have virtually the same spanning abilities as floor joists, however the 2×10 floor will meet L/480 requirements for deflection, while the 2×8 joists just barely meet the code minimum of L/360. The added plus – the 2×10 joisted floor takes 16% less board feet of lumber and is less expensive to build!

Why We Do Not Recommend Any Builders

Hansen Pole Buildings receives numerous requests every day from potential new post frame building owners, who are looking for a builder (in my terms technician) who can assemble their building kit. I am going to do both of us a favor and explain why we do not recommend any builders.

Hansen Pole Buildings is a supplier and a supplier only. We do not construct buildings anywhere for anyone – even ourselves. Our new post frame building addition of 30 feet x 96 feet is being contracted out to a technician, who happens to do erection work for several of our clients. When you order your new post frame building from us this is clearly reiterated in writing and approved by you:
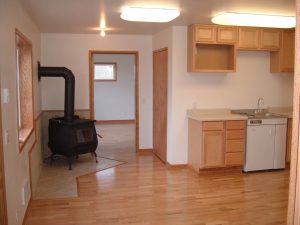
 

“Purchaser is purchasing a materials only pole (post frame) building package, designed per Seller’s plans. This is not a precut building, nor is the structural design to be determined by Purchaser or Purchaser’s agents. Assembly, by Purchaser or Purchaser’s agents, including measuring, cutting and the use of tools, will be required. Some components may come all or partially assembled (e.g., entry doors are most often shipped as pre-hung), however most items (such as, but not limited to, sliding and overhead doors) require the assembly of sub-components. Steel roofing, siding and trims often require cutting and/or splicing. It is the discretion of Purchaser or Purchaser’s agents to utilize the materials provided so as to minimize splices, as well as the creation of waste or scrap. No overage of any materials is provided for in this Agreement.”

Good clear agreements make for good neighbors. We do not want anyone to have their feelings hurt due to a misunderstanding.

Upon request, once you have ordered your new post frame building kit package, we can assist you in finding the names and contact information of two or more possible builders who can construct within your predetermined budget – however it is totally your responsibility to vet them out. Here are the seven steps to not getting yourself burned by any contractor, follow these: https://www.hansenpolebuildings.com/2013/07/contractor-6/ and require a performance bond and you will greatly limit your risk of not getting the finished product you expected. Here is Performance Bond information: https://www.hansenpolebuildings.com/2012/07/contractor-bonding/.

In a past life, I was a post frame building contractor based in the Pacific Northwest. We were blessed with many totally awesome subcontract crews who did great workmanship, as well as were good at building quality relationships with our clients.

Even with these excellent crews, it seems like about once a year they would absolutely “hose” (technical term for FUBAR) a building. I’d ask them why and the answer was typically they had no idea, just that it went wrong.

I share this because you might very well contract with the builder who has the best reputation for quality and has a fair price. Same builder could have one of those weeks coincide with your building and result in a less than satisfactory experience. We (and I) would prefer not to become a mediator for problems we had no hand in causing, even more so since we had no financial interest in the agreement between you and your builder of choice.

Not my circus, not my monkeys.

Converting a Pole Barn to a Residence

One trend I have seen over the past ten years is folks purposefully designing post frame buildings to homes – they are recognizing the advantages, among them savings in foundation costs, speed of construction, flexibility of design and ability to insulate. Along with this, more and more post frame buildings are being re-purposed from pole barns to living spaces. This becomes a challenge when advance thought was not put into the original building design as to what future uses might bring.

Reader MARK from FOSTER is in the midst of wanting to do one of these conversions and he writes:

“DEAR POLE BARN GURU: I have a pole barn that has foil bubble wrap on both roof and wide walls. I’m wanting to convert this into living space. I have 7″ of space in the walls to put insulation. So to insulate this can I add un-faced batt insulation and then drywall. I know that the foil-bubble wrap is waterproof so I don’t think I need a vapor barrier before the drywall because if any moisture was able to get in, it would not be able to get out. For the ceiling do I add Faced Batts with the facing point towards the heated space and then Drywall. You are the Guru and I want to see what your experience has to say. Thanks for your time.”

DEAR MARK: As a living space, your pole barn (post frame building) will generate a significant amount of moisture which you do not want to have get into the walls. This means putting a vapor barrier on the inside face of the wall insulation. You will want to make sure the un-faced batts completely fill the insulation cavity, so you will need material with a greater thickness than the R-19 six inch batts sold at your nearby big box store.

Now the challenge – you need to poke holes in the reflective wall insulation to allow any chance moisture from within the wall to escape. Trapping water vapor between the two vapor barriers will only lead to eventual grief in the form of mold, mildew and/or rot.

For the ceiling, it is essential to ventilate the dead air attic space you will be creating. Ideally your building was constructed with vented eaves and ridge and life will be good. You will want to use either un-faced batts, or ideally blow in insulation above your ceiling. Do not place a vapor barrier in the attic – as you want moisture to be able to rise into the attic space and be exhausted through the ridge vents.


Planning a new post frame building? If your building will have dimensions which could ever lend themselves to some or all of the building being used as conditioned space (heated and/or cooled), it would be prudent to design for it now, rather than having to face doing more work (as well as spending more money) at a future date.

Making Your Own Glulam Columns

Should I Make my Own Glulam Columns?

I’ve been internet chattering back and forth with a gentleman named Chris, who is probably never going to order a Hansen Pole Building, but it is okay – we have thousands of clients a year who are knocking at our doors (figuratively) ready to place their orders.

Total Disclosure – I do not get paid, nor does Hansen Pole Buildings, LLC get any sort of financial compensation in return for my endorsement of a particular product or vendor.  If I like a product, I will tell my readers straight up about it. Same goes the other direction.

Here is an excerpt from our most recent discussion:

Chris: “And I was going to make the laminated posts gluing and baking them, I have a local lumber company (not Lowe’s or HD ) they have good treated lumber that can be placed in ground.”

Me:  “The most important things to me are people getting great buildings and good value for their investment.

I believe you trust in my judgment. Please do you and me both a favor and buy true glulaminated columns.

Here are just a few reasons….

The 2×6 they use to make them is nearly half again stronger than anything you can buy at the lumber yard;
They use glue which is designed to hold up – even under ground and in wet conditions;
In order to get a true glue bond, the wood must be planed, then glued within 24 hours;
They have the equipment to press them during curing – which keeps them nice and straight;
The time alone you save will more than pay for them.

There are plenty of ways to save money on your new post frame (pole) building kit – building your own glulaminated columns is not one of them.  If you want to save both time and money (and end up with a better building), spend a few hours browsing about the nearly 1200 articles I have written and/or the over 600 questions I have answered from my loyal readers.

Have an idea and want to know if it is practical or not? Run it past me…. I’ll give you the straight story, every time.

Finishing the Interior of an Existing Pole Barn

Finishing the Inside of an Existing Pole Structure

There are literally millions of pole structures (aka post frame buildings or pole barns) in existence in the United States. Most of them were constructed without a thought as to future use, beyond their immediate need. Here is a story about one which actually did have some foresight!

barndominium-interiorDEAR POLE BARN GURU:  I have a customer who wants to finish the interior of a pole structure with a steel panel ceiling and drywall over framed walls. The building is 30’x40′ with 12′ ceilings, trusses on 8′ centers that are designed to carry the load of metal panels and blown insulation. The entire building, roof and walls are sheeted with 1/2″ osb. The roof is felted with perma felt and the walls are covered with Tyvek house wrap. The ridge is vented end to end and the 2′ overhangs are 12″ wide with vented steel soffit every third panel.

I plan to use 6″ fiberglass batting in the walls and blown-in insulation in the ceiling. The structure has 2 o.h. doors, 9’x10′, a walk in 3′ door and 3- 3’x3′ windows. It will be used for storage mainly with an open 15’x30′ man-cave area with a wood stove for heat when needed but not full time.

We are in southwest Iowa and I’d like some advice on proper moisture barrier if you’d be so kind.
Thank you, TOM in WOODBINE

DEAR TOM: Your customer has done things fairly well – which sadly doesn’t often happen.

The roof is in good shape for control of condensation under the roof steel. The OSB and felt should take care of this nicely. The attic may be under ventilated, with only having venting in every third soffit panel. Standard vented soffit usually will provide only about five square inches of intake per square foot of vent. With 160 square feet of sidewall soffit, your customer probably has about 800 square inches of intake (5.55 square feet), which might be adequate, but I sure would have been happier if he had all vented soffit panels.

Steel liner panel ceilings are always problematic –read more about them here..  https://www.hansenpolebuildings.com/2013/08/steel-liner-panels/

In the event your client is dead set upon a steel ceiling, make sure to do everything possible to reduce the humidity inside the building, so as to prevent condensation on the underside of the ceiling. If the concrete slab does not have a good vapor barrier under it – the floor should have a high quality sealant applied to the surface to reduce moisture coming through the floor. A test to determine if the vapor barrier is adequate or not is to leave a wrench on the floor overnight. When the wrench is removed in the morning, if there is a dark silhouette of the wrench on the floor, then moisture is passing through and needs to be controlled or eliminated.

On the walls the housewrap will keep moisture from the outside world out. Use unfaced fiberglass for the wall insulation, then cover all of the walls with 6 mil clear visqueen, read here:

(https://www.hansenpolebuildings.com/2013/07/moisture-barrier/).

The area to be heated with the wood stove is also going to be very prone as a high moisture area. The dry heat from the wood stove will draw excess moisture through the floor (again back to the floor), so additional ventilation may be needed in this area.

Good luck and let me know how it all turns out. Pictures are much appreciated, especially the man cave!

Mike the Pole Barn Guru

Misguided Stick Frame Builder

Few things drive me nuts more than self- serving advice columns. In my humble opinion, if one is offering advice as an expert in a construction field they should be open to a plethora of possible design solutions.

The following article appeared October 1, 2016 at www.kpcnews.com and is copied in its entirety without edits:

“Pole buildings can be insulated

  1. I have a large pole building and want to temper the inside just above freezing. I want to park equipment so they will thaw out and also want to store liquids to keep from freezing. I have had friends that have spray foamed the inside and it has been very costly. I also read that the spray foam doesn’t want to be left exposed. I know it’s an age-old question but what is the cost effective way to insulate my pole building? — Ken of Churubusco 
  1. There are several different approaches to insulating your pole building.Post footings do not provide a continuous thermal or structural footing so to think that the walls or ceiling of your pole building are going to have the same performance as a conventional built building is not correct.

Stick-Frame-Construction-150x150Yes, you can dig continuous footings between the posts and, yes, you can frame walls between the posts to try to emulate the characteristics of a conventional building but at that point probably you should have built it conventionally in the first place.
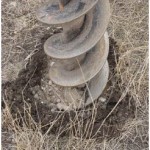
That being said, you’re looking to add some insulation to help with heat loss and to help air seal your pole building enough to be able to add some heat and lightly heat the building.

I am assuming the building has steel laid over wood purlins attached to posts basically 8 feet on center and the ceiling is open with trusses 4 feet on center. Closed cell foam is the best choice but costs more than open cell mainly to help stop moisture from soaking into the foam.

Normally I would, because of costs, use open cell foam and spray 2 inches to insulate and air seal. If additional insulation is desired then add fiberglass insulation with some sort of finish wall with a vapor barrier. The typical application is to line the ceiling with steel and blow cellulose insulation above to insulate the ceiling.

 Jeff Deahl is past president of the Builders Association of Northeast Indiana. Questions for the Square Corners column may be submitted at ba-ni.com or email info@ba-ni.com

 I suppose what rankled me the most is the comment, “at that point probably you should have built it conventionally in the first place.” The author is a stick frame home builder, rather than having done the research, he is merely making suppositions.

It doesn’t take a rocket scientist to design a post frame (pole) building which is thermally efficient – more so than close to (if not all) conventionally stick framed buildings.

And the post frame building will be less expensive.

A building’s foundation system has nothing to do with the thermal performance of the walls and ceiling. To think so, is truly misguided and this author offers no proof, just a slap down.

Stick frame construction is less thermally efficient due to the tremendous number of framing members which are in contact with both the outside and inside walls. Post frame construction affords a deep wall insulation cavity and can be designed with fewer direct thermal transmission points (thermal bridges) than stick frame.

I don’t just blow smoke in my articles, I can back up what I write with evidence: https://www.hansenpolebuildings.com/2013/08/thermography/

Do it Best

Do it Best®

I get a lot of people asking some great questions of the Pole Barn Guru. Some of which take some lengthy answers, in order to adequately make the point. Here is one which involves the thought of doing business through a Do it Best® store would add a level of security.

For your reading pleasure……

DEAR POLE BARN GURU: I have shopped for a pole barn for several months. I wanted a simple 30x40x10. I got several quotes and put a lot of thought into the project. I was concerned about “fly by night” builders. I wound up choosing a “doitbest” retailer, hoping that they would have the backing in case something went awry. The builder arrived yesterday to begin construction, I had to leave for work but my Dad came over to oversee the project. He noticed that when they set the poles, they did not use any concrete below or around them. The builder just backfilled the holes. My question is this; Is this an acceptable practice? They have not put the sheet metal on yet, should I stop the process until we discuss this? I am not an engineer or contractor, but it doesn’t seem like a good idea to have no concrete around or under the posts. Please advise? CHRIS IN CARTHAGE

DEAR CHRIS: If you shopped for several months and got several quotes, it sounds like you did put a fair amount of thought into your new pole barn (post frame building).

Do it Best® bills itself as the “World’s Largest Hardware Store”®. It is a cooperative which is owned by its approximately 3800 members, making it the only US-based full-line, full-service, member-owned distributor of lumber, hardware, and building materials products in the home improvement industry. Each store is independently owned, so dealing with a Do it Best® location gives you only what little protection can be afforded by the store you did business with. It is not like The Home Depot® or Lowes®, where every location is corporately owned and you are afforded the protection of a multi-billion dollar chain.

Regardless of the builders affiliation or lack thereof, it is important to do due diligence in thoroughly vetting them out. I’ve shared this many times in my articles, but apparently it has been under utilized: https://www.hansenpolebuildings.com/2013/07/contractor-6/

drilling-hole-150x150On to your question. Placing no concrete under or around the building columns is probably a recipe for disaster – no building of any sort is going to prove to be better than its foundation. Although it is possible to engineer a foundation without concrete, it would involve enough extra efforts (and usually some very deep holes) in order to make it work. The concrete in the holes serves numerous functions – it has to be able to adequately distribute the weight of the building and any imposed vertical loads (like snow and ice) into the soils beneath the building to keep it from settling. This is a prevalent problem with most post frame (pole) buildings, where either no concrete or an inadequate amount of concrete has been placed below the columns. Building codes require a minimum of a six inch thick footing. Having the concrete up the sides of the column, above the footing aids in prevention of uplift (your building being sucked away) as well as overturning, neither of which would be a pleasant experience.

Here is a recent instance of a new pole building owner with a similar experience to yours: https://www.hansenpolebuildings.com/2016/08/pole-barn-columns-settle/

In my humble opinion – you should stop the builder immediately and demand he provide an engineer’s certification of the adequacy of what he has done for a footing/backfill. He is not going to be able to do it, so the next step is to have him provide an engineered repair (which means it is wet sealed and signed by an engineer) and then make sure he actually does the work prescribed by the engineer.

I am going to guess the building which you have invested in is not an engineered building – where the plans have the “wet seal” and original signature of a RDP (Registered Design Professional – engineer or architect). This affords a new building owner the assurance someone who actually has the knowledge of structural design has verified the adequacy of the overall building design as well as the strength and load carrying capabilities of every member and connection. I also cannot imagine your building is somewhere structural building permits and site inspections occur – if it is, then get your local Building Official involved, as it is his or her responsibility to look out for the safety of those who are investing in new construction.

Good luck, and let me know how it turns out!

How to Avoid a Disastrous Pole Barn Project Part III

How to Avoid a Disastrous DIY Pole Barn Project

This is part three in a three part series on how to better ensure a great pole barn project, by getting rid of the pitfalls.

I’d like to thank Bret Buelo of Wick Buildings for the basis of this article, which appeared on the Wick Buildings website (www.wickbuildings.com) August 12, 2016. Information from Bret’s article appears here in italics along with my own input as well. Wick Buildings is highly rated by the Better Business Bureau and has been an NFBA (National Frame Building Association www.nfba.org) member for decades.

Part of the fun of any DIY project is learning new skills to complete a project. However, there is a point where you venture too far into the unknown and begin to cost yourself time, money and perhaps even your own personal safety.

If you’re a DIYer with lots of time on your hands and potentially cash to burn, by all means, you can take a shot at any pole barn project. But if you’re on a budget and time is of the essence, there are tipping points when you can find yourself in over your head.  Many pole barn jobs can get extremely complicated, and if you’re not careful, can lead to some significant mistakes.

We reached out to Gordon Sebranek, who manages the Engineering Department at Wick Buildings, for some insights. Following are the last three of nine potential pitfalls he outlined to help you decide if you’ve bitten off more than you can chew.

Go to parts one and two to get up to speed. To continue:

  1. Don’t Know the Specialized Building Tricks

General building training and experience is great, but there are also specialties within post-frame construction that require a different knowledge base.  For example, free-stall dairy setups involve a number of unique parameters. And these specialized projects tend to also require specialized equipment.

Guru comments: For those rare and unique projects, this may be the case. The Hansen Pole Buildings Construction Manual includes numerous tricks to a successful end result which are the product of experience of those who have constructed over a hundred thousand buildings. They are tried and true methods which allow the average DIYer to build like a pro.

  1. Lacking Time and Money to Make Mistakes

This category is entirely subjective. As we mentioned earlier, if you have unlimited time and money, then you’re never really in over your head. But if you are on a tight timetable or budget, you may soon find yourself in some serious soup.

Gordon notes that the length of a project depends on the specifics of the size and complexity.  He’s seen an experienced person design a 30 x 50 building in two hours. “Some jobs might take six weeks, because they’re very involved,” he said.

Project durations become longer depending on your experience level, too. Do you have the patience to teach yourself how trim out a building nicely, and to correct mistakes if and when they happen?

Guru comments: Tight time tables often occur when trying to hit the window of opportunity for a high quality post frame building contractor. When I was a building contractor, there were certain times of the year when it could be six to eight months before we had a construction crew available to put up your building.

Put structural design in the hands of the experts and you will be time and money ahead. Please – I implore you – do not attempt the structural design of a building on your own unless you happen to be an RDP, and even then, you might be ahead to farm it out to the specialists who do nothing but post frame buildings every day.

Doing things like cleanly installing trims is as easy as opening your Construction Manual and looking at the details and photos which walk through even the most challenging of applications.

And in construction mistakes can and will happen. I used to employ the best post frame building crews in the industry (in my past life as a pole building contractor). Even then, I’d see a crew blow half a day of time on something which could have been handled in five minutes by contacting the office for assistance.

This is why Hansen Pole Buildings offers free unlimited technical support via email during the construction process. 99 out of 100 times the answer was right there in the Construction Manual to begin with, but when something goes awry, it helps to have the experts near to give you the answer you need to quickly move forward.

  1. Don’t Know the Safety Requirements

You’re in over your head when you don’t have the appropriate safety tools to protect yourself on difficult jobs. Or, more accurately, when you don’t know what you need to do to protect yourself.

Wick Builders and the outside contractors that they work with adhere to OSHA requirements. Safety is the top priority on every job. It’s our opinion that if you don’t know the safety requirements for every job, then you are in over your head.

You only go around once, folks. Don’t short-change the safety requirements for a construction job.

Guru comments: I heartily agree. Safety is paramount in any construction project – my Dad was killed in a construction fall in 1988, so I am very sensitive towards avoiding injuries. OSHA (or state versions thereof) has many good ideas for safety and they consume innumerable hours of having to do paperwork – all of which the consumer pays for when they hire a contractor. For the most part, use common sense and play it safe. If you can fall more than a few feet wear a properly secured harness.

Most post frame building projects can (and should) be built on a DIY basis. This is a great way to take pride of ownership and get more out of your building dollar.

Once again I’d like to thank Wick Buildings for their contribution to this blog series, and to the fine art of pole buildings in general.

F Channel and Enclosed Soffits

My early days of post frame (pole) buildings came in the Pacific Northwest. In the early years, rarely did buildings have any overhangs…at least not beyond a few inches of roof steel extending past the siding.
When building did have overhangs, they were always “open”. Open, in this sense, did not mean birds and other critters could fly into the building through them, but rather they had no soffits.

With an open overhang, when one stands beneath and looks up at the underside of the overhang, the supporting substructure framing is visible, as is the underside of the roof steel, or roof sheathing.

A decade later and a transition from a provider of post frame building kit packages, to being a pole builder and clients began requesting their buildings to have enclosed overhangs. With a minimal investment over open overhangs, plus the advantages of being very attractive and limiting locations for nests of both barn swallows and wasps – it was (in my mind) a no brainer.

In researching how others were installing soffits, I found the majority use a piece of trim called an F and J up against the building sidewall.

f channelPicture an F channel with the downward leg being attached to a horizontal piece of wall framing, usually by nails. The horizontal “legs” of the F receive the soffit material – usually vinyl, steel or aluminum. From the end of the short (and lower) horizontal leg of the F channel, is another downward leg (envision an inverted J). The sidewall steel then slides up into the J from below.
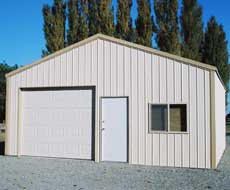
All of this appears to be a quick and easy install. Nail a single 2×4 against the outside of the columns, attach the F and J to it and slide the soffit panels into the F channel.

Now the problem with this (as happens with quick and easy) – the soffit panels are not attached to the F. When the breeze begins to blow, the soffit panels vibrate in the F channel, making noise. As wind speeds increase, the soffit panels can actually be blown out of the F – creating all sorts of challenges.

So how did we solve the challenge?

Instead of a single 2×4 nailed to the face of the columns, we took two 2x4s and nailed them together to form an inverted L. The short leg of the L now gives something solid to attach the soffit panels to. Below the soffit panels an inverted piece of J channel trim is installed, easily attached to the vertical leg of the 2×4 L.

I’ve now experienced several thousand soffit installations using this procedure and have yet to have a report of a single soffit panel being blown out!

Success.

Four Foot Entry Doors

One Foot

And it isn’t the left or the right one!

simple-pole-barnActually the one foot I have in mind is the difference in width between a standard 36 inch width entry door and a 48 inch wide one. Oh what a difference the extra foot makes!
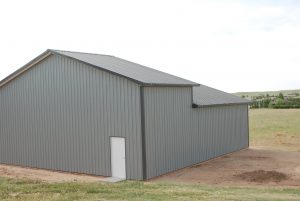
And most of the difference is not in cost. It is in functionality.

With an insulated commercial steel entry door with steel jambs, all factory pre-painted, the difference in investment between a “standard” width door and one with far greater flexibility for access and egress (a.k.a. 12 inches greater in width) is going to be somewhere around $150.

So, what good does the extra foot of width do exactly?

In my case – it has kept my knuckles intact when taking my 1986 Yamaha Venture Royale motorcycle through. I don’t always want to open up an overhead door on my shop to get my favorite scooter in or out. If it is hot outside, I want to keep my shop cool. If it is cold out, I want to keep it warm. Far less temperature change occurs when all I have to do is open the ‘person door’.

I’ve tried to get my bike through a three foot wide door. Yes, it can be done, however not without pain and possible damage to both my feelings and my ride.

Enjoy garden work?

The extra foot of door sure makes it easier to get things like a wheelbarrow in and out.  And how about the beast which makes your garden look like it could be on the cover of House Beautiful…the garden tiller. Running it through a four foot door is a snap. The hand lawnmower too.

Then there is my daughter, Bailey, the professional horse trainer. She will quickly vouch for the ease of getting saddles through a four foot wide entry door, rather than struggling through a narrower one.

Regardless of whom you select for your new pole (post frame) building provider – if you aren’t at least being offered a four foot wide door and being explained the advantages, do yourself a favor and suggest it!

The knuckles you save, may very well be yours!

Why DIY Clients Do Great Work

Over 50% of all Hansen Pole Buildings kit packages are constructed by the building owners themselves. If you are amongst these stalwart folks, kudos! Odds are your new post frame building will have a far superior end resultant than what you could or would have paid your hard earned dollars to have a builder do it for you.

The #1 reason – you care!

If you are among these folks, I praise you for your willingness to actually do things like reading the plans and following the instructions.

The contractor of the building in the photo did have a few challenging moments, which might have been less of a challenge had he followed along as we anticipated he would. Those will be glossed over and we will take a quick look at one of the photos provided by the proud new building owner.

contractor built building

Please try to ignore the installation on the fascia trims.

Getting on to business….

Looking at the sidewall steel panels, see how nearly every lap is sticking up? This is a common, yet easily solved challenge which I recently wrote about: https://www.hansenpolebuildings.com/2016/05/cool-solar-stuff/.
The builder even went to great lengths to make the problem worse, by placing a screw through the tops of some of the overlapping steel ribs. This is not a solution espoused in our installation instructions and frankly, I don’t know where he got the screws from, as we did not furnish any for this purpose.

Why is this worse? If someone now tries to resolve this, they may end up with some holes in the underlaps which can be seen past the edge of the overlapping panels.

panel lapsRun your eyes up to the top of the eave walls – where screws have been placed on both sides of each high rib. Again, this is not a screw pattern which is shown on our plans or in the instructions. Although there ARE some places for screws to be placed like this – this happens to be none of them.
Now kindly turn the corner and look at the peaked endwall.

See the line of screws which are even with the sidewall eave line? I will give you a moment.

See how they stop about six feet in from the corner?

Not how things were anticipated, this line coincides with the end truss bottom chord and should have run all of the way to the corner.

screw lineNow, move your eyes down a row of screws. At nine feet in from the corner, the screw line has a jog in it of about two inches. I won’t even ask how.
The building is completed and will serve its intended function admirably (at least providing the builder DID put screws on each side of the high ribs where they were supposed to go). The client appears pleased with the end result, so we smile and move forward.

I can honestly say in the thousands of building kits sold by Hansen Buildings and constructed by the building owners, I just have never seen screws placed quite like this.

Now for the #2 reason: Because they cared!

About Steel Galvanization

When it comes to steel, we talk a lot about galvanization. Many post frame building products are galvanized to prevent premature decay. These include fasteners (screws , nails, nuts, bolts and washers), engineered steel hangers, the pressed in steel connector plates for trusses and components for sliding, overhead and entry doors.

Every year, steel corrosion costs the economy a small fortune. Corrosion, also known as rust, is a natural process which occurs when steel is exposed to the environment. It can be slowed, however, with a protection technique called galvanization, which is the coating of steel with a layer of zinc to slow the corrosion process. Zinc is used to protect steel because the zinc layer rusts more easily than steel but also rusts much more slowly than steel. Therefore, the underlying steel remains safe from rust for many years.

galvalumeThere are two types of galvanizing: continuous and batch. Continuous galvanization occurs when zinc is applied to a ribbon of steel as it passes through a bath. This steel passes through the bath at very high speeds and is only in the bath for two to four seconds. Once it has been galvanized, the steel is then shaped into the final product. Despite this high galvanization rate, continuous galvanizing is limited in the fact that only very thin, flexible sheets of steel are able to be galvanized in this way. This limitation is due to the fact the steel needs to remain flexible so it can be formed and shaped later.

Objects which have been galvanized in this manner include items used for roofing and siding sheets.

Batch galvanizing, also called after fabrication galvanization, is different from continuous galvanizing in that the steel is first shaped into its final shape and then immersed in a bath of molten zinc. Although batch galvanizing is not as fast as continuous galvanizing, one advantage is any shape of metal can be galvanized in this manner.

The three steps in the galvanization process are preparation, galvanizing, and post treatment. The preparation step consists of immersing the steel in three different cleaning baths prior to galvanization. First, the steel is immersed in a caustic cleaner, which is an acid bath which removes all dirt and grease. After being rinsed in a water bath, the steel is then cleaned with a pickling acid (usually either hydrochloric or sulfuric acid) to remove rust and mill scale. The steel is again rinsed with water. The final step the preparation process is soaking the steel in a flux solution, which cleans the steel of any oxidation which has happened since the pickling step and protects it from further oxidation before it enters the galvanizing bath.

The galvanizing bath consists of a minimum of 98% molten zinc heated to a temperature of around 850˚F. Once the steel reaches bath temperature, the zinc in the bath chemically reacts with the iron in the steel to form the layers which protect the steel. It usually takes less than ten minutes for the steel to reach bath temperature and to react with the zinc. The steel then undergoes a post-treatment process which varies with the facility. One of the most common post-treatment processes is quenching, which is when the steel is soaked in a quench tank to make a layer which protects steel during transportation.

Now you know how important galvanization is to the longevity of steel!

Tru-Log Sided Pole Barns

We have a certain percentage of our clients who are looking for log siding for their new post frame buildings. Usually these folks already have a log home on their property, or their new pole building is going to be their home and they want the ‘log home’ look without the challenges associated with real logs.

Actual wood log buildings have a quaint, authentic look, but require vigilant maintenance at least every two to three years, and sometimes more frequently. This routine maintenance and upkeep is not only costly, but time consuming.

I’ve always believed post frame buildings should be as maintenance free as possible, and now there is a way to make this happen and give the authentic, genuine log look – TruLog™ steel log siding!

At a minimum, wood logs require staining, sealing and replacement of any cracked or damaged chinking every two to three years. Rotted logs may need to be replaced and insect infestations are always a potential challenge. With TruLog™ steel siding, your post frame home, garage or shop siding is essentially maintenance free. Any dust, dirt or debris on your steel logs can be easily rinsed off with a garden hose.

Painting? Not unless you want to change the color. TruLog™ steel siding is finished with a rugged, durable coating and DuPont™ Teflon® surface protector which resists fading, scratches and other types of wear. TruLog™ siding is available in four natural wood colors and the coating stands up to even the most intense UV rays.

TruLog™ steel log siding is made of tough, heavy-gauge steel which is supported by a foam backer contoured to fit behind the steel siding. The foam backer makes your new post frame building more energy efficient and may help you reduce utility bills because it provides insulation and increases the R-value of your building’s walls.

Not only are you choosing durable, high-quality material, with TruLog™ steel log siding, you are choosing the authentic, old-world, natural log appearance. This siding is manufactured to look like real logs, by incorporating hewing and chinking. Hewing is a characteristic completely unique to the process of chopping logs, and has been re-created to give the look of hew lines and wood grain for a realistic appearance. TruLog™ utilizes patented chink line technology to recreate the traditional appearance of sealant for visual contrast between logs.

Want the look of logs without the hassles and expense for your new barn? Ask for TruLog™ on your new post frame building!

More information on TruLog™ steel log siding can also be found at: https://www.trulogsiding.com.

Groupon & Pole Barn Water Park

For those who have been hiding under rocks, or do not have internet access (in which case you are not reading this article), Groupon (derived from “group coupon”) swept onto the scene in November 2008.

Groupon offers one “Groupon” per day in each of the markets it serves. The Groupon works as an assurance contract – if a certain number of people sign up for the offer, then the deal becomes available to all. If the predetermined minimum number is not reached, no one gets the deal of the day. Groupon makes money by keeping approximately half of the money paid for the coupon.

With 2013 revenues of $2.573 billion dollars and a website ranked in the top 400 worldwide Groupon is a force in the marketplace.

Well, I am a Groupon subscriber so every day I get an email with the day’s Groupon deal. Today’s deal opened my eyes to a pole building use I had not considered previously – the water park!

great-wolf-lodgeThe Groupon was for Great Wolf Lodge Grand Mound in Centralia, Washington. The photo with the Groupon ad has various water slides covered by a pole building!

See it here: https://www.groupon.com/deals/ga-great-wolf-lodge-grand-mound-4

My best guess is this post frame building has a Use and Occupancy classification under the International Building Code (IBC) of A-3. An A-3 building would be, “Assembly uses intended for worship, recreation or amusement and other assembly uses not classified elsewhere in Group A”.

Post frame buildings are what is known as Type V-B construction – a wood framed assembly without a fire rating. IBC Table 503 limits V-B Group A-3 buildings to a single story of 6,000 sft (square feet) and a 40 foot overall height.

Using one-hour fire assemblies (Type V-A construction) would increase the limits to two stories, each of which could be 11,500 sft with a 50 foot overall height.

Increases in building area are allowed for in IBC Equation 5-1 for both frontage (if the building adjoins or has access to a public way) and for having an automatic sprinkler system. The sprinkler increase alone triples the allowable footage to 18,000 sft.

Ever considered putting a water park inside of a pole building? I probably never would have – if it wouldn’t have been for Groupon!

How LinkedIn is Important to Your New Pole Building

How LinkedIn is Important to Your Pole Building

If you are one of the many who have been single in the past decade or so it is OK to admit (even to yourself) to the use of the internet to have found a date. If not for finding a date to check out someone who you might have more than a passing interest in dating. Face it, the ‘net affords the ability to gather a lot of information.

Now, gentle reader, you may be wondering how one ties dating into investing in a new pole building.

Think of ordering a pole building, like dating. It takes some time and effort to build the right relationship. The person (or persons) who are working (hopefully on the same side of the table WITH you) to see your building best meets your needs, are very important. Don’t like them? Or worse, don’t trust them? If either or both, chances are this is not going to be a marriage made in heaven.

Why LinkedIn?

With over 225 million members, LinkedIn is the world’s largest professional network. Today, it’s assumed every business professional has a LinkedIn profile.

I WANT my clients to check me out, and LinkedIn gives a one stop shop for finding out what makes me tick.

Mike MombTake a minute and go check out my profile, Mike Momb, at LinkedIn.com.
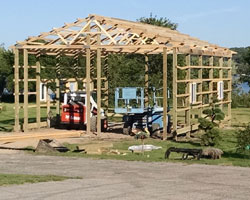
This gives you a detail overview of where I have worked, where I went to school, and organizations I have or do belong to. It also gives a list of endorsements from others as to my skills and expertise. You will find 80 or more people have endorsed me for Building Materials, Timber, Wood, Materials, Green Building and Construction. In a nutshell, “I know my pooh”.

While some things can be made up, endorsements cannot be.

You can also see the LinkedIn groups I am a member of, as well as I am married and what my outside interests are. (I met my bride on the internet and after 14 glorious years, would do it all over again!)

Part of due diligence is knowing who is on your team, and who is merely a pretender.

You Can’t Build a Post Frame Building Here

Author’s Note: This is part 5 of a series of blogs written from a 6500+ motorcycle trip from WA to Ohio and back.  See Blog from Oct. 15th for the beginning…and hang on for the ride!

Still in Wisconsin and I get into a discussion with a former builder. He tries to tell me the City of X will not allow pole buildings to be constructed within the city limits.

Welcome to WisconsinI reserve the right to not disclose the name of the city, as this is the not the first time it has happened – in states other than Wisconsin.  It doesn’t happen often, but when it does…I am all over this one!
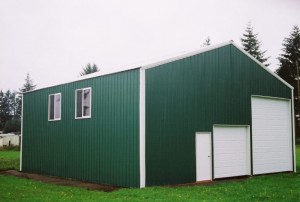
Now this happens to be one of my favorite subjects.  If I believed in past lives, maybe I was an attorney in one of them, because I get all too excited about the prospect of winning this argument.

Here is the basic Email I have used to sway Planning Departments (anyone is welcome to borrow this – or contact me and I will fight your battle):

“Post frame (pole) buildings are Code conforming buildings and the methodology for their structural design is outlined and/or referenced in every edition of the International Building Codes.

It is within the legal scope of a Planning Department or Commission (after following whatever processes are in place for public notifications, etc.) to be able to place limitations on the size of structures, their placement on a given property, as well as the appearance (e.g. restrictions on type and or color of siding and roofing materials). Any appearance restrictions must be applied uniformly to any Code conforming structural system.

In order to legally preclude the use of post frame construction (or of any other Code conforming structural system), the onus would be upon the jurisdiction to somehow prove their structural inadequacy. It would be both arbitrary and capricious to deny the utilization of post frame construction, which could easily leave open the door to a plethora of probably indefensible lawsuits – resulting in undue costs to the jurisdiction, as well as the taxpayers.

While I am not an attorney, nor profess to offer legal advice, I have been involved in similar circumstances with other jurisdictions, each of which has made the determination to NOT LIMIT the use of post frame buildings as a structural system. I would encourage the same decision in your jurisdiction.”

I first innocently emailed the City of X Building & Zoning Administrator:

“What restrictions would be placed upon post frame construction within the City?”

 I have to admit, I was almost saddened when the response was:

 It must meet all standards of the Wisconsin Uniform Dwelling Code”.

In the end, a win for post frame counts as one in the “W” column, no matter how it was done.

Wood: The Number One Green Building Material

There is a strong case to be made that wood is the greenest building material. But for it to really earn that title, we have to rethink how we build with it.

In North America, wood construction has dominated single-family and low-rise housing; steel and concrete have dominated commercial and mid-rise residential construction. This usage made some sense; the building codes favored noncombustible materials, and the low-rise residential market was big enough to suck up all the wood we could cut. The steel and concrete industries were, frankly, more innovative, and their products were considered more durable.

But this was before we worried about climate change, before fossil fuel prices started going through the roof, and before globalism started giving way to localism and the realization when one looks around, there sure is a lot of wood. In fact, right now we have more wood available than we know what to do with. So, why aren’t we using it more of it, and using it better?

With a few notable exceptions, we keep using wood primarily for the one thing we shouldn’t be building: single-family housing. There are 18 million vacant houses in the United States, yet we are cranking out 2x4s for the housing market.

There exists a more practical use for wood in construction. One which minimizes material use, from the ground up –is pole buildings. Wood really is the number one green building material!

The average footings and foundation for a 40’ x 60’ stick framed shop will take 10 to 15 yards of concrete, depending primarily upon frost depth. For a similar sized pole barn, less than two yards of concrete will support the columns.

Concrete, and the cement in it, is blamed for the production of 5 percent of the world’s CO2 production; aggregate extraction and transport is disruptive. But if you look at the concrete industry websites (for example https://www.cement.ca/en/Concrete-and-the-Environment.html), you would see the greenest of products, claiming it is a local resource (convince the neighbors of any gravel pit) and it is recyclable (into roadbeds). And it is heavy. So, when they say it only creates 175 pounds of emissions per ton, they don’t tell you how many tons go into a square foot of building (15 yards of concrete are over 5,000 pounds of emissions)!

When it comes to the structural framework, a post frame building uses only about 50% of the board footage of lumber required for a similarly sized stick frame building. Most pole buildings are steel roofed and steel sided. An average of over 25% or more of steeling roofing is recycled content and once its long useful lifespan is over, it can be recycled 100%!

When you talk about “going green”, go pole building!

To receive more pole building tips and advice subscribe to the pole barn guru blog!