Tag Archives: post frame holes

Sliding Door Latch, A Ceiling Mounted Crane, and an Auger Challenge

This week the Pole Barn Guru answers reader questions about securing a sliding door, some advice on a ceiling mounted crane, and a challenge finding an auger with a 30″ diameter for concrete collars.

DEAR POLE BARN GURU: How to keep my steel sliding door half open but secured? BRUCE in ROCKFORD

DEAR BRUCE: Your door should have a jamb latch on post to each side of door opening.
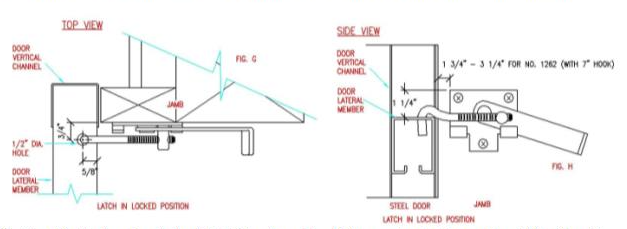
The “hook” attaches to a hole drilled into door girts. Drill an extra hole towards middle of a girt (at position you want to latch door) and you are in business.


DEAR POLE BARN GURU: Found your post on your website about ceiling mounted crane.

The photo looked like just 1 I-beam running length wise. Great idea about laminating to both side of the truss every few trusses.

I want to install a lift system with X & Y movement.

This requires 2 runways on each side of the garage door length wise with the bridge mounted on top of the runways to move hoist left and right.

With 2 runways instead of one spread out about 16 ft. (width of garage door), the load is spread out closer to the block walls than in the center where the plates are joining together the truss joints.

Would this eliminate the need to laminate the trusses?

I greatly appreciate your feedback.

Thanks, AL

DEAR AL: Ideally cranes are running off A Frames on floor tracks with an I beam between.

Next best is to mount Rails (runways) to inside of columns, with a bridge between them to support crane.
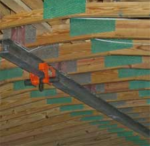
Your runways can be attached to truss bottom chords (I believe this is article you are referencing: https://www.hansenpolebuildings.com/2013/07/overhead-crane/). We just need to know maximum weight to be placed at any given point and where attachment will be (closer to truss center is better than close to sidewalls).

In our case, we are usually placing a pair of trusses every 12 feet, so there will be very few attachment points along your building length.


DEAR POLE BARN GURU: We have recently purchased a building from Hansen. We are still receiving materials at this moment. Our plans call for 30″ wide holes for the 3 ply 2×6 columns holding the trusses. I’m having a hard time finding an auger that big to rent. Are there other options besides the wet set brackets? ALLEN in CABOT

DEAR ALLEN: Thank you for investing in a new Hansen Pole Building. You can use a 24″ auger bit and then ‘bell out’ the bottom of the holes to 30″ diameter. Auger your hole – then offset your auger by a couple of inches and run it down again, then repeat offsetting in a different direction. We have also had clients successfully use a mini-excavator to create rectangular holes, rather than round, this is perfectly acceptable. Important part of this is having adequate area of concrete to properly distribute loads across your underlying soil.


Pole Building Holes in Caliche Soil

One of our clients is preparing his site in order to dig the holes for his new post frame building kit. He happens to live in an area of Washington State, east of the crest of the Cascade Mountains, which would be best classified as being high desert. He has encountered the bane of excavators in the more arid regions of the American West – caliche.

Our client reports: “After completing site excavation, I’m left with several areas that have caliche rock where I need to dig column footings. It’s a very hard, concrete-like layer of calcified sedimentary rock and I’m wondering if you guys have suggestions on how to dig through this most easily. The best idea I’ve come up with so far is a skid steer with a jackhammer to break through the caliche and hope that it’s not more than a few inches thick. I’ve also read that some people have had luck with a mounted auger that has a rock-drilling bit. Wondering if you can recommend any preferred methods that you’ve come across as I’m currently expecting that I’ll need to deal with this rock for at least half of the 28 column holes.”

What exactly is caliche soil?

According to the sum of all human knowledge (aka Wikipedia):

Caliche (ka-lee’-chee, or sometimes klee’-chee) is a sedimentary rock, a hardened natural cement of calcium carbonate which binds other materials—such as gravel, sand, clay, and silt. It occurs worldwide, in aridisol and mollisol soil orders—generally in arid or semi-arid regions. Caliche is also known as hardpan, calcrete or duricrust. The term caliche is Spanish and is originally from the Latin calx, meaning lime.

Caliche is generally light-colored, but can range from white to light pink to reddish-brown, depending on the impurities present. It generally occurs on or near the surface, but can be found in deeper subsoil deposits, as well. Layers vary from a few inches to feet thick, and multiple layers can exist in a single location.

My advice on digging through caliche

Back in the day I was a post frame builder in your neck of the woods and we did hundreds of buildings which ran into caliche. We finally just invested in a ram hoe attachment for our skid-steer and found it was able to get through it every time. You should check in with your local equipment rental companies to see what they have available in this realm. You might also contact the local utility companies, as often they have equipment sitting unused and will come drill holes for a nominal fee.

One Might Expect I Would Call This Good

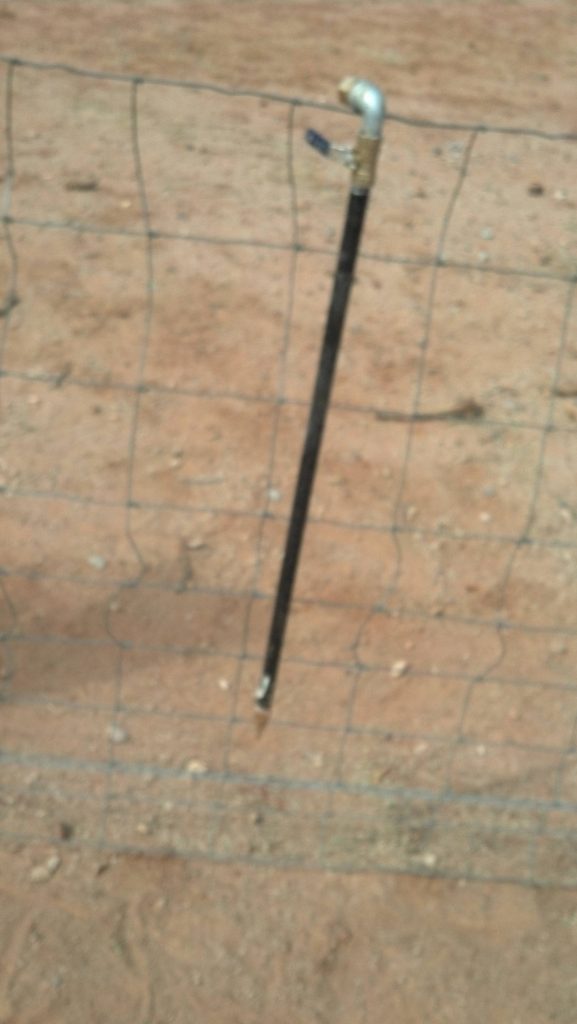
However I am thinking there must be another, maybe even better way. Well, thanks to the internet, I have found the poor man’s water jet/drill (as shown in the photo).

Here is how it was built and used:

“Needing to dig a series of post holes in my hard (caliche) dirt was a job I was not looking forward to. Even the caliche bar protested the job and merely bounced off the stuff. So I was either going to do it the hard way with good old blood, sweat, and blisters, pay someone to dig the holes for me, or come up with a better way.

I went to my hardware store and purchased a 30″ length of 1/2″ black iron pipe, a 1/2″ to garden hose adapter, a ball valve, a 90* elbow, a 1/2″ to 1/4″ pipe thread reducer, and a 1/4″ barbed nipple. Screw these all together and you have something that looks like the photo.

Attach the hose, turn on the valve and feed into the ground. I sunk this to the valve in less than a minute, which amazed me because this dirt is truly like concrete. For bigger holes, just drill a series of holes next to one another. The water tends to soak into everything between, and you can use a post hole digger to make your hole now that it’s not bouncing off the hard stuff.”

Have caliche on your new post frame building site? there are solutions!