Things I Need to Know When Adding on to a Post Frame Building
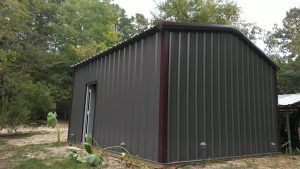
 Real life scenario – one of our clients is adding onto the end of a clearspan 24 foot wide by 36 foot long by 10 foot eave post frame building. The add-on makes the structure another 24 feet longer, same height and roof slope.
Piece of cake – right?
I’d written an article about this very subject previously, so the Hansen Pole Buildings’ Designer had the advantage of being well educated in this area: https://www.hansenpolebuildings.com/2015/08/building-endwall/.
There were some known challenges in this addition. The client needed a 12 foot tall overhead door in the new endwall. Luckily the existing roof slope was 7/12 and by using interior columns and rafters, instead of clearspan trusses, the door could be placed in the center of the endwall.
Problem solved…..
However, the existing building has an 18 inch overhang beyond the endwall, which was not communicated originally. The challenge was resolved by attaching the roof purlins in the bay closest to the old building to the old fly rafter.
However a larger challenge appeared – the client wanted to remove the endwall columns from his old building. The client knew this, the Building Designer knew it, however it was not communicated up the chain to those who were having to do the structural design for the building.
What might have been helpful, would have been getting our hands onto the truss designs from the existing building. However, no truss drawings could be found.This made it impossible to determine if the existing endwall trusses were designed as a clearspan, or if they were reliant upon the existing columns for bearing.
In the end – the solution was to span the end of the existing building with a large LVL (https://www.hansenpolebuildings.com/2013/01/lvl/).
So – things I want you to tell me about your existing pole building….
If you have the building plans and/or truss drawings, please share them with us.
Any paperwork you have from the original purchase (we want to as closely match what you have as possible).
Send us photos of the outside and inside of the building. Make sure they are clearly identified, so we know which wall the photo is showing.
Will you be making any changes to the end of the existing building? Will siding stay on the building, or will some or all of it be removed? Do you plan on moving or eliminating any columns?
Provide the measure of the eave height of the building (https://www.hansenpolebuildings.com/2015/02/eave-height-2/). Make sure to do this right, as this will be crucial in getting the best possible result.
Measure the distance from the bottom of the pressure preservative treated splash plank, up to the bottom of the base trim.
If the end of the existing building does not have a prefabricated roof truss on it, the roof slope needs to be verified.
Be prepared to have to answer more questions – the more we know about your existing building, the happier you will be in the end.


