Tag Archives: professional engineer

Restore or Rebuild?

Restore or Rebuild?

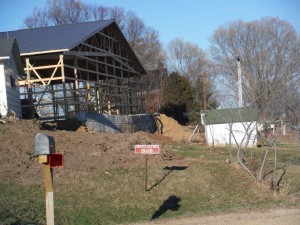
While it was not a post frame building, back in 1990 I began restoration (and adding onto) my family’s then over 80 year-old hillside lake cabin. If it was not for our sentimental attachment and some amazing existing stonework, it would have been far less expensive to have nuked it all and started from scratch (as more than one of our neighbors did with their cabins).

Reader CADE in GARLAND writes:

“I have an old gable barn 40×48 that my wife and I would love to “restore”. There are foundation issues on eave sides as well as bottom plates have started to rot. There are 14′ wide bays on each side and center section is 20′ wide. 6×6 posts spaced every 8′ oc and 2×6 purlins every 16″ oc. Wondering if I could keep the center section as is or add cross support as needed and turn the barn into a monitor style by basically removing the two sides and adding either mono trusses connected to the existing 6×6’s or double 2×10’s attached to each side of each 6×6 that would be 16′ wide or larger to get me away from the old footing and be able to place new posts in ground or on new footing? Maybe it’s best to jack barn up and re frame eave walls and repair foundation. We would love to hear any advice or ideas you might have. Thanks! I appreciate your website and all the information you put out by the way! Attached is a similar size barn that would be pretty close to what we are thinking of doing. Thanks again.”


Mike the Pole Barn Guru writes:
Thank you for your very kind words, they are greatly appreciated.

Now I have not seen actual photos of your old gable barn, however when I start to hear “foundation issues” it obviously raises concerns. You could do all sorts of things with what you have, however if you economically and practically should, might be an entirely different story. Before digging in further, my best advice would be to make an investment into having a qualified professional engineer do an actual physical assessment to determine what is or is not structurally salvageable and to give you a better feel as to if you should restore or restart.

Unless old barns have historical significance, it is often best to give them a well-deserved burial and start over with a fully engineered post frame replacement.

Building Your Own Pole Barn Trusses

Wants to Build His Own Pole Barn Trusses

Reader DANIEL in HAMPSHIRE writes:

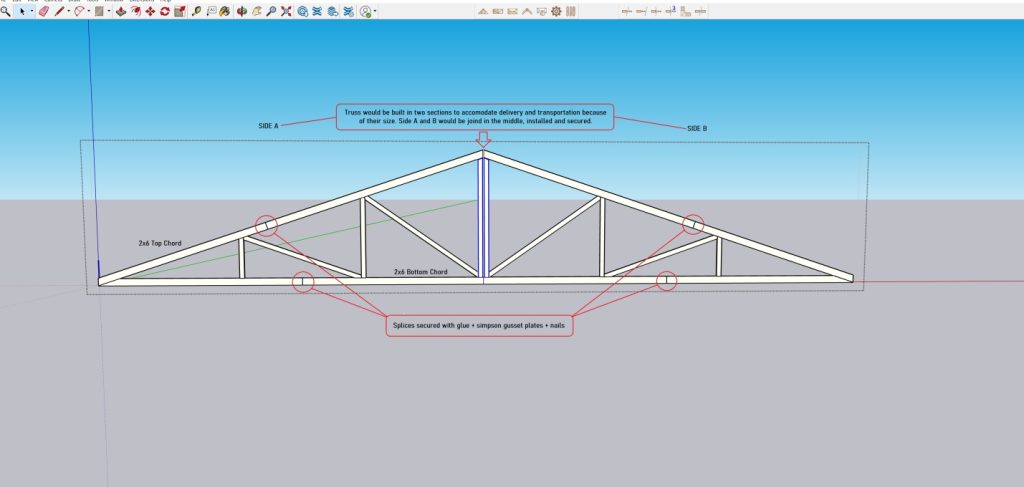
“Good evening, I was wondering if I could ask for your help? I have a question regarding truss designs and truss spacing. I’m building a pole barn (50ft wide x 112ft long x 12ft tall). Prices of pole barn kits have skyrocketed just as much as steel buildings. Building this size 3 years ago would have cost a third of the price today. I’m building an indoor fish farm. If you like to know more of my back story you can visit www.steelheadsprings.com I don’t want to waste your time reading it here. I spent years collecting investors and putting up my whole life and it turned out its not enough. However, I found a solution, I must build it myself, I must build everything myself. I have good support here however I don’t have a specialist. Every time I speak to an engineer, they tell me it can’t be done. Right now my problem is trusses. Locally, each 3-ply 6x6x14 post columns retails anywhere between 400 and 500 dollars. I laminated mine for just under a $100. Steel brackets to mount said post columns into concrete with hardware retails around $125 each, I sourced a local shop to build mine for $40 each. Steel sheathing for walls and roof was sourced from social media from an out of business contractor for .30$ on the dollar. Currently trusses are outrageously priced! The few local places are pricing them anywhere between $600 and $900 for the 40-footer and between $800 and $1300 for the 50-footer. One building needs 15 trusses and another two need 8 trusses each. Prices just keep going up, so I’m forced to build the trusses myself. So, I turned to the web. I’ve been educating myself on designs and ideal styles that would suit my buildings.  Already have the concrete columns pored. Pillars are 18-inch diameter and 50-inch deep. Brackets are already installed at 8ft on center. I would like to use the saddle style truss and wedge it at the top. I have 20 inches of middle board notched out to accommodate a saddle truss. I want a 4/12 pitch with 8ft o.c. truss spacing and 2ft o.c. purlin spacing. Because I’m going 8ft o.c. truss spacing I must install the purlins upright on its edge. This works perfectly because it gives me plenty of room for insulation to be installed flush with the steel. I have no overhangs and my heel is 10″. I found a company on the web (medeek designs). They design the geometry of the trusses. I basically plug in the lumber and the software does the rest. It designs the truss and with a simple click of the mouse I can get exact dimensions of my tc, bc and the webbing. However, it does not explain what size of lumber I should use to achieve the desired clear span goal. I must go to an online retailer and look up a truss and copy their design to plug in the information. I need your help; my land is in an unincorporated county which basically allows me to do anything that I want. I just must follow simple rules with foundation and snow/wind loads. Top Chord live load is 30psf, Top Chord dead load is 7psf, Bottom Chord live load is zero and Bottom Chord dead load is 10psf. I chose 12ft height because it is just tall enough for my needs and it’s sturdy enough for the wind and snow loads. I almost built 4-ply columns, but I decided to go with three because I would obtain the same rigidity with girts spacing of 24-inches instead of 36-inches. I built a 20-ton gusset plate press, and I used the software to build a sample truss. I tested it to the best of my abilities, and it stood its ground. I watched a few videos where some people installed wooden “gusset” plates as additional support over the steel plates. Some even used glue. I know that I want to over engineer this truss to make sure it stands the time. It leaves a good story for the upcoming generations about how we built this from the ground up. I still recall hearing stories from my grandfather and father how they both built their homes. I will attach a few pictures of the drawings that I have. Both 50-foot and 40-foot trusses should be double fink as this truss is rated for 40-60ft clear span. I was going to use 2×8 for both top chords and bottom chords with 2×4 for the webbing. The 40-footer truss isn’t the problem because the truss only has one cut in the bottom chord at the 20ft mid-point. The 50-footer truss is the big issue. If we assume that 2×8 lumber is strong enough for the construction, where should the bottom chord be spliced/connected as my common sense calls for a one 20ft middle section and two 15ft outer sections. If that is ok, what about the top chord, where should the 20ft board be extended? I’m so sorry for taking so much of your time, I hope this is enough information and I hope it makes sense. Can you please help? Thank you.” 

Mike the Pole Barn Guru:

Let’s start with the disclaimer at www.medeek.com:

The truss designs produced herein are for initial design and estimating purposes only. The calculations and drawings presented do not constitute a fully engineered truss design. The truss manufacturer will calculate final loads, metal plate sizing, member sizing, webs and chord deflections based on local climatic and/or seismic conditions. Wood truss construction drawings shall be prepared by a registered and licensed engineer as per IRC 2012 Sec. R802.10.2 and designed according to the minimum requirements of ANSI/TPI 1-2007. The truss designs and calculations provided by this online tool are for educational and illustrative purposes only. Medeek Design assumes no liability or loss for any designs presented and does not guarantee fitness for use.

Moving forward, Building Codes and ANSI/TPI have had several changes since Medeek put this information out. Most jurisdictions are using 2018 or 2021 versions of Codes and ANSI/TPI 1-2016.

I have previously opined in regards to site built trusses: https://www.hansenpolebuildings.com/2018/12/site-built-roof-trusses/

I spent two decades in management or owning prefabricated metal connector plated wood truss plants. In my humble opinion – attempting to fabricate your own trusses of this magnitude is a foolhardy endeavor, for a plethora of reasons:

1) You want to build trusses only from a fully engineered design, specifying dimensions, grades and species of all wood members, as well as detailing dimensions of all connections. Besides dead and snow loads, design wind speed and exposure need to also be considered. Do NOT try to copy someone’s online design, as it is likely to prove inadequate.

2) It is unlikely you will be able to obtain lumber graded higher than #2, without a special order. A 40 or 50 foot clear span truss with your specified loads is going to need some high grade lumber for chords – expect to see MSR or MEL lumber (read more here: https://www.hansenpolebuildings.com/2012/12/machine-graded-lumber/).

3) You will be unable to purchase steel connector plates of sufficient size and thickness to connect members. This leaves you with having to invest in Struct 1 rated plywood to cut into gussets.

4) Should you have a failure from building your own trusses without an engineered design, your insurance company can easily get themselves out of having to pay your claim.

Per your statement, “I know that I want to over engineer this truss to make sure it stands the time.”

Do yourself a favor and find a way to invest in prefabricated trusses. It will give you peace-of-mind you will not get otherwise.

Contracts Are Boring…Until You Go To Court

I have one goal – for people to end up with structurally sound buildings they love. Follow these guidelines and you are far more likely to love your new building.

Your work starts before you sign a contract.

ASSUME YOUR PROJECT WILL END IN COURT

ASSUME YOUR BUILDING PROVIDER/CONTRACTOR IS UNTRUTHFUL

ASSUME YOUR PROJECT WILL BE MORE EXPENSIVE

ASSUME YOUR PROJECT WILL TAKE LONGER THAN EXPECTED

Failure to accept these four statements will set you up for grave disappointment.

Buy Materials Yourself

Contractors generally have no qualms about using leftover materials from prior jobs, or purchasing cheaper materials than specified. If you seriously are concerned about material quality, take control yourself. Be aware, when contractors purchase materials for your building, they will mark them up. Paying for materials yourself assures you of not having liens against your property for bills your contractor did not pay.

It is very important you make decisions on exact materials you use for your building. With each type of material, there is a high end product, low end product, and something middle grade. Educate yourself on differences between each type of material, so you can choose based on your needs. If you allow a contractor to make any of these choices for you, they can really screw you over. Picking the right materials can make a huge difference.  If a contractor picks wrong materials, things are bound to go wrong.

Only Use Engineer Sealed Plans Specific to Your Building

Your building provider or contractor may have decades of experience, but unless he or she has initials “P.E.” (Professional Engineer) after his or her name, he or she is not qualified to make structural decisions. Have any deviations from plans reviewed and approved by your building’s engineer.

A building provider or contractor who sluffs off values of a fully engineered building plan does not have your best interests at heart.

Do Not Agree to a “Gentleman’s Agreement”

Always, always, always put your agreement with a building provider and/or contractor in writing. Having everything in writing has nothing to do with trust. It helps ensure everyone remembers what agreed upon terms are.  Months later you do not want to start arguing over what was originally agreed to. Contracts should be very detailed, including all expectations for both parties. 

Read the contract thoroughly, including all terms and conditions.

Keep in mind a good contract is written to provide clear communication between two parties.  It also protects both parties, and should never be “one sided”.  From my years as a general contractor, a well thought and spelled out contract (in writing) made for smoothest projects. 

Before agreeing to any work (as well as making any payment), require a written proposal describing in plain language what materials will be provided and/or work will be done. Do not sign a contract you do not fully understand. If anything makes little or no sense, ask for a written explanation. Still feel dazed and confused, or not getting what you feel are straight answers? Pay a one-time fee so a lawyer can walk you through what, exactly, it says and alert you to vague language. Terms such as “Industry Standard” have no real definition.

A total price should be as inclusive as possible. Any unforeseeable work or unit prices should be clearly addressed (like what happens if holes are difficult to dig). Maintain all paperwork, plans and permits when the job is done, for future reference.

Familiarize yourself with contract terms.

Proposals and contracts should contain specific terms and conditions. As with any contract, such terms spell out obligations of both parties, and should be read carefully. Be wary of extremely short or vaguely worded contracts. A well written contract should address all possibilities and may very well take more than one page.

If hiring a contractor, do not pay in full until all work is completed and lien releases provided from any and all material suppliers.

A statement regarding compliance with applicable Building Codes should be included, as well as what Code and version is being used and all applicable loading criteria. If the contractor is doing building permit acquisition, it should be stated in writing and a permit should be provided prior to work starting.

Hiring a contractor? Then, standards for workmanship should be clearly specified. For post-frame buildings this would be Construction Tolerance Standards for Post-Frame Buildings (ASAE Paper 984002) and Metal Panel and Trim Installation Tolerances (ASAE Paper 054117). Depending upon scope of work, other standards may apply such as ACI (American Concrete Institute) 318, ACI Concrete Manual and APA guidelines (American Plywood Association).

Articles to follow will cover specific terms of contracts and why they are important.

Stay tuned….

Question About a Pole Building Under Construction

If you are like me, when you hire a professional to do professional work, you expect them to be experts and to do things correctly. Few things in life upset me more than when a builder gives a client a great price and then cuts corners in order to make a profit.

Facebooker CHRIS in TENNESSEE messaged me:

“Question about our 30×40 pole barn that is being built. Our builder set our 6×6 post straight into the ground without any type of base at the bottom and just back filled the hole with dirt. Our plans from the company show a small concrete area at the bottom of each hole but they did not do that. I wanted to reach out to you to see if you can think of any long term issues I’m going to have down the road. Just looking for some education before talking to the company. Thanks.”

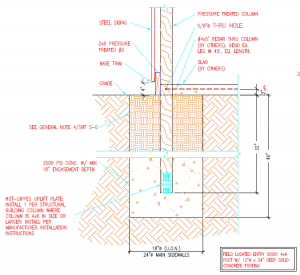
Sigh…..without an adequate footing beneath columns your building is going to sink. A minimum 6″ thick concrete footing needs to be poured under every column. There should also be a provision to prevent uplift. I would recommend no further payments to them until this issue is resolved. They should be providing an engineer certified solution to this.


“They just finished the metal on the building yesterday and it dawned on me I never noticed them putting concrete in the holes. We have a security camera on the corner of the house so I pulled up the video footage and they went straight from the holes being drilled to dropping the post in. Can that even be fixed that they are this far in the build?”

It can be fixed, but it is going to take a lot of work on their part. At this point, any repair should be done only with involvement of a Registered Professional Engineer to design a fix, supply sealed drawings and to sign off on completed work as being adequate. Most important part of your building is its foundation – this is not a place to compromise. Do not get bullied into backing down, you have paid for a good building and should expect to receive one.

“I’ve been confused about how the post should be set after trying to search the Facebook group. I saw people say never use concrete that it will rot the post and cookies are useless.”

There is a lot of bad information out there and a lot of armchair engineers (including builders). Concrete does not contribute to decay of properly pressure preservative treated wood. In most cases cookies are inadequate in both thickness and diameter.

“I just got off the phone with my builder (******** Barn Company) and of course they said they build 100’s of buildings like this and don’t have an issue.”

It doesn’t matter if they have built a million this way. Unless they are willing to provide an engineer sealed drawing (specifically for your building) to confirm it is adequate – call b.s.

You are likely going to get a lot of pushback from them, as they have screwed up and this fix is going to cost them money.

“My drawings show the concrete at the base and I questioned that and I got some story that “Oh, that’s in our software by default and cannot be remove on our plans.””

8 x 12 would not have been adequate anyhow. Again – if what they have done can be verified by an engineer, then okay – reality is it cannot.

Be prepared to have to hire a Construction Attorney and whatever you do, under no circumstances pay them anything more unless this condition is resolved, or your attorney tells you it is okay to pay.

“Thank you for all the professional advice.”

Adding a Lean-to on a Pole Barn

Adding a Lean-to on a Pole Barn

In six years and nearly 1500 articles written it is hard for me to believe I have actually overlooked the topic of a lean-to being added to a pole barn!

For the biblical readers amongst you, “Ask, and it shall be given you; seek, and ye shall find” (Matthew 7:7). Well, good reader DANNY in DANA is asking:

“I want to build on a Lean-to on my pole barn and have really having time getting information online, nothing address this project that I’m trying to get started on?”

Mike the Pole Barn writes:

What exactly is a lean-to anyway?

According to the sum of all human knowledge (www.Wikipedia.com) a lean-to is a type of simple structure originally added to an existing building with the rafters “leaning” against another wall.

Custom Designed Pole BarnWikipedia may consider a lean-to a simple structure, however there is far more involved than may meet the eye. Before diving deep into adding a lean-to to an existing pole barn (post frame building) a competent Registered Design Professional (RDP – engineer or architect) should be engaged to determine the adequacy of the existing structure to support the lean-to. Failure to do so can result in catastrophic failures – causing injury or death.

Before I ramble on further, this article is not an engineering recommendation and should not be considered as such. Please utilize only services which can provide RDP sealed drawings for your project.

Why bother? It is just a simple roof!

Here are just a few considerations:

The footings beneath the existing wall columns need to be verified for adequate diameter to support the weight of the existing building, the lean-to and the weight of imposed climactic loads such as snow.

Even if the newly proposed lean-to is just a roof, the existing wall columns need to be adequately sized to support a greater surface of roof for horizontally acting wind forces. If the lean-to is enclosed on the low eave side, the new lean-to roof outside columns must now carry the wind load against the top half of the new wall plus the entire roof!

A change in roof pitch between the existing building and the lean-to, or the lean-to high side being lower than the existing structure can result in snow drifting and snow slide off loads which need to be carefully considered.

If the existing building has trusses or rafters supported by a truss carrier (header between the trusses) it is unlikely this carrier will be adequate to support rafters being attached to it.

Come back next Tuesday for …the rest of the story on adding a lean-to onto an existing pole building.


How to Avoid a Disastrous DIY Pole Barn Project

How to Avoid a Disastrous DIY Pole Barn Project

I’d like to thank Bret Buelo of Wick Buildings for the basis of this article, which appeared on the Wick Buildings website (www.wickbuildings.com) August 12, 2016. Information from Bret’s article appears here in italics along with my own input as well. Wick Buildings is highly rated by the Better Business Bureau and has been an NFBA (National Frame Building Association www.nfba.org) member for decades.

Please keep in mind, Wick Buildings is in the business of constructing post frame buildings – we are in the business of saving people money who want to do some or all of their own work.

post-frame-buildingPart of the fun of any DIY project is learning new skills to complete a project. However, there is a point where you venture too far into the unknown and begin to cost yourself time, money and perhaps even your own personal safety.

If you’re a DIYer with lots of time on your hands and potentially cash to burn, by all means, you can take a shot at any pole barn project. But if you’re on a budget and time is of the essence, there are tipping points when you can find yourself in over your head.  Many pole barn jobs can get extremely complicated, and if you’re not careful, can lead to some significant mistakes.

We reached out to Gordon Sebranek, who manages the Engineering Department at Wick Buildings, for some insights. Following are nine potential pitfalls he outlined to help you decide if you’ve bitten off more than you can chew on your pole barn project.  Be sure to listen to his audio interview for details beyond the post below.

  1. Pole Barn Too Big

Gordon says a good cutoff point for a DIY-worthy project is anything over 10 feet tall and 45 feet wide. Anything larger requires a bigger crew, special equipment, and as you’ll see below, some tricks of the trade.

Guru comments: I’ve seen DIYers successfully construct buildings with eave heights over 20 feet tall and clearspans of 70 feet. Frankly, the average Do It Yourselfer (DIYer) usually ends up with a far nicer building than if they had hired a contractor to do the work for them.

  1. Crew Size Too Small

A typical pole barn project needs at least three people. Four is even better. Lots of things are doable with two people, but there are some tasks that simply require more bodies.

Gordon refers to setting trusses as an example. “You need one guy at the end to guide it, someone to run the skid steers, and someone on the roof, running purlins to brace the truss,” he said.

Guru comments: It wasn’t too many years ago one of our clients constructed a horse riding arena with an attached shed row for stalls of over 10,000 square feet. He did all of the work by himself other than hiring one person to give him an assist with the roof steel and to hire a crane to place the 66 foot span roof trusses.

As a former post frame builder – most of our crews were two persons only.

I know of one post frame builder, Jim Davis, who almost always worked by himself. He was able to do clearspans of up to 40 feet, without the need for another body.

  1. Trades Too Tough to Learn

You can watch a YouTube about how to complete a specific construction task, but there are some construction jobs that flat-out require talent.  “I can hang sheetrock,” Gordon notes, “but I can’t tape joints to make it look professional.”

Smoothing drywall compound requires a deft touch, and many of the following trades have areas that require both experience and talent. Gordon recommends sub-contracting for:

  • Concrete
  • Electrical
  • Plumbing
  • Insulation

Guru comments: I would agree with at least the top three of this list – and on number four (the insulation), installers typically get discounts on insulation from the manufacturer which make it possible for them to install for about the same price as the average person would pay for the materials.

Come back tomorrow folks, for part two in a three part series for words of wisdom from not one but two, leaders in the pole barn industry.

Let’s Talk Snow Load

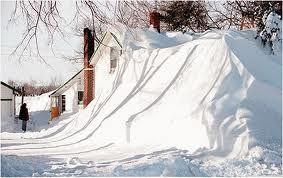
Even though it is now May – the heavy snowfalls in the New England states this past winter have left many with concerns. Here is an actual conversation, between a client who recently invested in a new Hansen Pole Building kit package, and our Technical Support Department:

Client: Good Afternoon,

Quick couple of questions.  The plans look like the wall girts for this project are the “commercial wall girt” design (Option 1)? 

I was initially under the impression that Option 1 was just for the design where the “Roof Purlins /joist are hung vertically from the side of the Trusses”.  I did not know that Option 1 also included a commercial wall girt design. 

Is it necessary to use the commercial wall girt design if I have Option 1:  “Roof Purlins /joist are hung vertically from the side of the Trusses” design? OR could the Wall Girts be just 2 x 4s nailed on the outside of the Support Posts?

Just curious-

After answering these couple of questions, I will log back in and approve the drawings.”
Building Code Snow LoadsNo snow yet, but we will get to it. Here is the response:

Thank you very much for your investment in a new Hansen Pole Building. Every building we provide has each member and connection structurally checked for adequacy under the most stringent Code provisions. Other than for very small column spacing, this means wall girts will need to be placed “book shelf” style, in order to be Code conforming.

Here is some reading which may prove helpful: https://www.hansenpolebuildings.com/blog/2012/03/girts/

Now we will get literally knee deep into the snow:

“The structural support poles on my drawing are at 14 ft.   Not 10 ft, and not 8 ft.  This is my concern.  (I read the guru blog).  14 feet between poles with double trusses, still doesn’t cut it when I could have 5 feet of snow on the roof.  This barn will be located in Northern Maine.”

Thank you for your concerns. Your building has been designed for the loading recommended for your area, 50 psf ground snow load – which you acknowledged as being verified by you as adequate with your Building Department, prior to your order being placed.

If you are planning upon having five feet of snow sit on top of your roof, then we would recommend increasing the snow load capacity of your roof to somewhere in the vicinity of 100 psf (this would equate to a ground snow load of approximately 173 psf). To increase the roof snow load by this 346% would add $xxxx to your investment.

Please advise accordingly.

“After some further research, I have found that the recommended ground snow load for my county in Maine is 90 PSF.  Please advise on new plan design and associated incremental cost to my project to accommodate.”

Just want to confirm you feel this will be adequate for your particular site, as a 90 psf ground snow load will support about 30-32″ of snow on the roof. If indeed you believe a greater depth may be placed upon it, it would behoove to design accordingly.

The liability I am putting on myself here is tremendous.  Does Hansen Pole Barns have any culpability for designing this building for snow load correctly?  Because I don’t know.  I am at a loss, I am not an engineer.  We have little if any Code Enforcement in this county.   But I know we get a boat load of heavy wet snow and the building will be in a sheltered area with not much winter sunlight. 

My builder originally said it was 50 PSF (As he thought that was the code).  But I don’t think knows.   When I looked at the design that I was sent, (and I am a believer in engineering, as I am a non-certified Mechanical Engineer), I know the design is not adequate.  So, I started to research on the internet.  The best I can come up with is what I found on the internet.  SEE ATTACHED

 I am located in New Vineyard ME, Franklin County 04956.  Every town that is near me shown on the attached “Ground Snow Loading” document is listed as “Case Study”, so I am guessing at the 90 PSF. (because everything around me is either at 90 or 100 PSF 

Looking for advice”

Although you may have read this previously, it may prove good background: https://www.hansenpolebuildings.com/blog/2012/02/snow-loads/

Based upon your information, we’d recommend a change in the Ce factor from 1.0 to 1.2. This effectively increases the design roof snow load by 20%

Along with this, here are some Pg options (in psf) to pick from (as well as the investment to increase) and the approximate depth of snow on the roof for each:

90   $ 2252       38″
100      2498       42″
110      2578       46″
120      3169       50″
130      3368       54″

Me personally, I tend to go for over design – I prefer to be the one who owns the last building standing when the storm of the century hits.
Ecology Blocks

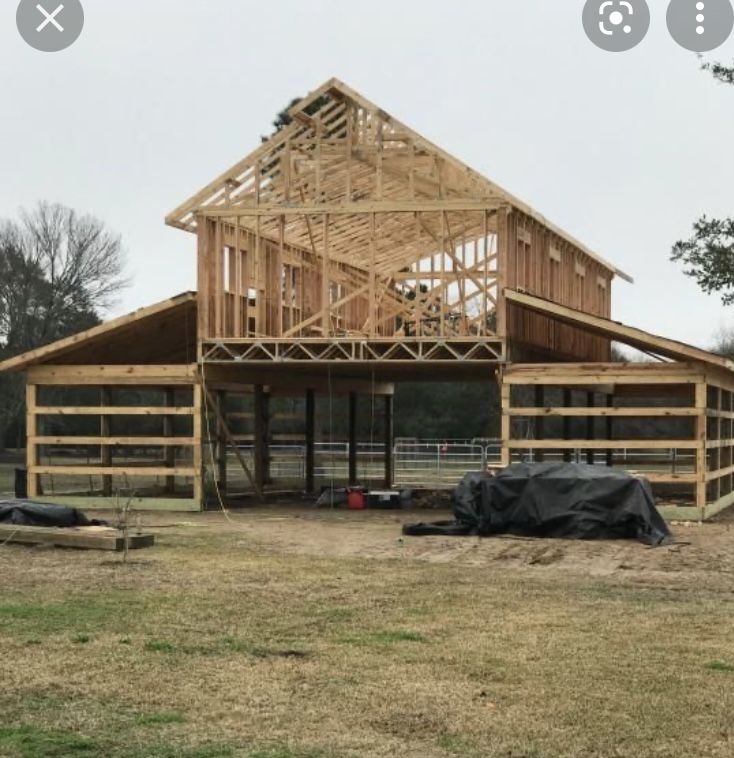
Hansen Pole Buildings Designer Rick is an avid stream fisherman. Near one of his favorite fishing holes, is also one of his favorite after fishing watering holes – The Castle Rock Inn. Last December 16, the Inn burned to the ground:

https://host.madison.com/news/local/columnists/on-wisconsin-optimism-remains-intact-at-the-castle-rock-inn/article_b14f8b8d-ae28-5668-a61f-be119981a5e3.html

Castle Rock InnThe owners of The Castle Rock Inn chose a pole building to replace the structure, saving months of time by not having to wait for spring in order to excavate and pour the continuous footings and foundations which would have been needed in other forms of construction. While the pole building was sadly not provided by Hansen Pole Buildings, Rick stopped by to take some photos of the new construction. Among the photos might be one of the saddest examples of a retaining wall which I have witnessed.
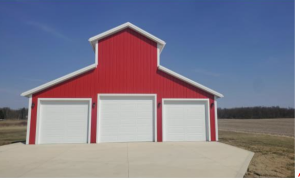
Retaining walls are built for both functional and aesthetic purposes. A majority of the retaining walls built today are of the type called Segmental Retaining Walls (SRW). A segmental retaining wall is built using interlocking concrete blocks.

For retaining walls over 3 to 4 feet in height, building codes generally require a building permit and structural wall design prepared by a qualified engineer. Independent civil engineers (P.E.) licensed in the state of the project must prepare these final wall designs. Design professionals who aren’t doing the structural engineering of the wall (such as a site civil engineer, architect or landscape architect) can retain a SRW engineer to provide the wall design.

Ecology blocks are often used in SRW systems. These are large concrete blocks, which are manufactured from left-over or unused concrete. Concrete, which in years gone-by would have been dumped and wasted or hauled to a land fill site, is saved and turned into a useful construction product, hence the term Ecology Blocks.

The blocks are cast into either a half block or a full block and use nearly a half or a full yard of concrete respectively. The dimensions for these blocks are 2’ x 2’ x 3’ for a half block and 2’ x 2’ x 6’ for a full block. Each block is cast with a 3” radius tongue and groove, for interlocking stability, in stacking applications.

Full ecology blocks weigh approximately 3850 lbs. and the half blocks are 1900 lbs. There is a picking eye of #5 rebar located in the spacing between the tongues in the top of each block. This picking eye is suitable for loading, unloading and for placing the blocks with a crane or backhoe capable of lifting and moving 4000 lbs., in the case of a full block.

Generally the blocks are made in three finished styles; scratched & framed, plain and cobble. The color and appearance of the blocks is fairly random and inconsistent, due to the nature and mix of concrete which is being returned from jobsites.

According to one of the Castle Rock Inn owners, “Our site actually sank a couple of inches so we had to bring in more fill to bring to grade.” Whether the sinking feeling may be attributed to the retaining wall is a decision for the experts to resolve, however it could very well be a suspect.

Have grade change near your future pole building site, which is best solved by a retaining wall? Don’t guess. Invest in a professional engineer to design the wall, then follow their plans!

Prescriptive Requirements

Larimer County, Colorado

I drive through the Fort Collins area about once a year. Other than the urbanized areas, the terrain is a classic example of Exposure C for wind (for a “fun” wind exposure story read https://www.hansenpolebuildings.com/blog/2011/11/wind_exposure/ or to get more technical: https://www.hansenpolebuildings.com/2012/03/wind-exposure-confusion/).

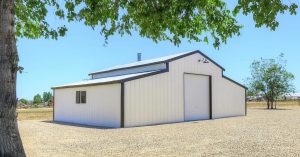
weathered pole barnOne of our clients had been discussing with Hansen Pole Buildings Designer Lily a pole building to be located in rural Larimer County. The county had provided him with a sheet of “prescriptive” requirements for non-commercial, non-residential pole barns in the county.
I’ve railed in the past about prescriptive requirements from Building Departments, so I might as well keep up my soapbox rant (visit my prior rant here: https://www.hansenpolebuildings.com/2012/02/prescriptive-requirements/).

For those who want to follow along, the Larimer County handout can be viewed at: https://www.larimer.org/building/pole_structure.pdf).

Let’s take a look at the “non-high wind” requirements.

Building is limited to 35 foot clearspan with engineered trusses. Columns are to be placed every eight feet. Footprint can be up to 3000 square feet. Maximum wind speed is 110 mph.

Now the catch in this is the statement in the handout, “All framing elements are to be designed in accordance with accepted engineering practice”. Which seems contrary to buildings utilizing the “basic handout design”.

With an eave height of 14 foot and a 4/12 roof slope, columns would need to be 6×10, IF diaphragm design is used, otherwise 6×12. I say “IF” because the handout makes no provisions for how to utilize diaphragm design.

In either case, all is well and good, except getting a solid sawn column larger than 6×6 in Colorado is a challenge unto itself.

The treated hold down cleat is not likely to provide sufficient resistance to uplift to resist 2512 pounds. A sophisticated engineering analysis would be required for proof. Read more about column uplift here: https://www.hansenpolebuildings.com/blog/2012/02/concrete-collars/

The 2×6 wall girts at 24 inches on center will work to carry the wind load (stressed to just under 96% of capacity), however deflection using the common framing lumber with a MOE (Modulus of Elasticity) of 1,300,000 is over in the deflection department by nearly 35%. It would take a MOE rating over 1,800,000 to meet the deflection requirements. (Read about girt deflection here: https://www.hansenpolebuildings.com/blog/2012/03/girts/)

The interior truss to column connection, must be able to withstand 4411 pounds of uplift force. Considering a Simpson Strongtie (https://www.strongtie.com/products/connectors/HRS-ST-PS-HST-LSTA.asp) HST2 7 gauge steel plate with six 5/8” diameter through bolts will only support up to 4835 pounds, it is not possible to imagine the two ½” carriage bolts (as specific in the handout) as being anywhere close to adequate.

To reiterate my basic premise: If a Building Department has PRESCRIPTIVE REQUIREMENTS for Pole Buildings – invest in an engineered building kit. It is less expensive to pay for the engineering and it guarantees a building which will be designed to actually meet the building codes!

Registered Design Professional

National Lampoon’s Vacation

In the iconic 1983 movie National Lampoon’s Vacation, the Griswold family plans a trip to Wally World to see Marty Moose

Just like the Griswold’s plans, sometimes best laid plans for buildings don’t come out just as anticipated. Wrong turns are made, dimensions sometimes go astray. Face it. In life, stuff happens.

And sometimes, when the stuff has happened, there is a Building Official who wants proof the stuff which has happened will work. Or, some higher authority to come up with a “fix” or “repair” to make what is referred to “as built” on the jobsite stand up structurally.

Most Building Officials are not as forgiving as Wally World owner, Roy Wally in the movie

Engineers SealWhen a pole building is constructed from engineered plans (not just the use of prefabricated metal connector plated trusses, built from engineer sealed truss drawings), oftentimes the Registered Design Professional (RDP – engineer or architect) can provide a brief letter to the Building Official, in the event things have gone astray. Sometimes a sketch needs to also be provided, but (provided this method is acceptable to the Building Official) this fix is going to prove far less expensive than having to rework one or more pages of the blueprints.
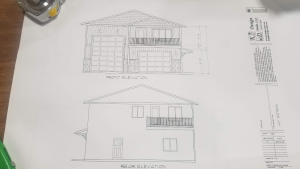
The calamity occurs when a Building Official wants an engineer sealed fix or repair for a set of plans which was not designed by a Registered Design Professional. There are very few RDPs who are willing to take on this type of work, when they are not the Engineer of Record for the building. A “letter” from the engineer is probably not going to be forthcoming. In most cases, the solution is going to result in having to hire an RDP to do a complete analysis of the structure.

Can you see the $$$$?

I believe Hansen Pole Buildings to be an exception to the norm – as we use the very same structural design programs as our engineers. The difference between a Registered Design professional sealed set of plans and calculations, and the non-sealed plans….the engineer’s review and seal.

This is not the case if an individual has drawn up something of their own, or purchased a building kit from their local lumberyard. Even otherwise “reputable” pole building kit package suppliers often have significant differences between their non-engineered and engineered buildings.

The easiest solution is to have a plan which is checked out in advance. Don’t just rely upon Clark Griswold’s knowledge base (and become the next National Lampoon comedy of errors) – invest in a pole building kit package which comes with plans specific to your building, sealed by a Registered Design Professional.

Buying a Non-Engineered Building

The One Simple Secret to Pole Buildings Which Stand Up

HINT: It has nothing to do with how it is built!

Regardless of what anyone pays for a new pole building, whether investing in a complete kit package, piece mealing it together, or having it constructed – the general idea is to have the building stand up.

Obvious, right?

Properly designed pole buildings have every component and connection checked by rigorous engineering calculations to insure the ability of your new building to meet the applicable wind, snow and seismic conditions being applied to the structure.

This is a lot of calculations – on an average pole building, it could be 200 pages worth. Single spaced.

I told you I was going to share a secret.

International Building CodeWL^2 / 8

Cool, isn’t it?

Well, only if you know what it is. For engineers and other skilled professionals – it is the formula for a uniformly loaded simple beam, supported at each end.

W is the load being applied to the beam.

L is the length of the beam (which is squared)

Multiply the two and divide by 8 to calculate the bending moment (read what bending moments are all about at: https://www.hansenpolebuildings.com/blog/2012/09/bending-moment/).

Why is this a secret?

Most of the folks who are trying to sell you a non-engineered building have no one in their organization who knows what this formula is. And even fewer know how to use it!

The person who sells me a new car doesn’t have to know why the car works – they have highly paid brilliant engineers who do those things.

WOULD YOU SERIOUSLY BUY A NEW CAR WHICH WASN’T DESIGNED BY ENGINEERS?

Anyone considering investing in a new pole building should do what I call “due diligence”. Make sure there is someone (hopefully a registered design professional) involved in the design who knows the secret…and better yet, is skilled at using it!

Can a Building Official Legally Change Engineered Building Plans?

pole-barn-plans

I will preface my answer with the statement I have used more than once: If anyone, including any building department plan checker, field inspector, other official, or a contractor, makes any changes or deviations from provided engineered building plans my advice is to obtain a signed statement to the effect they have now become “designer of record”. In effect, they have assumed all liability for the building’s structural design.

With this said, here is where things get dicey. Always pick the battles. Some requests by Building Officials are so minor, it is not worth getting into a fight over. The risk is always in putting forth a challenge, which might raise the ire of the plans checker or inspector. More often than not, a change asked for by the Building Department is a preference item only, which has no code to back it up.

If he wasn’t a building official, it wouldn’t really matter much whether he gets rankled or not. If he was a supplier or subcontractor, fine, take the risk; if he can’t handle it, hire a new one. But you can’t hire new building officials. Get on the wrong side with one and run the risk of installing yourself on the person’s or jurisdiction’s blacklist. Navigating the regulatory quagmire is hard enough without painting a sign on your forehead which says “I am a jerk.”

Trust me on this one – getting into the jerk line at the Building Department is tantamount to waterboarding. Life…will….become….miserable.

I have heard of projects where during construction the engineer of record got calls from the contractor asking for interpretations to the cryptic red marks all over the structural plans. This is alarming because engineers do not release construction plans with red marks on them. If corrections are to be made, engineers make them in the office and reissue the plans. What has happened is an overzealous plans examiner took it upon himself to change the engineered plans via red marks and then issue the plans for construction without bothering to ask or tell the engineer!

In changing the engineer’s design, the Building Department superseded the actual registered engineer as the engineer of record and assumed all sorts of liability. If their risk manager ever got wind of this, heads would roll. And roll they should.

Oftentimes, engineers do nothing about this, especially if it is near an Act of Congress to obtain a building permit in the particular jurisdiction. Sadly sometimes the only way to obtain a permit is via the building department redoing the design and assuming the liability. Raising a stink could cause long delays in the issuance of a permit.

Before questioning the Building Official, weigh the costs. If the building inspector is a reasonable person, ask the question. If, on the other hand, the inspector is seemingly “out to get you”, maybe let the issue pass and then at the end of the project bring it up to his superior.

If you are a Building Official and reading this, please do give me feedback on “smoothing the road”. Trust me; I am on your side. My goal is always the same: To provide adequate support and education to clients to assist them in getting a well-designed pole building which is safe, sound…and built to code.

I Like Building Officials

For those of you who are not Building Officials, stop laughing, I am serious. Building Officials have a job – to protect those who use structures (which include buildings).

In Chapter 1 of the IBC (International Building Code), under Purpose of the code, it states, “This code is intended to provide minimum requirements to safeguard the public safety, health and general welfare through structural strength, means of egress facilities, stability, sanitation, adequate light and ventilation, energy conservation, and safety to life and property from fire and other hazards attributed to the built environment.”

How would you like it if this was your job description?

This is not an easy proposition, by any means. The IBC itself has been simplified to roughly 800 pages – which might be manageable, if it were not for the literally hundreds of other texts and documents which the building code now incorporates by reference!

There is just no possible way for any one person to know all of this information, and how it applies.

An example from just this morning: A Building Official from a township in Michigan was doing a review of the plans we had provided for one of our clients. This particular building has a design ground snow load of 25 psf (pounds per square foot). With a 6/12 roof slope, and the other appropriate factors applied, the roof live load is 18 psf. The building has a 29 gauge steel roof and 2×6 #2 roof purlins on edge spanning a distance of 11’ 7-1/2” from center of joist hanger to center of joist hanger.

In Chapter 23 of the IBC are provided basic tables for rafter spans, which the aforementioned official was attempting to apply to the roof purlins. While these tables may be handy as a reference for rafters in a “stick frame” type of construction with shingled roofing over sheathing, they just do not apply for the design of purlins.

The closest the official could get was a table with a 20 psf roof live load (11% higher than our case) and a 10 psf dead load (833% higher than actual). Using these much greater loads, the tables would only allow for a span of 11’7” with a spacing of 24 inches on center.

The Building Official contacted us, and we provided full calculations to justify the design as submitted. These calculations easily extend for over a full page, typed without spacing between lines. The calculations include footnotes as to the sources of all data and calculations, as a verification they are indeed correct and complete. Checked in them are strength in bending from snow, and wind loads. Also verified is… does the member meet shear and deflection criteria and the connection of the purlin to the trusses?  Yes, it does, calculations were provided.

Should the official have known enough structural engineering to have been able to calculate these himself? I think not, and even if he would happen to be a registered professional engineer (which most Building Departments do not have the luxury of having on staff), unless these were calculations he was performing on a daily basis – no.

The Building Official was doing due diligence in requesting backup information on something which just did not look quite right to him. From our aspect, we are always able to provide and glad to assist.