Properly Placing Post Frame Building Purlins Overhanging Lowered End Truss
Even professional post frame building erectors have challenges with concepts like properly placing purlins when they overhang a lowered end truss.
What could be so difficult, one might ask, you just space them the same as all other purlins, right?
Well, sort of.
End trusses, in this scenario, are placed lower on columns than interior trusses. At interior trusses, purlin tops are even with top of truss. At ends purlin bottoms are across top of truss. In order to compensate for this differing geometry, thickness of roof purlin adjusted for roof slope needs to be taken into account.
Reader (and builder) ALEX from COEUR d’ALENE writes:
“Hey Mike,
Long time lurker, first time question.
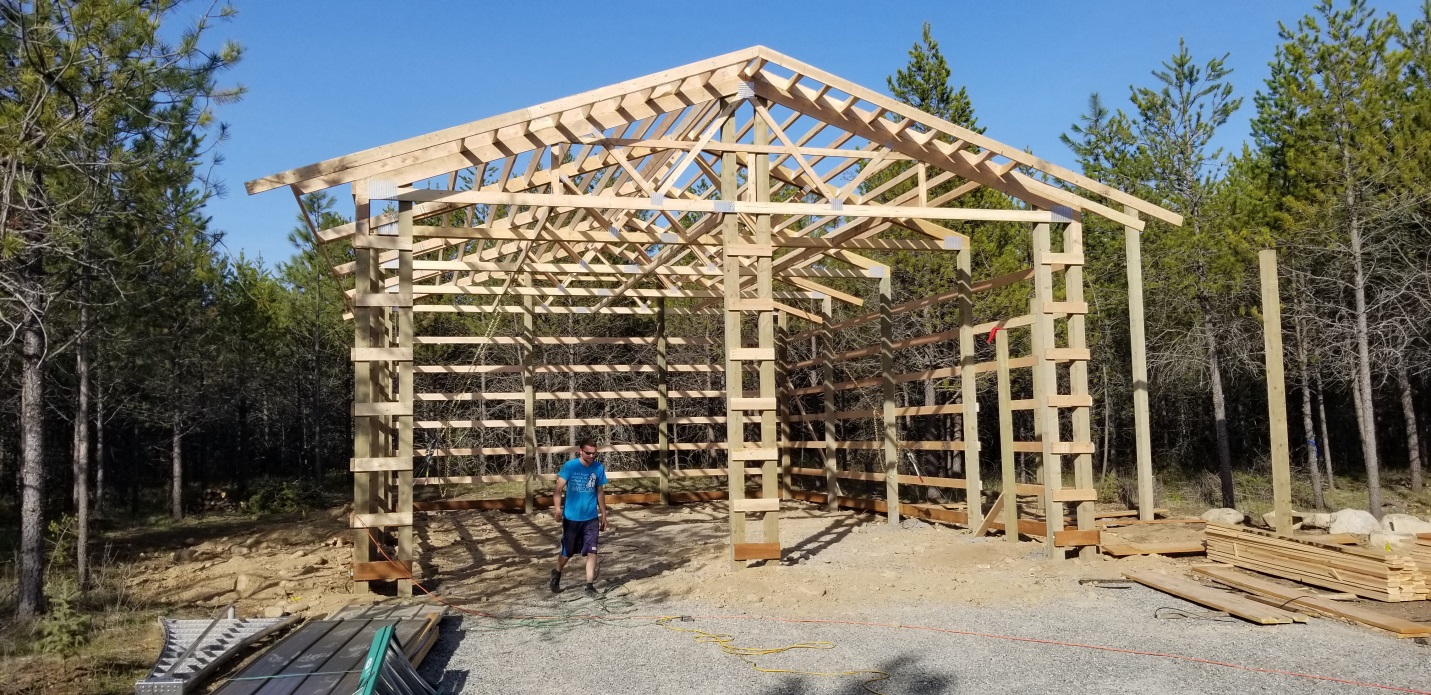
I have a building that I need to build overhangs on. I always have a hard time finding the starting number for that first block. (We run the purlins over the top of the gable truss. We build on ground and use crank boxes just for some insight)
I find if it’s not perfect it’ll grow and by the time we get to the top it’s not square anymore or straight
If you have any insight that would be great!”
 Please note: photo is of Alex’s building, this is not a Hansen Pole Building.
This is copied from the Hansen Pole Buildings Construction Manual:
After laying out fully recessed purlin locations on interior trusses place one of interior trusses flat on a level surface.
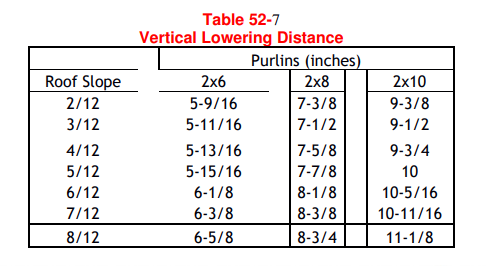
Lay an endwall truss on top of interior truss, holding end truss top chord vertical lowering distance (indicated in table below) lower than interior truss top.

IMPORTANT: Align two truss ends.
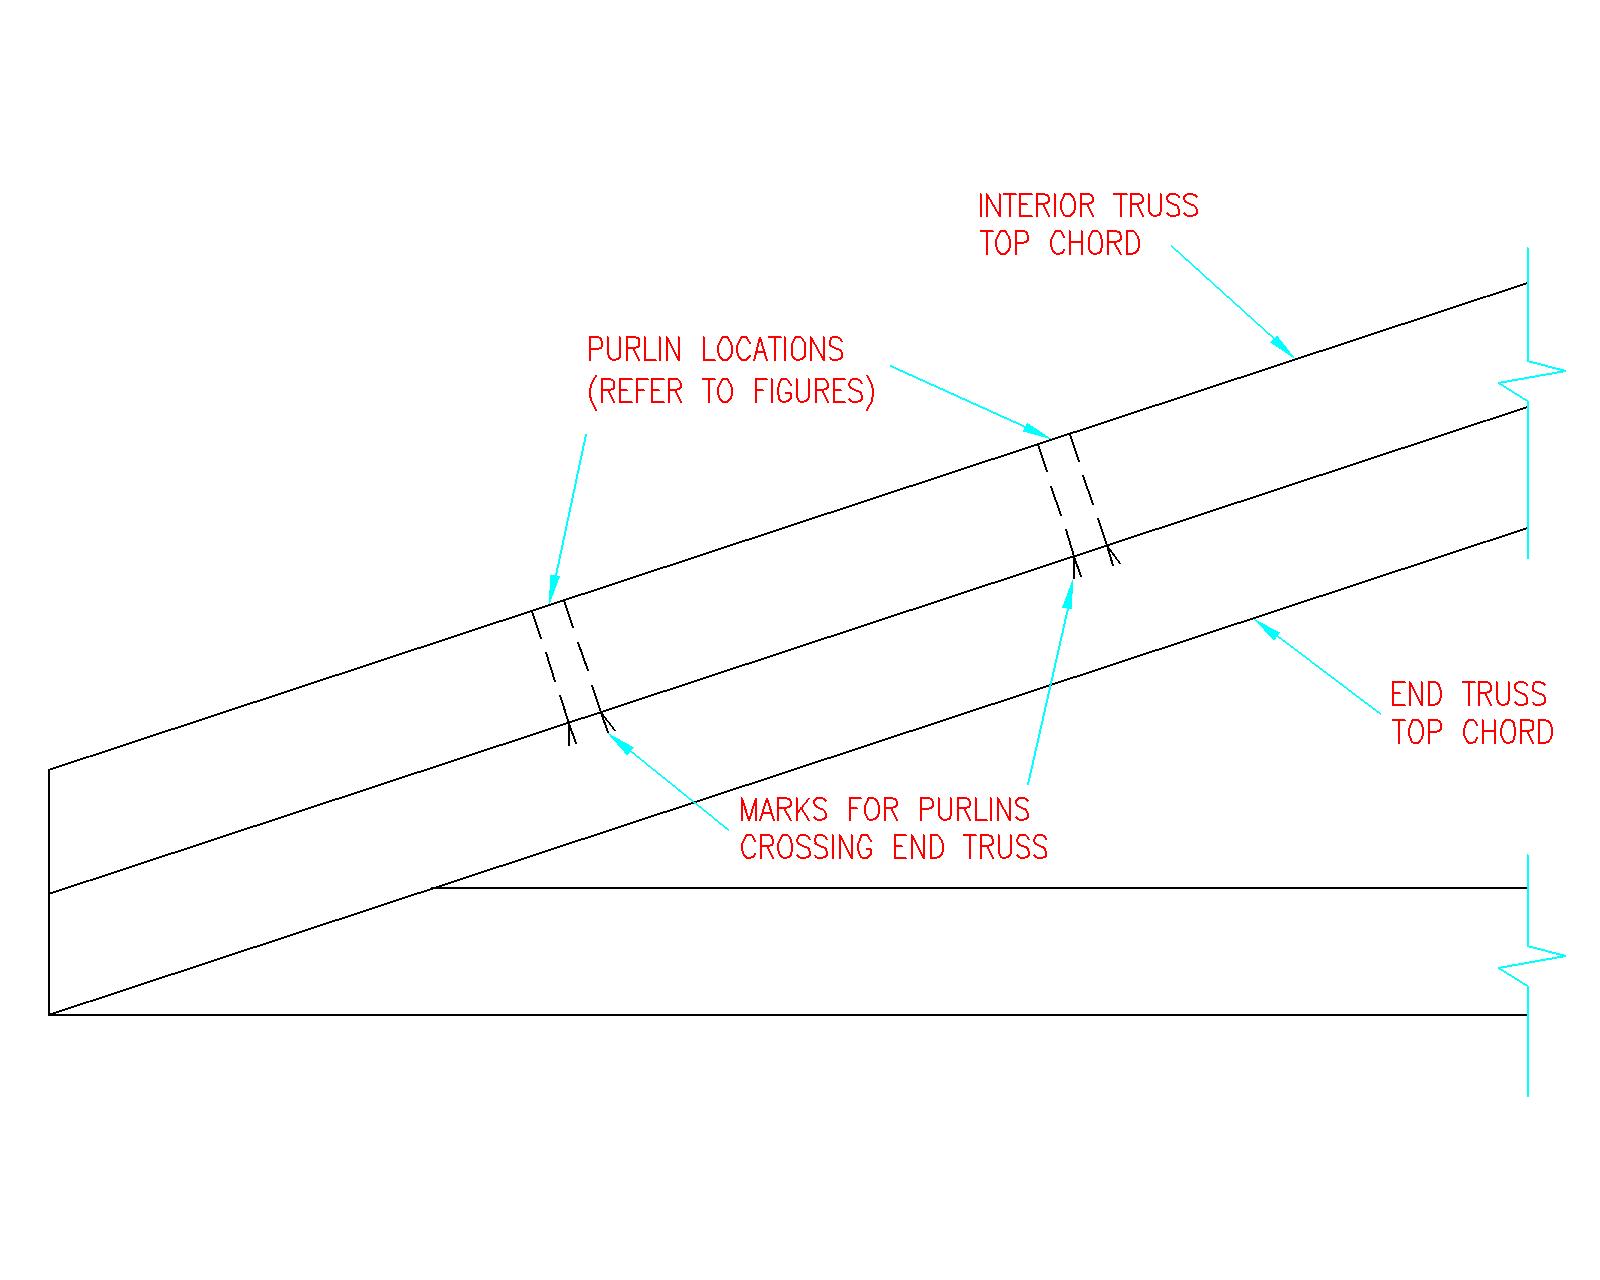
Working from lines drawn on interior trusses for purlin locations, mark on endwall truss top where pencil lines on interior truss are at the intersection of these two trusses. See Figure 52-3
These will be rake purlin locations as they cross end the truss.

Figure 52-3 Marking Rake Purlin Locations
As an alternative to this marking, a similar procedure to Chapter 9 (Hansen Pole Buildings Construction Manual) can be followed, with this immediately following exception.
Using Table 52-2 ADD length shown (Example: 4/12 slope and 2×6 rake purlins = 1-13/16”) to FIRST RAKE PURLIN SPACING ONLY, and draw marks on truss top accordingly.
Balance of rake purlins will be on standard purlin spacing from the first pair of marks.
Table 52-2
| ADD TO FIRST RAKE PURLIN SPACING | ||||||
| Purlins (inches) | ||||||
| Roof Slope | 2×6 | 2×8 | 2×10 | |||
| 2/12 | 7/8 | 1-3/16 | 1-1/2 | |||
| 3/12 | 1-3/16 | 1-13/16 | 2-5/16 | |||
| 4/12 | 1-13/16 | 2-7/16 | 3-1/16 | |||
| 5/12 | 2-5/16 | 3 | 3-7/8 | |||
| 6/12 | 2-3/4 | 3-5/8 | 4-5/8 | |||
| 7/12 | 3-1/4 | 4-1/4 | 5-3/8 | |||
| 8/12 | 3-11/16 | 4-13/16 | 6-3/16 | |||
Needing more tips and tricks for successful post frame building erection? Just ask, or better yet – make your next post frame building a Hansen Pole Building!


