Tag Archives: rockwool insulation

ADU’s, Best Insulation, and a Post Frame Home

This week the Pole Barn Guru answers reader questions about building an attached ADU (additional dwelling unit) with a shared wall, the Guru’s thoughts on the best option to insulate a space, and whether specific design choices are possible in a post frame home.

DEAR POLE BARN GURU: We are planning to build a shop with an attached ADU (additional dwelling unit) for my mother to live in. Can the ADU with a monolithic slab share a wall with a pole-barn, that will also have a slab floor? CARL in SHERIDAN

DEAR CARL: Certainly can. Unless the shop is no more than 1000 square feet, you will have to have no less than a one-hour fire separation between them. This can easily be accomplished with each side of wall having 5/8″ Type X gypsum wallboard applied. Both shop and ADU can and should be post frame (pole barn) constructed.


DEAR POLE BARN GURU: My concerns are best insulation since this is a metal exterior, attic insulation blown in cellulose, will have drywall in house, attached garage metal flat ceiling, vapor barrier above metal ceiling? Thanks. VICTOR in CHRISMAN
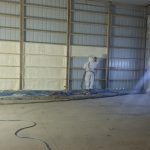
DEAR VICTOR: I think you will find a general consensus as to closed cell spray foam applied directly to steel roofing and siding as being “the best”. In my humble opinion, it is most effective in Climate Zones 3 and under when entire building shell is being encapsulated by it. It also comes with a very pricey initial investment.

With this said, your requirements where you are (Climate Zone 4) are for R-49 in ceilings, R-20 in walls.

If this was my own building, this is what I would do:

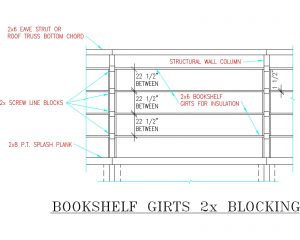
Walls (from out-to-in): Steel siding; Omnidirectional Housewrap meeting ASTM E2273 drainage efficiency requirements; Commercial bookshelf girts; R-30 Rockwool Comfort batts; Wel lsealed interior vapor barrier.

Ceiling: Raised heel trusses to allow full depth of insulation from wall-to-wall; Integral Condensation Control factory applied to roof steel; vent eaves and ridge in proper proportion; blow in R-60 fiberglass or granulated Rockwool directly above your ceiling finish. I am not a fan of cellulose over a steel ceiling as chemicals in it (if it gets damp at all) will react with steel to prematurely deteriorate it.

 

DEAR POLE BARN GURU: My wife and I are looking at post-frame for our next house and we don’t need a full second story, so we’re considering a loft/one-and-a-half story setup because we also want traditional gabled dormers. We really like the looks of cottage style architecture and want a roof that is somewhere in the ballpark of 9/12 or 10/12, but want to take advantage of the cost savings that post-frame. It’s my understanding from reading other posts that the minimum eave height for two story post-frame houses with 8ft ceilings is ~19ft. What would the minimum eave height for a loft/one-and-a-half story be, and about how much would doing this (for the purposes of adding functional dormers) inflate the cost of a similar size building? NIK in CLEVELAND

DEAR NIK: Post frame construction will prove to be your most economical permanent structure, so you have made an excellent choice. With your preferred roof slope, it is possible you might be able to have an eave height a low as 10 feet, if you want an eight foot high finished ceiling below. One of our Building Designers will be reaching out to you to further discuss your wants and needs and can work with you to create a firm budget.


Why Are You Stuck on Bookshelf Girts?

Why in World are you Stuck on Bookshelf Girts?

Reader JAMES writes:

“Why in world are you stuck on bookshelf girts. For instance with ‘normal’ pole barns one could SPF the walls and roof and have almost no heat loss through the lumber. One could argue your “bookshelf girts” and purlins between trusses makes the building VERY close to a “normal home”. Do you offer a traditional style built pole barn as there MUST be savings to be had.”

Mike the Pole Barn Guru writes:
There are as many ways to structurally design post-frame buildings as there are providers and builders. Our way of building happens to be very similar to what would be considered as traditional style in Western states such as Washington, Idaho, Oregon, California, etc.

We do happen to offer buildings with columns every eight feet, trusses every four feet – however very few clients ever pick this as an option.

We are always looking at ways to make our post-frame buildings more efficient and DIY friendly, without sacrificing performance.

Worst part of post-frame construction (and least easily to detect challenges in advance) is having to dig holes. By widely spacing columns (usually most cost effective is every 12 feet), number of holes having to be dug is reduced by roughly 1/3rd from eight foot spacings.

Let’s examine R-value, calculated using Type 1, conventional method.

For sake of discussion, we will use an 18 eave height (tall enough for two stories in most instances). I’ve chosen a flash and batt method, for sake of cost effectiveness of insulation.

R-value through cavity

Air film – inside 0.67

½” gypsum wallboard – 0.56

2” closed cell spray foam – 14

5-1/2” Rockwool – 23

Exterior cladding – 0.5

Total R = 38.73

R-value through girts

Air film – inside 0.67

½” gypsum wallboard – 0.56

2×8 girt – 9.06

Exterior cladding – 0.5

Total R = 10.79

On an 18’ wall, in one 12′ bay there will be 8 girts with an area of 1.5” x 144″ x 8 = 1728 square inches or 12 sft (Square Feet)

Total area of a bay = 18’ x 12’ = 216 sft

Hence girts makeup 12 / 216 = 0.056 (5.6%) of wall

10.79 x 0.056 + 38.73 x 0.944 = 37.16

37.16 / 38.73 = 0.959 (95.9% of a wall without girts)

How about pieces in say a 60’ long wall?

Your “traditional”

Splash planks:  1/12’ 3/16’

Girts: Exterior 2×6 8/12’ 24/16’ Interior 2×4 8/12’ 24/16’
NOTE: Exterior girts may fail in deflection, especially at wall corners where forces are greater

Columns (excluding corners): 7/22’

Truss carriers (will vary depending upon roof load): 2×12 2/12’ 6/16’

Me:

Splash planks: 5/12’

Bookshelf girts: 2×8 40/12’

Girt blocking: 2×4 10/16’

Columns(excluding corners): 4/22’

Your version has me handling 74 pieces of lumber, with 1582 bd.ft. (board feet) of lumber vs. 59 pieces with 984 bd.ft. of lumber

Your wall sets outside of external wall girts at Building Line and creates an 8-1/2” thick framed wall. On a 40’ wide building, net framed interior clear width is 38’7”.

My wall has outside of columns at Building Line, so only 5-3/4” is lost on each side. Net framed interior clear width is 39’0-1/2”

In summary, my being stuck on bookshelf wall girts loses only 3.2% to thermal bridging, reduces holes to be dug (per sidewall) by 43%, reduces pieces to be handled 20% and board footage of lumber used by 38%, while delivering a greater net usable interior space.

Termite Resistance of Stone Wool Insulation

Termite Resistance of Stone Wool Insulation

Could you possibly share whatever information you might have on a product that is termite proof/termite resistant to insulate my slab on my building.

The only thing I have found somewhat useful is Cellofoam. It’s a EPS product that is infused with insecticide.”

Mike the Pole Barn Guru says:

Solution – Rockwool Comfortboard 80.

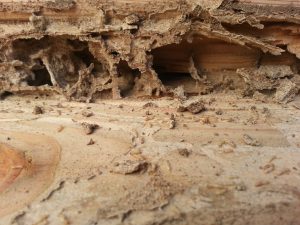
Rockwool Technical Innovations released a bulletin in August 2019, wherein they had recently completed third party testing at University of Hawaii to determine termite resistance of stone wool insulation. Insulation samples were tested to AWPA E1-09, “American Wood Protection Association Standard Method for Laboratory Evaluation to Determine Resistance to Subterranean Termites”. Test involved exposing insulation samples to 400 Formosan subterranean termites for a 28-day period then measuring weight loss of material, termite mortality rates and visually evaluating sample damage. Results were then compared to a control sample of Southern Yellow Pine untreated and Southern Yellow Pine treated for termite resistance with ACQ, type D.


Test results indicated stone wool insulation proved to be termite resistant per this rigorous test making material appropriate for use under conditions of very heavy termite hazards.

Laboratory observations made during testing moted termites initially investigated stone wool, but then covered it with sand within first week. This is an avoidance behavior evidenced by termites wanting to isolate something undesirable, such as an unacceptable food material.

Material weight loss of stone wool was only 1.22% compared to 4.85% for treated wood and 50.92% for untreated wood.

Both IRC (International Residential Code) and IBC (International Building Code) address foam plastic insulation use in areas where termite infestation probability is ‘very heavy’ and restrict its use when installed on exterior face or under interior or exterior foundation walls or slab foundations located below grade. To use foam plastics in these applications and geographies, it is required all structural members are made of non-combustible materials or pressure preservative treated wood, or an approved method of protecting foam plastics and structure from termite damage is used.

Condensation Control, Ventilation or Insulation

Most Builders Do Not Understand Condensation Control, Ventilation or Insulation

Crucial to proper performance of climate controlled buildings of any sort is condensation control, adequate ventilation and insulation. Sadly, most builders do not understand how to come up with a proper design solution.

Reader AARON in WISCONSIN DELLS writes:

“Hello, I was wondering if you had a minute for a quick question ? I have read posts for countless hours regarding vapor barrier between trusses and roof steel and I can’t find the answer I’m looking for. I’m building a 44×96 that will have in floor heat in South central Wisconsin (by Madison) so we have cold winters and humid summers. Walls will be spray foamed. I will be applying a vapor barrier (poly) to the bottom of roof trusses and then putting a metal ceiling on and spraying fiberglass insulation above the ceiling. Fully vented ridge cap and 2’ overhangs with vented soffits around the entire building. The builder did not put any vapor barrier down between the roof steel and the trusses so the steel is directly on the trusses. Could this end up creating a moisture issue or will I have enough air flow in the attic space that I do not need the vapor barrier between the roof metal and trusses ? Thank you very much for your time.”

Thank you for reaching out to me Aaron, I am always available to answer questions.

Your builder sadly did you no favors in not having a means to prevent condensation on your roof steel underside. It also requires having an actual thermal break, not just a vapor barrier. Your best solution now is to have two inches of closed cell spray foam applied directly to the underside of your roof steel, making certain they do not block ridge vents. Without this thermal break, expect to end up with damp insulation.

If your builder installed vented soffits on your building’s end overhangs, you need to find a method to block them off – otherwise your attic will not vent properly.

In regards to ceiling vapor barriers, Joe Lstiburek (building scientist and founding principal of Building Science Corporation) says plastic vapor barriers should only be installed in vented attics in climates with more than 8,000 heating degree days. Even in South central Wisconsin, you are not to this point.

You’ll want to verify a correct ratio of air intake from soffits to air exhaust at ridge (chances are good your builder did not). At least 40% and no more than 50% of your attic’s net free ventilating area (NFVA) should be at the ridge. You may need to block off some of your sidewall eave vents to get the ratio correct.

I would also recommend you blow in rockwool insulation in your attic rather than fiberglass. Fiberglass insulation loses R value when outside (attic) air temperatures are low and is also affected by even small amounts of moisture.