Tag Archives: roof framing

A Checklist to Follow, Setting Piers, and to Plumb, Level, and Square

This Wednesday answers reader questions about a barndominium checklist to follow, if one should set piers on virgin ground when adjusting for grade changes, and to plumb, level, and square a building before adding roof sheathing.

DEAR POLE BARN GURU: I remember you had a checklist to follow when building a barndominium or pole barn but I’m not sure where I saw it. Can you email where I can find it again? Thank you! Appreciate your time. MONICA in COLOMA

DEAR MONICA: This is usually what my readers find most valuable: https://www.hansenpolebuildings.com/2021/02/a-shortlist-for-smooth-barndominium-sailing/

Please reach out any time with questions, or call 1.866.200.9657 to speak with one of our team members.
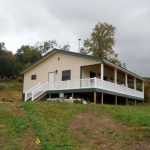
 

DEAR POLE BARN GURU: The area where I plan to build a pole barn required fill to bring the grade up to the driveway level. My plan is to install concrete piers with the column brackets installed on top of the pier. My question is do I need to have the concrete pier depth into the virgin ground? The fill was not compacted but has been setting for one year. Also, if the pier does need to engage with virgin ground, how deep into the virgin ground does the pier need to be? CRAIG in EAST WATERBORO

DEAR CRAIG: At very least, piers need to rest on virgin ground, and should also be at or below frost line, unless other provisions are made to prevent frost heave. It would probably be most ideal to engage a geotechnical engineer to visit your site and determine actual strength of your fill. This could easily save you a small fortune in excavating and concrete, or prevent your building from later having structural issues.
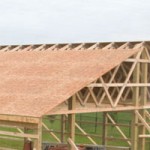
 

DEAR POLE BARN GURU: My contractor failed to plumb, level and square up the wall of my 40×40 pole barn before he installed the trusses and purlins. Can this be fixed before he installs the sheathing for the standing seam metal roof? Thanks in advance, PAUL in SMITHFIELD

DEAR PAUL: Provided footprint dimensions are accurate and square at grade, building length is correct at trusses and trusses are placed at proper height, there is no reason to square up roof planes until just prior to installing sheathing for roof. Provided roof planes are squared, corner columns do not need to be adjusted to plumb until roof is complete.
Dear Pole Barn Guru: Can I Lay Purlins Flat?

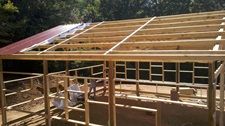
DEAR POLE BARN GURU: With trusses spaced 6 feet on center can you lay 2×4 purlins flat? Curious in Columbus


DEAR CURIOUS: In order to answer your question properly, I will have to make a whole bunch of assumptions. I will assume this is a single truss, code minimum snow load, 4/12 roof slope and 29 gauge steel over purlins 24 inches on center (o.c.).

The purlins have to be able to support their own weight of about 0.5 psf (pounds per square foot) plus the steel 0.63 psf.

As the roof live load of 20 psf, is being carried by members 24” o.c. with the slope of the roof, the live load can be reduced using the cosine of the roof slope (0.949) to get the applied load of 18.98 psf. Adding the dead loads, the total load to be carried is 20.11 psf.

To calculate whether a 2×4 will work or not, we use this formula:

(Roof live load + roof dead load) X spacing  X (span of purlin)^2

Divided by:

8 X (Section modulus of a 4×2 of 1.3125) X Fb (fiberstress in bending) X 1.15 (duration of load) X 1.15 (Cr, repetitive member factor as the purlins are spaced 24” o.c. or less) X 1.1 (Cfu, the flat use factor for applying the load to the wide face of a member)

If the resultant is less than 1, then the 2×4 works in bending.

Let’s try 2×4 std&btr (standard and better) SPF (Spruce-Pine-Fir), which is the most common framing material found at lumber yards.

20.11 psf X 24” X 6’^2 / 8 X 1.3125 X 550 X 1.15 X 1.15 X 1.1 = 2.068

Upgrading to #2 SPF (not available in most lumber yards) with a Fb value of 1312.5 which plugged into the above equation yields a result of 0.87, so it works in bending.

However – it must also be checked for deflection (while a member might carry the load without breaking, if it bends too far, the roof will have “waves” in it.

In Table 1604.3 Footnote a of the IBC (International Building Code), “For secondary roof structural members supporting formed metal roofing, the live load deflection shall not exceed l/150”. The “l” being the span of the structural member (roof purlin in this case).

Being as liberal as possible, using the distance between the trusses every 6’, gives us a “l” value of 70.5”. This means the maximum allowable deflection would be 0.47”.

To calculate the actual deflection, this formula is used:

5 X Ps (roof snow load adjusted for slope factors) X purlin spacing X purlin span^4

Divided by:

384 X E (modulus of elasticity for the lumber being used) X I (moment of inertia for the lumber size)

Plugging in the variables:

5 X 18.98 psf/144 (has to be divided by 144 to give psi) X 24” X 70.5”^4 / 384 X 1,400,000 X 0.984 = 0.795”

Bottom line: As the deflection is far greater than what is allowable, a 2×4 #2 roof purlin laid flat would not meet the requirements of the Code, or sound engineering design.  

Day Three at Steve’s: Squaring a Roof

This week I am relating a recent day by day account of putting up a pole building for my oldest step-son’s father-in-law in Happy Valley, Tennessee.  Check back to Monday for the beginning of this string.

On to day two on the jobsite…another sunny day.  (Read that as “oppressively hot and humid”.) Jake picked up a towable manlift for placing the rest of the trusses. This turned out to be a true back saver.

While the rest of the trusses were lifted into place, I cut all of the roof purlins to length, using a permanent marker to put arrows for “crowns up” on each of them. As trusses were installed, the purlins got placed into each bay, to stabilize them. The man lift proved handy in getting purlins into place, as it made working 12 to 17 feet in the air, a snap.

Here is where we caused ourselves some challenges, in two respects. One – not all of the handy arrows directions were followed by those doing the installs, and the second – the purlins needed to be fit tight against the trusses, in the joist hangers.

The roof did get all framed up, however the next morning found the aerial crew having to spend a good portion of the morning taking joist hanger nails out of purlins and fitting them tight, as well as flipping over a few purlins so the crowns were the right direction. Because wood is flexible – and not absolutely 100% perfectly straight, just cutting purlins to length and installing them means they will fit snug on the first try.  What needs to be done is to use cable come-alongs from truss to truss to tighten up each bay, thus pushing the purlins tight into each joist hanger.  This is an important step in ensuring the building comes out “plumb” and “square”. Extra time spent for squaring a roof will save a mountain of headaches once application of roofing and siding materials ensues.

Once all was good and snug, we started to square up the right side of the roof. When squaring a roof, the best way to go at it is to focus on one half of the roof at a time. The overall roof lengths were absolutely perfect – the fascia and ridge were exactly the same length, and exactly what they should have been. Goes to show what pre-cutting all of the purlins to length and making sure they are tight against the trusses in each bay can do for a job!

We checked the diagonals…while holding our collective breath. They were exactly right on the money! Life was good. Fascia was straight and we were ready to run roof steel.

At 100 plus degrees, we did not get far – opting to wait it out until cooler temps the next morning. While admiring our work, we noticed a strange hump in the fascia on the opposite side of the building….uh oh – problem!

After investigating, the problem was found, but the solution took some thought.

Come back tomorrow for the answer.