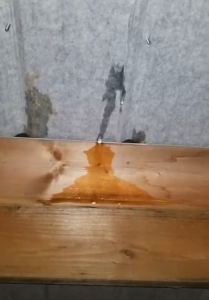
Yesterday, I was contacted by one of our clients who invested in a new Hansen Pole Building back in 2008. While his inquiry was about re-roofing his building using shingles, the real issue is – his steel roof is leaking!
Properly installed, a threw-screwed steel roof should never, ever leak.
 So, what exactly would be the keys to a proper installation?
The Number One most important factor to preventing leaks is to pre-drill the roof steel. Steel is tough and when not pre-drilled, the effort to force a screw threw the sheeting can make a screw which is missing or barely grabbing a purlin, feel like it is properly installed. Pre-drilling provides nice, straight screw lines on your roof. If a screw does not “grab” the purlin beneath, the lack of resistance lets you know right away you have a miss.
What happens when a screw misses a purlin? This is an easy fix. Remove the screw as well as the preceding several feet of screws along the same line. Either push the underlying purlin up towards the peak of the roof, or push it down towards the eave line until the pre-drilled hole aligns with the center of the purlin. Reinstall the screws and it is good to go.
Overlaps. Each steel panel has an underlap (usually a full rib plus a flat leg) and an overlap (usually a ¾ lap). Even professional builders have made the mistake of putting the full rib edge, over the ¾ rib. This is a guarantee of a leak and is easy to fix. The screws along the lap can be removed, the panel edges lifted up and put back down properly. Reinstall the screws and the problem is solved.
Nailing on roof steel….is not the answer to a proper installation. It is a leak looking for a place to happen. If suggested – run, do not walk, away.
The screws themselves. Traditionally, steel roofs have been applied with the industry standard #9 or #10 diameter screw. In actually laboratory testing, done by an engineer, these diameter screws slotted the steel under repeated load cycles. The same engineer who did the testing designed the screw now used on all Hansen Buildings. With a larger (#14) diameter, where the screw passes through the roof steel, the slotting action was eliminated. What is slotting? This happens because steel expands and contracts, and if left with too small screws through the panels, will cause small “slots” to occur in the panels. Yep, more leaks!
Lesser quality screws may use neoprene rubber gaskets beneath the screw heads. Neoprene deteriorates over time, and when it does, leaks occur. By using screws with EPDM washers, this becomes a non-issue.
Screws which are under or over-driven, or driven at an angle, become potential leaks. Screws should always be driven in perpendicular to the steel until snug, but not until you see the steel “dimpling”. If over-driven during roof steel installation, it’s easy to just back them out a bit until the “tight but not too tight” is achieved.
Too long or too short steel overhang at the eave side of the building will lead to problems. The ideal roof steel overhang past a fascia board (or past the high ribs of wall steel without overhangs) is 1-1/2 to 1-3/4”. Make the overhang too short and water can actually run up the underside of the roof steel and into your building. Too long and water will shoot over the top of gutters and may not have an adequate overlap beneath the ridge cap at the peak.
Make sure to utilize closed cell, form fitted closure strips beneath the ridge cap and at the eaves. Not only will these keep out flying critters, they will also prevent wind from blowing in debris and weather.
Properly installing the roof steel on your new pole building takes no longer than doing the job wrong. Armed with the right knowledge and the correct products, you will achieve a quality application which will last a lifetime.


