Tag Archives: roof trusses

Code Requirements for Residential Roof Trusses

Code Requirements for Residential Roof Trusses

Reprinted from a March 2019 article in Structure Magazine authored by Brent Maxfield, P.E.

Part 3 of 3:
Implementation

1. Building Officials, Contractors, Owners, and Building Designers should be cognizant of and enforce the requirement that the Contractor and the Building Designer review the Truss Submittal Package prior to the installation of the Trusses. Building Officials should establish procedures to ensure that this code requirement is followed.

2. Many engineering drawings have general notes that require the Trusses to be designed and stamped by a registered engineer. It is important to understand that the stamp is for individual Trusses and not for the Trusses acting together as a system. Many engineers falsely assume that this stamp is for the individual Trusses as well as for the roof system.

3. Truss web bracing locations are provided on the Truss Design Drawings in the Truss Submittal Package. The BCSI document usually provides the bracing details. Many Truss webs do not align with adjacent Trusses, making continuous Lateral Restraint

bracing impossible to install. In these cases, T or L bracing will be required. Construction Documents should provide details and instructions for when T or L bracing is required.

4. Truss web bracing is critical to the stability of the roof system, yet very few residential projects have engineering observation of completed roof systems. Unless the Truss spans 60 feet or more, special inspection of the Truss web bracing installation is not required. This is an area where the code requirements could be improved.

5. Many projects have general notes that state that snow drift and unbalanced snow loading are required to be considered in the Truss design, but the Construction Documents do not provide the actual values of the snow drift loads and the unbalanced loads for each Truss. This is contrary to ANSI/TPI 1, Section 2.3.2.4(d). It is important to understand that the responsibility for calculating and providing the loads applied to each Truss rests with the Building Designer.

6. A functioning roof system is the responsibility of the Building Designer and consists of Trusses, bracing, blocking, connections to structure, diaphragms, and an understanding of the load path of all forces. The Truss Submittal Package is only one piece of the system.

7. If a portion of the roof system falls outside of the scope of the IRC, then that portion, including the associated load paths, will require engineering analysis. If the Building Designer is not an engineer, then an engineer who is not filling the role of the Building Designer could be engaged for a limited scope to design and stamp the elements that fall outside of the scope of the IRC.

This article intends to educate engineers about the roles and division of responsibilities for residential wood Trusses. It is critical to understand the specific scope of the Truss Designer as defined in ANSI/TPI 1. The Truss Designer is responsible for individual Truss Design Drawings using loading information obtained from the Truss Manufacturer, who gets information from the Contractor in the form of selected information from the Construction Documents. The Building Designer is responsible for ensuring that the Truss loads given to the Truss Designer are accurate. The Building Designer is also responsible for ensuring that all Trusses act together as a roof system. All players need to understand and fulfill their responsibilities as outlined in ANSI/TPI 1 in order to achieve a safe and code-conforming building.
Hi, I Should be an Engineer

Hi, I Should Be an Engineer. Can You Tell Me What I Left Out?

Seemingly every Spring I receive an email similar to this one from JOHN in UNION DALE, who it sadly appears has not done much (if any) homework in reading my articles.

JOHN writes:

“ Hi, I have been doing a couple of months homework on making my pole barn, my plan is a 30×50. Right now my plan is using (16) 6x6x16 pole about 52 inches in the ground, the spacing between posts will be 10 ft, now I have not decided on a concrete cookie before the setting the post or gravel first has a drainage layer the set the pole and then use about 5 bags of concrete for uplift protection and the normal back fill, for the posts I got post protectors, so the wood is separated from the soil, my plan is to use double  2×12 for the top strapping with the posts notched at the top for added snow load, has far has the roof it will either be a 4/12 or 5/12 pitch my plan is using 2×6 rafters that I’m making on the ground and hoisting up by myself and they will be on 48 inch on center, my purlins are going to be 2x4s about 2ft apart and standard metal to finish it off, if you can can you please let me know if I left anything out, thanks ps I forgot to say the door opening on a non-load bearing wall will be a 12ft wide and 10ft tall, I’m thinking about putting a door  on a load bearing wall a 10ft, all doors are going to be sliding barn doors.”

Mike the Pole Barn Guru Responds:

Well John, you have left out a crucial part. One no proper pole barn should be without. Plans designed and sealed by a Registered Professional Engineer specific to your building at your site. To build without them is, in my humble opinion, fool hardy and I cannot endorse your plan of attack or methods of construction without them. Outside of this – attempting to field construct your own roof trusses is not a good choice. Prefabricated trusses are truly a bargain, especially when considering risks involved should your home made trusses collapse injuring or worse killing you or a loved one. 
For last year’s related article, please read: https://www.hansenpolebuildings.com/2019/05/self-designed-pole-buildings/

For extended reading on the misadventures of site built roof trusses: https://www.hansenpolebuildings.com/2018/12/site-built-roof-trusses/

Roof Trusses 4′ o.c., Condensation Issues, and a Sliding Door

This Monday the Pole Barn Guru answers questions about roof trusses at 4′ o.c., ways to solve condensation issues, and sliding door options.

DEAR POLE BARN GURU: My question is I just purchased some roof trusses that are 32 feet long heel to heel they are constructed with 2 by 4s can I put these on 4 foot centers? Thanks. CRAIG in BELVIDERE

DEAR CRAIG: You can if you want your building to collapse in a moderate snow event. Along with your trusses, you should have received an engineer sealed truss drawing with all specifics as to what can be carried by it and spacing. If you did not, and they are prefabricated metal connector plated wood trusses, there should be a manufacturer’s stamp somewhere on truss bottom chords. You could then contact them and give them truss specifics (and probably a few photos showing lumber grades, web configuration and steel connector plate sizes. From this, they may be able to determine what you have actually spent your hard earned money on.
If you are unable to determine where they came from, another alternative would be to take their information to a Registered Professional Engineer with roof truss experience. For a few hundred dollars, you may be able to get an opinion as to their strength.


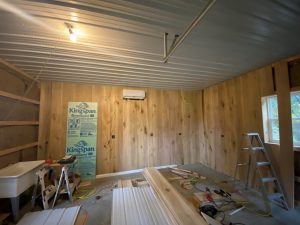
DEAR POLE BARN GURU: Hello, I have a 30x46x16 all steel pole barn that I am having condensation problems with. My question is what is the best thing I can install or do to help the problem? I have been told by others to install a ventilation exhaust fan controlled by an thermostat. I do have electricity in barn. I also have a wind turbine I haven’t installed yet too? Should I put both of these items in or one of them? And if so, do you guys install these items? Please help, its rusting all my tools and growing mildew in my RV!! Thanks ALYSSA in LEWIS CENTER

DEAR ALYSSA: You have found a challenge (one of many actually) Quonset steel building providers never seem to mention – condensation (read about other Quonset issues here: https://www.hansenpolebuildings.com/2011/07/quonset-huts/).

The two best things you can do are to seal your concrete floor (https://www.hansenpolebuildings.com/2019/02/how-to-properly-apply-post-frame-concrete-sealant/) and have two or more inches of closed cell spray foam insulation applied to the inside of your steel building shell. An exhaust fan might help, provided it can adequately move enough air (need to move between 3000 and 4000 CFM – cubic feet per minute) and it will require an air inlet of similar dimensions. We are not contractors, so we won’t be able to assist you with any installations.
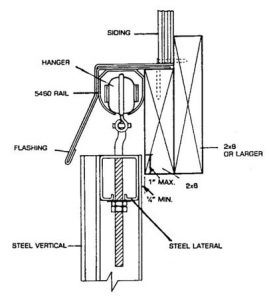
 

Figure 27-5

DEAR POLE BARN GURU: Hi. Not really looking for a whole building. What I am looking for is an exterior sliding door to install onto a shop wall. The Shop is a timber frame unit. The opening is roughly 6 feet wide by 7 – 7.5 feet tall. I have not yet taken exact measurements. I will as soon as I can find a vendor within my price range.

I was very intrigued by your video presentation describing the “nail on” round track system. Also, this shop is in an odd location. It is a basement shop under my house, the house is built on a slope, so the wall I want to put the door onto is at ground level, but the opposite wall is fully underground. Since it is an exterior door to my basement any info on weather sealing for the cold Vt. Winters would be greatly appreciated. ANDREW in WESTMINSTER

DEAR ANDREW: Whilst I can appreciate you thinking a sliding “barn style” door might be a solution, I am doubtful as to it truly being a viable design solution. At best a sliding door will be a challenge to insulate beyond a bare minimal R value. A bigger concern is you are not going to achieve a tight air seal.

A design solution I can recommend (although it may stretch your budget) would be to go with an insulated commercial steel double entry door (six feet wide) in steel jambs. These doors will afford a secure access to your shop, are insulated and can seal air tight.

Although we typically only provide doors with our complete third-party engineered post frame building kit packages, you can message Materials@HansenPoleBuildings.com for a delivered price.


Roof Truss Quality Control

Roof Trusses are structural frameworks, generally two-dimensional, whose members are almost always assembled to form a series of inter-connected triangles, Perimeter members of the assembly are called truss chords and interior members are called truss webs.

Metal plate connected wood trusses (MPCWT) are composed of wood members joined with metal connector plates (also known as truss plates). These metal connector pates are light-gauge, toothed steel plates.

MPCWT are an integral part of most pole buildings. Their use allows for wide cost-effective clearspans and greatly speeds jobsite construction.

Hansen Pole Buildings, like most providers of pole building kit packages, does not fabricate our own trusses. Outsourcing allows us to provide economical solutions which are relatively local to each building site, by holding delivery costs to reasonable levels.

One of our clients recently had some concerns regarding the quality of the trusses received at his site. Each of our clients is provided with a secure individual log-in to their portion of our website, which allows them to quickly and easily upload photos. Using this system, the client provided some interesting photos. Among them were some where the client could fully place his finger between some of the wooden members of the trusses.

Roof TrussesIn a not too distant past life, I owned two truss plants for 17 years. In sum total, I owned, managed or worked in one capacity of another in truss manufacturing companies for over two decades. Truss manufacturers are not only responsible for in plant quality control, they are also subjected to random third-party inspections quarterly. The process is rigorous – no manufacturer ever wants to fail an inspection.
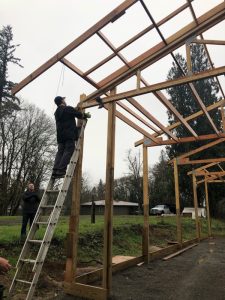
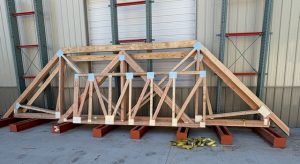
The Truss Plate Institute has a lengthy document governing the entire truss process – including quality control. For those of you who like to read, or have issues falling asleep at night, the ANSI/TPI 1-2007 standard can be read online for free at: https://design.medeek.com/resources/truss/documents/ANSI_TPI1-2007_Standard_and_Commentary-Appendices.pdf

The relevant portions of the document regarding Wood Member-To-Wood Member Gaps is found at 3.7.6.1 of the document:

“Except as indicated in Section 3.7.6.2 or as otherwise specified on the Truss Design Drawing, maximum gaps in all joints except floor Truss chord splices shall not exceed 1/8 in. (3 mm), where the gap is measured at each edge of the Metal Connector Plate for joints in which the plate edge is within the scarf, and measured at the end of the scarf for joints in which the plate edge is outside the scarf. Scarf is the portion of the joint in which it is intended that there be wood-to-wood contact between two Wood Members. The maximum gap for floor Truss chord splices shall not exceed 1/16 in (1.5 mm) across the entire scarf. For joints designed with single points of contact between adjacent members as shown on the Truss Design Drawing, the maximum gap between all contact points shall not exceed 1/8 in. (3 mm).”

Pretty tough requirements!

In the case of these particular trusses in question, the photographs were forwarded to the manufacturer, and their engineer provided sealed documentation of their adequacy. The manufacturer also had a representative make a personal visit to the client to examine the trusses and verify they met with the engineer’s expectations.

Pole Barn Truss Spacing Rerun

Happy 4th of July!

On holidays, I take a day to relax, and “re-run” some of my most highly read blogs.  From over a year ago, today’s subject has been viewed close to 8,000 times.  Yes, that’s 8 thousand. So here you go, for what I consider one of the hottest topics in pole building design: Pole Barn Truss Spacing

What do you mean they aren’t 2 feet apart?

Back in the day (early 1990’s) I was on the National Frame Builders Association (NFBA) Board of Directors. One of my fellow board members from the Midwest wanted to take a peek at how pole barns were constructed in the West, so I invited him out for a tour.

After spending a day looking at several of our building projects, his comment to me was, “The inspectors in our area would never let a pole building be constructed with roof trusses placed every 12 feet”.

Twenty years later, I beg to differ. Hansen Buildings has buildings in each of the 50 states and all of them have roof trusses on what my board member friend would describe as being “widely spaced”.

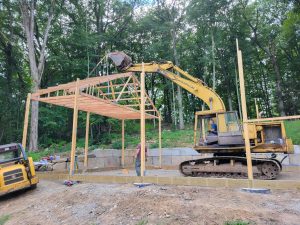
Framed Pole Barn

Modern truss design is highly computerized. Enter the span of the truss, bay spacing and load conditions and the engineering programs will design a truss spacing which will meet the design criteria. The lumber and steel plates the trusses are constructed from, have no idea how far apart they are going to be placed.  They are inanimate! Yet, somewhere in the deep, dark reaches of history, lies the theory wood trusses must be spaced no more than 24” on center, or maybe 48”, or perhaps even eight or ten feet? The reality is, there is no magic number.

While H. Howard Doane is credited with being the innovator of the modern pole barn, it was his Agricultural Service farm manager, Bernon Perkins, who is credited with refining the evolution of the modern pole building to a long-lasting structure.  It was Perkins who pioneered roof purlins being placed on edge. With this design change, roof trusses could be placed 12 feet apart, making it possible for roofs to support the loads to which they would be subjected.

I’ve had roof truss manufacturers try to convince me it is impossible to place wood trusses at spacings of over every 4 feet. Their defense is, “Our engineers will not allow us to”. The manufacturers of the steel roof truss plates (also referred to as gussets or Gang-nails), provide the engineering design for pre-fabricated wood trusses. Their programs will allow for trusses to be placed on 12 foot or even 16 foot centers, and their engineers will place their engineer’s seal on the drawings to verify.

The practicality, cost effectiveness and ease of construction of pole buildings is based upon efficient use of the fewest amount of materials, to do the most work, within safe engineering design. Hundreds of thousands of pole barns are in use today with truss spacing every 12 feet, or even more. They stand as a tribute to the ingenuity of modern pole building design.


Roof Trusses: Planes, Trains and Automobiles

Roof Trusses: Planes, Trains & Automobiles

Usually none of these get hung from the bottom chords of roof trusses, however lots of other things can be.

Standard pole building truss designs will support only the extra weight of minimal lighting and electrical. Don’t panic, virtually anything can be supported from your pole barn trusses and we can design for it – as long as you let us know what it is, in advance.

I know I’m going to get “the eye” from my wife if I tell this story, but sometimes I just can’t help myself!  One day ten years ago shortly before my wife and I got married, I happened to look up into the trusses in her garage.  I don’t know a better way to say this, but after my jaw hit the floor, I wasn’t sure if I should stand there and risk having 20 years of “stuff” come crashing down on me, or just do the smart thing and….RUN for my life!

Up above in her trusses was camping gear, and I’m talking serious camping gear: tents, chairs, camp stove, and….a huge tent.  This was just the beginning.  Ski gear with tow ropes, at least 3 sets of skis, a dozen life vests, wake boards and boat ladder occupied another corner of the “loft” area.  Close to the front door was the “garden section”: pots and planters of all sizes, rolls of black liner for garden beds, weed eaters (one gas, one electric) and for some odd reason, snow shovels.

Junk stored above the trusses

Do you have junk in your ...truss?

Next was the “seasonal decorations” area – Christmas, Easter, Halloween and enough tubs of Christmas lights to outfit 5 or 6 homes!  Lastly and probably the most confusing, was an assortment of “miscellaneous” boxes.  I’m talking 18 to 20 boxes, some of which I could barely haul down they were so heavy. To my dumbfounded query, “what IS all this stuff?” she quipped, “You know – those things you really don’t need any more but can’t bear to part with”!

Being the compassionate, sensitive, guy I am (read this as scared!) to really voice my major objections to this unfathomable “load” in her trusses, I gently broached the subject: “Um darlin’, so – you had the trusses of your garage designed to carry all this extra load….right?”  I cringed and dove for cover as she indignantly answered, “Load?  All the stuff FITS up there, doesn’t it?  And after 20 years it’s not fallen down yet, so what’s the problem?”  Since I sensed a bit of exasperation in her voice, I carefully explained the importance of supporting “whatever you are putting up there”.

And I am now happy to report, after ten years of marriage and letting her sons take turns living in her former home, she finally consented to bringing down all the “stuff” in her garage.  (OK, so I nagged a bit about it – I’m a Building Guru, what do you expect?) But now if the roof on her old garage falls down, “you know who” is going to be saying, “Told you so”!

So back to designing your roof trusses for increased loads.  The most popular – is 5/8” sheetrock, attached to ceiling joists hung between the trusses. Ever considering having a dry walled ceiling? If so, just order your new pole building with ceiling loaded trusses.

Just killed or planning on killing an elk? An average adult male elk weighs about 1000#. Tell us in advance and we can have the trusses designed to be able to support the extra weight.

How about pulling engines? That 700 to 800 pound V-8 engine can be accounted for – again, we just need to know about it, as well as where on the trusses you plan to pick up the load.

Moveable crane? While tracks are best and easiest attached to the inside of the sidewall columns, the tracks can also be mounted to the bottom of the trusses.

Whether it is light or heavy, your favorite toy or your spouse’s hundred plus boxes of “stuff I just can’t part with”, if you want to hang it from your trusses, just let us know!

To receive more pole building tips and advice subscribe to the pole barn guru blog!

Pole Barn Truss Spacing

What do you mean they are not 2 feet apart?

Back in the day (early 1990’s) I was on the National Frame Builders Association (NFBA) Board of Directors. One of my fellow board members from the Midwest wanted to take a peek at how pole barns were constructed in the West, so I invited him out for a tour.

After spending a day looking at several of our building projects, his comment to me was, “The inspectors in our area would never let a pole building be constructed with roof trusses placed every 12 feet”.

Twenty years later, I beg to differ. Hansen Buildings has buildings in each of the 50 states and all of them have roof trusses on what my board member friend would describe as being “widely spaced”.

Modern truss design is highly computerized. Enter the span of the truss, bay spacing and load conditions and the engineering programs will design a truss which will meet the design criteria. The lumber and steel plates the trusses are constructed from, have no idea how far apart they are going to be placed.  They are inanimate! Yet, somewhere in the deep, dark reaches of history, lies the theory wood trusses must be spaced no more than 24” on center, or maybe 48”, or perhaps even eight or ten feet? The reality is, there is no magic number.

Framed Pole Barn

36′ long garage with 12′ bays

While D. Howard Doane is credited with being the innovator of the modern pole barn, it was his Agricultural Service farm manager, Bernon Perkins, who is credited with refining the evolution of the modern pole building to a long-lasting structure.  It was Perkins who pioneered roof purlins being placed on edge. With this design change, roof trusses could be placed 12 feet apart, making it possible for roofs to support the loads to which they would be subjected.

I’ve had roof truss manufacturers try to convince me it is impossible to place wood trusses at spacings of over every 4 feet. Their defense is, “Our engineers will not allow us to”. The manufacturers of the steel roof truss plates (also referred to as gussets or Gang-nails), provide the engineering design for pre-fabricated wood trusses. Their programs will allow for trusses to be placed on 12 foot or even 16 foot centers, and their engineers will place their engineer’s seal on the drawings to verify.

The practicality, cost effectiveness and ease of construction of pole buildings is based upon efficient use of the fewest amount of materials, to do the most work, within safe engineering design. Hundreds of thousands of pole barns are in use today with trusses spaced every 12 feet, or even more. They stand as a tribute to the ingenuity of modern pole building design.