Order of Construction
Reader DANIEL in SAINT JOSEPH writes:
“Hi Mike, I am looking to start building in the next year or two on my up north Minnesota cabin land. I was planning on doing my own general contracting to save. In what order would you recommend I schedule the subs to do their work and when should I begin finding the subs? I already have the septic and well installed for my camper.”
 Mike the Pole Barn Guru writes:
Here is a general construction sequence. In most instances, you want to line up your subcontractors 6-12 weeks prior to needing them. Further ahead, seems to make it difficult to get return calls. A great source of more reliable subs, is by contacting your nearest Home Builders Association and asking for referrals.
1. STAKE LOT
First step of home building is locating your new home on its lot. This will usually involve a surveyor who will come out and accurately drive stakes to locate your home on lot. They will be used by excavators and foundation subcontractors to guide their work.
2. OBTAIN PLANING, ZONING AND BUILDING PERMITS (Where required)
3. TEMPORARY UTILITIES
You will need to have water, electric power, and toilet facilities available during construction process.
4. CLEAR AND ROUGH GRADE
Clearing is removal of trees and undergrowth from actual construction site and yard areas. Rough grading is moving dirt around to establish approximate drainage patterns, yard areas, drive and walk levels, etc. you hope to achieve. Properly compact any fill in no greater than six inch lifts.
5. WELL
If you are going to have a well, you might as well dig it up front so you will have water available for construction.
6. LAY OUT BUILDING
7. DIG HOLES FOR COLUMNS OR PIERS
Call for hole inspection (where required)
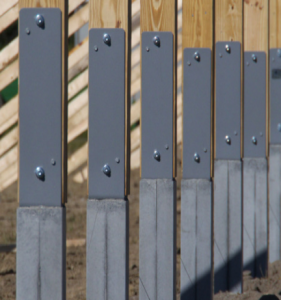
8. SET COLUMNS IN HOLES OR INTO WET-SET BRACKSET Backfill per plan
9. INSTALL
a)SPLASH PLANKS
b)TRUSSES AND/OR RAFTERS
c) Purlins and all other roof framing (including ceiling joists and bracing)
d) roof steel and ridge cap (or sheathing, felt and roofing)
e) any raised wood floor framing and floor sheathing
f) Girts and all other wall framing
10. CALL FOR FRAMING INSPECTION (where required)
11. INSTALL
a) Weather Resistant Barrier over wall framing
b) Entry doors, sliding doors and windows
c) All steel wall trims except corners
d) Wall steel and corner trim
12. SEWER AND WATER TAPS
If you are connecting to municipal water and sewer, this is where pipes are laid to house and actually connected (tapped into) water and sewer mains.
13. UNDER SLAB UTILITIES
Any plumbing and electrical needs to go under concrete slab is installed here.
14. UNDER SLAB VAPOR BARRIER, UNDER SLAB AND PERIMETER SLAB INSULATION, PEX FOR RADIANT FLOOR HEAT
15. SLAB FLOOR
16. ANY STAIRS RESTING ON SLAB FLOOR
Get these in now so that the subs working inside can get from one floor to the other without depending on ladders.
17. GARAGE DOOR AND EXTERIOR LOCKS
Some people wait until end to get garage door in. But we think having it in place creates a good place to store materials and equipment during construction. Installing exterior locks means whole house is secure.
18. BACK-OUT FRAMING
This is a general category including interior room partition, soffits for wall cabinets, and drywall nailers.
19. FIREPLACE AND CHIMNEY
A prefabricated fireplace should be installed before roughs (below). A prefab will have a framed chimney. A masonry fireplace and chimney can be installed before any brick veneer.
20. ROUGH HVAC
HVAC (heating, ventilation, air conditioning) sub is first of three “mechanical” subs (plumbing, electrical, HVAC) to come to job. He will install duct work for your HVAC system and possibly furnace. He comes first because stuff he puts into walls is biggest and most inflexible.
21. ROUGH PLUMBING
Next comes plumber to install his pipes.
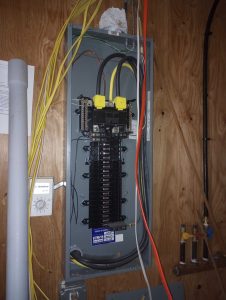
22. ROUGH ELECTRICAL
Codes call for house to be “dried in” before wiring is installed. With exterior windows and doors in place and roof on, it’s time. For roughs, electrician will put in boxes (switch, outlet, and lighting) and will pull wires into them. Cable, telephone, speaker wires, etc. are also installed at this point.
23. ELECTRIC & GAS METER SET
You’ll need these in place to get some heat in house for drywall installation.
24. GUTTERS AND DOWNSPOUTS
It’s good to get water away from house as soon as possible.
25. WALL INSULATION
Once everything else is in walls and rough inspections are completed, it’s time to insulate your home.
26. TEMPORARY HEAT
With meters set (above), HVAC sub can get some temporary heat going. This will be critical for getting drywall joint compound (mud) to dry in a timely fashion. Carpet sub also needs a warm home so carpet is installed at a temperature comparable to normal living conditions.
27. DRYWALL
Sometimes called “Sheetrock®.” This will be “hung” (screwed to wall girts, studs and ceiling joists), taped (at joints), and “mudded” (joint compound applied) . . . after the in-wall plumbing, HVAC, electrical, and insulation have been inspected!
28. ATTIC INSULATION
29. CABINETS
Base and wall.
30. INTERIOR DOORS AND TRIM
Trim materials installed here may include door casing, base mould, window stool and apron, window casing, chair rail, crown mould, built-in cabinets, stair railing parts, and others. This step also includes hanging doors.
31. PAINT AND WALLPAPER
First coat of paint is usually sprayed. Get it in before hard wood floors are installed.
32. HARDWOOD FLOORS
Now it’s time to install your hardwood floors.
33. COUNTER TOPS
Counter tops are next. this may involve a different sub than one who installed cabinets.
34. VINYL AND CERAMIC TILE
Vinyl floor coverings and ceramic tile are installed. Two different subs.
35. SAND ANF FINISH WOOD FLOORS
This is first of two finishes. The last is done just before you move in.
36. APPLIANCES AND SPECIAL EQUIPMENT
This would include all of your major appliances – washer, dryer, range, oven, refrigerator, as well as any other special equipment you have specified.
37. FINISH ELECTRICAL
Here is where electrician comes back to install switches, outlets, light fixtures, ceiling fans, door bells, etc. He will also hook up appliances, furnace, air conditioner, doorbell, and so forth.
38. FINISH PLUMBING
Plumber will install sinks, lavatories, toilets, and all faucets.
39. FINISH HVAC & FINAL HEAT
Your heating sub will install registers and get furnace and air conditioning running properly.
40. SHOWER DOORS AND MIRRORS
Install shower doors. Hang mirrors.
41. CARPET
Now it’s starting to feel like home!
42. HARDWARE AND SCREENS
Typically, this is door, window, and closet hardware. Window screens.
43. DRYWALL REPAIRS
You may need to get drywall subcontractor back out to patch some dings caused by other subs’ work. This is normal.
44. CLEAN UP
This is final interior clean up.
45. FINAL PAINT
Touching up drywall repairs and so forth.
46. FINAL WOOD FLOOR FINISH
This should be your last inside job before moving in.
47. RETAINING WALLS
These outside home building jobs can be going on while work proceeds inside.
48. WALKS, DRIVES, AND PATIOS
You should wait until drywall has been delivered, because drywall trucks are VERY heavy, and could damage your flat work
49. SEPTIC TANK AND DRAIN FIELD
Same as above on timing with regard to drywall delivery. Septic tank holds waste and allows microbic action on solids. Drain field is where effluent leaches into soil.
50. FINISH GRADING AND LANDSCAPING
Final finished grades are established to ensure proper drainage away from home, and to prepare yard for landscaping. Trees, shrubs, grass, etc. are installed.
 Never accept a bid “by the hour.” It doesn’t work. Remember Murphy’s Law; “If you want to see how long a job can take, pay someone by the hour.” You may pay a little more for a fixed price bid, but it’s worth it for peace of mind.
 Utilities must be connected. Exactly who is responsible for running water lines, sewer lines, and electrical hookups will vary with each subcontractor involved. Get responsibility pinned down when you are hiring subs, then follow through to be sure it is done properly.


