Tag Archives: sliding door

Adding Insulation, Sliding Doors, and Use of Knee Braces

This Wednesday the Pole Barn Guru answers reader questions about adding wool bat insulation between purlins against an R-7 vapor barrier, and the Guru’s thoughts on Knee Braces in post frame construction.

DEAR POLE BARN GURU: Hello We have an existing pole barn that has an R-7 vapor barrier. The vapor barrier is between the metal and the 2×6 purlins. We would like to insulate the ceiling and maintain the vaulted ceiling look. We are using a 5.5″ wool bat insulation. Can we put the bats in between the purlins in direct contact with the vapor barrier or do we need an air gap between the vapor barrier and the new insulation? If an air gap is needed, how much space is required? Will it need to be vented? SARA in ANACORTES

DEAR SARA: Building Codes require a continuous one inch air space from eave to ridge above batts, as you propose. This would require adequate ventilation at eave and ridge as well. Your best option is to remove your current condensation control blanket, have two or more inches of closed cell spray foam applied directly to roof steel, then fill balance of cavity with Rockwool, without a vapor barrier below.


DEAR POLE BARN GURU: What type of bracket is used at the bottom of a double sliding pole barn door where the closed doors meet. CHUCK in GORDAN

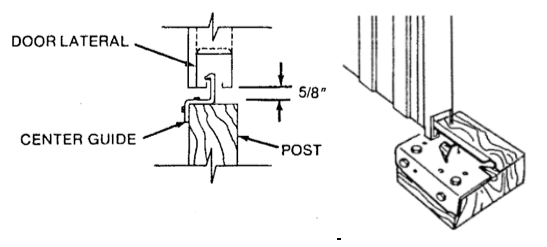
DEAR CHUCK: CENTER GUIDE & STOP

One required for each bi-parting door pair.
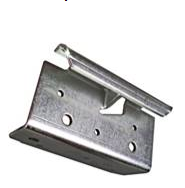
Center guide may be mounted to a pressure treated column cutoff piece or embedded in concrete.
Locate guide at door opening center point. Sliding door bottom laterals will hook into center guide.
For proper closure, each bottom horizontal is to be cut or notched 1/16” short for center verticals to compensate for center stop thickness.
 

DEAR POLE BARN GURU: Hello, I’ve read through your website and it seems that I don’t need these knee braces but I figured I’d write and ask about what you think. Total size of the building is 80×40 14ft height and approximately 7 feet to the pitch of the roof. The building had these knee braces and also metal cross bracing between each post. I want to remove the knee bracing to be able to build offices inside this thing. Thank you. MIKHAIL in EVANSVILLE
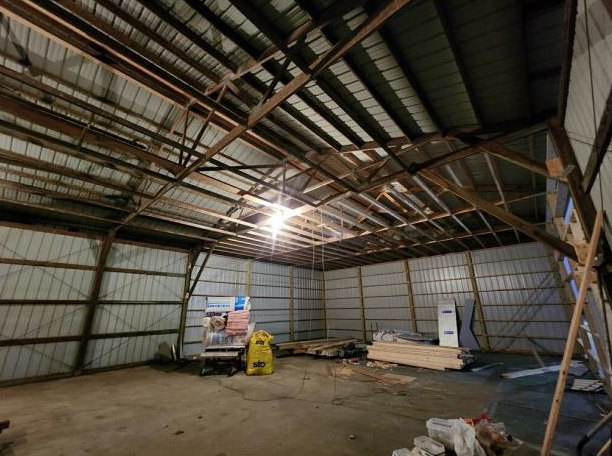
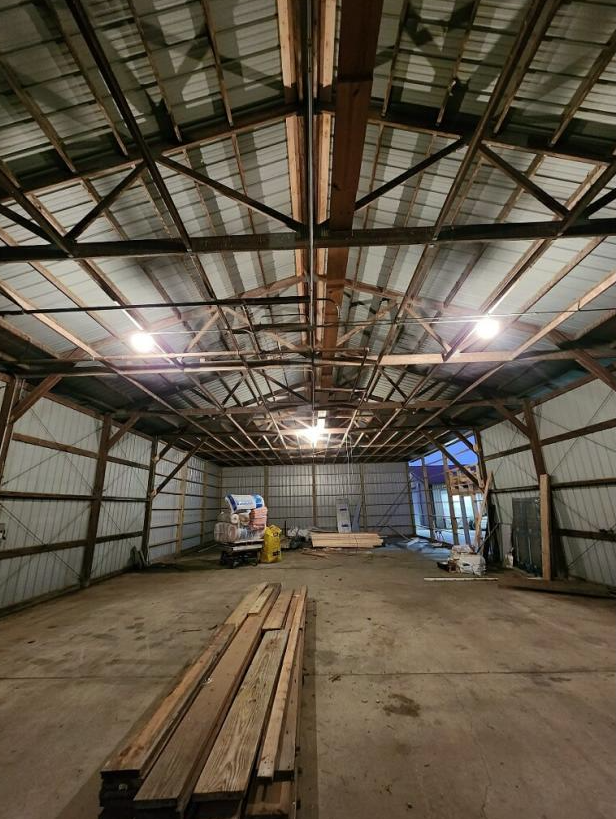
DEAR MIKHAIL: While knee bracing is generally ineffective, they should never be removed without approval from your building’s original engineer, or after a thorough analysis has been done by a competent engineer. It appears your building has (or is in process of) been recently added onto. Engineer for your addition should be able to advise on your knee brace concerns. Hopefully, he or she has accounted for increased shear loads to endwalls (by adding to length of building). As length-to-width ratios increase, shear loads can become greater than what simple through screwing can provide. Under severe (but not extreme or approaching building code minimums), this could result in catastrophic failure.
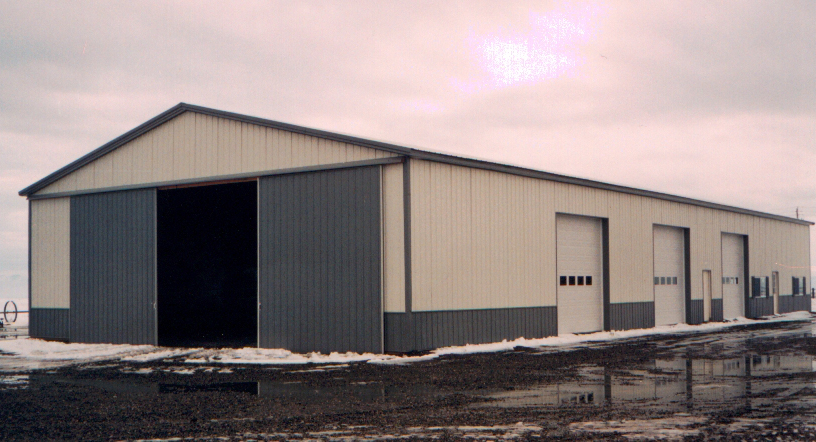
Electrical Poles, Adding an Awning, and Sliding Door “Overlap”

This week Mike the Pole Barn Guru answers reader questions about the practical use of “electrical poles” for the addition of a lean-to to a garage, adding a door awning to a pole barn kit, and how much overlap a sliding door will have around the perimeter.

DEAR POLE BARN GURU: If I add a lean to on to my garage 18 x24,/ 24 foot side. Electrical poles 6 feet out of ground 8ft away. Add 2x 6 trusses and purlin on top of that. How do I attach the 2×6 to the round pole? SUE in HINCKLEY

DEAR SUE: We would never recommend or suggest utility poles be used for post-frame construction, for a plethora of reasons. Here is some extended reading:

Reasons to Buy Used Utility Poles for Pole Barns


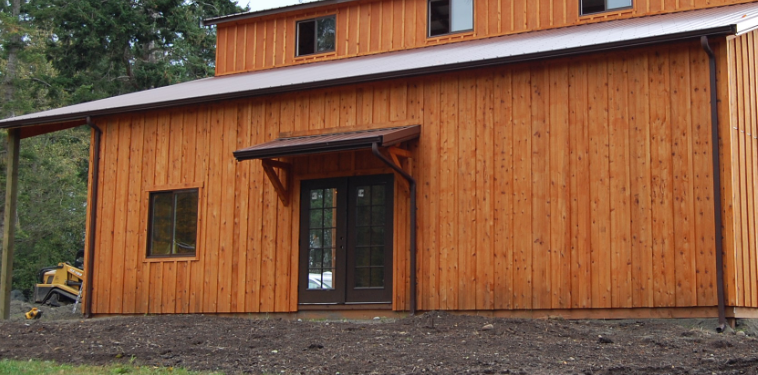
DEAR POLE BARN GURU: I’m having a 36′ x 36′ pole barn built from your kit. It has an entry door. Do you sell a door awning that will fit securely to the wall siding? I don’t want the awning to leak up against the wall. Thanks. ROGER

DEAR ROGER: Bad news is – whomever is erecting your building may have told you it would be one of our buildings, however it is not. We have had contractors do this in past years, only for there to be problems later, clients called us only to find out it was not what they believed they had invested in. Sadly, you will not have our industry leading limited Lifetime Structural Warranty. For our buildings we do offer a wide variety of weather tight entry door covers, both self-supporting and pole supported. These can have single sloped, gabled or hipped roofs to meet our client’s needs. We are unable to provide any of these choices for buildings other than ours.


DEAR POLE BARN GURU: Hello, I have a question. If you have time to answer. If the rough opening of a sliding door is 20′ x 14′. How much overlap should the doors have when closed? As in on the top and outer sides? I have tried looking at your site, and every other site on the internet. I am seeing maybe 3/4″ on top and the outer sides. Of course the center of the doors meet in the middle. Would the 2 doors be something like 10′ 1″ x 14’1″ Or bigger? Thank You, JOE

DEAR JOE: Typically for a 20′ wide x 14′ tall split sliding door, with top mounted track, from grade (bottom of pressure treated splash plank) to bottom of 2×6 track board (mounts on face of door header) will be 14′ 4-1/2″. 20′ width is measured from center of post to center of post on each side. Working from these dimensions, each door leaf will be 10′ wide x 14′ tall. Space between track board and top of sliding door will be roughly 1/2″ (this will be covered by sliding door track cover trim). Bottom of door will be roughly 1/2″ above top of a nominal 4″ concrete slab (3-1/2″ actual). Each extreme outside edge will overlap wall by ½ width of column on each side.

Radiant Barrier, In-Ground Use Poles, and Sliding Door Replacement

This week the Pole Barn Guru answers reader questions about potential moisture issue when adding insulation to walls with a radiant barrier, advice about in-ground use poles, and replacing old sliding doors.

DEAR POLE BARN GURU: I have a pole barn on a concrete slab with footers. My 6×6 are anchored down and have a 2×6 plate down the perimeter of my living area. Foam under all the wood. I have radiant barrier on the outside of the walls 2×4 are over it then metal, so I have a air gap between the metal and radiant barrier. I’m adding R19 insulation it will touch the radiant barrier. And then drywall over the insulation. So you think Moisture will form under my drywall. I will have some air flow in my attic on top of my wall insulation it can breathe some.

Thank you. SONNY in MARYVILLE

DEAR SONNY: Your radiant barrier acts as a vapor barrier. In order to prevent moisture from being trapped within your wall cavity you will want to use unfaced batts. I would recommend rock wool, rather than fiberglass or cellulose, as it is unaffected by moisture. Do not add an internal vapor barrier or retarder (such as clear poly).

Having the radiant barrier forces your walls to dry to inside. If you did not place a well-sealed vapor barrier underneath your slab, you should seal it to minimize moisture coming up through your concrete. Depending upon how you have insulated and vented your attic space, you may need to add mechanical dehumidification to prevent mold growth.

You also should not have air flow from your wall into your roof, consider adding fire blocking in order to meet Code requirements https://www.hansenpolebuildings.com/2022/08/fireblocking-and-firestops/


DEAR POLE BARN GURU: Morning guru sir. I have been neck deep trying to plan our building. We are relocating to eastern Tennessee. A lot of people are saying to never put wood poles in the ground. What are your thoughts on this and how should I plan the foundation part of my build? It is a 2600 square foot single level with an almost as large garage. Thanks STEPHEN in CARVER

DEAR STEPHEN: I would have absolutely no qualms about using properly pressure preservative treated (UC-4B rated) columns in ground. Personally, my lovely bride and I live in an 8000 square foot finished, million dollar post frame shouse (shop/house) with embedded columns. I have also built (yes, me) two post frame buildings in Eastern Tennessee – one for my eldest son in Maryville (read about it here: https://www.hansenpolebuildings.com/2012/05/building-design-2/), the other in Happy Valley (an entire series of articles on this particular build begins here: https://www.hansenpolebuildings.com/2012/07/construction-time-2/). Both of these buildings used embedded columns and I predict these buildings will be standing long after my eventual demise (and will probably outlive my grandchildren and their grandchildren).
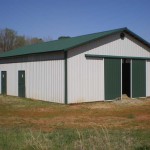
 

Horse ShelterDEAR POLE BARN GURU: I have a pole barn and need the outside sliding doors replaced. There are two doors and they’re each 10′ high, 8′ wide, and 1-2/3″ thick. Do you do this kind of work? ANDY in MIAMISBURG
DEAR ANDY: Thank you for reaching out to us. We are not contractors in any state and only provide materials for sliding doors along with our complete building kits. We would suggest you post this on your nearly Craigslist, under “gigs”.


Don’t Make Mistakes on Horse Stall Doors

Don’t Make Mistakes on Horse Stall Doors

Horse owners please join in, this one is for you:

Picture, if you will, your dream barn. You know how many stalls, feed rooms, tack rooms, etc., are needed and how much space they will take up. You have the exterior down pat, but you may not have put as much thought into stall doors for your horses.

Building the right stall for your horse is crucial for creating a comfortable environment and working space. Very intricate details matter, from stall door types to their hardware.

Caveat – even though our daughter Bailey (https://www.hansenpolebuildings.com/2018/09/planning-your-equestrian-facility/ ) is a famous horse trainer, I have never ridden a horse. I have had many, many clients (along with my daughter) who have provided valuable feedback. I am sharing common view points below.

There are two main types of stall doors to choose from when designing your horses’ ideal stalls—sliding and swinging doors. As with any option, each type of door has its pros and cons.

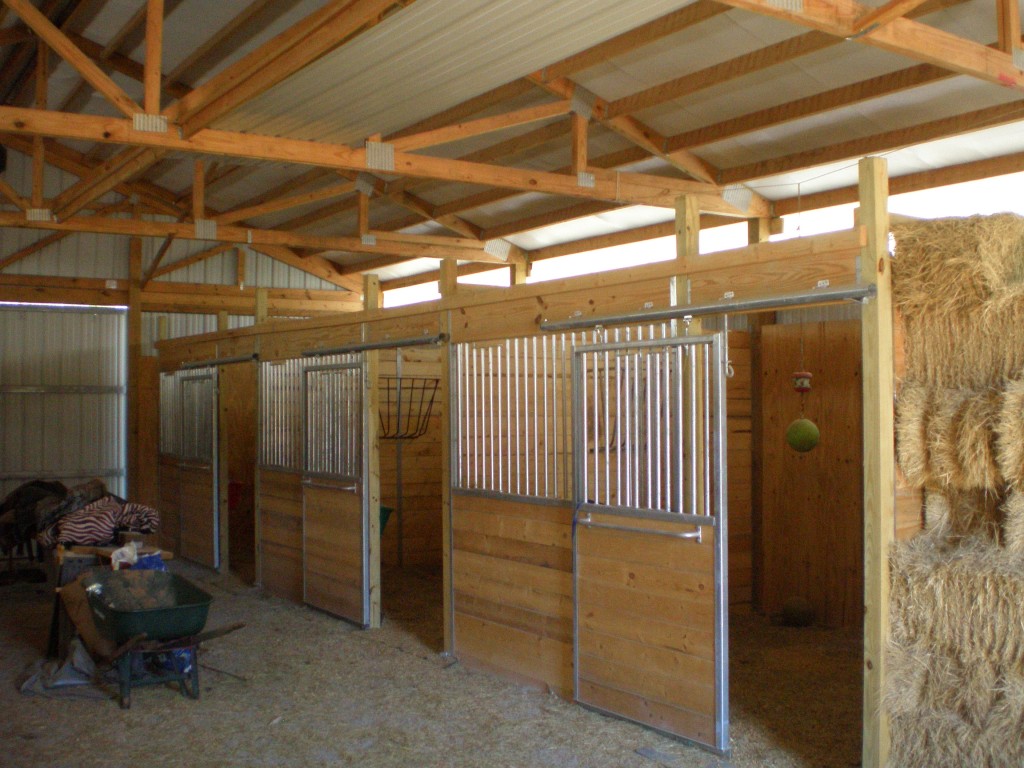
Sliding doors are great investments for your horse stalls for a number of reasons. They are far less expensive. They are less hazardous than swinging doors because they won’t take up aisleway (https://www.hansenpolebuildings.com/2011/12/horse-aisleway/ ) room as you open them. I would never recommend a swinging door into an aisleway. A sliding door simply slides on its track so both you and your horse can enter and exit a stall comfortably together without worrying whether the door is latched back properly or blocking space in the aisle.

Pole Building - Horse Stalls

In addition, a sliding door allows you to adjust the stall’s entrance just wide enough for you to enter without risking your horse sneaking past you, anxious to get into trouble. This makes accomplishing basic chores much easier, whether you’re changing your horse’s water or refilling feed.

Swinging stall doors are both more traditional and less practical. Dutch doors have grown in popularity and are more often seen in barn architecture. Why are they still so popular?

For some, it makes an ideal exterior door. Although appearing as one solid piece when closed, Dutch doors are actually split in two sections. The top half can be opened and secured outside with a hook and eye latch, allowing your horse to bask sunshine and enjoy views (think Mister Ed) of fields or outdoor arenas while secure in his stall. Sounds like a good way to torture your horse to me. Dutch doors also make great exterior stall doors because they provide your horses with opportunities to communicate with one another while trapped in their stalls, exercising their natural desires to socialize.

You can read more about exterior stall doors here: https://www.hansenpolebuildings.com/2014/10/exterior-horse-stall-doors/

Regardless of your stall door choice, your doorways should always be approximately four feet in width to provide comfort for you and your equine friends.

Dial (866)200-9657 to speak with a Hansen Pole Buildings’ Designer in regards to your horse stable wants and needs.

Help with Instructions? Correct Frost Depth, and Nailing Schedule for OSB

Today the PBG attempts to assist with finding some instructions, the correct frost depth, and nailing schedule for OSB.

DEAR POLE BARN GURU: A friend of mine gave me a cannonball track and hardware setup for my pole barn garage. I have looked everywhere for INSTALLATION INSTRUCTIONS. I cannot find anything on line. Can you please tell me where to look. I would appreciate any help you can give. Thank you. RAY

DEAR RAY: Your request could pose some challenges as Cannonball was acquired by one of their competitors, Western Products of Indiana January 1. We use sliding door systems from a Cannonball competitor, so all of the parts are not exactly the same. I’ve searched online for the installation instructions with the same results you have found – none. Best bet is to try to call Cannonball direct and see if they can assist. (800)766-2825


DEAR POLE BARN GURU: Hello , was wondering if you could tell me the depth I need to be at for a pole barn ( garage ) it is going to be 24’x32’. I’m using 4×6” PT poles and going to put them about 10’and 12’ apart on center. I live in Indianapolis on the north side. When I looked up the National frost depth for my area it showed 54”, thought it was a bit deep for here, but want it to be safe as well as lasting. Thank you for any advice you could give. ROBERT in INDIANAPOLIS

DEAR ROBERT: The column depths will be specified on the sealed plans produced by your RDP (Registered Design Professional – architect or engineer). If they are missing you should contact the RDP directly to receive clarification. In no instance should the bottom of the column holes be above the maximum frost depth, which in your case would mean 54 inch deep holes. When it comes to post frame buildings – the last place to scrimp on or cheap out is the foundation. With the correct diameter concrete footings, proper depth and provision for uplift resistance (all of which your RDP should have addressed) you should be off to a terrific start.
DEAR POLE BARN GURU: Your project # 18-0112F. Can someone show where I can find the nailing schedule for the OSB that goes on the roof?? Thanks JIM in KINGSTON

DEAR JIM: The nailing schedules for sheet sidings and sheathing is always found on the “A” pages of the engineered plans provided with your building. Usually they are in a tabular box.

For those who are reading and somehow did not invest in a Hansen Pole Building kit package – if the nailing is not found on your plans, do not guess or take a chance – contact your RDP (Registered Design Professional – architect or engineer) and have them provide a nailing schedule sealed by them.


A Retro-Fit, Truss Support? and Sliding Door Installation

The pole barn Guru looks at a Retro-Fit, truss supports, and installing a sliding door.

DEAR POLE BARN GURU: I have a question about Retro-Fit insulating my pole barn. I live in Southwest Michigan and bought my house with an existing 40’x60′ building, just used for storing farm equipment before I acquired it. Steel roofing straight to the roof purlins and steel siding straight to the wall purlins. Can I put a metal ceiling in with blown fiberglass insulation above and metal walls with Batts between the inside wall and outside wall, or do I need to have some sort of vapor barrier? MITCH in MICHIGAN

DEAR MITCH: First things first, in order to retro-fit the trusses, confirm the trusses are capable of supporting the weight of the steel liner panels and insulation. Most post frame building trusses are not designed to support a ceiling. There should be a stamp on every truss which identifies the truss manufacturer as well as the design loads. You need a minimum three psf (pounds per square foot) bottom chord load to support the ceiling. If it is less, and you can contact the truss manufacturer who should be able to provide an engineered repair to upgrade the trusses, for a nominal fee.

You will need to have some form of thermal break below the roof steel – my choice would be closed cell spray foam. On the walls, you should really have a building wrap between the steel and the framing, however an inch or so of closed cell spray foam would work, filling the balance of the cavity with unfaced fiberglass, then a well sealed vapor barrier on the inside.


Engineer sealed pole barnDEAR POLE BARN GURU: Pole Barn Guru, do you have to have girt under end trusses. End trusses setting on 2×12 from header and nailed to 6×6 pole with 2×6 blocking below trusses 24″o.c. sheated header 3 2×12 notch blocked and clipped. STEVE in CHEYENNE

DEAR STEVE: In order for me to answer your question, I would need to see the engineered plans for your building. If you are unsure of how to determine from your plans, you could contact the engineer of record who designed your building and ask him or her.

DEAR POLE BARN GURU: On a sliding 4×8 walk in door, on the barn exterior are all 4 sides flat or is the top out the thickness of say 1.5 inches? If it is out will it not seal? If all is flush with it not roll easy? Joe

Figure 27-5

DEAR JOE: The sliding door track needs to be mounted to a ‘track board’ which is typically a 2×6 placed on the face of the sliding door header. This puts the top out 1-1/2″ which allows the door to be able to slide past the adjacent siding without banging against it. Sliding doors do not and will not seal air tight, so this should not be an issue unless you had some sort of unrealistic expectations.

To Retro-fit Sliding Doors, Insulation, or Windows!

DEAR POLE BARN GURU: I have an existing pole barn with a rough opening and I want to retro-fit a sliding door over it to block wind and rain. If I can supply you with the rough opening dimensions, can you quote the parts kit to assemble a metal frame and hangers that I can clad in gray tin metal roofing panels on-site here? I plan to hang it from the rafter tails. SAMUEL in GEORGIA

DEAR SAMUEL: Thank you very much for your interest. Hansen Pole Buildings only supplies sliding door components with the investment in a complete engineered post frame building kit package, due to the challenge of shipping parts only without them being damaged. You should stop at the Pro Desk of your local The Home Depot®, as they should be able to assist you.


DEAR POLE BARN GURU: I have a 40’W X 52’L X 14’H with 2′ of the 14′ containing sky light panels. Also have (2) 12′ x 12′ garage doors and (2) man doors. I would like to know what it would cost to insulate the walls and ceiling. Thanks. KEITH in MORGANTOWN

DEAR KEITH: Depending upon how your building has been constructed and the level of climate control you wish to achieve, there are a plethora of routes to go to insulate. Unless you are willing to lose the use of the eave light panels at the top of the sidewalls, your ability to heat and/or cool is going to be severely compromised.

Probably your best bet is going to be to contact local insulation companies, as they can physically examine your building and make recommendations based upon the construction techniques used, your goals and budget.

DEAR POLE BARN GURU: I have a steel pole barn 30×30 with six steel post supported by steel open trust , They are tied to getter with 2×6 every 3 ft , I want to put some windows in removing a 2×6 ? Is how strength is in the 2×6 and do I need to place a header over the window. Thanks CARSON in PORTLAND

DEAR CARSON: Unless the window opening will be across the location of a column, which would entail cutting the column, you will probably not need to have a structural header across the top of it to carry roof loads. As to the framing in of the window itself, you should contact the registered design professional (RDP – architect or engineer) who designed your building to get an engineered design for the window openings you have in mind. Placing too many windows on a wall (especially an endwall) could seriously jeopardize the structural integrity of your entire building and could lead to a catastrophic failure.


Just Another Reason to Love Builders

Please keep in mind, I was a post frame (pole) building contractor in a past life. With as many as 35 crews erecting buildings in six states – if something could possibly go awry, one of my crews would find a way to achieve it!

Seriously.

Some of them were creative in methods which I could not even have imagined (you would have had to have been there).

In some ways, they reminded me of my beloved Seattle Mariners, always seemingly finding a way to snatch defeat from the jaws of victory.

oregon-builders-150x150In today’s episode of “How the Stomach Churns” we find Builder Bob (the name has been changed to protect those who probably don’t read my articles anyhow) industriously working away in the wilds of Colorado – where he determines the sidewall steel above a sliding door is four inches too short!
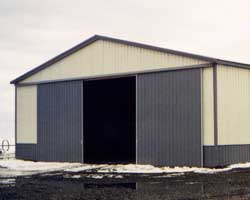
Could this happen?

Well anything COULD happen, but in all likelihood the Hansen Pole Buildings’ Instant Pricing™ system is pretty darn accurate when it comes to steel takeoffs – so probably not.

I always work from the theory somehow we have screwed up, so I go through the scenario longhand, to the joy of all involved:

Eave height = 16′ above grade (all of my long term and loyal readers fully understand how to measure eave height: https://www.hansenpolebuildings.com/2015/02/eave-height-2/; builders, not so much as it does involve having to read, at the very least, the plans).

Drop across 1.5″ wide eave girt and J Channel (3/4″) at a 5/12 roof slope = 0.9375″

So top of wall steel is at 15’11.0625″

Top of sliding door track board is at 10’10” above grade

15’11.0625″ – 10’10” = 5’1.0625″

Steel above sliding door is 5’0″ long

This leaves just over 1″ of sliding door track cover back flange exposed – which is perfect

If it is 4″ too short, I am going to guess one or more of the following has occurred:

Eave height is too high (maybe measured from top of slab, instead of grade)

Sliding door header and track board are not properly located (at 11’0″ and 10’10” above grade to tops, respectively)

In the event the eave height is too high, there are solutions. However, all of them are going to involve some sort of investment in more materials by the builder. If the challenge is door number two, the solution takes only time and a good cat’s paw to remove the nails holding the sliding door header and track board – properly position the two and reinstall.

Voilà! A door that fits and steel sent by Hansen Buildings is indeed the right length.

Pole Barn Savings Part II

Eight Nifty Tricks to Save Money When Building a Pole Barn (reprised)

This is Part II of a two part series on pole barn savings through material and feature choices. Bret Buelo of Wick Buildings® wrote an article by this title last year, some of the items I agree with, some not so much. This is my “take” on his points. If you missed the first part – back up one day and read the first 4 points. To continue…

Hanger Sliding Door“5. Install a sliding door. They’re less costly than overhead garage doors or hydraulic doors for equipment access doors that you don’t use frequently.

And today’s slide doors, even large ones, are much easier to open and close than your Dad’s old slide door due to improvements in tracks, trolleys, materials and construction techniques.”

While sliding door systems have improved immensely, for most people the lack of convenience and security does not outweigh the savings. For horse barns or purely agricultural structures, they might very well be the best solution. As for cost, relatively small sized overhead doors can actually be less expensive than sliding doors. Overhead doors can also be provided as insulated and electric operators are reasonably added. For those in snow country, having to shovel the snow away for those frozen door tracks on a sliding door is still an obstacle, while an overhead door rolls right up the tracks.

“6. Use DripStop for condensation control. To prevent condensation from forming or dripping on high-end equipment, purchase DripStop.

It’s not an insulation, yet it effectively controls condensation in non-insulated buildings. It works well for mini warehouses, animal confinement or any cold-storage building in which you wish to deter moisture from dripping on your stuff.

DripStop can potentially save you thousands of dollars in comparison to using ceiling insulation.”

Steel roofing is prone to issues involving condensation. DripStop is not going to be as cost effective (from a material only standpoint) as reflective insulation: (https://www.hansenpolebuildings.com/blog/2011/11/reflective-insulation/).

Where the savings is going to come from is in labor, read more about this here: https://www.hansenpolebuildings.com/blog/2014/07/condenstop/

“7. Choose an interior liner system over a drywall finish. A good tip for many buildings; adding a steel flushwall liner system interior to your building can be much less expensive than finishing your building with drywall.

You’ll get a durable interior without all the hassle of hanging and finishing drywall.”

I am going to disagree with this design solution entirely. Ever try to hang a cabinet or a shelf on walls with a steel liner? And steel liner ceilings have some of their own issues: https://www.hansenpolebuildings.com/blog/2013/08/steel-liner-panels/

As to costs, I checked today’s prices at The Home Depot® where ½” USG Sheetrock® is 27 cents per square foot. Steel liner panels 95 cents per square foot. I’d really like to see where the savings is in his argument.

“8. Weigh your options on soundproofing materials. Some people will install a sound-absorbing ceiling material, but that isn’t always the most cost-effective option to reduce noise.

A perforated steel liner with insulation behind it can be a better way to reduce noise, especially in commercial and shop environments.”

From over 16,000 buildings of experience, sound-absorption is way down the list of priorities. In only a single case have I been involved in a project with perforated steel liner panels. It happened to have been specified by an architect who didn’t know better (most possibly it was a result of being influenced by a particular builder who pushed the product). It was to be installed over 7/16” OSB, in a situation which would often result in the liner panels being hosed down with water…..which would go through the perforations…..getting the OSB wet. Anyone other than me seeing potential problems with this as a design solution?

In a future article – I’ll highlight some of my own pole barn savings “tricks” and advice for a new post frame building. Stay tuned!