Tag Archives: soffits

Attic Ventilation – Where Hindsight is Always 20-20

Attic Ventilation – Where Hindsight is Always 20-20

Reader CHRIS in TULSA writes:

“Hello! I have a question about attic venting that I’m just not experienced enough to answer properly. I have a new 24’x’40’x12′ post frame building I’m currently working on finishing out (fiberglass insulation, walls, ceiling, etc.). My hindsight was bad and I didn’t opt for getting an overhanging roof with soffit venting, etc. Instead I did have the builder install 2, 10′ ridge vent sections on both ends of the roof. The building will not have plumbing, but will be air conditioned with mini splits, etc. My question to you is regarding properly venting the “attic” space created once the ceiling is installed. Again, I have 2, 10′ ridge vent sections as the exhaust, but was wondering if I need to add some gable venting or something similar as the intake. I should also add the entire barn has been wrapped in Tyvek. Any help with this is greatly appreciated, or if you sell a product that would help I would be interested in more information on it. Thank you for your time!”

Sadly builders and building providers rarely take proper ventilation into consideration, leading to me getting lots of questions asked about solving later challenges.
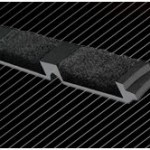
vented-closure-stripYour ridge vents will only “work” when you have properly sized and placed air intakes. In your case, you will be limited to gable end vents. Gable vents are not nearly as effective as eave/soffit vents, so you are likely to experience poor air flow as you approach center of your building (and could have some condensation issues there as well). Tyvek would not have been my first choice in your roof, as it allows moisture to pass out and become trapped between it and your roof steel. This could potentially cause some premature degradation, over time.

At least 40% and no more than 50% of your ventilation can be located in upper portion of your attic space. You will need to know NFVA (Net Free Ventilating Area) of your ridge vents, then NFVA of your gable vents should be equal to, or slightly greater than your exhaust. Gable vents should be placed as low as possible, to achieve best airflow.
Solving Horse Barn Condensation Challenges

Solving Horse Barn Condensation Challenges

Proper ventilation of horse barns is essential to good equine health. Reader DONN in LONGMONT writes:

“Hi, last summer I added 8 more horse stalls to our existing  horse barn. There was a lean-to already attached that I extended on to and enclosed. The horse stalls are approximately 12’x12′ and a 10′ wide walkway that is poured concrete. The entire footprint is, 100′ x 24′.The ceiling height is approximately 12′ tall at the original barn and 7′ tall at the west end for fall. 2 sliding doors to bring horses in and out on the north & south ends and 8 windows on the west side that are 3′ x 4″. I insulated the walls & ceiling with 6″ batt insulation then drywall and painted. I started having condensation issues with water getting into the drywall and lights in the horse stall only so we installed 6 – 6″ turbine vents spaced evenly throughout the horse stalls and cracked the windows to allow air to come in. This seemed to help for a while but now I’m having the same issue with condensation. When I cut a hole in the ceiling above one of the horse stalls, it is dry about half way down and the other half I have moisture trapped in the insulation. Any ideas/ information on how to stop the condensation?”

Mike the Pole Barn Guru answers:

An average 1100 pound horse intakes 5 to 10 gallons of water a day – all coming back out in one form or another. For good equine health, air flow is essential, most usually handled by intakes from vented soffits and exhaust from ridge vents (for extended reading: https://www.hansenpolebuildings.com/2012/11/horse-barn-ventilation/). Most post frame stall barns have unfinished interiors, further allowing for air flow. In your case, you have sealed off air infiltration points and are seeing negative results from 40 to 80 gallons of water vapor (333 to 667 pounds) being added to your barn’s air daily. This does not take into account moisture rising from any floor areas without concrete slabs on grade (or slabs without a well-sealed vapor barrier below).

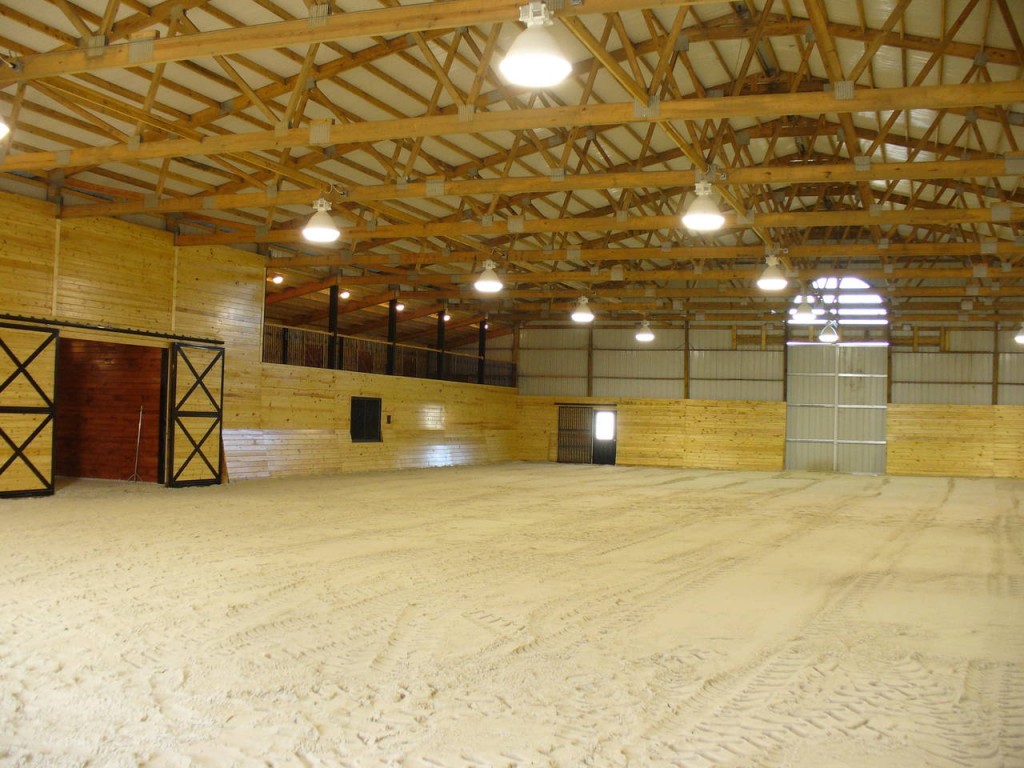
Riding Arena Interior
Air’s ability to hold moisture is a function of temperature. Your building has roughly 22,800 cubic feet of volume. At 40 degrees F and a 90% relative humidity (RH) you would have 33 grains of water vapor per pound of dry air (13.33 cubic feet). With 7000 grains per pound of water you get:

333# x 7000 grains = 2.331 million grains.

22,800 cft / 13.33 cft = 1710# of air x 33 grains = 56,444 grains.

Just to maintain even a 90% RH at 40 degrees F you would need to turn the air in your barn 41 to 83 times per day (depending upon actual output). To get to 60% RH (high end of comfortable living) air turns would need to double, for 30% RH triple.

Your solution is going to be to mechanically ventilate your barn. An HVAC professional can design a system for you to remove your excess moisture – otherwise you are looking at problems beyond just condensation (mold, mildew and premature degradation of lumber), such as your horses’ health.

Help Me Insulate My Pole Building

This story is sad, to me. As post frame building “experts” we (an industry collective we) owe it to our clients to educate them at design phase to avoid a situation such as reader ERIC in SPOKANE VALLEY has become happily (or maybe less happy) involved in.

Eric writes:

“I want to start insulating my pole building. 30x40x16, roof layers are metal, synthetic underlayment, osb, 2×8 purlins. My question is, can I leave an air gap between roof and insulation, as I plan on using R19 batting and covering with facing. Has an open ridge vent. Thank you.”

Mike the Pole Barn Guru responds:

Placing batts between purlins is probably not a Top Twenty best answer for several reasons:

If you do not completely fill purlin cavities, Code requires airflow from eave to ridge over top of the insulation. You have no way to achieve this without a major remodel. You don’t even want to go there.

Getting a perfectly sealed vapor barrier under purlins would be nearly impossible to achieve.

You would have to seal the ridge vent (it isn’t working anyhow, because your building does not have an air intake from enclosed vented soffits).

While installing a flat ceiling at truss bottom chord height might appear to be a quick solution, it also is fraught with some perils:

Trusses are probably not designed to support a ceiling load. It might be possible to obtain an engineered repair from the company who produced your building’s trusses.

Ventilation system would need to be addressed for newly created dead attic space.

Closed cell spray foam insulation would need to be added in the area closest to eave sidewalls.

Weighing what you have to start with, my recommendation is to spray three inches of closed cell foam insulation below your roof sheathing. This will provide a greater R value than R19 batts and provides a vapor barrier. You will need to seal off the ridge (foam installer may be able to just spray foam underside).

Also, I notice in your photo what appears to be a total absence of truss web and bottom chord bracing. I’d have to have a copy of your building’s sealed plans, a truss drawing and some more photos to truly discern.

How Could This Have Been Avoided?

Whoever provided this post frame building should have been asking some important questions:

Will you, or anyone who might own this building in future years ever want to climate control (heat, cool or both)?

If yes, what method of roof insulation is being considered? I like insulation over a flat level ceiling personally, as I then no longer pay to heat or cool the attic area. In order to do this right, energy heels (https://www.hansenpolebuildings.com/2012/07/raised-heel-trusses/) should be utilized. It also means having adequate attic insulation with soffit vents as intakes and ridge vents as exhaust.

It all could have been so much simpler.


Metal Building Insulation

Building Has Metal Building Insulation

Hansen Pole Buildings’ Designer Rachel received an inquiry from a client whose existing post frame (pole) building has metal building insulation.

Rachel sent this to me:

“STEVE would like some advice on insulating.  He has a Cleary Building which has blanket insulation in the walls and roof and he would like to insulate over the top of this insulation and wondered if there would be issues.   
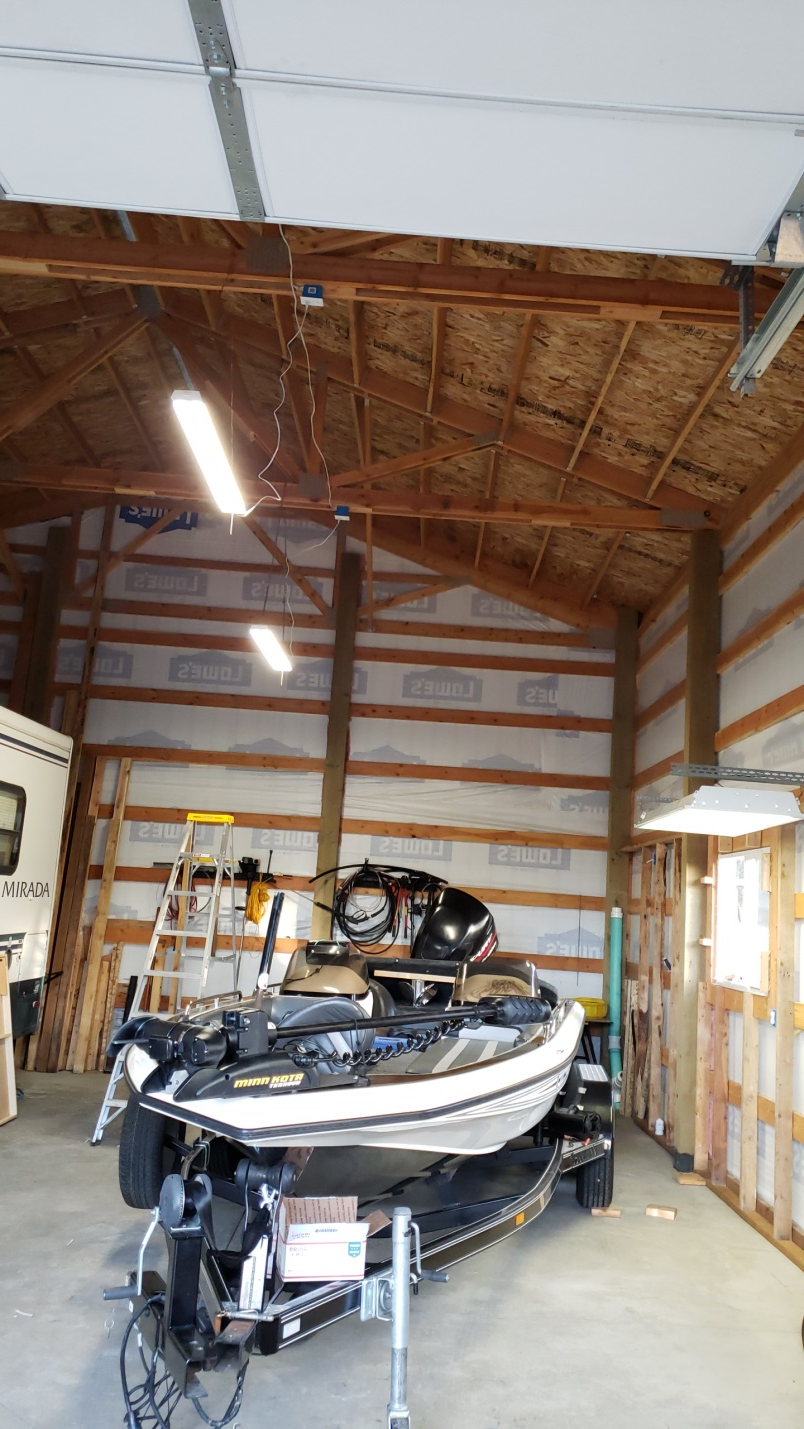
Steve mentioned that as your standing in the building you see the white vinyl on the inside.  Is there vinyl on both sides?  If not, shouldn’t the vinyl by facing the steel?

Any information or assistance you can give him would be appreciated.”

Mike the Pole Barn Guru writes:

I am not much of a vinyl faced metal building insulation fan to begin with (read more here: https://www.hansenpolebuildings.com/2011/11/metal-building-insulation-in-pole-buildings-part-i/]. Even though I have it in roofs of my two older personal post frame buildings, it isn’t a product I would use if I were to construct a new building for myself.

Problems would come from having insulation sandwiched between two vapor barriers.

I would do this personally –completing each wall individually, I would remove wall steel, remove  wall metal building insulation. Cover each wall with a Weather Resistant Barrier (like Tyvek) and reapply wall steel. Spray two inches of closed cell foam insulation upon the inside of the wall steel. If full wall thickness bookshelf girts were not used in the walls (flush or extending inside of columns), another set of girts should be added to the inside surface of columns. Your engineer of Record (engineer who sealed your building plans) should be consulted to determine proper size and spacing of girts. Once installed, fill insulation cavity completely using BIBs. Glue two inches of rigid closed cell foam insulation board, taping all seams, to the inside face of girts. Glue interior finish (typically gypsum drywall) to the inside of foam boards.

PBG NOTE ADDED: Hansen Pole Buildings’ Designer Rick Carr aptly pointed out to me WRB (Weather Resistant Barrier) purpose would be defeated by spray foam application. Correct application should be one only, however only after metal building insulation removal.

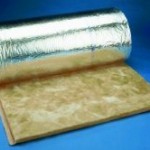
For your roof, provided trusses are adequate to support applicable dead loads, I would install a truss bottom chord level ceiling. This would allow insulation to be blown into dead attic space. In order to achieve adequate insulation above the sidewalls, it may prove necessary to use closed cell spray foam insulation above the ceiling in areas closest to the sidewalls. If eaves have ventilated soffits, ensure an inch or more of free air space exists between insulation and roof deck (or metal building insulation). Appropriate ventilation must be provided in dead air area above insulation.


Cardboard (or Plastic, Foam, Metal) Eave Baffles

Cardboard (or Plastic, Foam, Metal) Eave Baffles

The model building codes (IBC and IRC – International Building Code and International Residential Code) require enclosed attic spaces, in most cases, to have ventilation. The most efficient ventilation design solution is to have enclosed vented soffits at the eaves as an air intake, and a vented ridge as an air exhaust.

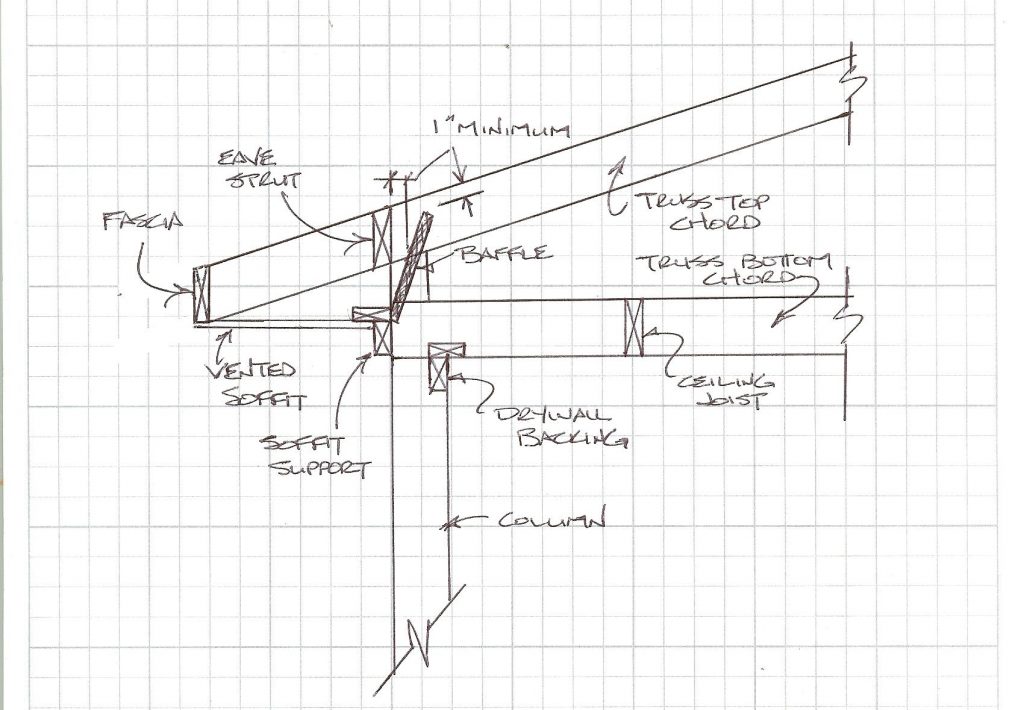
In order for this system to work effectively a minimum of a one inch air space has to be maintained from eave to ridge across the top of the attic insulation. For traditional stud wall frame buildings with trusses or rafters every two feet, this air channel can be maintained by prefabricated eave baffles which block the insulation from tumbling into the soffits. There are numerous materials used for these baffles, each of which has its own good and bad points.

But what about post frame construction? With trusses at a myriad of different spacings, due to engineering design or builder preference, there is not a one size fits anyone solution to maintain airflow.


Energy efficiency is a high priority for new building owners, making arriving at solutions which are as painless as possible a prime directive for post frame designers.

In order to maintain full insulation depth from outside of wall to outside of wall, it is most advantageous to use raised heel trusses (https://www.hansenpolebuildings.com/2012/07/raised-heel-trusses/). Now, how to keep the insulation where it belongs?

High R rigid insulation sheets can be cut to fit between the trusses, extending from the soffit supports to no less than one inch below the roof sheathing. A minimum one inch space must also be left between the inside of the eave strut and the insulation sheet.  Product dependent, of course, the high R boards can offer an R value of approximately six per inch of thickness.

Plywood or OSB (Oriented Strand Board) can also be used as a baffle, however either product is going to be heavier to work with, as well as not affording more than a minimal R value.


Fascia Trim Dimensions

How to Calculate Fascia Trim Dimensions

Justine (aka Hansen Pole Buildings’ wizard of deliveries) and I were discussing this subject today, so it makes for a good time to share!

In most cases, pole buildings with sidewall (eave) overhangs have fascia boards. These are most generally 2×6, 2×8, etc., depending upon snow loads as well as the “look” the building owner wants to achieve.

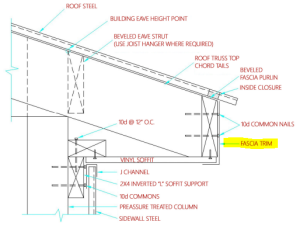
I say “in most cases” because there is one fairly significantly sized company who believes it is apparently satisfactory to just run the roof steel a foot past the sidewall without supporting it in any way…..sure hope the building owner never needs to get on the roof, and there are never any ice dams in the winter!Fascia TrimIn most instances, fascia boards will be installed vertically, attaching to a plumb cut on the ends of the truss or rafter tails. This application allows for the easy installation of gutters, which are required in many jurisdictions.

When steel or vinyl siding is used, I happen to feel it is a right nice idea to put steel trim on the wood fascia boards. It happens to look nice, and it keeps the fascias from having to be painted (after all, the idea is to be maintenance free) or turning gray, then black, then just rotting.

Along the I-5 corridor in Washington and Oregon, there are plenty of builders and pole building kit suppliers who rely upon “cheap is the king” and leave the fascia boards exposed. I am not quite understanding this in a climate where 60 inches a year of rain is not unusual!

Fascia trims are most easily done as an “L”, which covers the “street” side of the fascia board, as well as the bottom side (which will always be 1-1/2 inches in width). The height is the variable.

Done right, the top edge of the fascia board should be run through a table saw, to cut a bevel on the top of it matching the slope of the roof. This bevel cut allows the roof steel to be applied to the top, without crinkling or otherwise damaging the roofing when attached with screws.

The remaining height of the street side face of the fascia board can be determined by deducting the thickness of the bevel cutoff. Multiply the 1-1/2 inch width of the fascia board by the slope of the roof (e.g. 4/12). 1.5” times 4 divided by 12 = 0.5 or ½ inch. For a 2×6 fascia board at a 4/12 slope, the trim size would be 1-1/2 inch x 5 inches for an overhang without a soffit.

When soffits are added, the thickness of the soffit material needs to be added to the vertical dimension. Most typically steel or vinyl soffit panels will be no greater than ½ inch in thickness.

No rocket science involved, just an opportunity to brush up on the math skills we learned in grade school!