Disclaimer – this and subsequent articles on this subject are not intended to be legal advice, merely an example for discussions between you and your legal advisor.
Please keep in mind, many of these terms are applicable towards post frame building kits and would require edits for cases where a builder is providing erection services or materials and labor.
PREMISES: Purchaser will be responsible for personal injury or property damage sustained by anyone entering the jobsite, as well as security. Purchaser warrants soil is of bearing capacity to meet what is stated in the Agreement. Seller has not made any soil studies, and the determination of any need for a soil analysis, as well as the costs of the same, shall be made by and paid for directly by Purchaser. In the event soil bearing capacity is less than as stated, any and all costs of redesign, redrafting or reengineering shall be paid for by Purchaser.
This version of “premises” is written specifically towards built buildings and is, for practical purposes, a ‘hard rock clause’:
PREMISES: Purchaser will be responsible for personal injury or property damage sustained by Purchaser or third parties who enter the jobsite, and for all security at jobsite. Upon completion, Seller shall remove all of Seller’s tools, construction equipment and machinery from the building site.
Purchaser warrants that all soil is clean, unobstructed, of adequate bearing capacity and meets a minimum of 95% compaction. Seller’s price allots a maximum average of 30 person-minutes per column hole for hand-digging or 10 equipment-minutes per column for auguring, with excess time to be paid for by purchaser pursuant to Section xx of this Agreement, “Change Orders”.
Purchaser to absorb all costs associated with underground water or unexpectedly high water table including, but not limited to, diversion of flow or removal of water from column holes.
Seller has not made any soil studies, and the determination of any need for a soil analysis, as well as the cost of the analysis, shall be paid directly by Purchaser.
Should asbestos or other hazardous waste be discovered during the course of Seller’s work, Seller will promptly notify Purchaser, who must advise the applicable governmental agencies. It shall thereafter be Purchaser’s responsibility to contract a certified hazardous waste removal contractor in order to perform all asbestos or hazardous waste removal.
For extended reading on ‘hard-rock’ clauses: https://www.hansenpolebuildings.com/2014/03/hard-rock-clause/
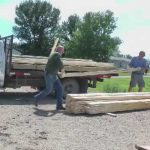 TRANSPORTATION/SHIPMENT: Other than ferry charges, freight and transportation charges within the Continental United States are included in sales price unless otherwise expressly stated in the Agreement. For projects outside of the Continental U.S., shipment is made to a mutually agreeable port, or is available for “will call” at one of Seller’s distribution points. If needed, Purchaser will provide any permits and/or pilot cars for oversized loads, and equipment and/or labor required to unload trucks.
Purchaser shall make access to the building site available at all times to Seller’s agents for purposes of delivery.
Materials delivery challenges: Once any material leaves the truck bed it becomes responsibility of the Purchaser and all risk of loss, damage, and other incidents of ownership shall immediately pass to Purchaser, but title to such materials will be retained by Seller as security interest for Purchaser’s performance until payment in full is received. This security interest constitutes a “purchase money security interest” pursuant to the Uniform Commercial Code.
Signed delivery slips shall be proof of receipt of materials in good order. Acceptance by common carriers shall constitute delivery, therefore, the freight carriers are liable for materials lost or damaged in transit and (in case of loss or damage en route), Purchaser must immediately notify the carrier’s agent at destination, in order to establish a formal claim when presented, and no claims for damages shall be made against Seller.
PROTECTION OF WORK: It is agreed Purchaser shall be responsible for replacement of any stolen or damaged material after delivery in good order.
DELIVERY ACCESS: Purchaser shall provide clear, level site, with sufficient area and adequate access (at least 10 feet in width and up to 14 feet of height) for trucks to make delivery without danger to property or equipment, and shall assume, pay and hold Seller harmless from all claims of damages to property of others. Delivery trucks may be semi tractors pulling 48′ or longer trailers. If a site does not have adequate access, it is the responsibility of the Purchaser to find a suitable alternative delivery location.
Drivers are instructed to not risk themselves, their loads, or their equipment in an attempt to make delivery to a location driver deems as unsafe. The final decision as to adequacy of access shall be determined by the truck driver. Should, for any reason, adequate access is unavailable and Seller’s truck must make another trip to the job site, Purchaser agrees to pay the cost of an extra delivery at $5 per loaded mile, with a $250 minimum.
In the event Purchaser instructs a driver to access over a particular route or area and the truck becomes stuck, requiring towing, or causing damage, Purchaser will absorb all expenses, including a minimum of $120.00 per hour truck standby time for each and every hour, or partial hour, truck is stuck or delayed. Purchaser shall be responsible to provide safety jackets, warning signs, whistles and persons to direct traffic, if necessary, to allow access to the jobsite. Should materials NOT be able to be delivered and properly stocked, the Purchaser agrees to absorb all costs of moving materials.
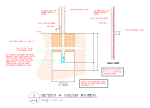 DEAR POLE BARN GURU: I am looking to build a 20ft x 24ft pole barn garage. The footings are going to be drilled and filled with concrete now, with the structure being completed at a future date. My city engineer requires 30″ deep footings. He was not able to say for sure what diameter footing I needed to drill. Do you have any insight to what diameter footing I should expect to need for this size structure? JOE in CINCINNATI
 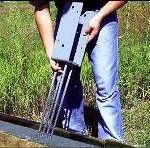 DEAR POLE BARN GURU: I was fortunate to have acquired enough columns for a building. My question as these are not ground contact columns and I prefer at this time to not pour a concrete floor is it allowable to pour a perimeter of concrete ( 2’x2′,3’x2′?) thickened edge if you will and set the columns to keep them off the ground? I was thinking partially setting rebar perpendicular in the concrete leaving 1-2′ protruding towards the buildings center to tie a future slab possibility into what would be the existing edge ( foundation). This is a cost driven situation as you may have already surmised. Really appreciate your knowledge and time. RICK in TWO RIVERS


 TRANSPORTATION/SHIPMENT:
 My recommendation – invest in engineered plans. It becomes an assurance a registered design professional has verified your building will meet Code mandated loading requirements. In some cases, insurance companies offer discounts for buildings designed by an engineer. It’s certainly worth asking your agent for one!