Tag Archives: weather resistant barrier

Air Sealing Your Post Frame Barndominium

Unless someone reincarnates Nikola Tesla (and he is sane) chances are good energy costs are not going to decrease. Air sealing your post frame barndominium or shouse increases your comfort by reducing drafts and cycle time your heating and cooling systems are running.

Air sealing your barndominium reduces humidity increasing comfort levels. A drafty barndominium is more than just a waste of natural resources, it also means higher energy bills. Air sealing will automatically lower your energy bills due to less leakage of conditioned air.

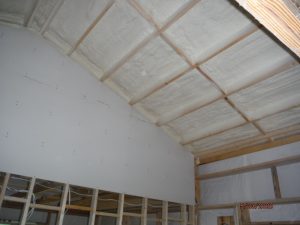
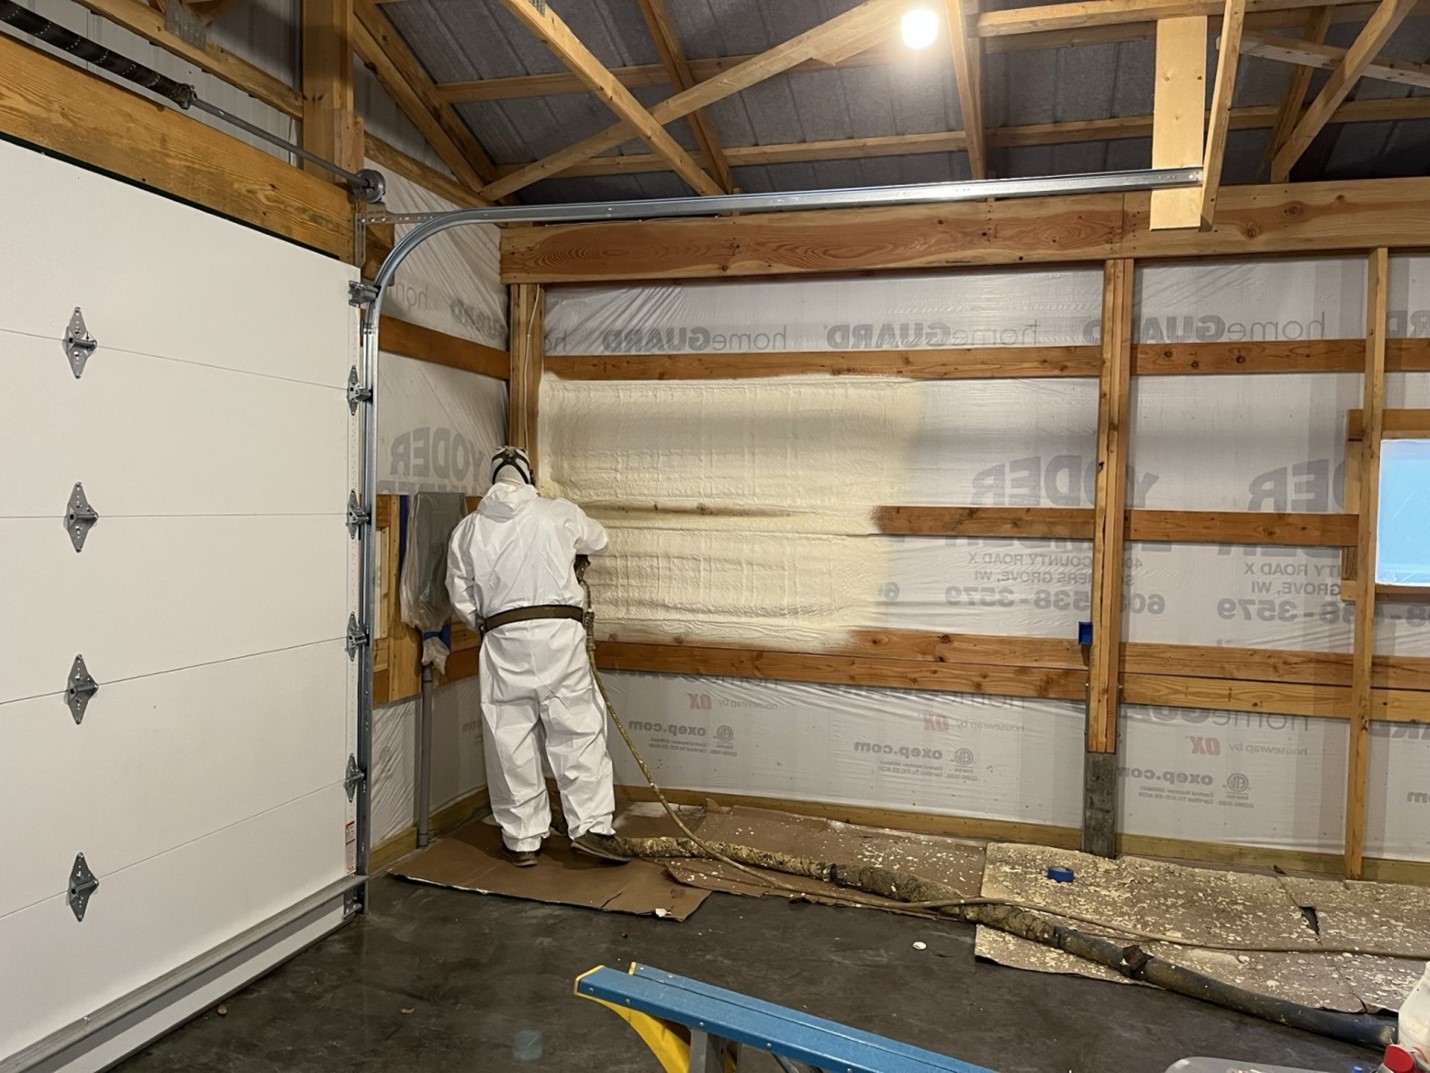
Using two inches of closed cell spray foam directly inside steel siding panels not only air seals exterior walls, as it is an effective vapor barrier, but also provides approximately a R-14 level of insulation. Effective applications also require installing form fitted inside closure strips at top and bottom of every wall steel panel – including window and door openings. Closure strips keep spray foam in your walls rather than oozing out and keeps small crawling and flying critters out.
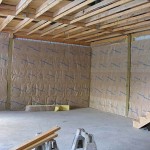
For those who opt not to utilize closed cell spray foam, air sealing begins with a totally sealed Weather Resistant Barrier (WRB) wrapping all framing before steel siding is applied. For further reading on Weather Resistant Barriers please see: https://www.hansenpolebuildings.com/2016/01/determining-the-most-effective-building-weather-resistant-barrier-part-1/

Care should be taken to effectively use WRBs around openings for windows and doors, as well as utilizing caulking and self-adhesive sealant tape for an airtight seal. Place sill gaskets under all exterior doors. Use spray foam or caulk to fill any gaps between doors and windows and adjacent framing.

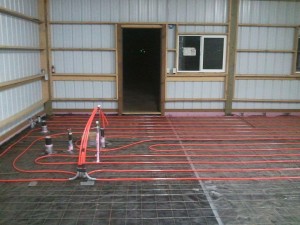
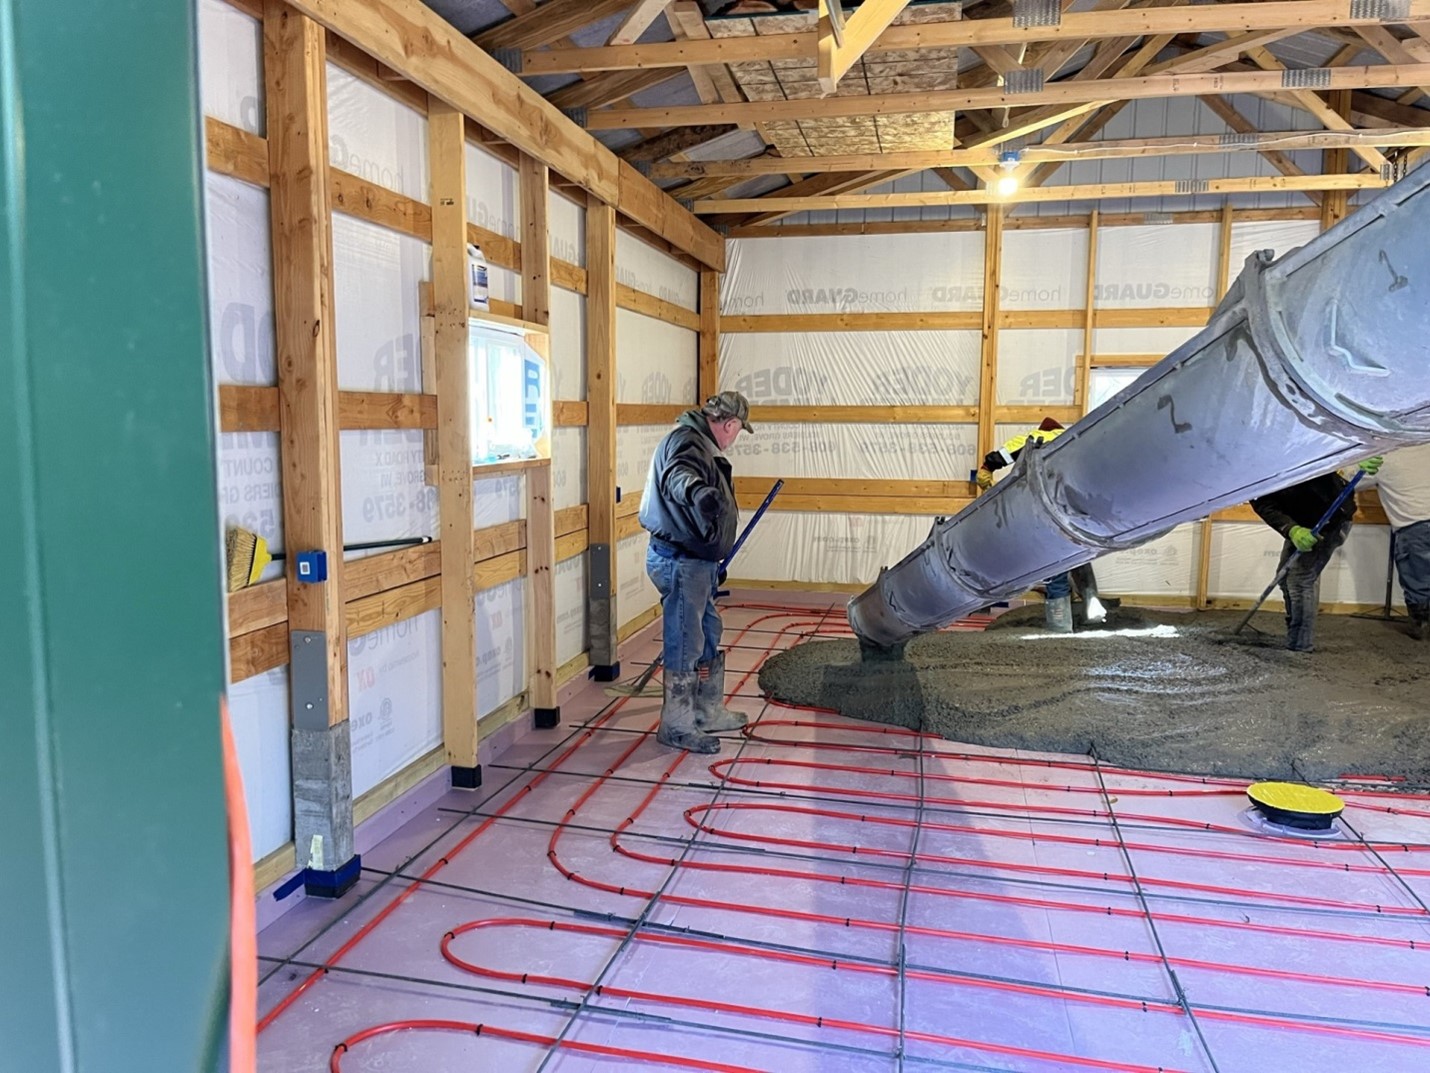
In Floor Heat System InstallationWhen placing under slab vapor barriers, run up inside of pressure preservative treated splash planks and sealing to top and around columns. Install seal gasket under pressure treated base plate (mud sill) and caulk inside edge to concrete slab.

With wall insulation systems other than closed cell, use a clear visqueen vapor barrier on the inside of all framing. Seal every penetration in this vapor barrier.

Before installing interior window and door trims, caulk where trim will meet frames. Make sure door sweeps are installed and the threshold is properly adjusted.

Common infiltration paths include attic access and simply insulating envelope (or shell) isn’t enough. In fact, insulation’s ability to perform is almost cut in “half” if not air sealed first.

Expandable polyurethane is used in areas too wide for caulk. If an area is wider than 1/4″ caulk can fall out of grooves. Acrylic-latex caulk is for all gaps small enough for caulk to function properly such as base plate and seam between floor and wall and wall and ceiling. Fire-rated caulk is non-combustible and for any areas where wires penetrate through base plates, walls, etc. (This is a recently implemented new national code.)

While it seems obvious gaps and crevices in a barndominium should be sealed, most builders either have not yet begun or just recently started utilizing air sealing processes. If hiring a contractor, make certain complete air sealing processes are spelled out in contractual documents – money you will save over your barndominium’s lifespan.

Best Practice for Closing and Insulating 2×10 Headers

Best Practice for Closing and Insulating 2×10 Headers
Reader DAVE in VIROQUA writes:

Best practice for closing and insulating 2×10 headers. My pole barn has building wrap then closed cell spray foamed walls. Ceiling not yet installed but want to use blown in fiberglass with vapor barrier. The spray foam on walls goes up to the bottom edge of the outer header. Before the ceiling is installed and insulated what is your suggestion to close and insulate the double 2×10 header to prevent moisture issues etc.? My walls will be finished off at a later date. Building has vented soffits and ridge vent. Roof panels have drip guard on underside as well. The post framing is laminated 2×6-3ply. Thank you.”

Mike the Pole Barn Guru pens:
One of my pet peeves of what I refer to as 4 & 8 buildings (trusses every 4′, columns every 8′) is when truss carriers (headers between columns) are applied to column faces, rather than being notched in. Rarely are fasteners sufficient to be able to resist loads imposed by those once every hundred years snow storms, resulting in roofs lowered to top of vehicle levels. 

Besides connection challenges, it further reduces actual amount of usable interior space. As an example, builders/providers will set outside of exterior (barn style) girts at Building Lines, and to finish interior requires adding yet another set of face mounted wall girts. This ends up with wall framing 8-1/2″ thick. On a 24′ wide building, if 1/2″ gypsum wallboard is used, interior finished dimension ends up being only 22’6″!

In answer to your question, you’ll want to enclose above double 2×10. This can be done by cutting strips of whatever low cost sheet good you can find (OSB, plywood, etc.) and installing them between trusses on top of truss carriers. Fill cavity between 2x10s with closed cell spray foam.

Hopefully you will not have issues with your current closed cell spray foam applied to a weather resistant barrier. Best practice is to spray directly to inside of steel (please read more here https://www.hansenpolebuildings.com/2020/04/spray-foam-insulation-3/)

Insulation Prep, Foundation and Footing Prep, and USDA Programs

Today’s Pole Barn Guru tackles reader questions about plans to insulate and preparations ahead of insulating, recommendation for framing and footing an apartment to prevent movement, and if the PBG knows whether or not the USDA programs apply to post frame homes.

DEAR POLE BARN GURU: I am currently constructing my Hansen provided pole building, to be used as a shop. I plan to eventually insulate the walls with rolled fiberglass. My question is, are there any preparations I should make during construction? House wrap under my steel siding? Are inside closure normally provided for use between base trim/siding? Thanks, KURT in PORT ORCHARD

DEAR KURT: Thank you for your investment in a new Hansen Pole Building – be sure to send me lots of progress photos during construction (and of course ones when it is all complete).
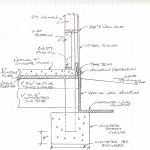
In your Climate Zone, I would recommend using a Weather Resistant Barrier between wall framing and siding. You can either use Kraft faced fiberglass insulation or unfaced batts with a 6mil clear poly vapor retarder on inside of your insulation.

Inside closures are not a standard feature for wall steel, however they are relatively affordable and your Hansen Pole Buildings’ Designer can reach out to you on Monday with a price on them.


DEAR POLE BARN GURU: I would like to build a 30x72x18 monitor-style barn with a small apartment w/loft one end. How would you recommend framing and footing the apartment to prevent movement between the “two” buildings? Full foundation? Slab? Other Ideas? GREG in KALISPELL

DEAR GREG: Any possible movement would come from either inadequately compacted or loose soil below column footings, inadequate footing diameter, or frost heave. To prevent frost heave, columns footings should be placed at frost depth or deeper and perimeter of slab should be insulated vertically with rigid insulation. In your climate zone, this would entail a four foot ‘tall’ R-10 insulation board. Install on inside face of pressure preservative treated splash plank, with top of insulation even with top of concrete slab. As an alternative, you can insulate slab perimeter per Frost-Protected Shallow Foundation requirements found here (note, slab edge does not have to be thickened or have a stem wall): https://www.huduser.gov/publications/pdf/fpsfguide.pdf


DEAR POLE BARN GURU: Hello Guru! We were wondering if the USDA Rural Development program allows for the construction of a pole barn home? KIRSTYN in LANSDALE
DEAR KIRSTYN: I am finding nothing precluding a fully engineered post frame home from qualifying. It does appear qualification for these programs is fairly stiff for potential borrowers.

Rain-screen Siding for Post Frame Barndominiums

Horizontal exterior sidings like wood clapboards, vinyl, and fiber cement have traditionally been nailed directly to underlying sheathing, typically over a water-resistant underlayment of asphalt felt or some sort of housewrap. This is still common practice, but over the past few decades, a more labor-intensive technique known as rain-screen siding has been steadily gaining ground.

Reportedly first recommended by Canada’s National Research Council in the early 1960s, the rain-screen approach involves fastening siding to vertical furring strips, usually spaced to correspond with wall studs. These resulting vertical channels are usually covered with insect screening at top and bottom but are otherwise left open to permit free passage of air. As in a conventional siding application, OSB or plywood beneath should first be covered with a properly flashed and lapped layer of felt or housewrap.

According to rain-screen advocates, these open channels tend to reduce wind pressure against housewrap or felt, making it less likely wind-driven rain will penetrate housewrap imperfections. (In fact, rain-screen siding is sometimes described as “pressure-equalized siding.”)

Any moisture driving through siding drains away quickly, while air space behind siding promotes rapid drying. This, in turn, may help prevent problems — such as mold and wood rot, as they can develop when moisture works its way past sheathing and into the wall cavity.

Reader SAM in NEW HAVEN writes:

“I’m working on details for a planned insulated pole barn house, and would like to create a vented rain screen assembly to allow the wall to dry to the outside.  Could you install Hansen metal siding over a vented rain screen furring strip (over a Weather Resistant Barrier mounted on the structural furring strips)?   Something like roll-on rainscreen or even strips of corrugated sign board like in this JLC article: https://www.jlconline.com/how-to/exteriors/easy-low-cost-drainable-strapping-for-rainscreen-siding_o.”

Mike the Pole Barn Guru responds:

Engineered post frame (pole barn) houses rely upon their skin (usually steel roofing and siding) being properly installed to provide diaphragms. When material is placed between horizontal wall girts and steel siding to create a vented rain screen assembly, it defeats your building’s structural integrity, unless structural sheathing is applied to wall girts.
You can dry to outside by just applying steel over a WRB over wall girts. Vertical steel siding does not allow for water to penetrate from outside like horizontal lap siding could. High ribs of steel panels will provide channels so any moisture passing out of the wall cavity and through WRB can run out the bottom of the steel siding.

Texas Post Frame Barndominium Insulation

Reader KIMBERLY in LINDEN writes:

“We are building a 52x40x10 post frame home in East Texas.  The entire thing will be living space.  I have been researching as much as possible on the best way to insulate a post frame home with metal siding and roof.  The information is overwhelming and you get a completely different answer depending on who you talk to.  I know not to skimp on insulation, but the consensus on most “barndominium” FaceBook groups is that spray foam is the only way to go.  I have reservations about that, because it may be a superior way to insulate, but it depends almost exclusively on who is doing the actual foam application.  On top of that you need to spend more money on your HVAC system to add the proper ventilation/air exchange.

I want a well insulated home that is specific to the type of building material and location we live in.  To me, “not skimping” on insulation doesn’t mean that it has to be the most expensive insulation either.  

I also know the insulation world is constantly changing and evolving, but what would your recommendation be to insulate our home in East Texas?

Thank you so much for your time!”

Mike the Pole Barn Guru responds:

Your insulation requirements will vary depending upon where you are in East Texas. Climates zone 1 (closest to Gulf) require R-30 ceilings, R-13 walls. Zone 2 requires ceilings to be R-49 and zone 3 (farthest north) goes to R-20 walls. You can look up you county’s climate zone here: https://codes.iccsafe.org/content/IECC2021P1/chapter-3-re-general-requirements#IECC2021P1_RE_Ch03_SecR301. I will cheat for you and tell you Cass County is Climate zone 3A.

For sake of discussion we will assume you have a dead attic space and will be insulating directly above a finished ceiling.  I would ventilate your dead attic space at the eave (air intake) and the ridge (air exhaust). Make provisions for preventing condensation on the underside of roof steel by having some sort of a thermal break. My personal preference is by using an Integral Condensation Control (https://www.hansenpolebuildings.com/2020/09/integral-condensation-control-2/).  You will want to order roof trusses with raised heels (https://www.hansenpolebuildings.com/2012/07/raised-heel-trusses/), so you can get full insulation depth from wall-to-wall with blown in fiberglass. Heel height should be R value of insulation divided by three and add two inches so you can achieve adequate airflow above insulation.

Should you want to condition your attic – delete ventilation, raised heels and the Integral Condensation Control. I would apply closed cell spray foam two inches to the underside of roof steel, then add open cell spray foam to desired R value.

For walls – best results will be from two inches of closed cell sprayed to inside of wall steel, then fill balance of wall cavity with either open cell spray foam, or unfaced batts (ideally stone wool https://www.hansenpolebuildings.com/2013/03/roxul-insulation/). You could also use BIBs to fill (https://www.hansenpolebuildings.com/2011/11/bibs/). Do not place a Weather Resistant Barrier (WRB) under wall steel or a vapor barrier on inside of wall.
As an alternative to spray foam, you can use a WRB between framing and wall steel, then BIBs with an interior vapor barrier or faced batt insulation.

Energy costs are not going to go down, so I would encourage you to err towards more insulation rather than less – and (since most heat loss is upward) invest more into added ceiling insulation than walls.

In warmer, humid climates like yours, your HVAC system should include an Energy Recovery Ventilator (ERV) regardless of what your choice of insulation systems ends up being.

Insulated Bookshelf Wall Girts

While we United States residents like to think of ourselves as perhaps the center of our universe, post frame construction appears world wide.

Reader JONATHAN in HALIFAX picked Alabama as his state when he filled out his online request for information when he wrote:

“What insulation do you suggest between bookshelves of wall?”

With so many post frame buildings being used for residences, commercial buildings, shop/houses and barndominiums, properly addressing how to insulate has become of utmost importance.

I am going to take a stab and guess your Halifax is in Nova Scotia, rather than Alabama. My lovely bride and I made a stop there on a cruise from New York City a few years ago – beautiful area (and I got a Harley-Davidson T shirt).

If so, you are in what would be an equivalent to our IECC (International Energy Conservation Code) Climate Zone 7. For wood frame walls, this would require an R-20+5 or R-15+10, where your plus value is for continuous insulation.While continuous insulation is most often usually on exterior of framing, Martin Holladay – editor of Green Building Advisor feels confident in it working as well on inside of framing. Given this, I would put a Weather Resistant Barrier (https://www.hansenpolebuildings.com/2016/01/determining-the-most-effective-building-weather-resistant-barrier-part-1/) between wall framing (bookshelf wall girts) and siding, then fill your cavity with rock wool (as it is not negatively affected by moisture), then use rigid foam insulation inside of your framing. You can glue these sheets to your framing (bookshelf girts) to eliminate any thermal bridging from fasteners and then glue your interior finish to it. Make sure to tightly seal your rigid foam boards and to caulk along the bottom of exterior walls to get a good seal. Built in this fashion, your walls will ‘dry’ to the outside, reducing the need for dehumidifying inside.

Of course you will want to get approval from your local permit issuing jurisdiction before moving forward.

For extended reading on rock wool insulation please see https://www.hansenpolebuildings.com/2013/03/roxul-insulation/

PermaColumns, Pole Barn Planning, and Insulating a Roof

This Monday the Pole Barn Guru discusses the use of PermaColumns, planning of a pole barn in Florida, and the best solution for a building without roof or exterior wall weather resistant barriers.

DEAR POLE BARN GURU: I am having a pole building put up with engineered laminated columns. The contractor is pushing a “Perma Column” made up of concrete and welded rebar that goes in the ground, about 5′ long surrounded by more concrete, and the laminated columns are bolted on top through 1/4″ steel brackets. My question is, are these laminated columns OK to go directly into the ground, with concrete, or is it important to keep them out of the ground as these Perma Columns would do? TIM in MEDICAL LAKE

DEAR TIM: Back in my post frame building contractor days we built many a building in and around Medical Lake.

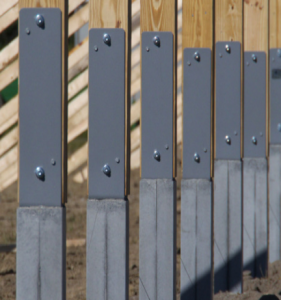
Hopefully those columns are true glu-laminated columns, as opposed to nailed together. Most of these are designed specifically for post frame construction and have their lower six or more feet pressure preservative treated for structural in ground use. If this is your case, there is no issue with their lower end being embedded directly in ground (reducing costs and increasing ease of construction). While precast Permacolumns would keep columns out of ground, there is a better option – https://www.hansenpolebuildings.com/2018/04/perma-column-price-advantage/


DEAR POLE BARN GURU: Hello. We are planning to build a pole barn home in Arcadia, Florida. We were looking into the 40 x 60 with 2 leans on the sides. However, we cannot find someone who specializes in these constructions and can tell us how to start, what type of foundation is needed since it’s a pole barn. Do you do the entire project or you just supply the kit? Do you have contractors you work with as far as installation? Please get back to me asap. ANA MARIA in NAPLES

DEAR ANA MARIA: Well, you have reached out to where you should be, as Hansen Pole Buildings specializes in post frame homes (barndominiums and shouses).

Links in this article will get you through budgeting, financing, finding property, room design and floor plans: https://www.hansenpolebuildings.com/2019/10/show-me-your-barndominium-plans-please/.

Post frame foundations can be as simple as properly pressure preservative treated columns embedded in ground, to columns mounted to engineered brackets or even continuous footings and foundations.

Our buildings are designed for the average physically capable person who can and will read instructions to successfully construct their own beautiful buildings (and many of our clients do DIY). Our buildings come with full 24” x 36” blueprints detailing the location and attachment of every piece, a 500 page fully illustrated step-by-step installation manual, as well as unlimited technical support from people who have actually built buildings. For those without the time or inclination, we have an extensive independent Builder Network covering the contiguous 48 states. We can assist you in getting erection labor pricing as well as introducing you to potential builders. We would appreciate the opportunity to participate in your new home. Please email your building plans, site address and best contact number to caleb@hansenpolebuildings.com or dial (866)200-9657 .


DEAR POLE BARN GURU: Have a 30×42 pole shed at my new home that I purchased. It is partitioned into 2 parts, a back room (30×12) and front (30×30). The back room is finished off with OSB on the walls, in between the horizontal 2×6 purlins there is 1.5″ unfaced rigid foam board (expanded polystyrene I believe) and on the ceiling it appears that it is just a rock wool type insulation between the purlins and a 6 mil plastic vapor barrier stapled to the purlins along the bottoms all the way around the room. There is crosses cut into it every so often (assuming for a vent). The room is heated by a Propane wall heater and it gets Very warm and holds heat very well even with it being open to the 16 ft. peak. This room has been like that for 25+ years and it shows no signs of condensation, rust, rot, or anything for that matter. The front section (30×30) has 1.5″ RTech faced rigid foam boards between the horizontal girts with the foil sides facing into the shop & seams spray foamed etc. The 30×30 room will be heated with a vented 75k BTU unit heater that is also run off of LP. Side note- The building has no WRB between the steel and “studs” on the walls or roof. My question is how can the roof be insulated without the use of spray foam or removing the metal and wrapping it. I am looking for all the feasible options for this project, thank you. JACKSON in COLEMAN

DEAR JACKSON: Providing your building’s trusses are designed to support weight of a ceiling and any non-conditioned dead attic space above can be adequately vented, your best bet is to install a ceiling (my preference would be 5/8″ Type X gypsum wall board) and blow in fiberglass insulation. This will be your most cost effective alternative in materials and labor and will result in a minimum amount of space to be heated.


Post Frame Barndominium Exterior Wall

Post Frame Barndominium Exterior Wall Questions

Reader IAN in RIDGWAY writes:

“I am looking for help understanding a couple of exterior wall questions.  

  1. My county is enforcing the 2018 IECC for energy efficiency. In my region this requires R-20 cavity + R-5 exterior wall assembly.  From everything I’ve read, this means a continuous layer of 1″ rigid between the framing members and the metal siding.  Is this an accurate understanding in your mind?  Does the 1″ of rigid between framing and siding affect the integrity of the structure at all?  Are the fasteners that are shipped with your kits long enough to accommodate the 1″?
  1. We will be living in our pole building, which means we will need to meet minimum code standards for receptacles at the exterior walls.  I am under the impression that the poles must remain whole and are not designed to have a hole drilled through each for ease of pulling wire.  Am I correct here?  What is the suggested solution? Conduit everywhere below my slab?”

Mike the Pole Barn Guru responds:


Nice to see jurisdictions enforcing IECC (International Energy Conservation Code) requirements, as it will result in more energy efficient structures. In Ouray County, you are in Climate Zone 6B. This requires ceiling R-49, wood frame walls of R-20 plus R-5 (or R-13 plus R-10) where second value is continuous insulation and slab edges to have R-10 four feet deep.
According to Martin Holladay (Green Building Advisor editor) your continuous insulation is just as effective when installed on the interior of your wall framing. This is very important when it comes to fully engineered post frame construction. Properly engineered, post frame construction relies upon shear strength of steel skin to transfer wind loads through building planes to ground (https://www.hansenpolebuildings.com/2011/12/lateral-wind-loads/). Having rigid insulation between framing and siding would reduce or negate your siding’s shear strength and result in a less than satisfactory outcome. My recommendation would be to use a Weather Resistant Barrier on the outside of the framing, directly inside of steel siding. Fill insulation cavity with unfaced batts (preferably stone wool such a Roxul as it is not affected by moisture https://www.hansenpolebuildings.com/2013/03/roxul-insulation/) or BIBs (https://www.hansenpolebuildings.com/2011/11/bibs/), then a well sealed rigid insulation board between framing and interior finish. Done this way, your wall will ‘dry’ to the exterior, making your home’s HVAC system less responsible for reducing interior humidity levels.

Your wire pulling is far easier than you may have initially envisioned. 

Very little drilling, if any, will be needed for holes in order to run electrical wires. Wall framing (girts) extend or are placed so as to leave a 1-1/2 inch space between outside of wall columns and siding.

Think of a hole being drilled through as being an “open knot”. Lumber grading rules refer to these as being “Unsound or Loose Knots and Holes” due to any cause. Most structural framing – like wall girts and roof purlins or posts and timbers are graded as Number 2.

For practical purposes, a hole up to just less than ¼ of board face being drilled through will be within grade in #2 lumber. Example: 3-1/2” face of a 2×4 a hole up to 7/8” may be drilled through, as often as every two feet. Allowable hole sizes are reduced and spacing increased for higher grades of lumber. 

Any holes drilled through pressure preservative treated lumber or columns, especially near         grade, should be treated with a Copper Naphthenate solution. Copper Naphthenate is available as a brush-on (Cuprinol No. 10 Copper-Green® Wood Preserver          https://www.homedepot.com/p/Copper-Green-1-gal-Wood-Preservative-176223/300502829)

or spray-on(https://www.homedepot.com/p/Copper-Green-Wood-Preservative-14-fl-oz-  

       Aerosol-CopperSpr/100191444)

Zero Lot Line Post Frame Construction

There are occasions where the best location to place a building just happens to be right up to a lot line. Let’s face realities – if your site’s required setbacks without fire resistive construction are five feet, what is going to accumulate in this area? Most often it is either “stuff” or weeds, neither of these being aesthetically pleasing.

Reader CLINT in SPOKANE, is faced with this and writes:

“I have a unique question regarding a firewall.  In Spokane County you are allowed to build up to the property line of your neighbor given that you have a 1hr rated fire wall from both sides on the property line.  (2hrs total).  I’ll attach a copy to the code requirements.  To meet code apparently you have to use “type x” drywall on both the interior and exterior of the wall.  I understand the install and have even read up on your reference to a 3hr firewall from some time ago.  My question is, how do you weather-proof the exterior drywall? It seems that putting metal siding directly over-top the drywall could lead to moisture damage.  I’m guessing that even if it is OK for most of the wall what about the lower ground level part?  Do you need a vapor barrier or special trim/flashing to prevent splash damage from ground level. Or maybe even humidity alone could be bad?  I’ve seen what drywall does with water so that is my concern with it being only a metal layer away from the elements. Thanks for your help!”

Mike the Pole Barn Guru advises:

While your copy of Spokane County’s requirements did not make it, I am fairly familiar with them as I was once their most prolific post frame building contractor (built over 200 buildings in Spokane County in a single year).

To reach two hours, you should have two layers of 5/8″ Type X on each side of your framed wall. You also need to insure any rain or snow coming off your roof does not land in your neighbor’s yard. This will entail a slight setback to allow for gutters and you will need a snow retention system on this side of your roof (this is assuming we are discussing an eave side and not an endwall).

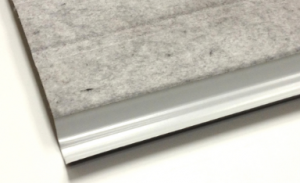
Start with investing in “green board” 5/8″ Type X drywall. While not waterproof, it is moisture-resistant. It is available from providers such as GTS Interior Supply in Spokane. You should use a Weather Resistant Barrier (WRB) on your exterior between drywall and steel siding. Screws for steel should be three inches in length for this wall, in order to get adequate penetration into wall girts. Base trim (aka rat guard) can be special ordered with a longer flat leg to seal off water splash up from ground. Mineral (rock) wool insulation should be used in this wall, as it is not affected by moisture.

Extended reading about NFBA’s three hour firewall testing can be found at https://www.hansenpolebuildings.com/2012/03/firewall/

How Best to Use Metal Building Insulation

How To Best Use Metal Building Insulation

Loyal reader ANDY in SOUTH CAROLINA writes:

“ I read with interest the article “What house wrap is good for” on your website and would like to include house wrap on a pole building I’m currently planning to build in the upstate of South Carolina.  Typically builders in that area simply use 3” polypropylene faced fiberglass insulation between the wall girts and steel siding. My situation is a bit different than most I have seen in that my single story building will be 1500 sq ft total, with 900ft dedicated to garage and shop space, and 600 ft dedicated to a guest apartment. If I were to place house wrap between the girts and steel as I believe you recommend, could the 3 inch faced insulation simply be placed on the inside of the girts for the garage space, and significantly more fiberglass insulation used around the apartment – inside deeper cavities of flush walls?  

Thank you.”

For those of you who need to know, here is article referenced by Andy: https://www.hansenpolebuildings.com/2012/11/house-wrap/


Surprisingly there are a lot of builders who “sell” people on how valuable a benefit Metal Building Insulation is. Long time readers may recall my personal adventures with it: https://www.hansenpolebuildings.com/2011/11/metal-building-insulation-in-pole-buildings-part-i/

Three inch thick Metal Building Insulation makes for a very poor return on investment as every time it crosses a wall girt it gets compressed pretty well to R-0. If lucky, one might net an R-3 or so out of it. It also tends to cause steel siding to pucker outward between girts. Properly sealed, it does make for a decent condensation control.

My recommendation would be to place a well-sealed WRB (Weather Resistant Barrier) between all wall framing and siding. Use commercial style bookshelf girts to create an insulation cavity https://www.hansenpolebuildings.com/2020/05/how-to-install-bookshelf-girts-for-insulation/. Use unfaced batt insulation with a minimum 6 mil clear visqueen vapor barrier on the inside. For what you would pay for three inch Metal Building Insulation, you can completely fill your insulation cavities.

Air Sealing Your Post Frame Barndominium

Unless someone reincarnates Nikola Tesla (and he is sane) chances are good energy costs are not going to decrease. Air sealing your post frame barndominium or shouse increases your comfort by reducing drafts and cycle time your heating and cooling systems are running.

Air sealing your barndominium reduces humidity increasing comfort levels. A drafty barndominium is more than just a waste of natural resources, it also means higher energy bills. Air sealing will automatically lower your energy bills due to less leakage of conditioned air.

Using two inches of closed cell spray foam directly inside steel siding panels not only air seals exterior walls, as it is an effective vapor barrier, but also provides approximately a R-14 level of insulation. Effective applications also require installing form fitted inside closure strips at top and bottom of every wall steel panel – including window and door openings. Closure strips keep spray foam in your walls rather than oozing out and keeps small crawling and flying critters out.

For those who opt not to utilize closed cell spray foam, air sealing begins with a totally sealed Weather Resistant Barrier (WRB) wrapping all framing before steel siding is applied. For further reading on Weather Resistant Barriers please see: https://www.hansenpolebuildings.com/2016/01/determining-the-most-effective-building-weather-resistant-barrier-part-1/

Care should be taken to effectively use WRBs around openings for windows and doors, as well as utilizing caulking and self-adhesive sealant tape for an airtight seal. Place sill gaskets under all exterior doors. Use spray foam or caulk to fill any gaps between doors and windows and adjacent framing.

In Floor Heat System InstallationWhen placing under slab vapor barriers, run up inside of pressure preservative treated splash planks and sealing to top and around columns. Install seal gasket under pressure treated base plate (mud sill) and caulk inside edge to concrete slab.

With wall insulation systems other than closed cell, use a clear visqueen vapor barrier on the inside of all framing. Seal every penetration in this vapor barrier.

Before installing interior window and door trims, caulk where trim will meet frames. Make sure door sweeps are installed and the threshold is properly adjusted.

Common infiltration paths include attic access and simply insulating envelope (or shell) isn’t enough. In fact, insulation’s ability to perform is almost cut in “half” if not air sealed first.

Expandable polyurethane is used in areas too wide for caulk. If an area is wider than 1/4″ caulk can fall out of grooves. Acrylic-latex caulk is for all gaps small enough for caulk to function properly such as base plate and seam between floor and wall and wall and ceiling. Fire-rated caulk is non-combustible and for any areas where wires penetrate through base plates, walls, etc. (This is a recently implemented new national code.)

While it seems obvious gaps and crevices in a barndominium should be sealed, most builders either have not yet begun or just recently started utilizing air sealing processes. If hiring a contractor, make certain complete air sealing processes are spelled out in contractual documents – money you will save over your barndominium’s lifespan.

Worldwide Steel Buildings or Post Frame?

Loyal reader STEPHEN in AUSTIN writes:

“Mike –  I am so thankful for all the info you and your company have provided over the years. Your experience and knowledge have helped so many.  I especially love your promotion of bookshelf girts.  Every time I see a building framed within a building, I ask why?  Bookshelf girts make so much sense.  In my research, I also came across Worldwide Buildings, a competitor of yours.  They have a similar system:  https://youtu.be/yilRYwxukRQ

What would you see as some of the cons to their setup?  I am assuming cost is probably the biggest drawback.  Anything else?  I would plan on foam board (Possibly as a WRB as well that is taped) for any structure for a thermal break, whether it is steel or wood.  Any input you could give would be appreciated.”

Mike the Pole Barn Guru comments:

Thank you very much for your kind words. My goal is to see to it people avoid making crucial mistakes so they end up with buildings best meeting their wants and needs, and be as ideal as possible – even if they are not Hansen Pole Buildings.
Until recently my son Adam, his wife and our grandson lived in Austin, TX we are in a small world!

Bookshelf wall girts solve so many potential challenges and seem like a fairly obvious design solution to me. I also scratch my head when I see people framing up a house inside of a PEMB (pre-engineered metal building.).

I do know some of Worldwide’s staff, have met them in person, and they certainly seem like good people. I have no idea what sort of an investment comparison there is. Our buildings do come complete with engineer sealed drawings and sealed verifying calculations including a foundation plan, where these would be extras elsewhere. It does appear you would need some degree of precision in placing steel frame bolts. They also may have some additional expense involved with their slabs (usually PEMB slabs require a significant amount of rebar). 

Steel frameworks are great transfers of thermal energy – you would want to significantly isolate them with insulation having as great an R value as you would be using in your roof and walls. I see a lot of vinyl backed fiberglass insulation being applied on their website. This is not a very effective insulator as it gets crushed down to nothing at any purlin. For walls, you want a WRB (Weather Resistant Barrier) allowing any moisture inside walls to escape outward, so this vinyl backing would not be ideal. 

Foam board insulation should not be placed between framing and siding as it will allow your building’s siding to shift with wind and over time will cause deformation of screw shanks and/or elongate screw holes and eventually cause leaks. Ideally you would glue any foam insulation boards on the interior side of framing (to prevent thermal transfer from screws), taping all joints and sealing to concrete slab.

On their website they show girt clips on their frames for supporting 2×4 bookshelf wall girts – making for a fairly shallow insulation cavity. As near as I can tell, their packages do not include any lumber for girts, purlins, etc., merely steel frames, roofing and siding.

Thank you again for being an avid reader, please continue asking any questions.

Creating Extra Work in Barndominium Framing

Creating Extra Work In Barndominium Framing

A supposed downside of post frame (pole barn) buildings for barndominiums is having to frame a wall inside of an exterior wall in order to create an insulation cavity and a way to support interior finishes.

This myth is created and propagated by post frame kit suppliers and post frame builders who do not understand there is a solution – and a very cost effective one (in both labor and materials).
Rather than framing exterior girts (as shown in photo) and then adding vertical stud walls between columns, bookshelf girts can be utilized.

I’ve done several thousand pole buildings using this “bookshelf” or “commercial” girt method. I have two of them myself – in Northeastern WA, so I have a cold climate to contend with.

Use a commercial girt one size larger than wall columns (2×8 on a 6×6 post, etc.), setting commercial girts so 1-1/2″ hangs past the column’s exterior face. Wrap framing with a well sealed high quality Weather Resistant Barrier (for extended reading on Weather Resistant Barriers https://www.hansenpolebuildings.com/2016/01/determining-the-most-effective-building-weather-resistant-barrier-part-1/). 

As an alternative to using a Weather Resistant Barrier, closed cell spray foam can be applied to the interior face of siding as part of a flash-and-batt system https://www.hansenpolebuildings.com/2020/01/flash-and-batt-insulating-barndominium-walls/.

You will find this installation method compensates for any irregularities in column dimensions and creates a deeper insulation cavity. Side benefits – electrical can be run around column exteriors, without a need to drill through them to run wires. On walls a multiple of three feet in length, it also saves having to rip an edge of a panel off either the first or last sheet of steel on a wall.

In either case, block ends of bookshelf commercial girts solid against columns with what is called a “bearing block”.  Take 2×4’s or larger (depends upon engineering) cut 22-1/2” long to fit between commercial girts and install them flat against the post on faces where girts will attach.  Wide face of the block should be flat against the column and aligned with the post edge (not sticking out past column edge unlike girts).   Nail these girt support blocks to columns with a minimum of  two (2)10d galvanized common nails at each end (higher wind loads may require more nails).  This type of nailing is quick and easy and provides a solid support for commercial girt above blocks.  This is a far more solid and stable connection than toe-nailing. Toe-nailing is done by angling a nail upwards from bottom (or downwards from top) of commercial girt, at a 45 degree angle trying to catch enough post edge as the nail goes through to column to hold it there.  Toe-nailing is a very poor connection (and is subject to lots of installation errors).

For maximum cost effective R value, use BIBS insulation. I found it to be cost competitive with installed batt insulation, has a higher R value and completely fills all voids. https://www.hansenpolebuildings.com/2011/11/bibs/

I fondly remember a gal who called me one day asking for “canning jar shelves”…you know like you did before for us.”  Checking our records, I quickly discovered we designed commercial girts on their first building.  They liked them so much – they wanted them again!

No Leak Barndominium Windows

No Leak Barndominium Windows

Steel covered barndominiums, regardless of whether they are PEMBs, weld ups or post frame, if they leak it is in one of two places. First of these is when an errant roof screw misses a purlin or is improperly seated. Second of these is around windows.

As a builder I found a solution to most potential window leaks: https://www.hansenpolebuildings.com/2012/09/leaking-windows/

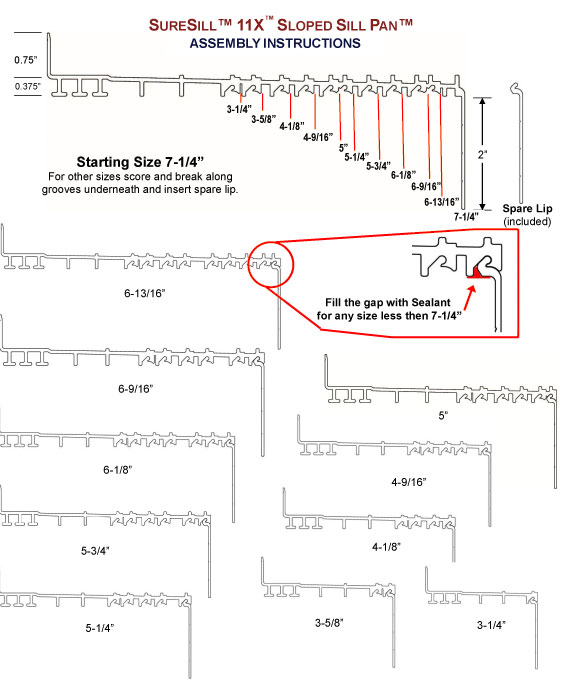
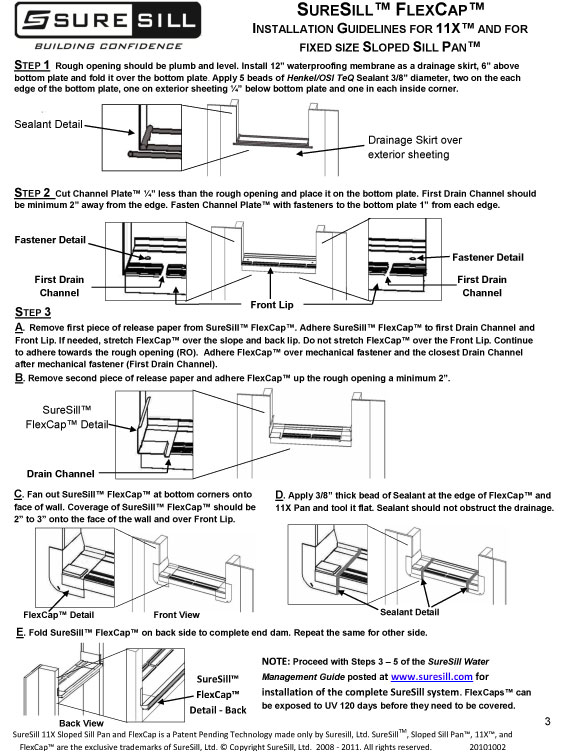
And taking it one step further, using pan (aka sill) flashings: https://www.hansenpolebuildings.com/2017/02/use-window-pan-flashing/

Sill flashing is a piece of preformed plastic flashing sloping away from window opening, so any water getting behind siding won’t collect under the window and cause problems. Rough openings (ROs) provided by manufacturers don’t generally allow for sill flashing thickness. Add an extra ¼ inch of height to ROs. 

Don’t start hacking away at WRB (Weather Resistant Barrier), especially if you’re new to window flashing. Do not make an X or I cut. Instead feed the window opening through WRB, cut along all four edges and remove the cutout. Do NOT wrap WRB into the opening. At the upper corners of the opening, make a slit six inches long upward at a 45 degree angle away from opening. Temporarily fold this newly created flap upwards.

Keep in mind WRB is your last line of defense against any water finding its way past siding. So if you do blow any cuts, make sure you patch them with WRB wrap tape.

Follow instructions below for installing an aftermarket pan flashing, such as SureSill™ Sloped Sill Pans™ (available at The Home Depot™). 

Install self-adhesive flashing tape (3M All Weather Flashing Tape 8067 or similar) around the window, overlapping tape onto flange and WRB. Do sides first, overlapping drainage skirt. Then across top overlapping side tapes. Cut tape to length with a utility knife and peel a little bit of backing free and stick it to the window top. Then lay it alongside the window and peel away the rest of the backing as you smooth it into place. Embed it with a laminate roller for a good seal. For best adhesion in cold weather, hit tape with a heat gun while you roll. 

Fold down previously created top WRB tab and tape 45 degree cuts.

Barndominium Brick Wainscot

Actual Brick Considerations for Barndominium Wainscot

With post frame buildings becoming a ‘rage’ for use as homes, barndominiums and shouse (shop/houses) alternatives to dress them up are quickly arising. Amongst these options are clients looking to have actual brick wainscot, as opposed to using a different color of steel siding, thin brick, or other cultured stone.

I have opined upon this subject previously (https://www.hansenpolebuildings.com/2018/08/brick-ledge-on-a-pole-building/), however it is now time to dive deeper into it.

Preparing an exterior surface of a post frame building wall for a brick veneer is a simple and straightforward procedure. This article will supply you with some helpful information if you are planning to install a brick veneer on your barndominium’s exterior.

First, term “veneer” can have a dual meaning. In construction terminology,“veneer” is applicable to any exterior finish material and this includes standard brick masonry installed onto an exterior wall. “Veneer” can also be taken literally to mean a thin superficial layer of material installed directly onto an exterior wall surface. There are many thin-brick wall systems available utilizing brick only ½ to 1 inch in thickness as opposed to a standard 4-inch nominal (3 ¾-inch actual) thickness. It typically consists of a thin layer of stone or brick mounted with adhesives directly onto a substrate material and is installed in panels. 

Step 1: Structural Support for the Brick Veneer

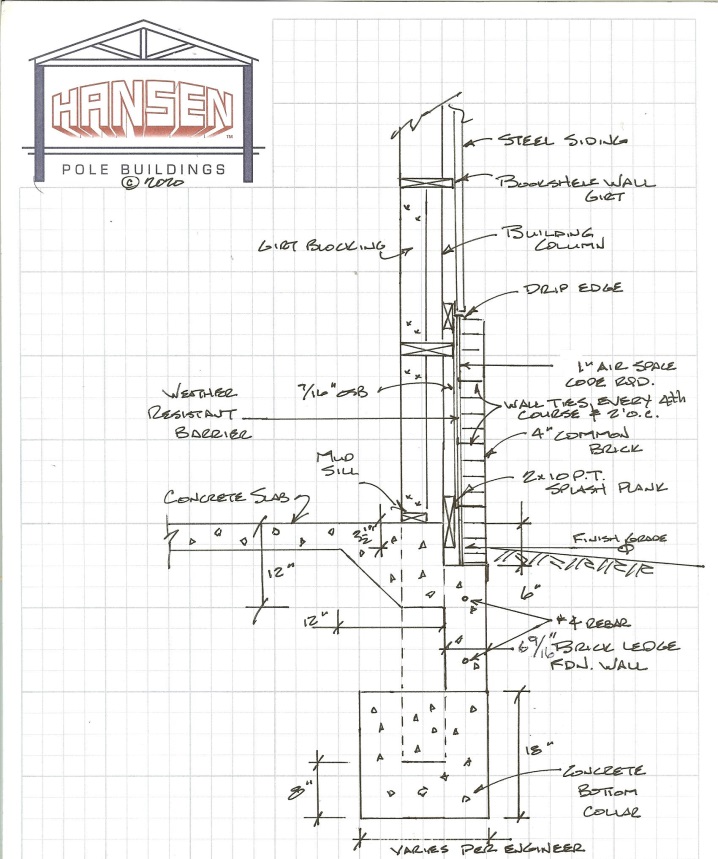
A fully assembled brick veneer is quite heavy and requires adequate structural support. Support is provided by a brick ledge as part of a foundation wall above wall column’s bottom collars. A decision to install a brick exterior is therefore made during conceptual design phases of your new barndominium’s construction. A brick ledge is constructed simply by adding a 6-9/16 inch thick concrete foundation wall outside your post frame building’s wall column. Ledge height will be six inches lower than top of finished concrete floor. Without an adequate structural support by a brick ledge, brick masonry is not an option for your barndominium’s exterior.

Step 2: Be Sure to Provide a one inch Air Space between Sheathing and Brick

Brickwork bears directly upon the concrete ledge, wide enough for both nominal width of brick and a building code required one inch air space. This one inch air space between sheathing and brick allows wall to “breathe” by providing an outlet for air and moisture. It also accommodates any irregularities in the wall surface.

Step 3: Install Weather Resistant Barrier

A weather resistant barrier (https://www.hansenpolebuildings.com/2016/01/determining-the-most-effective-building-weather-resistant-barrier-part-1/) must be installed onto sheathing to prevent water from entering the inner wall assembly since brick veneer itself is not water-resistant.

Step 4: Install Wall Ties to Anchor the Brick to Sheathing

Lateral support for brickwork is provided by wall ties or brick anchors. They generally consist of L-shaped strips of corrugated metal 1 by 6 inches long nailed through sheathing into wall girts (https://www.strongtie.com/clipsandties_miscellaneousconnectors/bt_tie/p/bt). Horizontal component of brick tie penetrates into brick veneer at a mortar joint. Ties are installed at every fourth brick course and at two-foot horizontal spacings.

Pre-Drilling, Housewrap, and Concrete Footings

Today the Pole Barn Guru answers reader questions about pre-drilling steel panels, the proper use of house-wrap and weather resistant barriers, as well as concern for the effectiveness or fresh concretes ability to withstand compression.

DEAR POLE BARN GURU: What size hole should I predrill in panels for the #12 diaphragm screws? Thanks! JOSEPH in KIOWA

DEAR JOSEPH: From Hansen Pole Buildings’ Construction Manual, Chapter 2:
 

“For pre-boring nail holes, 7/64” and 1/8” bits are required. Same size bit can be used for pre-drilling steel roofing and siding.”


DEAR POLE BARN GURU: Having read all of the info relating to insulating and am still confused. Main question is my entire 40×48 was wrapped in Tyvek including the roof. Now am trying to figure out if and how I can install a vapor barrier for the roof? Am planning to put in a ceiling with blown insulation above it and would like some options for the vapor barrier. Not sure if the roof Tyvek is a help or a hindrance. KEVIN in MALAD CITY

DEAR KEVIN: I’d like to find builders who are using Weather Resistant Barriers (WRB) under roof steel on post frame buildings, thinking they are installing a vapor barrier, and slap them silly. They have totally wasted their client’s hard earned money and, as in your case, have created a hindrance. Your only real solution is to remove Tyvek from under roof steel and replace it with an actual vapor barrier (one with a thermal break). You might see if a local spray foam installer would be willing to flash spray two inches of closed cell foam on underside of your building’s WRB.

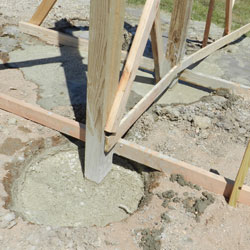
DEAR POLE BARN GURU: My contractor poured concrete in each hole for a 30’ x 32’ pole shed and about 4 hours later started setting poles and put the entire frame up yet that same day. Can the concrete actually cure that fast or should I be concerned? PAUL in MITCHELL

DEAR PAUL: I am guessing you are talking about concrete poured for a footing pad under the columns.
Concrete gains its strength with time after casting. The rate of gain of concrete compression strength in higher during the first 28 days of casting and then it slows down. The compression strength gained by concrete after 24 hours is only 16%!

For practical purposes, a four hour old concrete footing is virtually worthless. Yes, you should be concerned.


IBC Requirements for Building Wrap

IBC Requirements for Building Wrap

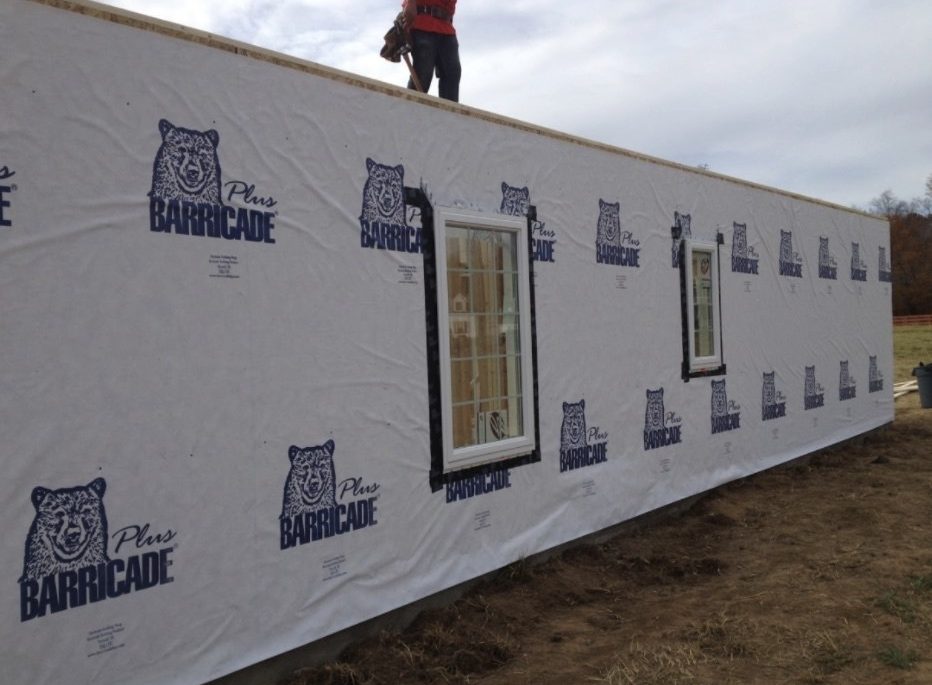
When using a building wrap as a weather-resistant barrier (WRB), it must meet 2018 International Building Codes (IBC 1402.2) requirements of a WRB for water-resistance and vapor permeability.

A superior building wrap is air- and moisture-resistant, permeable, and has a high UV-resistance and tear strength. It should also be simple and quick to install, to limit damage during application. Using a high-quality building wrap compliant with IBC 1402.2  code creates a structure with a weather-resistant exterior wall envelope. A weather-resistant exterior wall envelope ensures a building is energy-efficient and healthy.

2018 International Building Codes (IBC) mandate buildings meet minimum requirements for exterior walls. IBC Chapter 14  IBC provides these minimum requirements, including wall coverings, exterior doors and windows, exterior wall openings, and architectural trim. Specifically, section 1402.2 states exterior walls must provide a building with a weather-resistant exterior wall envelope. Exterior wall design and construction must include a water-resistant barrier behind exterior veneer preventing accumulation of moisture within wall assemblies. Exterior walls must also include a way for water/condensation entering a wall assembly to drain/evaporate.

IBC specifies a few cases where a weather-resistant exterior wall envelope is not required.

  1. Code does not require a weather resistant wall envelope over concrete or masonry walls designed in accordance with IBC chapters 19 and 21.
  2. Code does not require a weather resistant wall envelope for exterior insulation and finish systems (EIFS) in compliance with IBC 1407.4.1.
    • IBC 1407.4.1 states for EIFS with drainage, water-resistive barrier must comply with IBC Section 1403.2 or ASTM E2570. IBC 1403.2 states attachment of no fewer than one layer of No. 15 asphalt to studs or sheathing, with flashing, must provide a continuous water-resistive barrier behind exterior wall.
  1. Exterior wall envelopes resisting wind-driven rain, including openings, joints, and intersections with a dissimilar material in accordance with ASTM E331 are not required to have a weather-resistant exterior wall envelope.

BENEFITS OF BUILDING WRAP

Applying a high-quality building wrap, like Barricade® Building Wrap, over sheathing, and behind siding, meets or exceeds IBC 1402.2 requirements for weather-resistant barriers. A properly installed building wrap creates a protective envelope against air infiltration and moisture into wall systems. A buildup of moisture within a building’s walls is problematic because moisture can lead to wood rot (caused by fungi) and expensive repairs. High moisture can also cause mold, unhealthy for structure occupants. Uncontrolled air infiltration lowers effective wall system R-value and lessens energy-efficiency and air quality of a building. To reduce air infiltration and stop accumulation of moisture within wall systems, along with meeting requirements of IBC 1402.2, design of a high-performing exterior wall must include a weather-resistive barrier, like building wrap.

Do Vapor Barriers Trap Moisture?

Vapor Barriers Trap Moisture?

Do vapor barriers trap moisture in walls of post frame buildings? They can, but only if they are installed on both sides of a wall insulation cavity.

Regular readers of this column will recognize a prevailing trend towards climate controlling both new and existing post frame buildings. An ability to control interior climate extends far beyond merely what one happens to be doing for insulation. It also includes what one does for weather resistant barriers and vapor barriers.

Insulating WallsThe purpose of a vapor barrier is to stop warm, moist, indoor air from infiltrating fiber-type insulation (think fiberglass or cellulose) during cold weather and condensing. Visible moisture or frost on the inside of a vapor barrier is either caused by a leaky vapor barrier or moisture migrating into the wall cavity from the outside. Leaky siding can cause this, and it often happens in basements that are apparently leak free. Vapor barriers are essential for any kind of insulation that air can pass through. Never do the really foolish act of slashing a vapor barrier that you find has moisture behind it or forgetting to install a vapor barrier in the first place. Today’s best vapor barriers prevent moisture from moving into wall cavities while also letting trapped moisture escape.
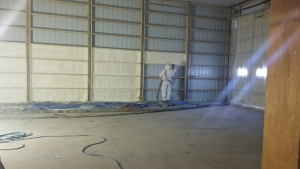
Recommendations below are for cold-climate construction. As a rule of thumb, if you have to heat your building more than cool it, this probably applies to your circumstance.

A weather resistant barrier (https://www.hansenpolebuildings.com/2016/01/determining-the-most-effective-building-weather-resistant-barrier-part-1/) will prevent moisture from entering a wall from outside of building. It also allows any moisture within a wall to exit. Pretty slick stuff, as it is smart enough to be directional.

Inside of this wall, once unfaced (recommended) insulation batts are installed, should be a vapor barrier (https://www.hansenpolebuildings.com/2017/11/vapor-barriers-post-frame-construction/). It is imperative this vapor barrier not have unsealed tears or holes. It should be sealed to floor and ceiling and any joints, rips or tears should be adequately taped. Where problems most often occur, with vapor barriers, is when penetrations are made for things such as electrical boxes. Properly sealing of these penetrations with closed cell spray foam from a can does more to prevent warm moist air to pass through into your post frame wall insulation cavity, than anything else.


Pole Barn Insulation, Part II

Continued from yesterday’s blog:

(1) Storage – if you ever believe anyone might ever in the future desire to climate control then provision should be made for making it easiest to make future upgrades.

At the very least a reflective radiant barrier (single cell rather than wasting the money for the extra approximately 0.5 R from double bubble), an Integral Condensation Control (https://www.hansenpolebuildings.com/2017/03/integral-condensation-control/) or sheathing with 30# felt should be placed between the roof framing and roof steel to minimize condensation.

If a concrete floor is poured (in ANY use building), it should be over a well sealed vapor barrier.

For now we will assume this building is totally cold storage. If it might ever (even in your wildest dreams) be heated and/or cooled include the following in your initial design: Walls should have a Weather Resistant Barrier (https://www.hansenpolebuildings.com/2016/01/determining-the-most-effective-building-weather-resistant-barrier-part-1/) between the framing and the siding. Taking walls one step further would be ‘commercial’ bookshelf wall girts (https://www.hansenpolebuildings.com/2011/09/commercial-girts-what-are-they/).

In the roof – have the trusses designed to support a ceiling load ideally of 10 pounds per square foot (read about ceiling loaded trusses here: (https://www.hansenpolebuildings.com/2016/03/ceiling-loaded-trusses/). Trusses should also be designed with raised heels to provide full depth of future attic insulation above the walls (https://www.hansenpolebuildings.com/2012/07/raised-heel-trusses/).

Make provision for attic ventilation, by having an air intake along the sidewall using enclosed ventilated soffits and exhaust with a vented ridge.

Any overhead doors should be ordered insulated – just a good choice in general as, besides offering a minimal thermal resistance, they are stiffer against the wind.

(2) Equine only use: Same as #1 with an emphasis upon the ventilation aspect.

(3) Workshop/garage and (4) Garage/mancave/house are going to be the same – other than whatever the client is willing to invest in R value, being the major difference.

Adding onto #1 for the walls the low end would be unfaced batt insulation with a 6ml visqueen vapor barrier on the interior. Other options (in more or less ascending price and R values) would be Mineral wool insulation as it is not affected by moisture (https://www.hansenpolebuildings.com/2013/03/roxul-insulation/),  BIBs (https://www.hansenpolebuildings.com/2011/11/bibs/), closed cell spray foam in combination with batts and just the closed cell spray foam (https://www.hansenpolebuildings.com/2016/07/advantages-spray-foam-over-batt-insulation/).

For added R value and a complete thermal break, add rigid closed cell foam boards to the inside of the wall.

Once a ceiling has been installed, blow in attic insulation.

For (4) a Frost-Protected Shallow Foundation (https://www.hansenpolebuildings.com/2016/11/frost-protected-shallow-foundations/) with sand on the inside rather than a thickened slab is an excellent and affordable design solution.

For insulation solutions which follow the roof line, the best bet is going to be the use of closed cell spray foam, as it solves the potential condensation on the underside of the roofing and does not require ventilation above.

In most cases, the steel trusses fabricated for post frame buildings are either not designed by a registered engineer, are not fabricated by certified welders or both – so it makes it difficult for me to recommend them as part of a design solution.

With scissor trusses, they can be treated the same as a flat ceiling would be, provided the bottom chord slope is not so great as to cause blown in insulation to drift downhill.